MachDoc
Well-Known Member
- Joined
- Apr 4, 2021
- Threads
- 3
- Messages
- 61
- Reaction score
- 103
- Location
- New Jersey
- Vehicles
- 2021 Premium Grey, 2023 GT Vapor Blue
- Thread starter
- #46
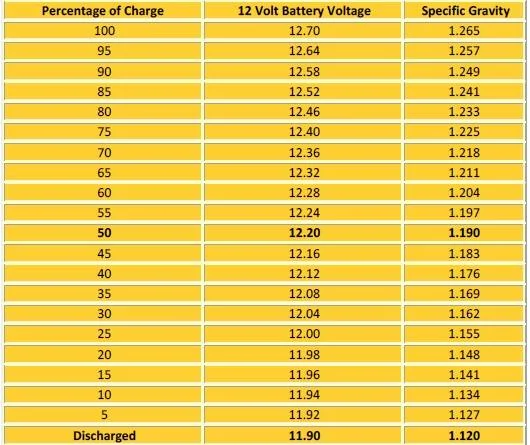
How is a 12 V battery still being at 12.1 V after 10 days of drain by my dashcam a "40% charge"?12.12 volts is a 40% charge.
Sponsored