Resigning from the DMG Club and forming The Green Goblin Club
- Thread starter Murse-In-Airy
- Start date
- Watchers 6
OP
OP
Murse-In-Airy
Well-Known Member
- First Name
- Rod
- Joined
- Mar 5, 2021
- Threads
- 82
- Messages
- 3,678
- Reaction score
- 8,297
- Location
- Chaumont, NY
- Vehicles
- Mach-E ER AWD
- Occupation
- Nurse
- Thread starter
- #122
Damn my man. ? I love it. Be sure to start your own thread too. That balance between the lime and black is amazing. I went all in on the lime. You used it to draw the eye to the uniqueness of your car. SUPER WELL DONE. ? ? ?
Can I join @Murse-In-Airy ? Still waiting to get them rims on, louvers vinyl, and side striping.
Will add pictures once those are done.
Astro19
Well-Known Member
- Joined
- Apr 9, 2022
- Threads
- 7
- Messages
- 98
- Reaction score
- 113
- Location
- Dallas
- Vehicles
- Mustang Mach E select
Yeah I wanted a more accented look. But I love yours too.Damn my man. ? I love it. Be sure to start your own thread too. That balance between the lime and black is amazing. I went all in on the lime. You used it to draw the eye to the uniqueness of your car. SUPER WELL DONE. ? ? ?
Hoping the sides turn out well.
GoIrish
Well-Known Member
- Joined
- Jun 18, 2021
- Threads
- 18
- Messages
- 120
- Reaction score
- 80
- Location
- Los Altos, CA
- Vehicles
- Mustang Mach E Premium AWD Ext Range
DONE! Took way longer than I budgeted. Did not need to disconnect screen, proof attached, thanks for the excellent instructions! If anyone wants to attempt this and has questions, happy to helpIt’s really not hard to do.
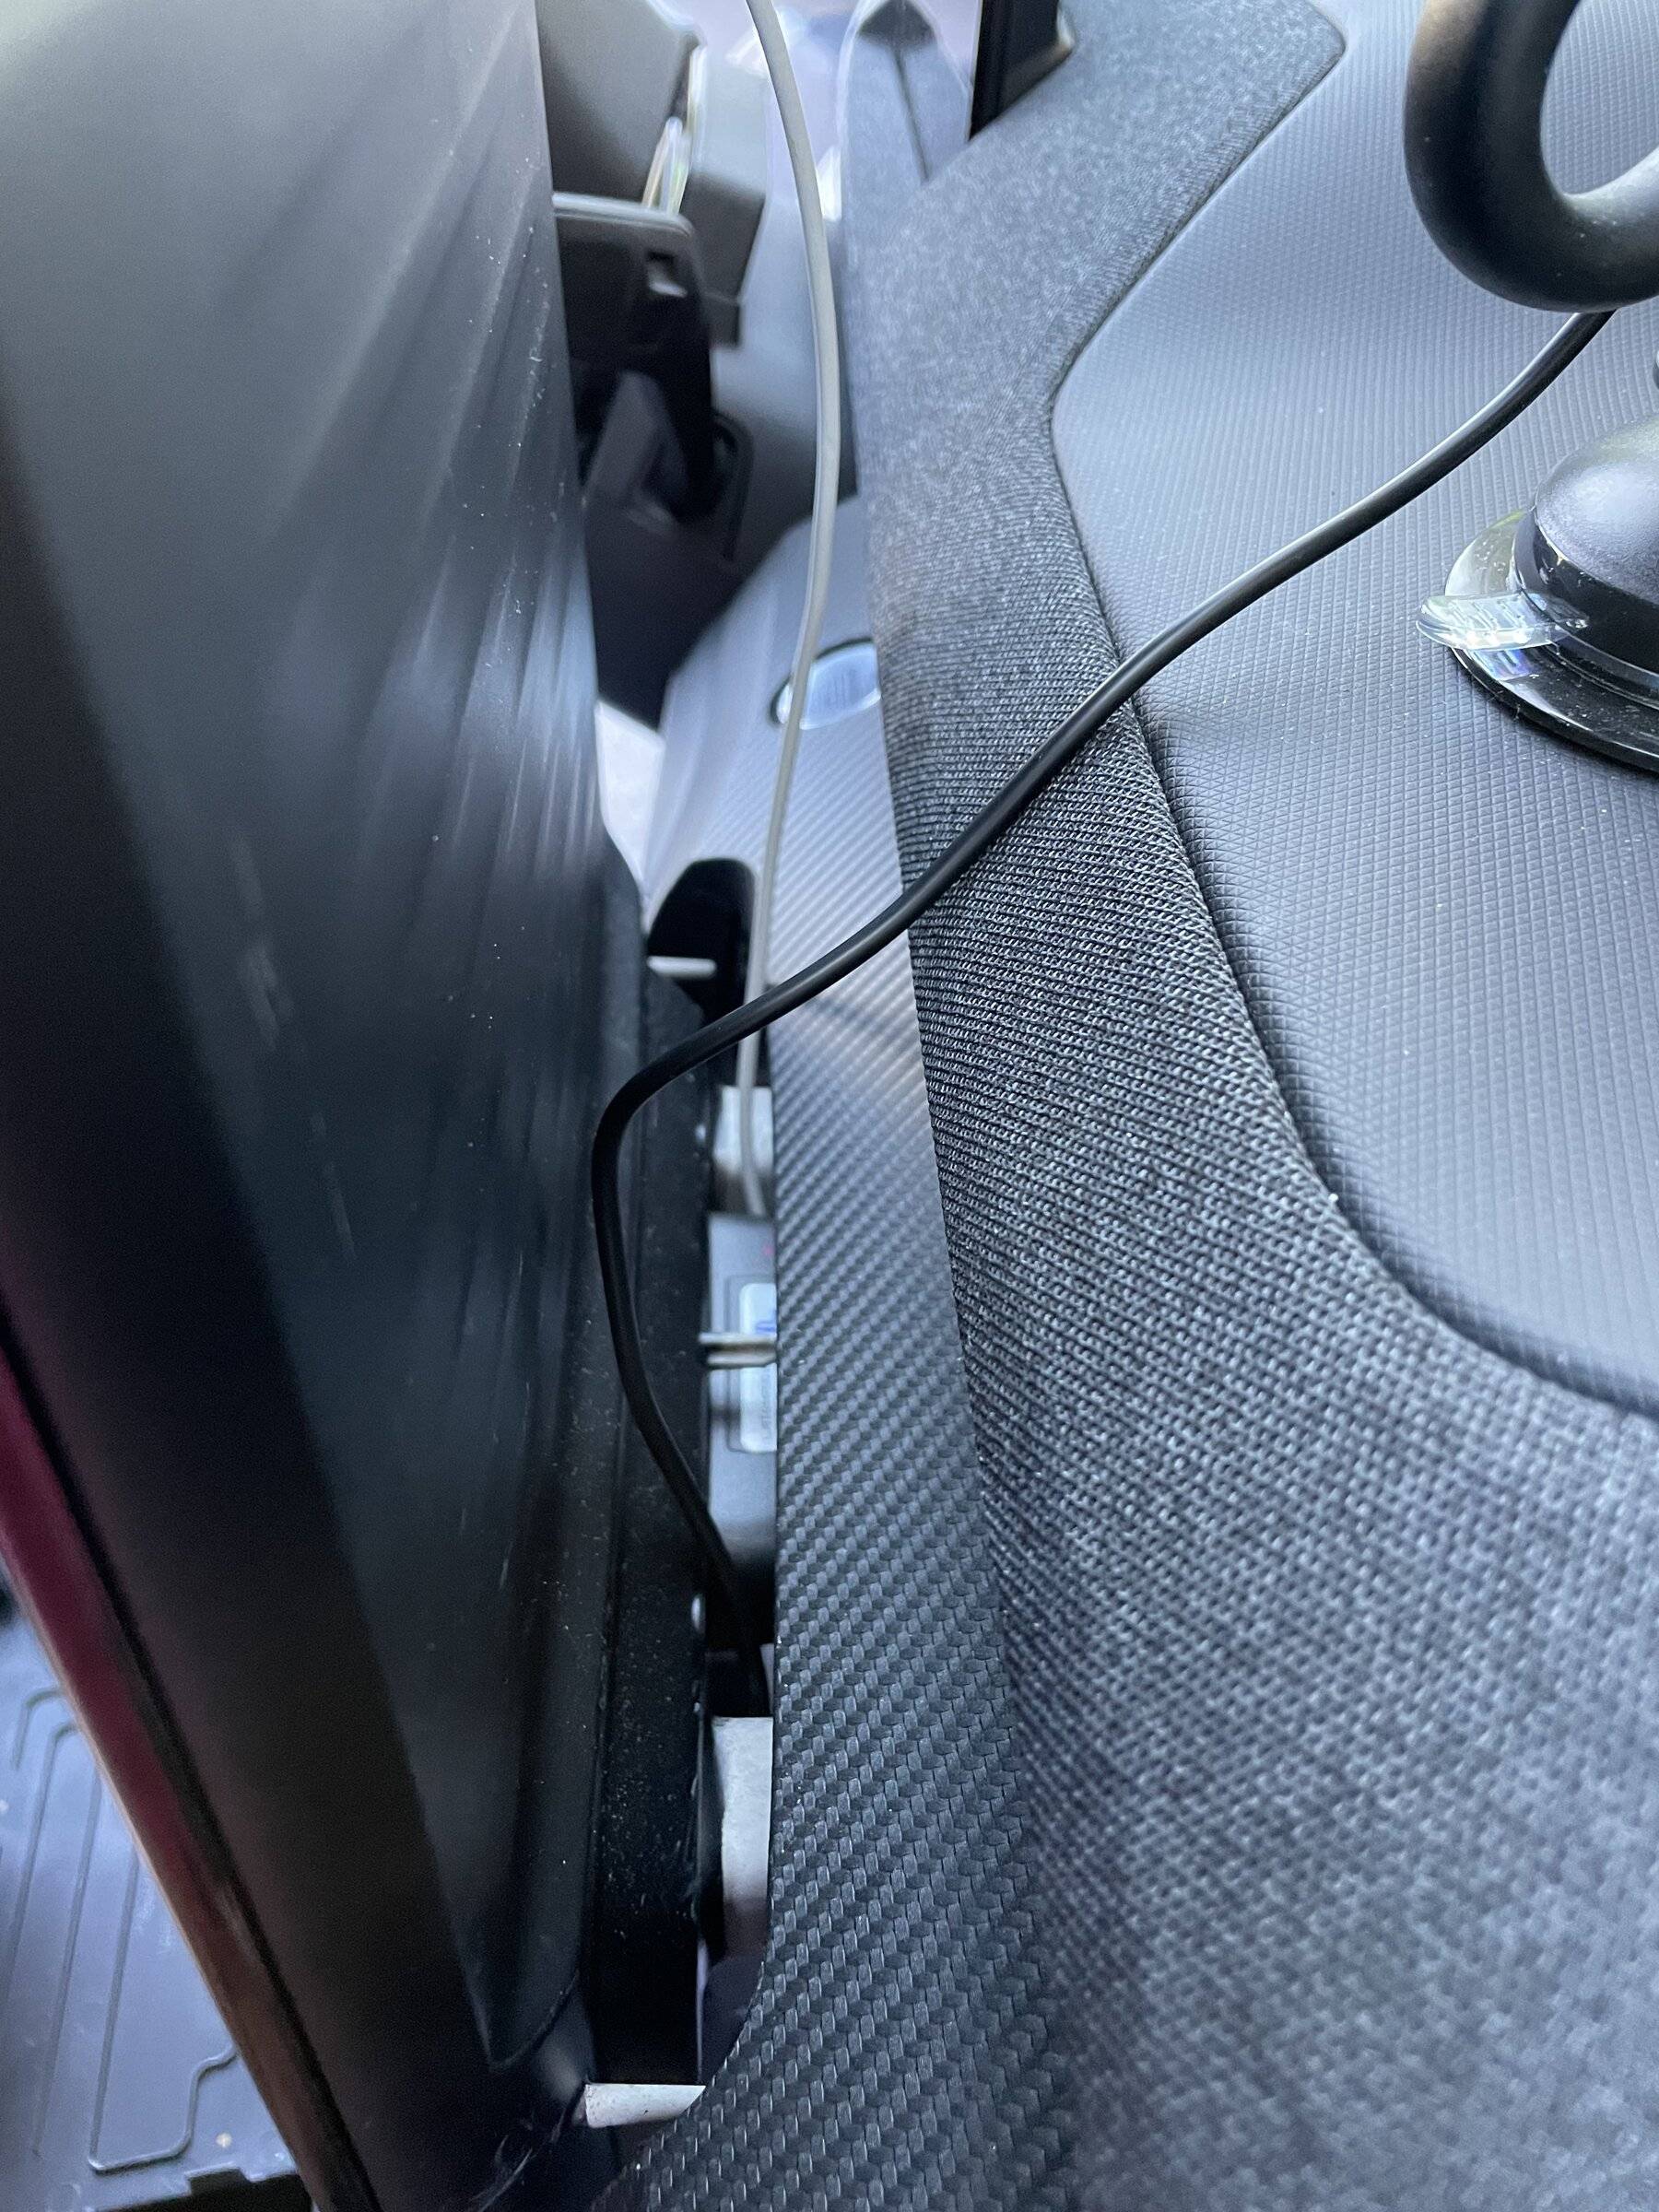
There’s a dash panel behind the lower half of the screen that you pry out with a moulding tool. The WSM says to unplug a wire down there that may be in your way but I didn’t find that necessary. With the panel removed, there’s two 10mm bolts that need to be removed. The bolts are vertical with the bolt heads pointed downward. It takes a long extension on your ratchet and a little gymnastic body positioning to get at them. The bolts are pretty long too IIRC. Those bolts go through two square tube arms that are affixed to the back of the screen. With the bolts out, the screen, with the square tubing attached, slides forward. Slide it forward enough to get at the two cables attached to the back. DONT BREAK THE CONNECTORS ON THE CABLES. Disconnect the cables and finish sliding the screen forward. DO NOT DROP THE SCREEN.
With the screen out of the way I was able to access the two screws holding the big dash trim piece in place. All of it is held with body moulding retainers EXCEPT two screws hidden BEHIND the screen. Engineers are Jerks sometimes.
ChasingCoral
Well-Known Member
- First Name
- Mark
- Joined
- Feb 3, 2020
- Threads
- 502
- Messages
- 14,318
- Reaction score
- 28,680
- Location
- Maryland
- Vehicles
- 2021 GB E4X FE, 2022 F-150 Lightning Lariat ER
- Occupation
- Retired oceanographer
That is spectacular!Those of us that have been here for a while have long lamented the lack of a good color pallet available for our beloved Mustang Mach-E. My original order was for Carbonized Grey. When I got impatient a couple days later I was able to find a Shadow Black. Boring…. but I dressed it up and brought most of you on that journey with me. When I found a GT-PE it was Dark Matter Grey. Not exciting.
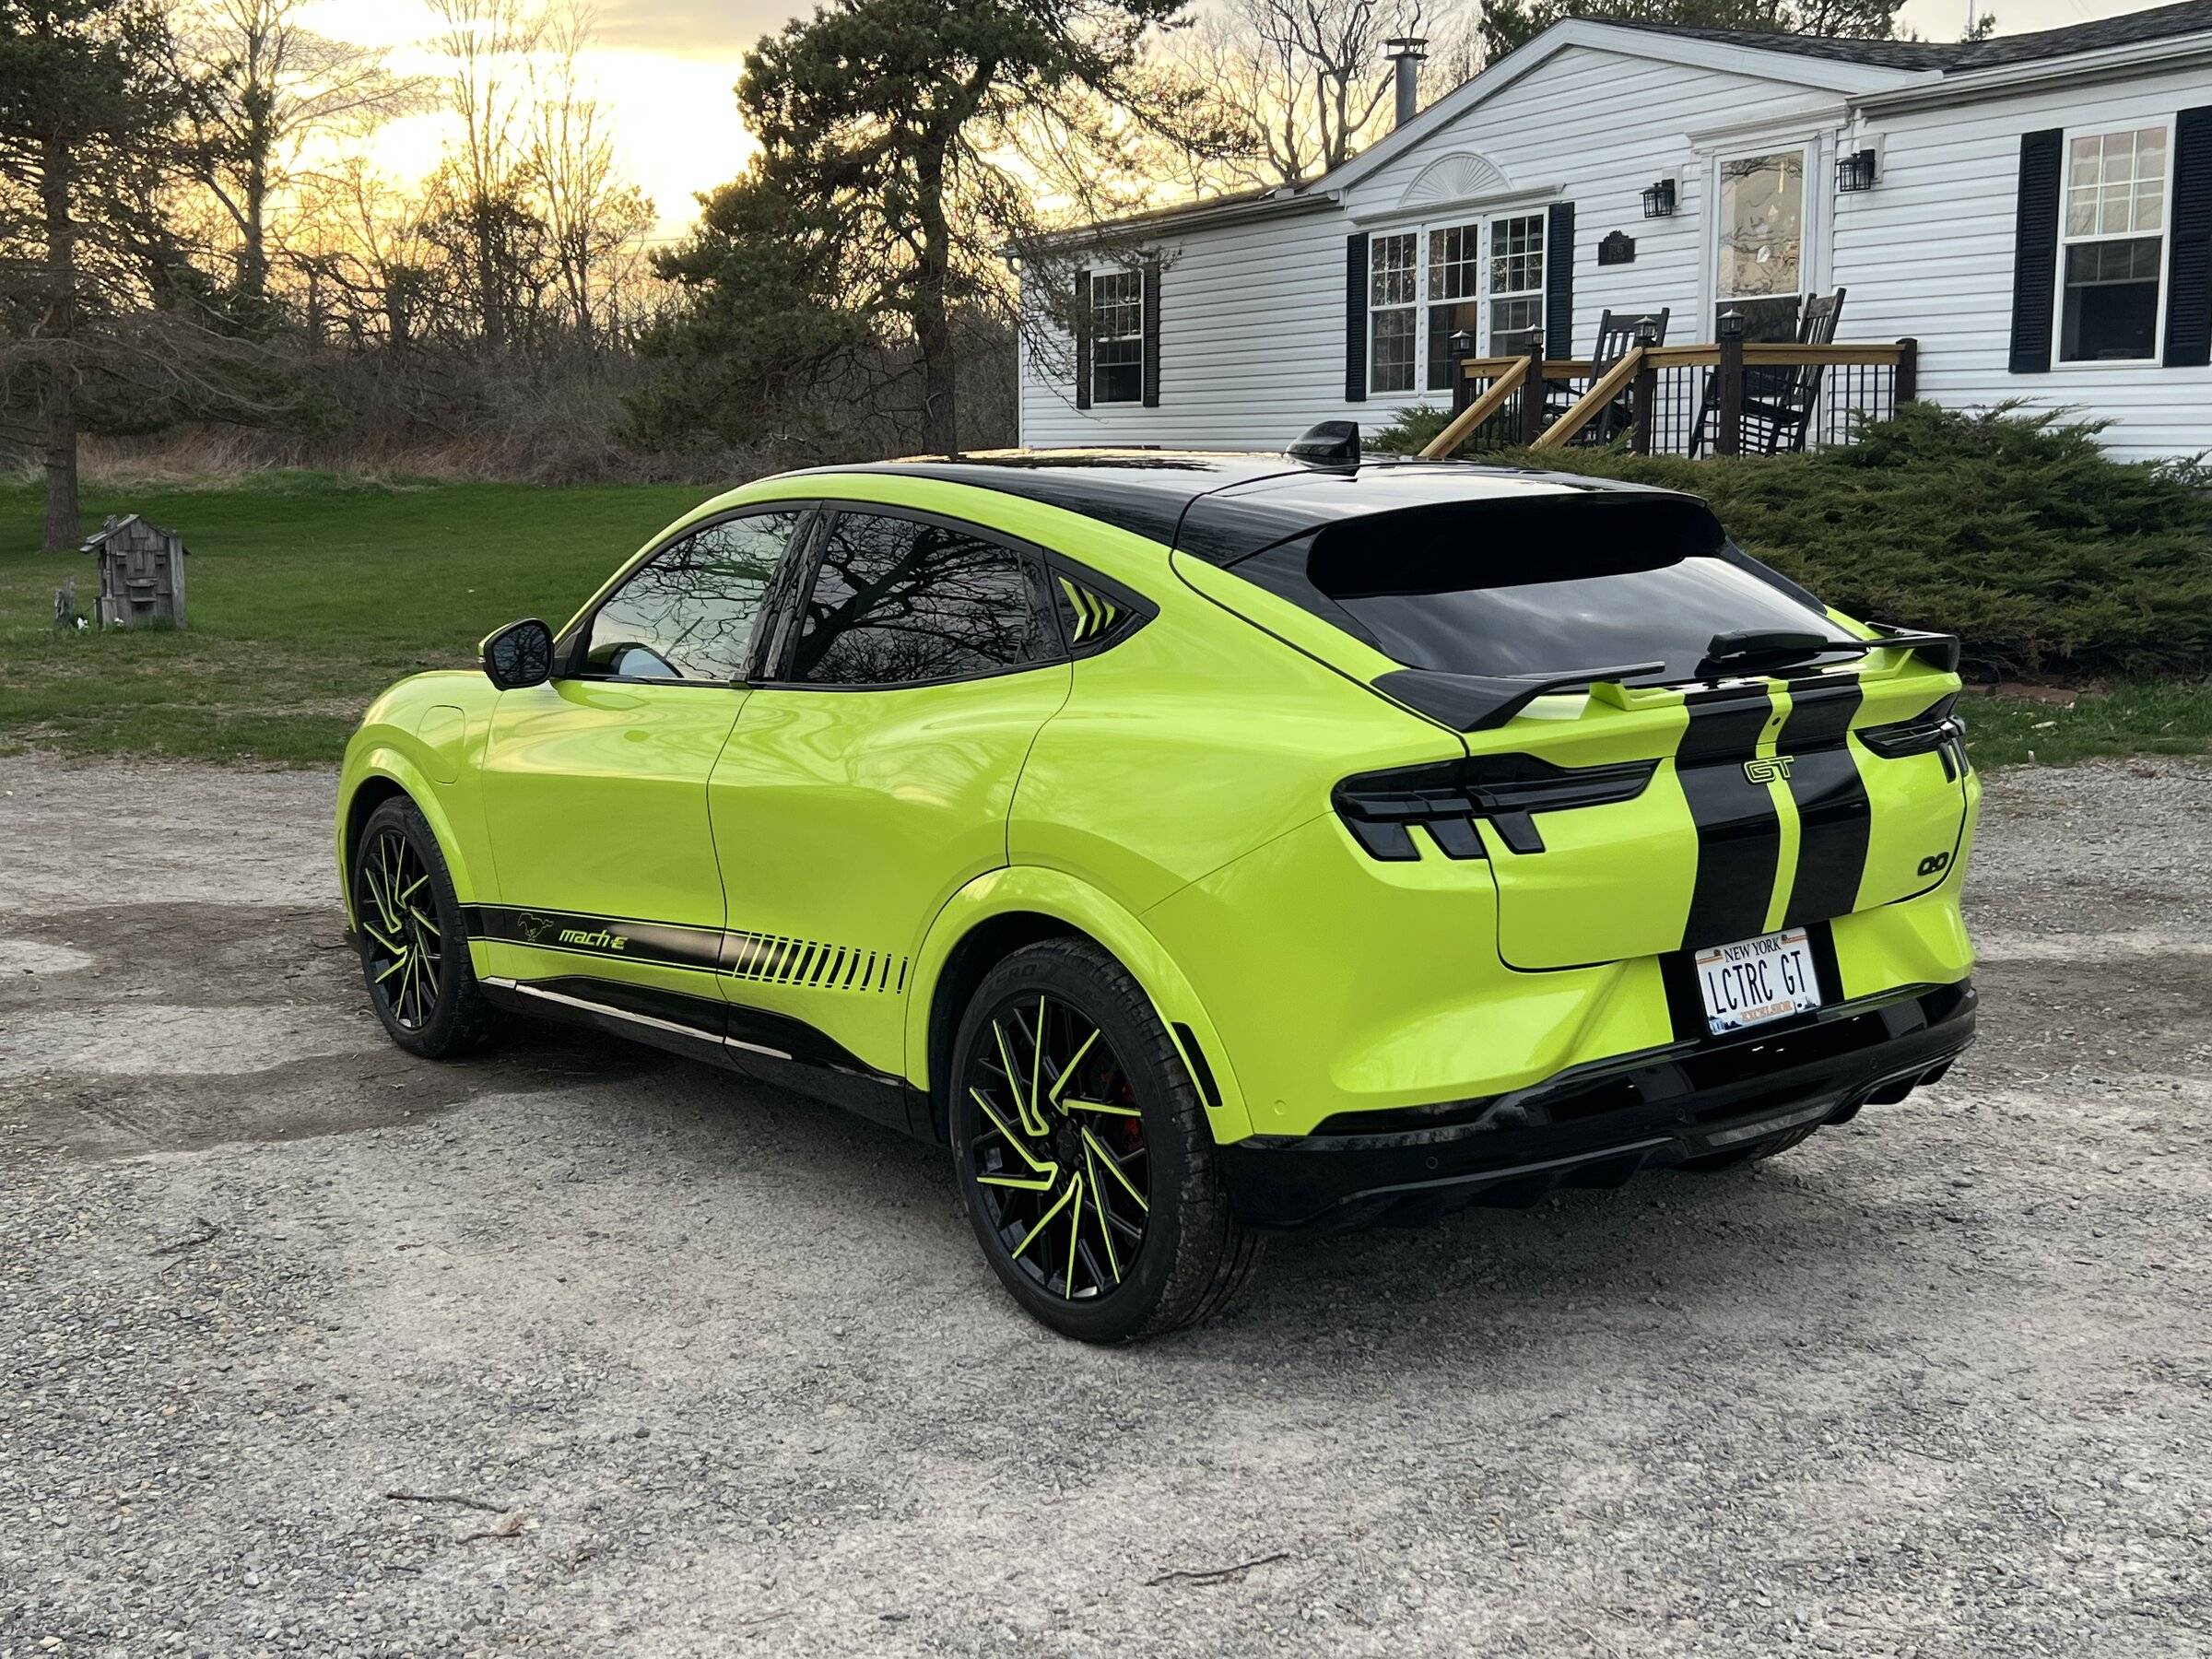
In 1969 there were 37 colors available, from Calypso Coral to Spanish Gold. There was Grabber Green, Blue, Yellow, and Orange. And of course there was the iconic Groovy Green. Why couldn’t Ford’s First environmentally friendly mustang come in Groovy Green. What’s more Groovy than protecting the environment by being GREEN in a totally awesome car. But DMG was available, so I went for it.
But….. I can’t leave anything alone. You all know that. So today I reveal Ghost-E the Grey Specter has undergone an identity change. Allow me to introduce:
The Green Goblin*** (named by my wife because apparently calling it the green one isn’t acceptable.)

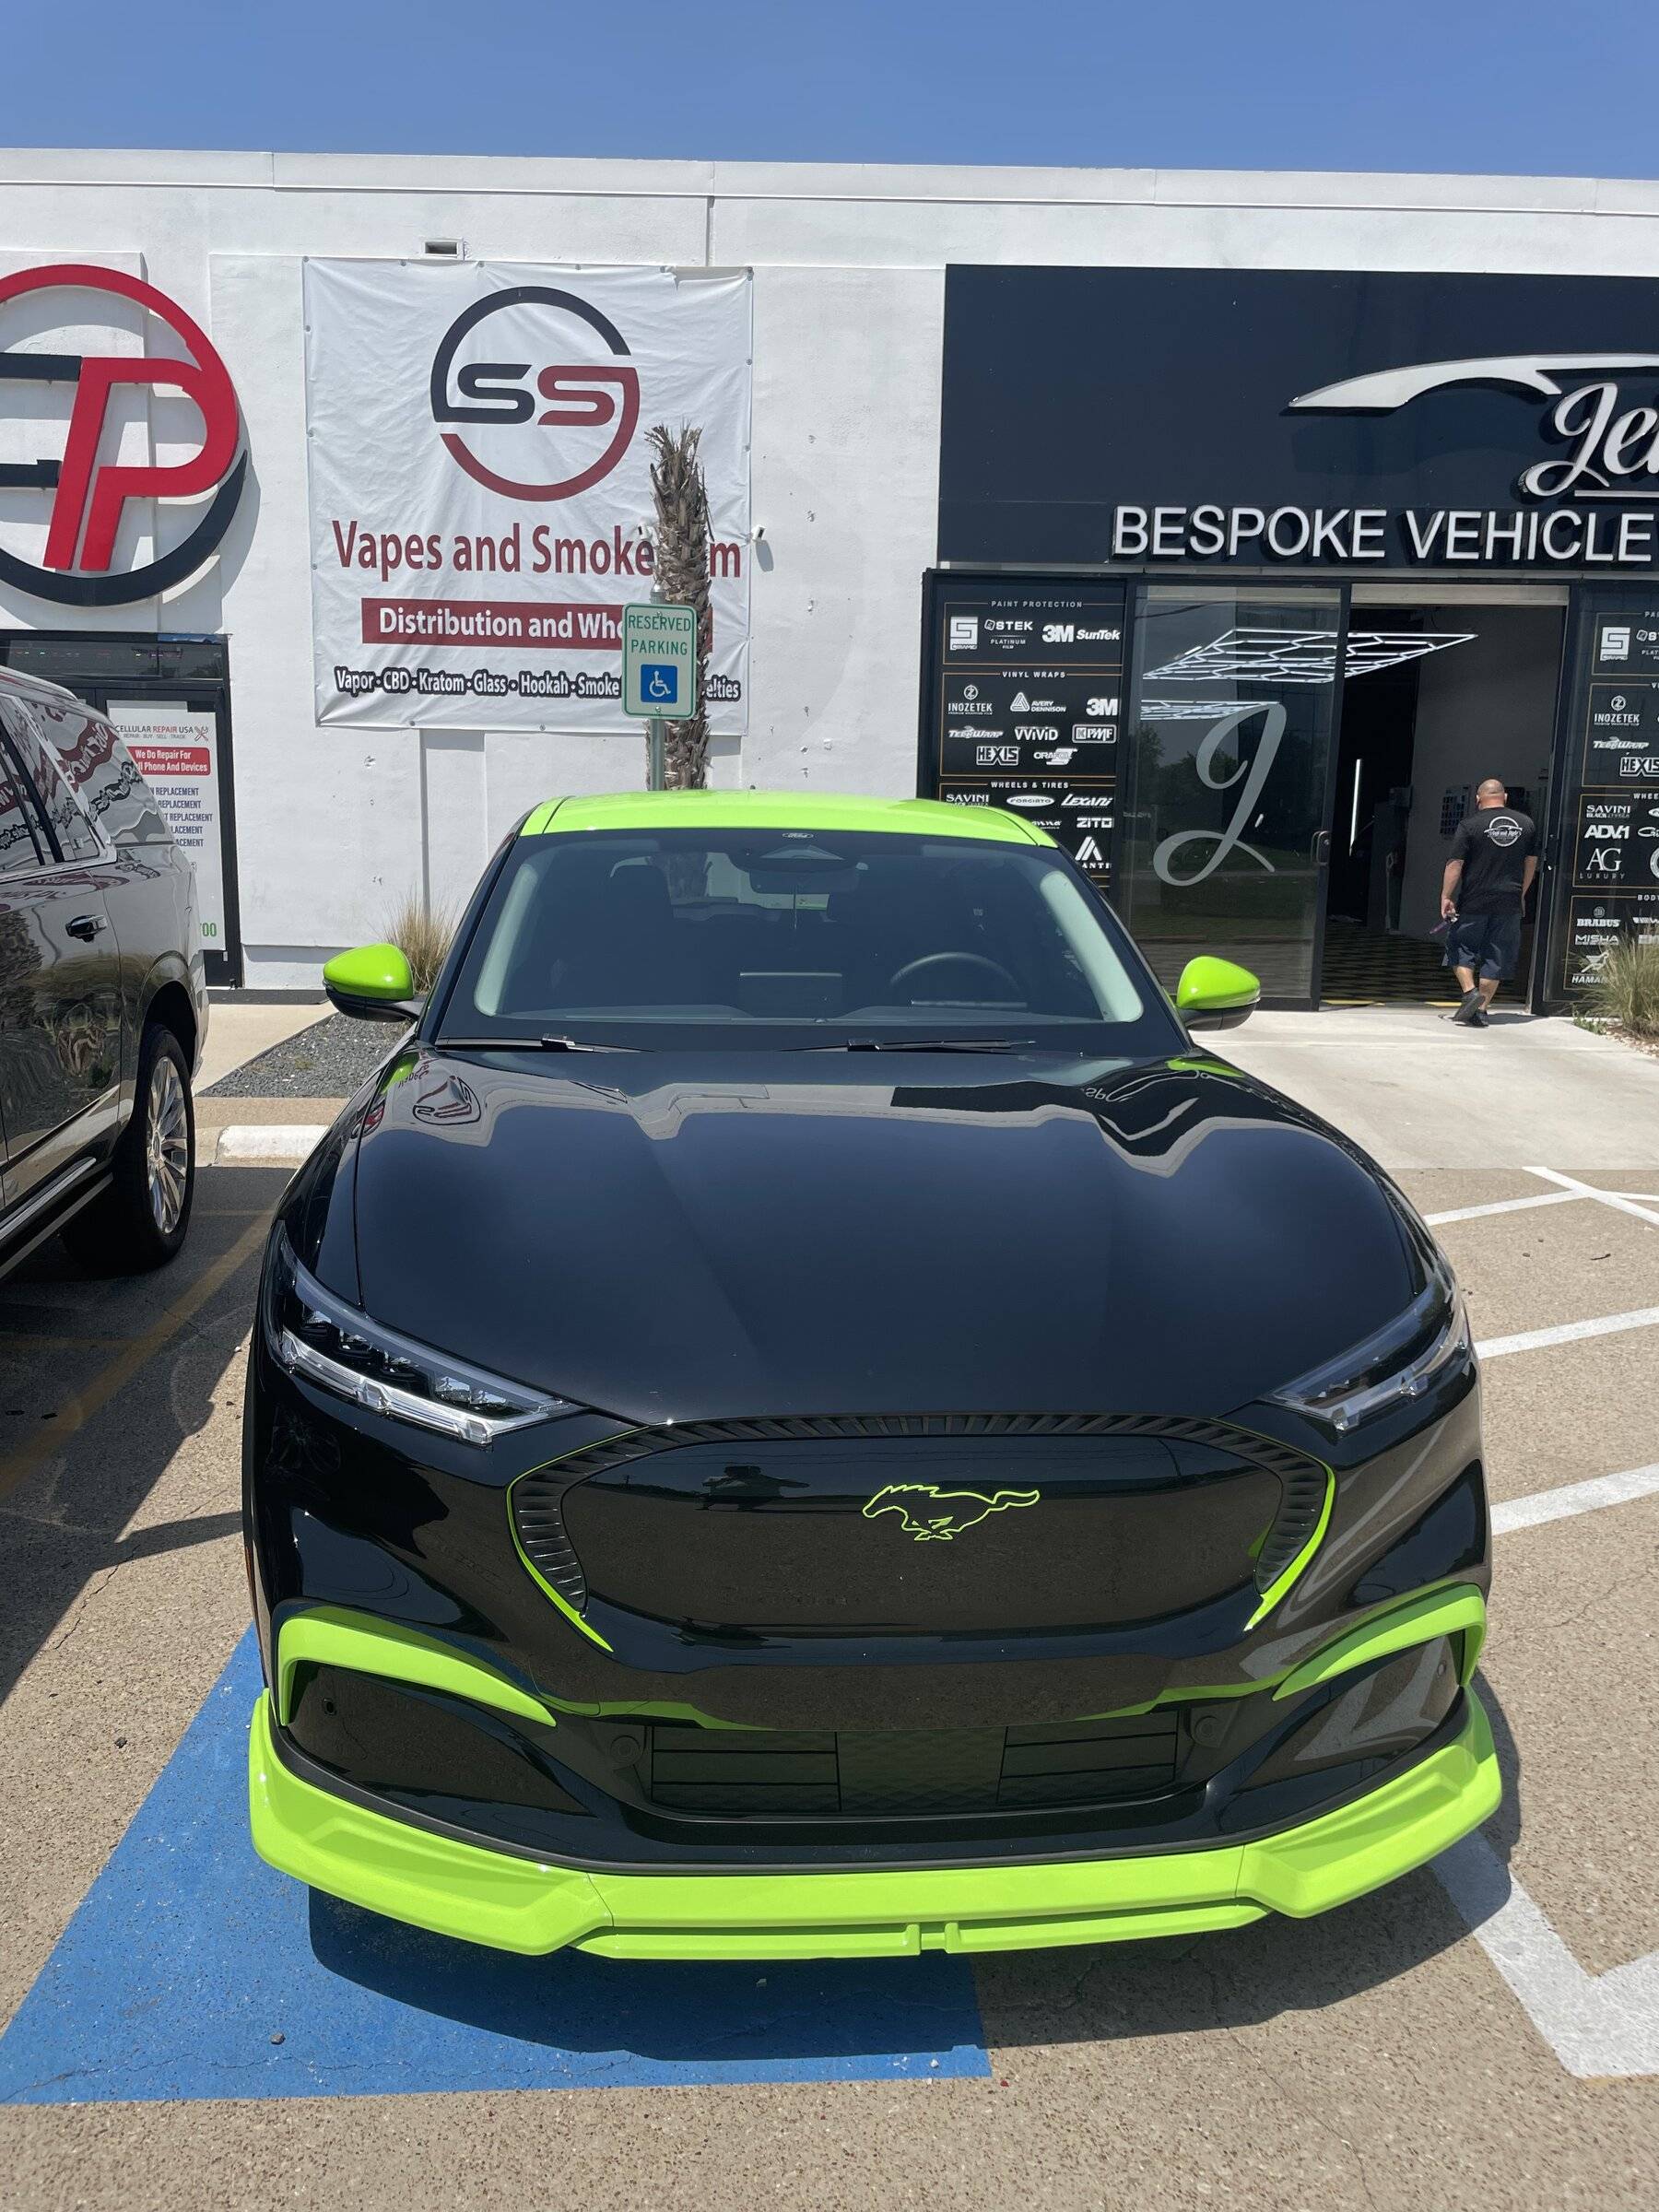
I found a shop in Fulton NY willing to wrap the car. Upward Graphics owner Malbert Delapena said he could do it and had an opening in a month. Everyone else was too busy to even give me date or their first opening was 6 months away. I know you’ll ask so I’ll get it out of the way and say I paid $3400 for the wrap and the stripes. I picked Avery Gloss Lime Green for the color. It’s as close to Groovy Green as I could get for commercially available wrap, taking into account that supply chain issues are present in vinyl too. And of course, I had to have stripes. The side stripes I ordered from AutoDesign.shop and the Upward Graphics folks put them on while they had the car.
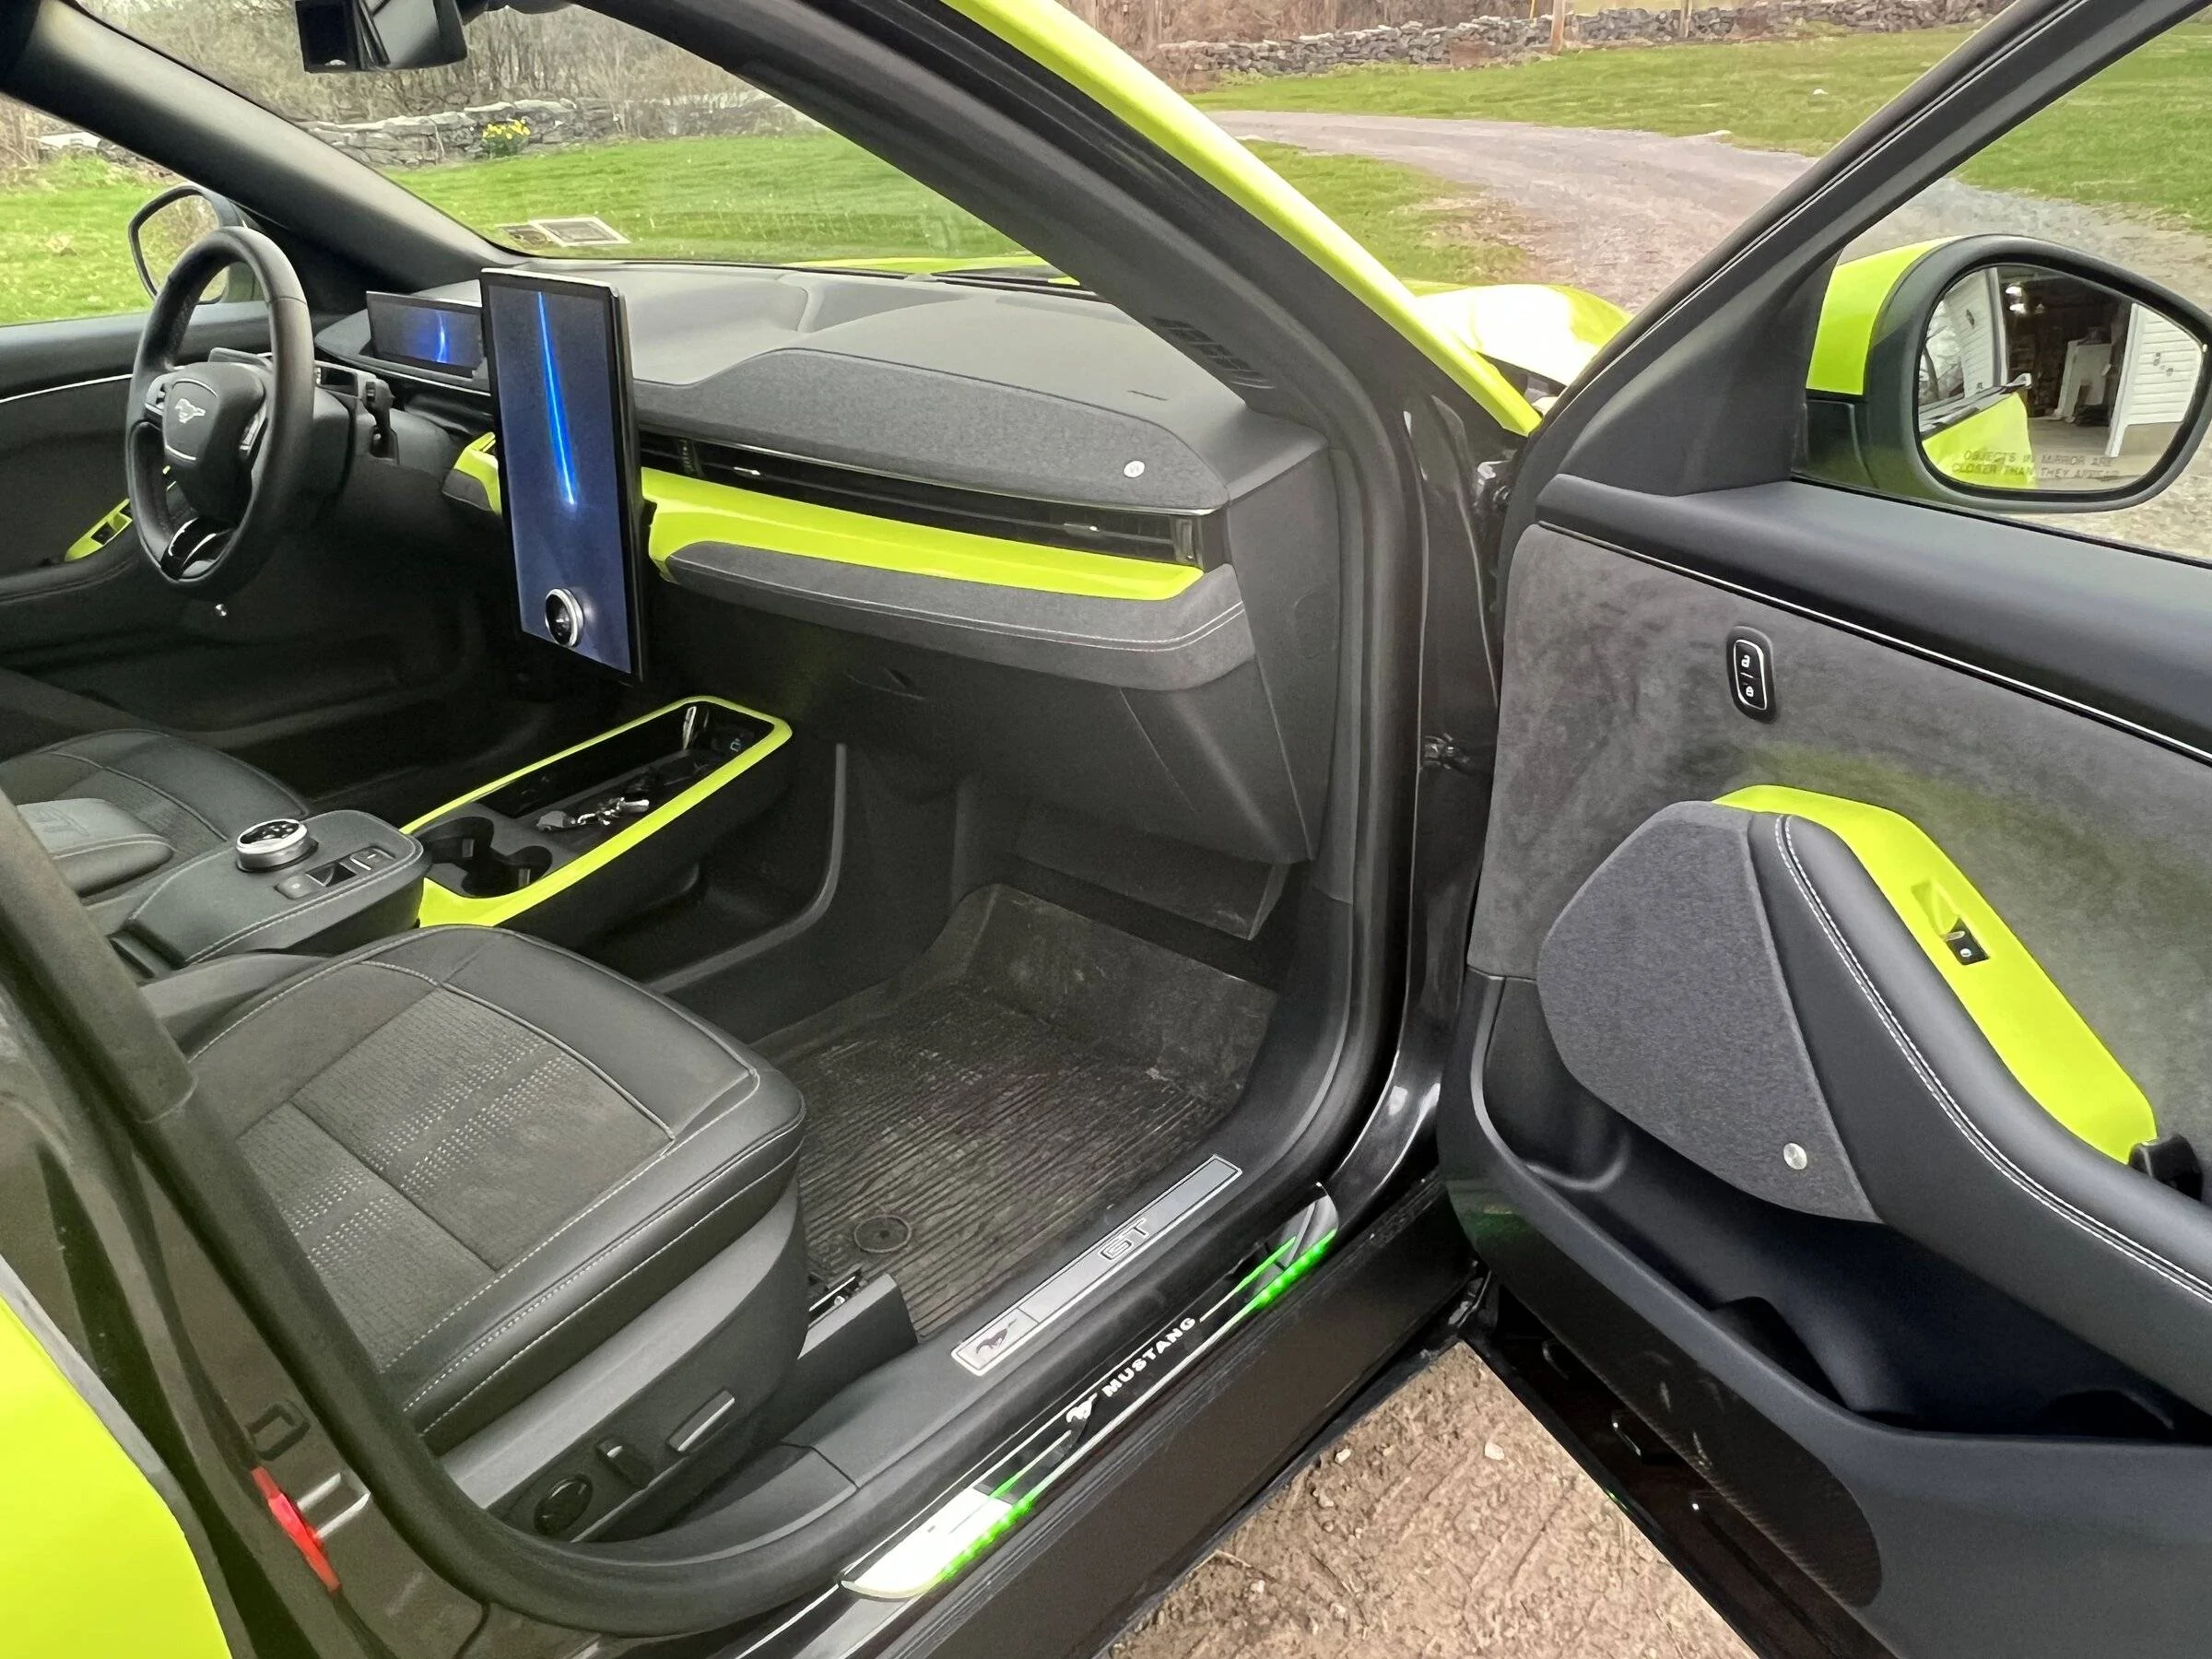
While I was waiting for my turn at the wrap shop I bought some lime wrap and started playing with ideas myself. To accent the inside, I wrapped part of the dash.
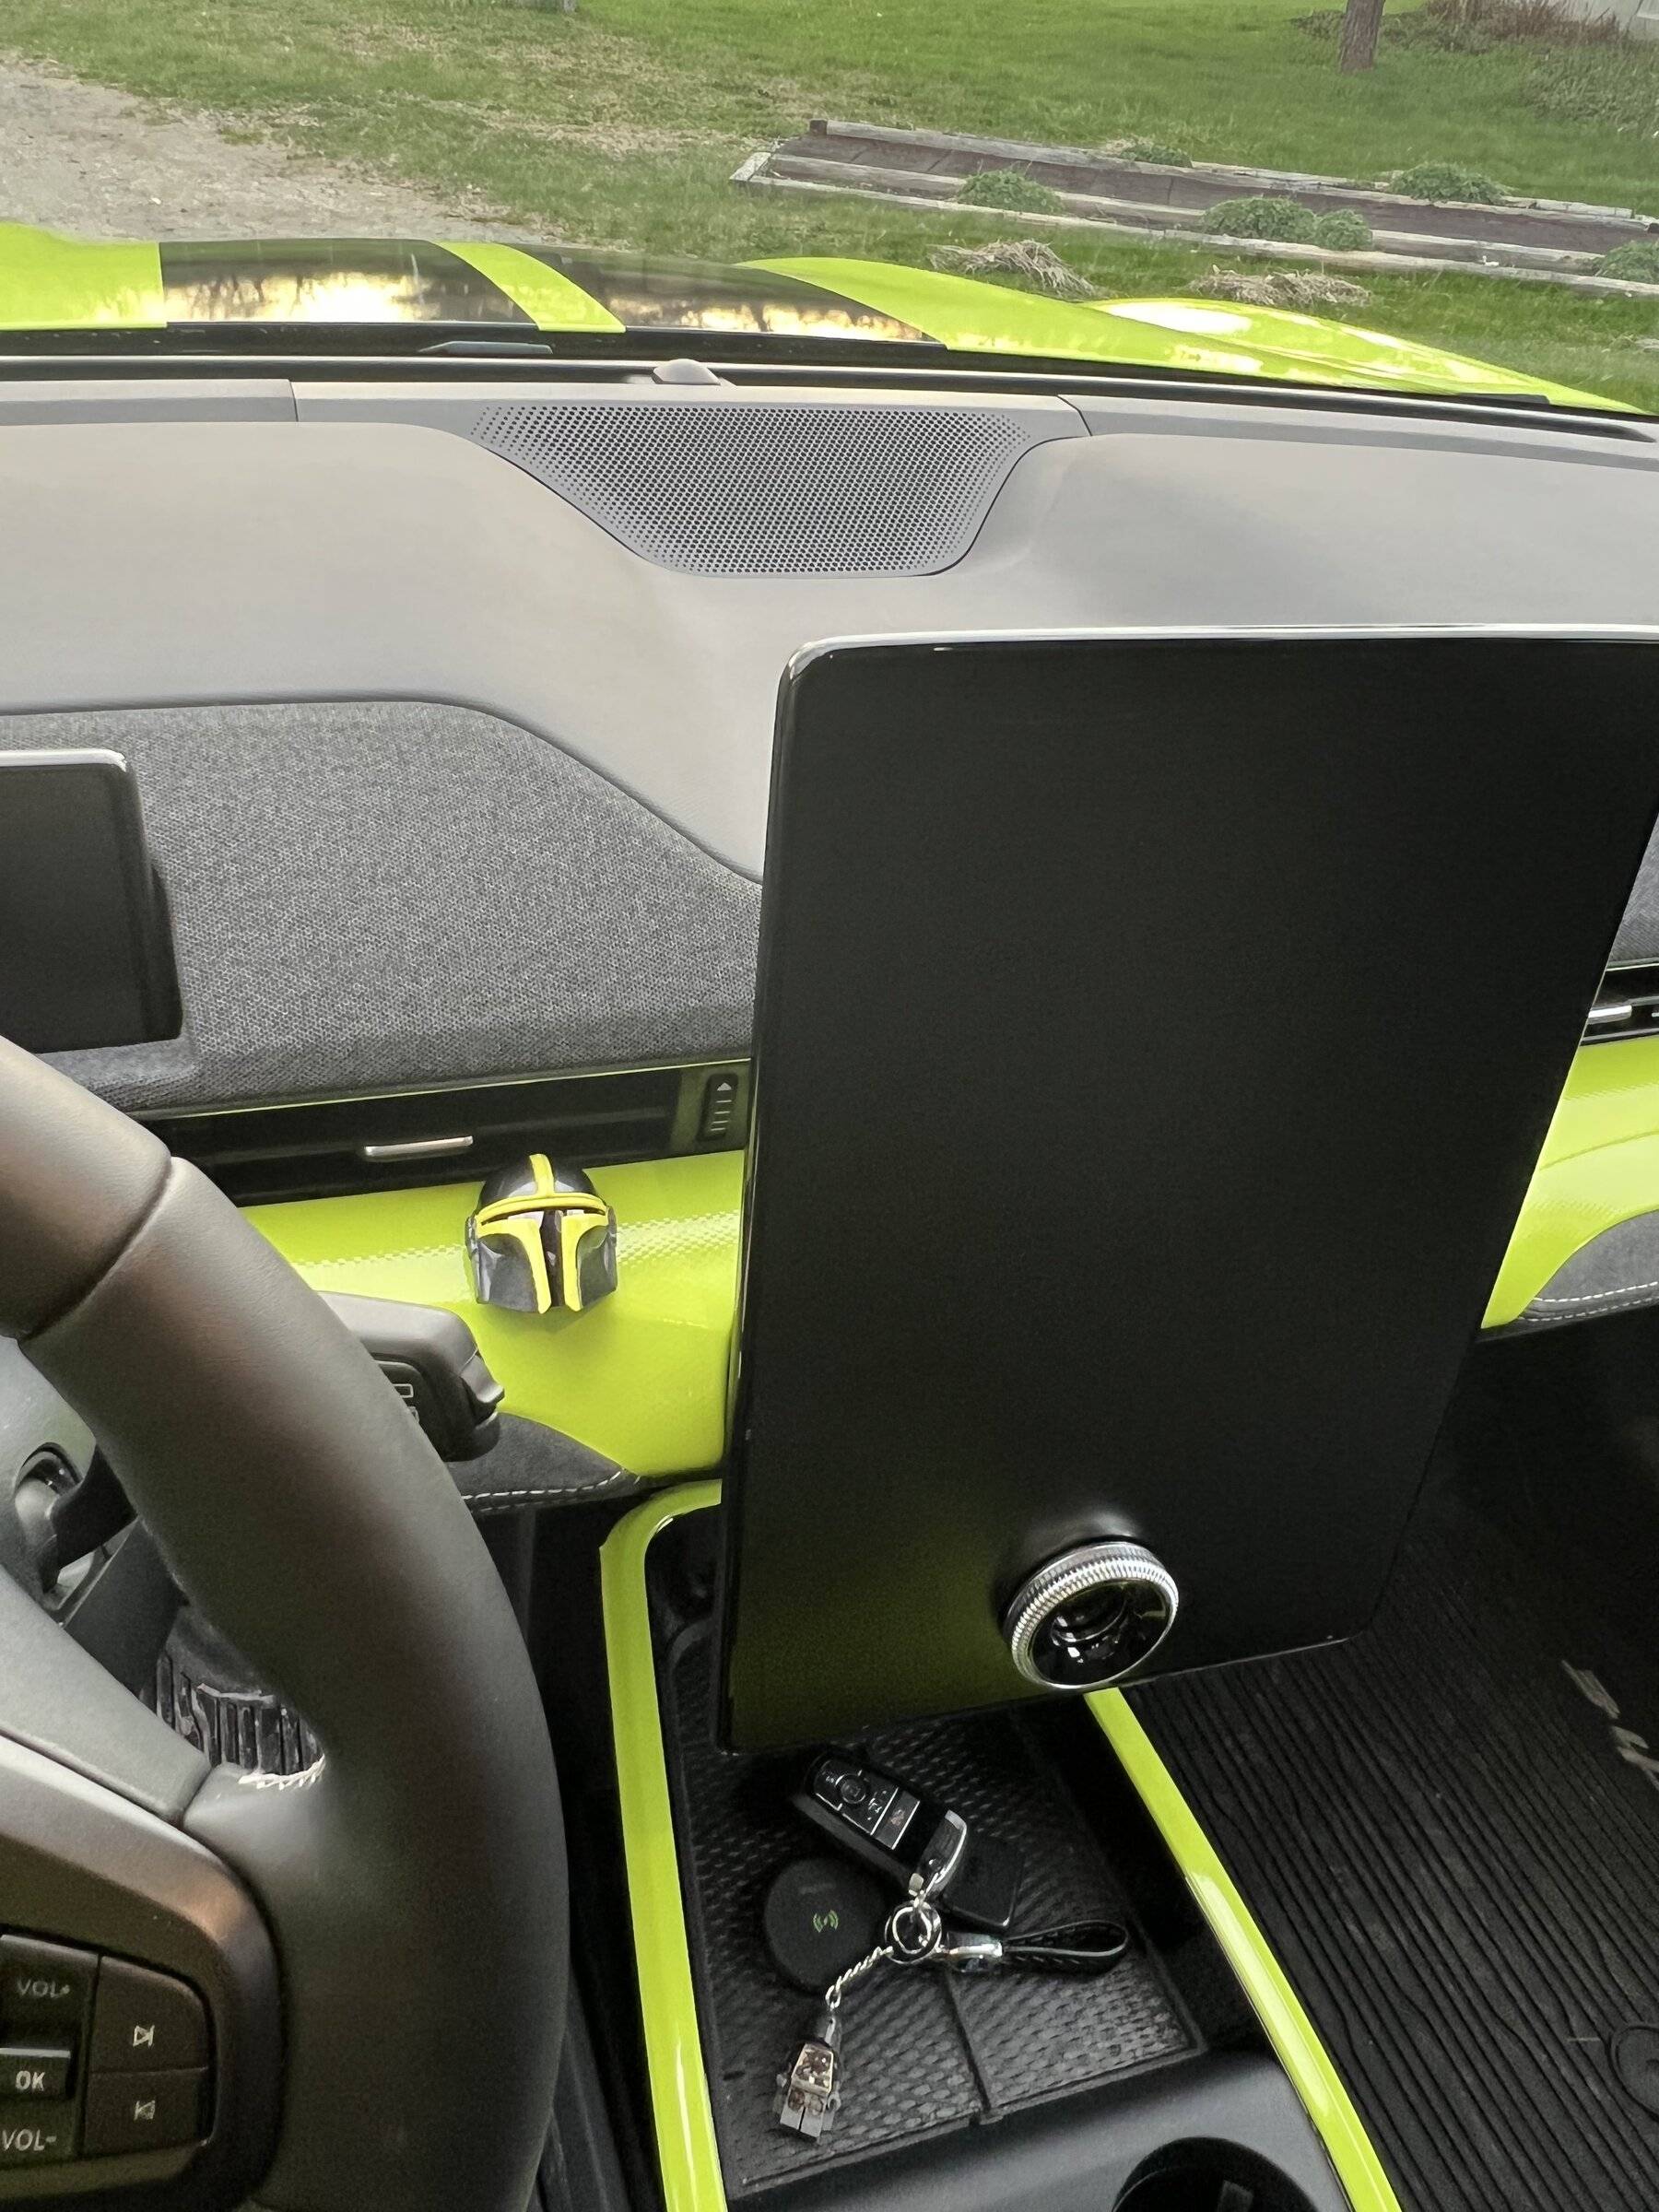
Around the Charging tray I bought the trim cover from AOSK and wrapped that. I also bought their door trim covers, but those didn’t wrap worth a damn. I went searching for a paint that matched the wrap. Turns out while I was aiming for somewhere around 1971 Grabber Lime or 1969 Groovy Green, Avery Gloss Lime is actually an exact match to 2019 Jeep HyperGreen. With the correct paint I painted the button covers. Which immediatley turned into A disaster as the paint didn’t stick. So I learned about painting plastics by sanding, using adhesive primer, then a plastic adhesive paint, finally topping with the color I really wanted. But the button covers match and all is good.
I also made a custom start button pusher.
Simon at EV-Vida sold me the Mandolorian button cover designed to be flipped up before you can push your start button. I, instead, Painted it with DMG paint then added Grabber Lime stripes (I hadn’t yet found out about Jeep HyperGreen). I JB welded a screw inside the helmet and put a rubber stopper from a syringe on the end of the screw. Now I just push the helmet down a little and let it push my start button.
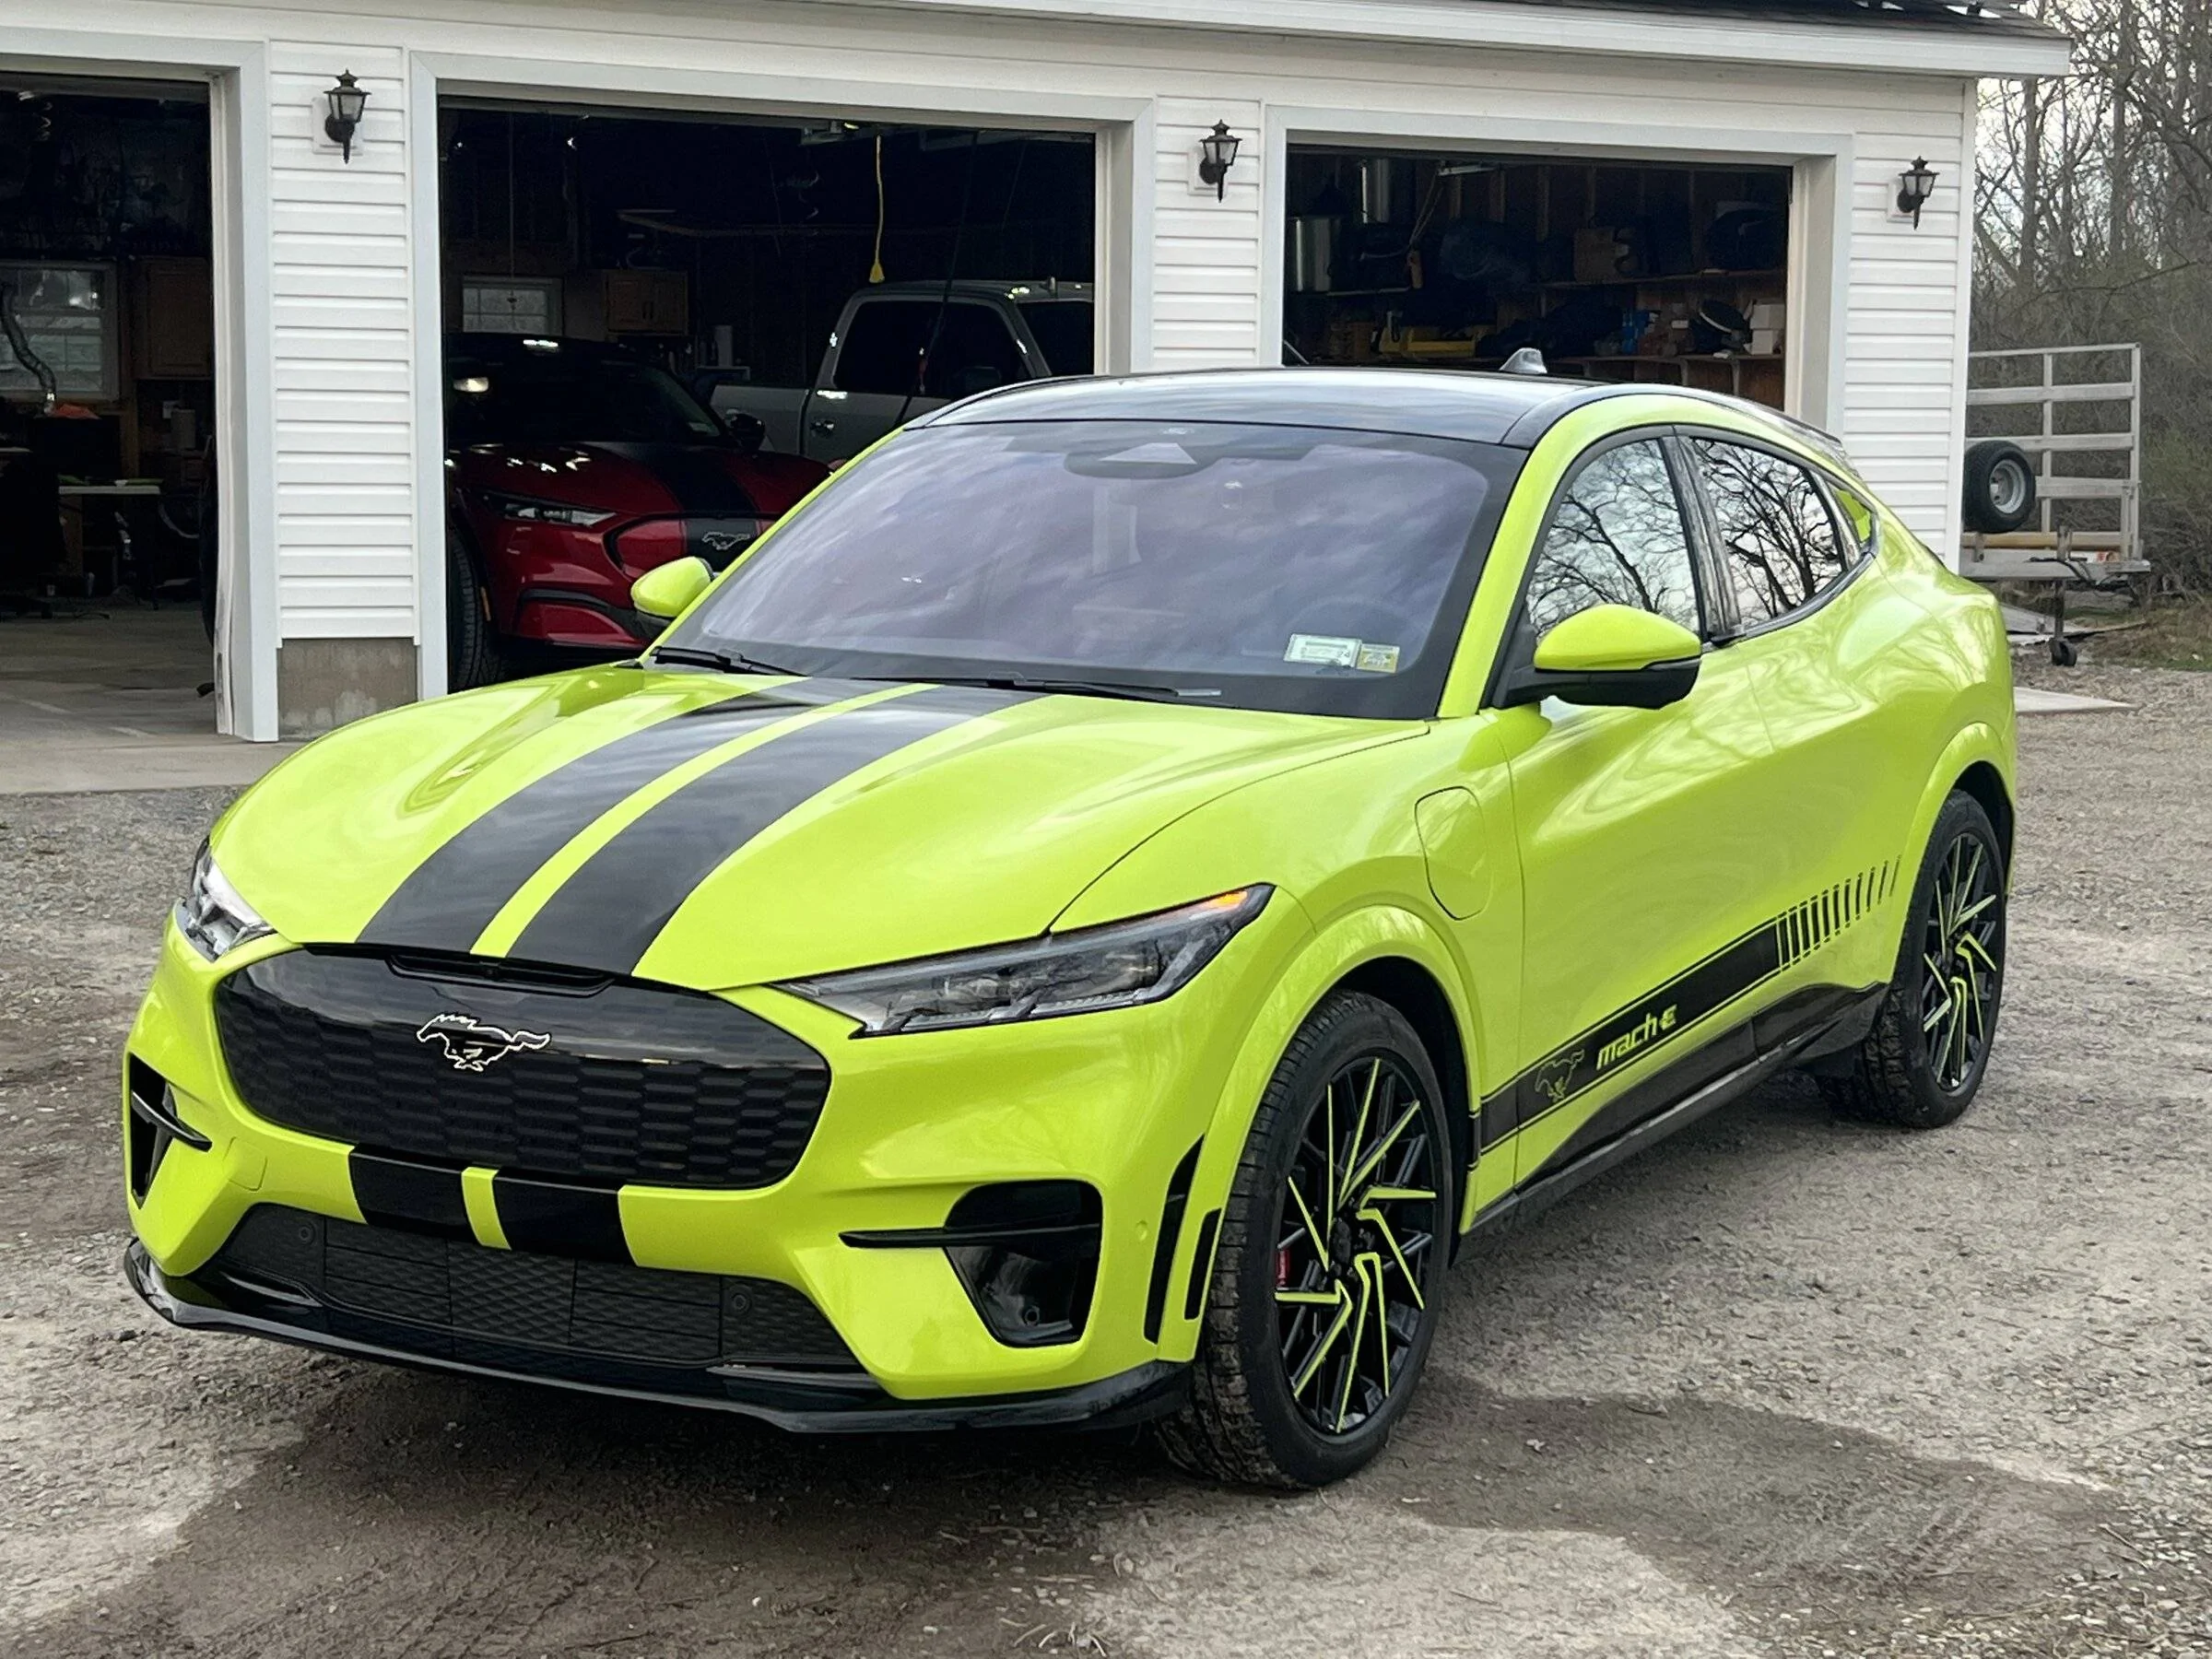
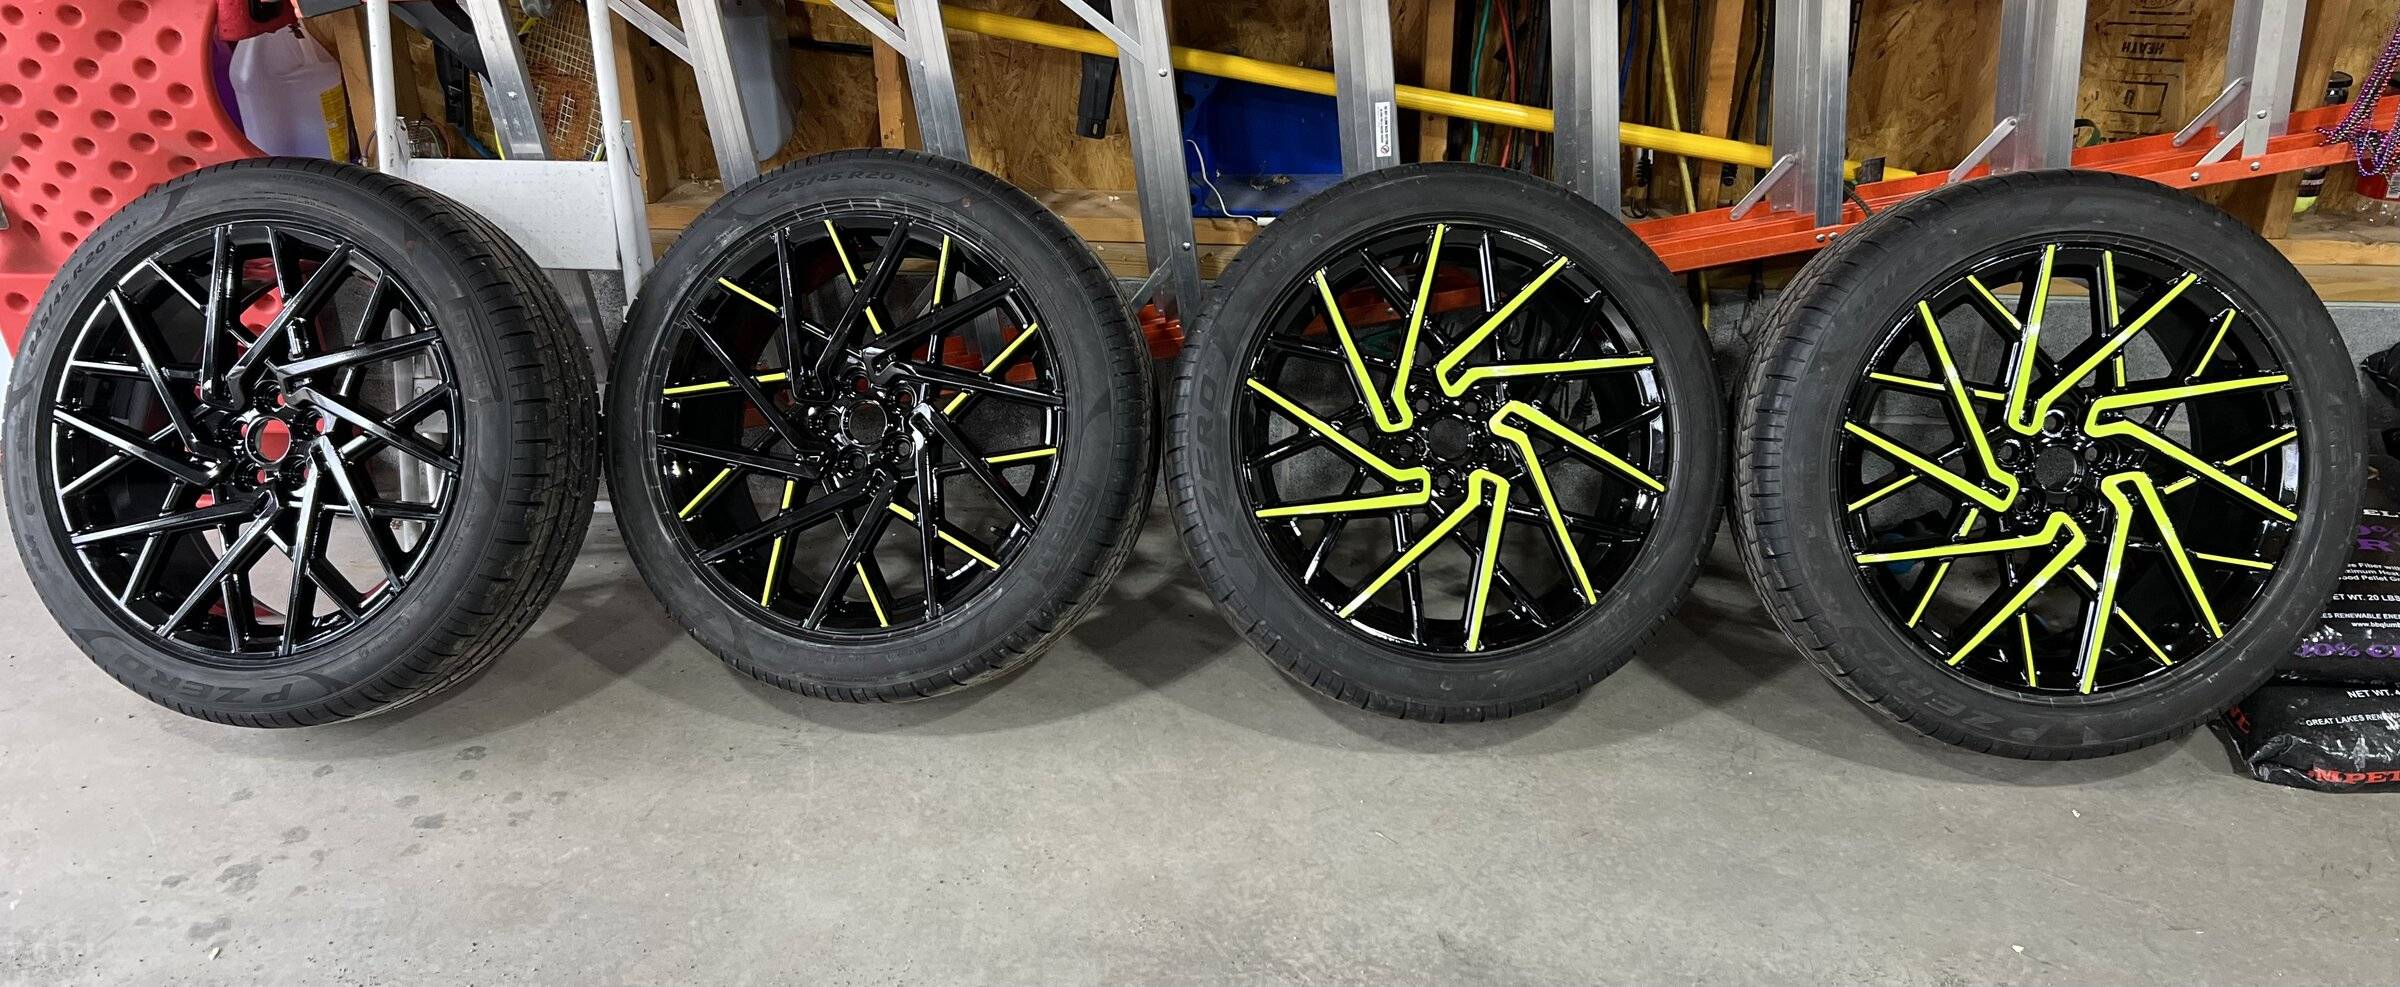
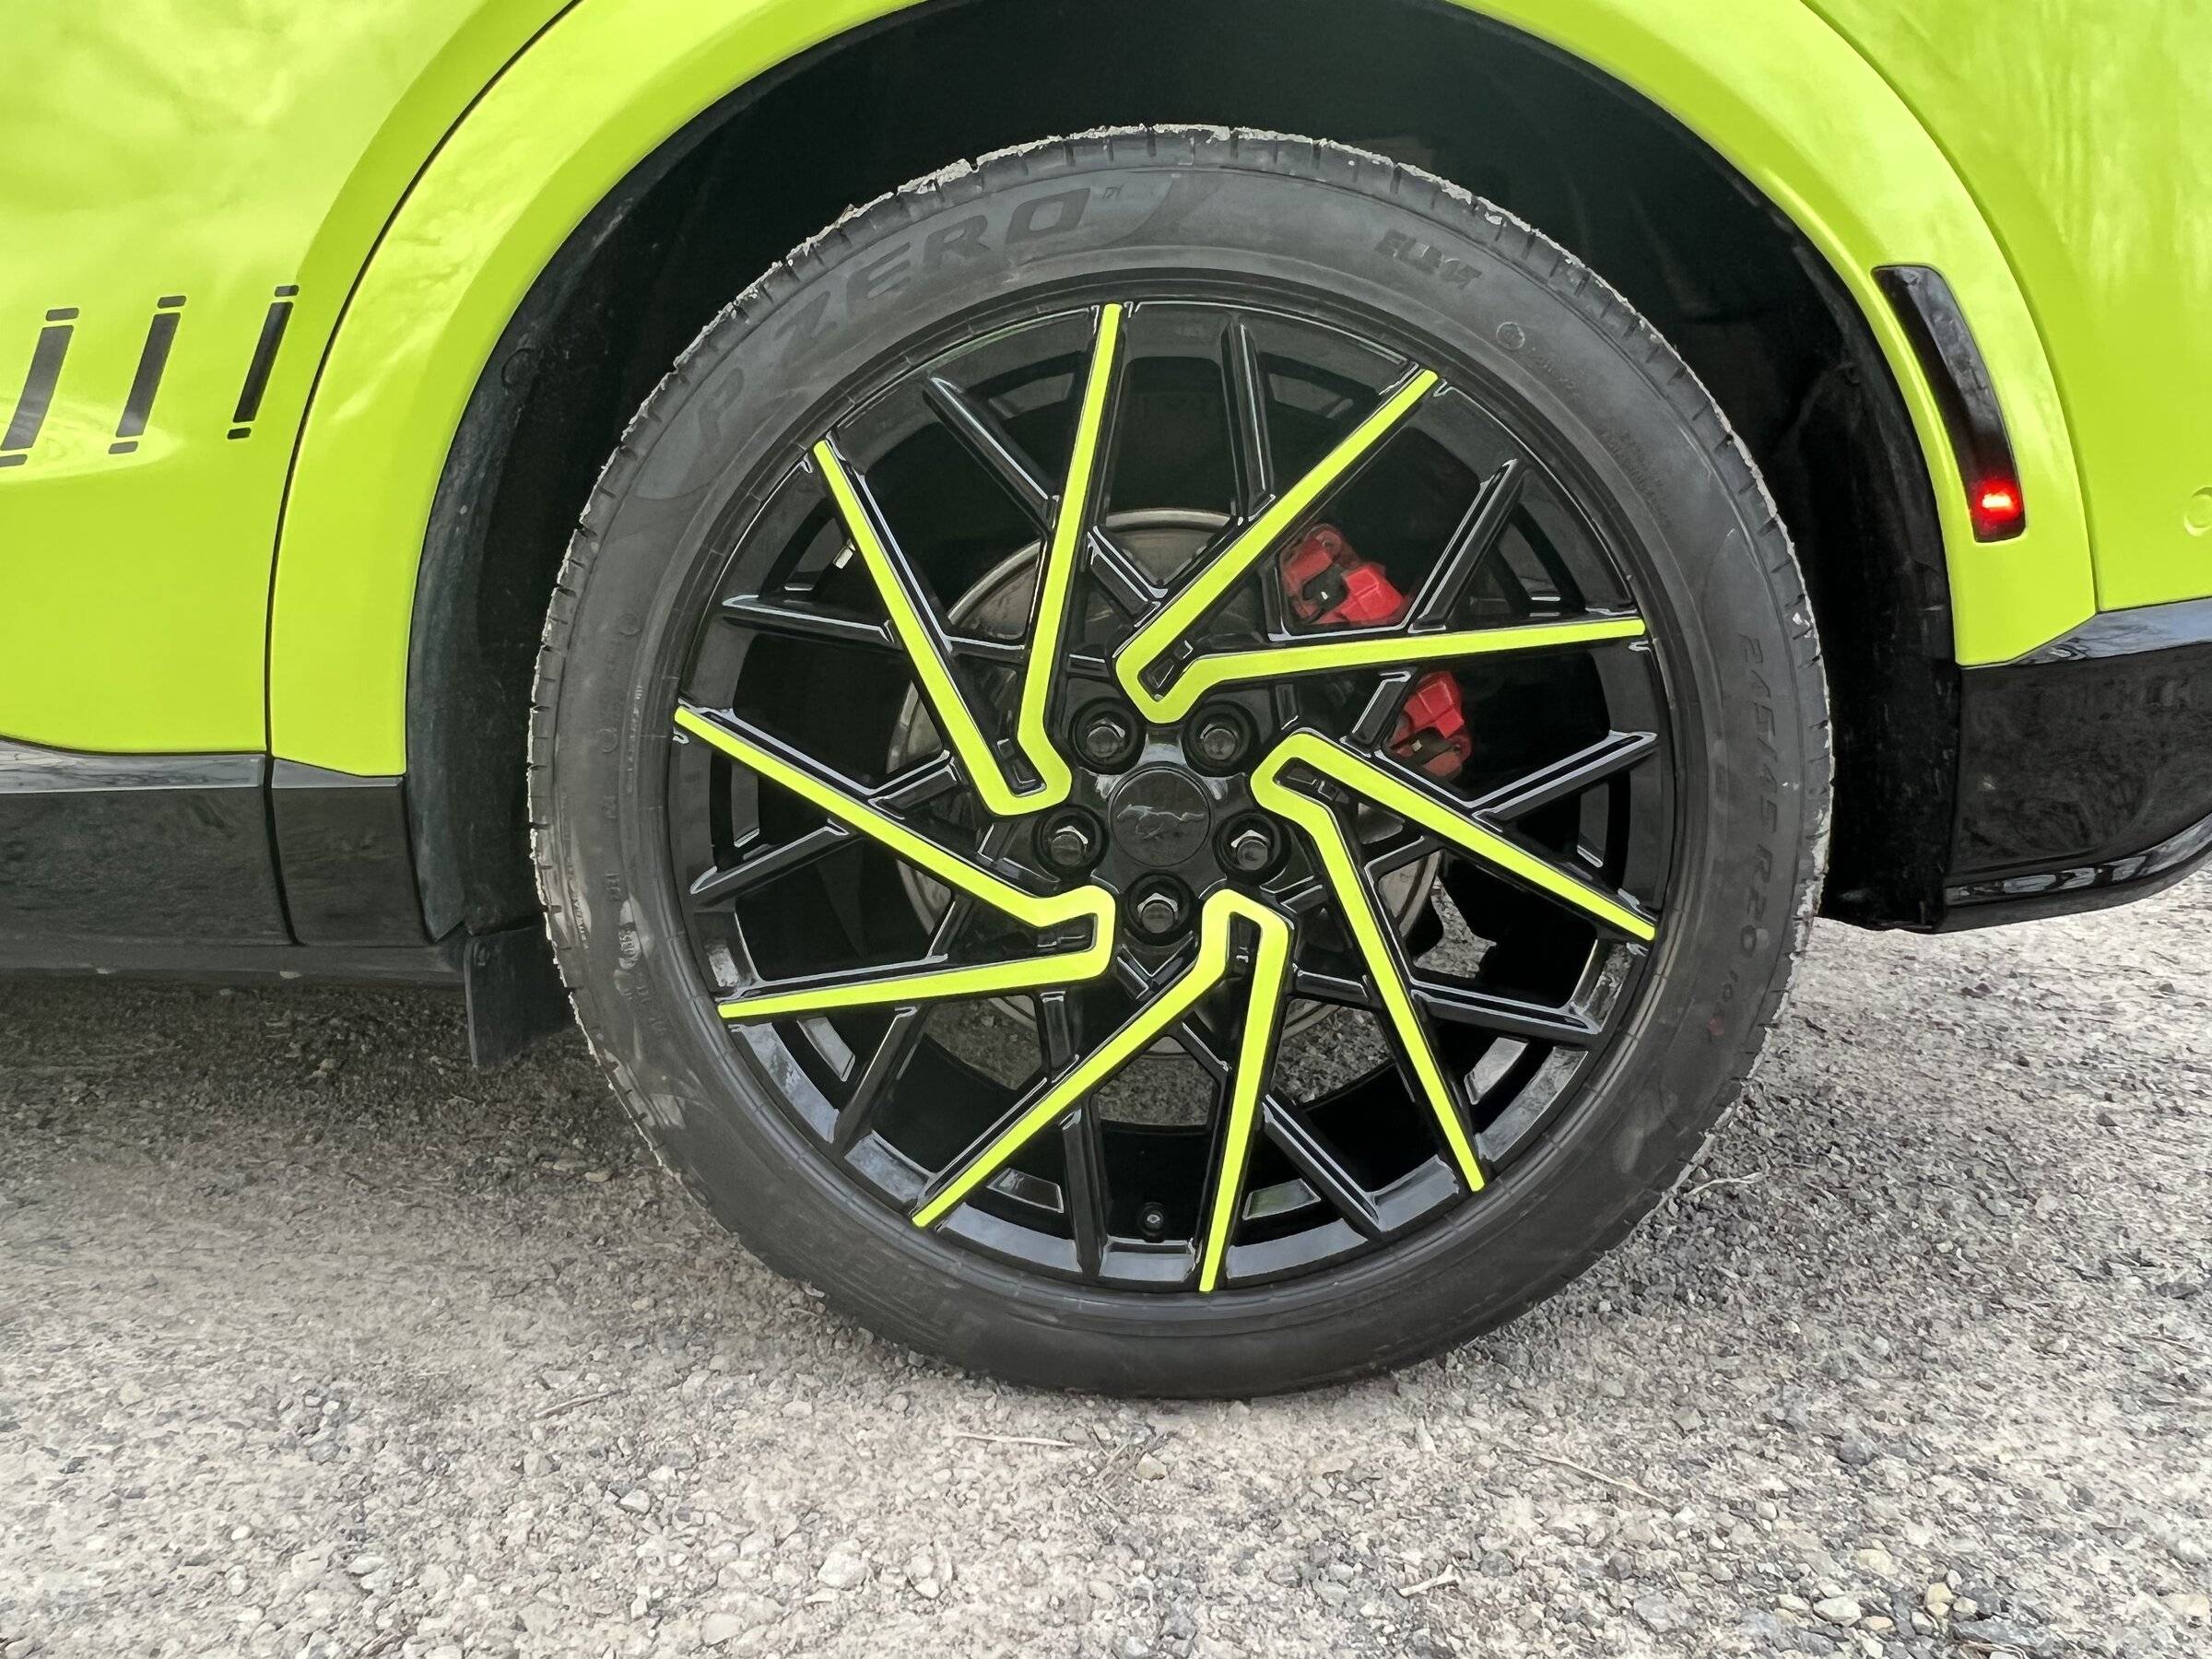
My next hair brained idea was to liven up the wheels. If I had an aero wheel cover, I could paint the covers to match. But I didn’t. Instead I had the OEM wheels to play with. I had them powder coated all black to get rid of the machined faces. Then I did a good old fashioned crayon rubbing of the faux spokes and gave the rubbing to a friend with one of those Cricut craft cutters. He cut some of my vinyl to lay over the spokes. I wasn’t sure how much color to the tires would be too much, so I decorated one wheel with each option, from all spokes black to all spokes lime.

I had to wait to get the car back to see how much was too much. All black was boring, a little lime wasn’t enough and all lime was too much. Number three won (after confirming with the Mrs.) So I decorated up all four tires the same. I also swapped the center caps to the weighted spinning pony center caps that light up as sold by EV-Vida. I had to plastidip the chrome ponies on them while peeling the dip from the rest so the light will show through. I’ll probbaly never know if they look cool or not as I’ll never see the backlit ponies on my center caps while I drive by. But in my mind they’re cool. Oh, yeah, I also replaced the stock lug nuts with the bigger McGard black lug nuts.
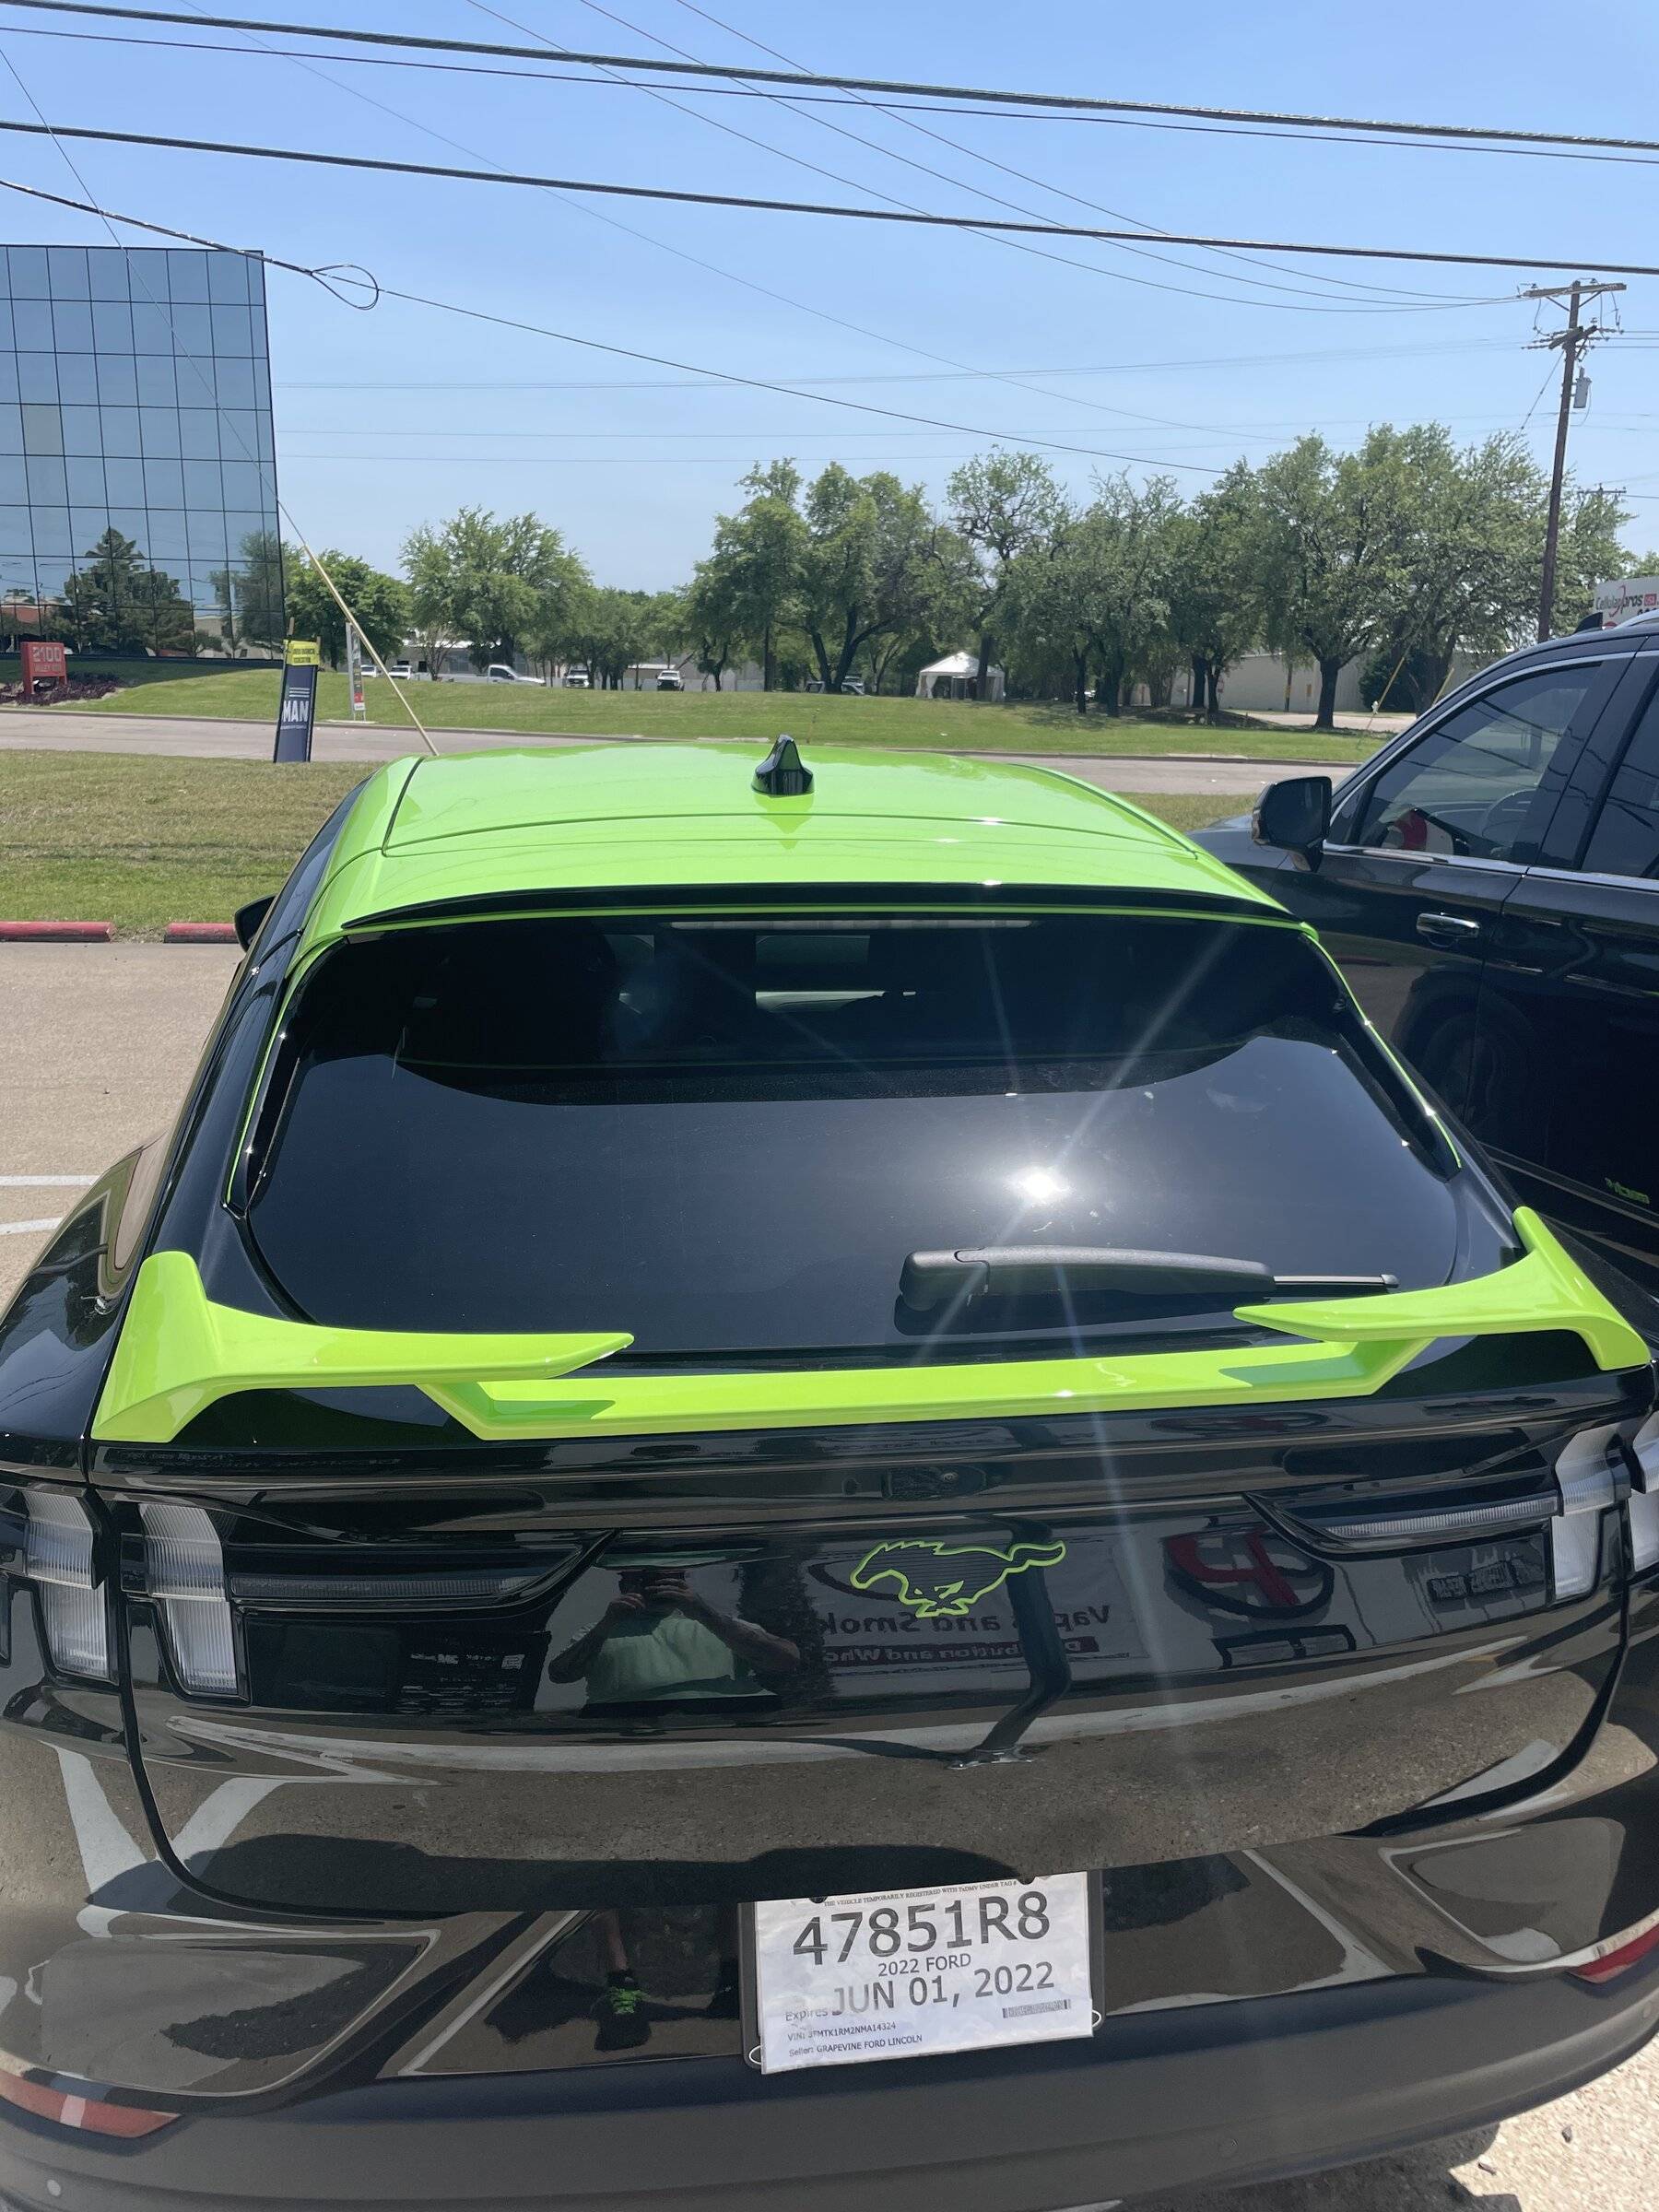
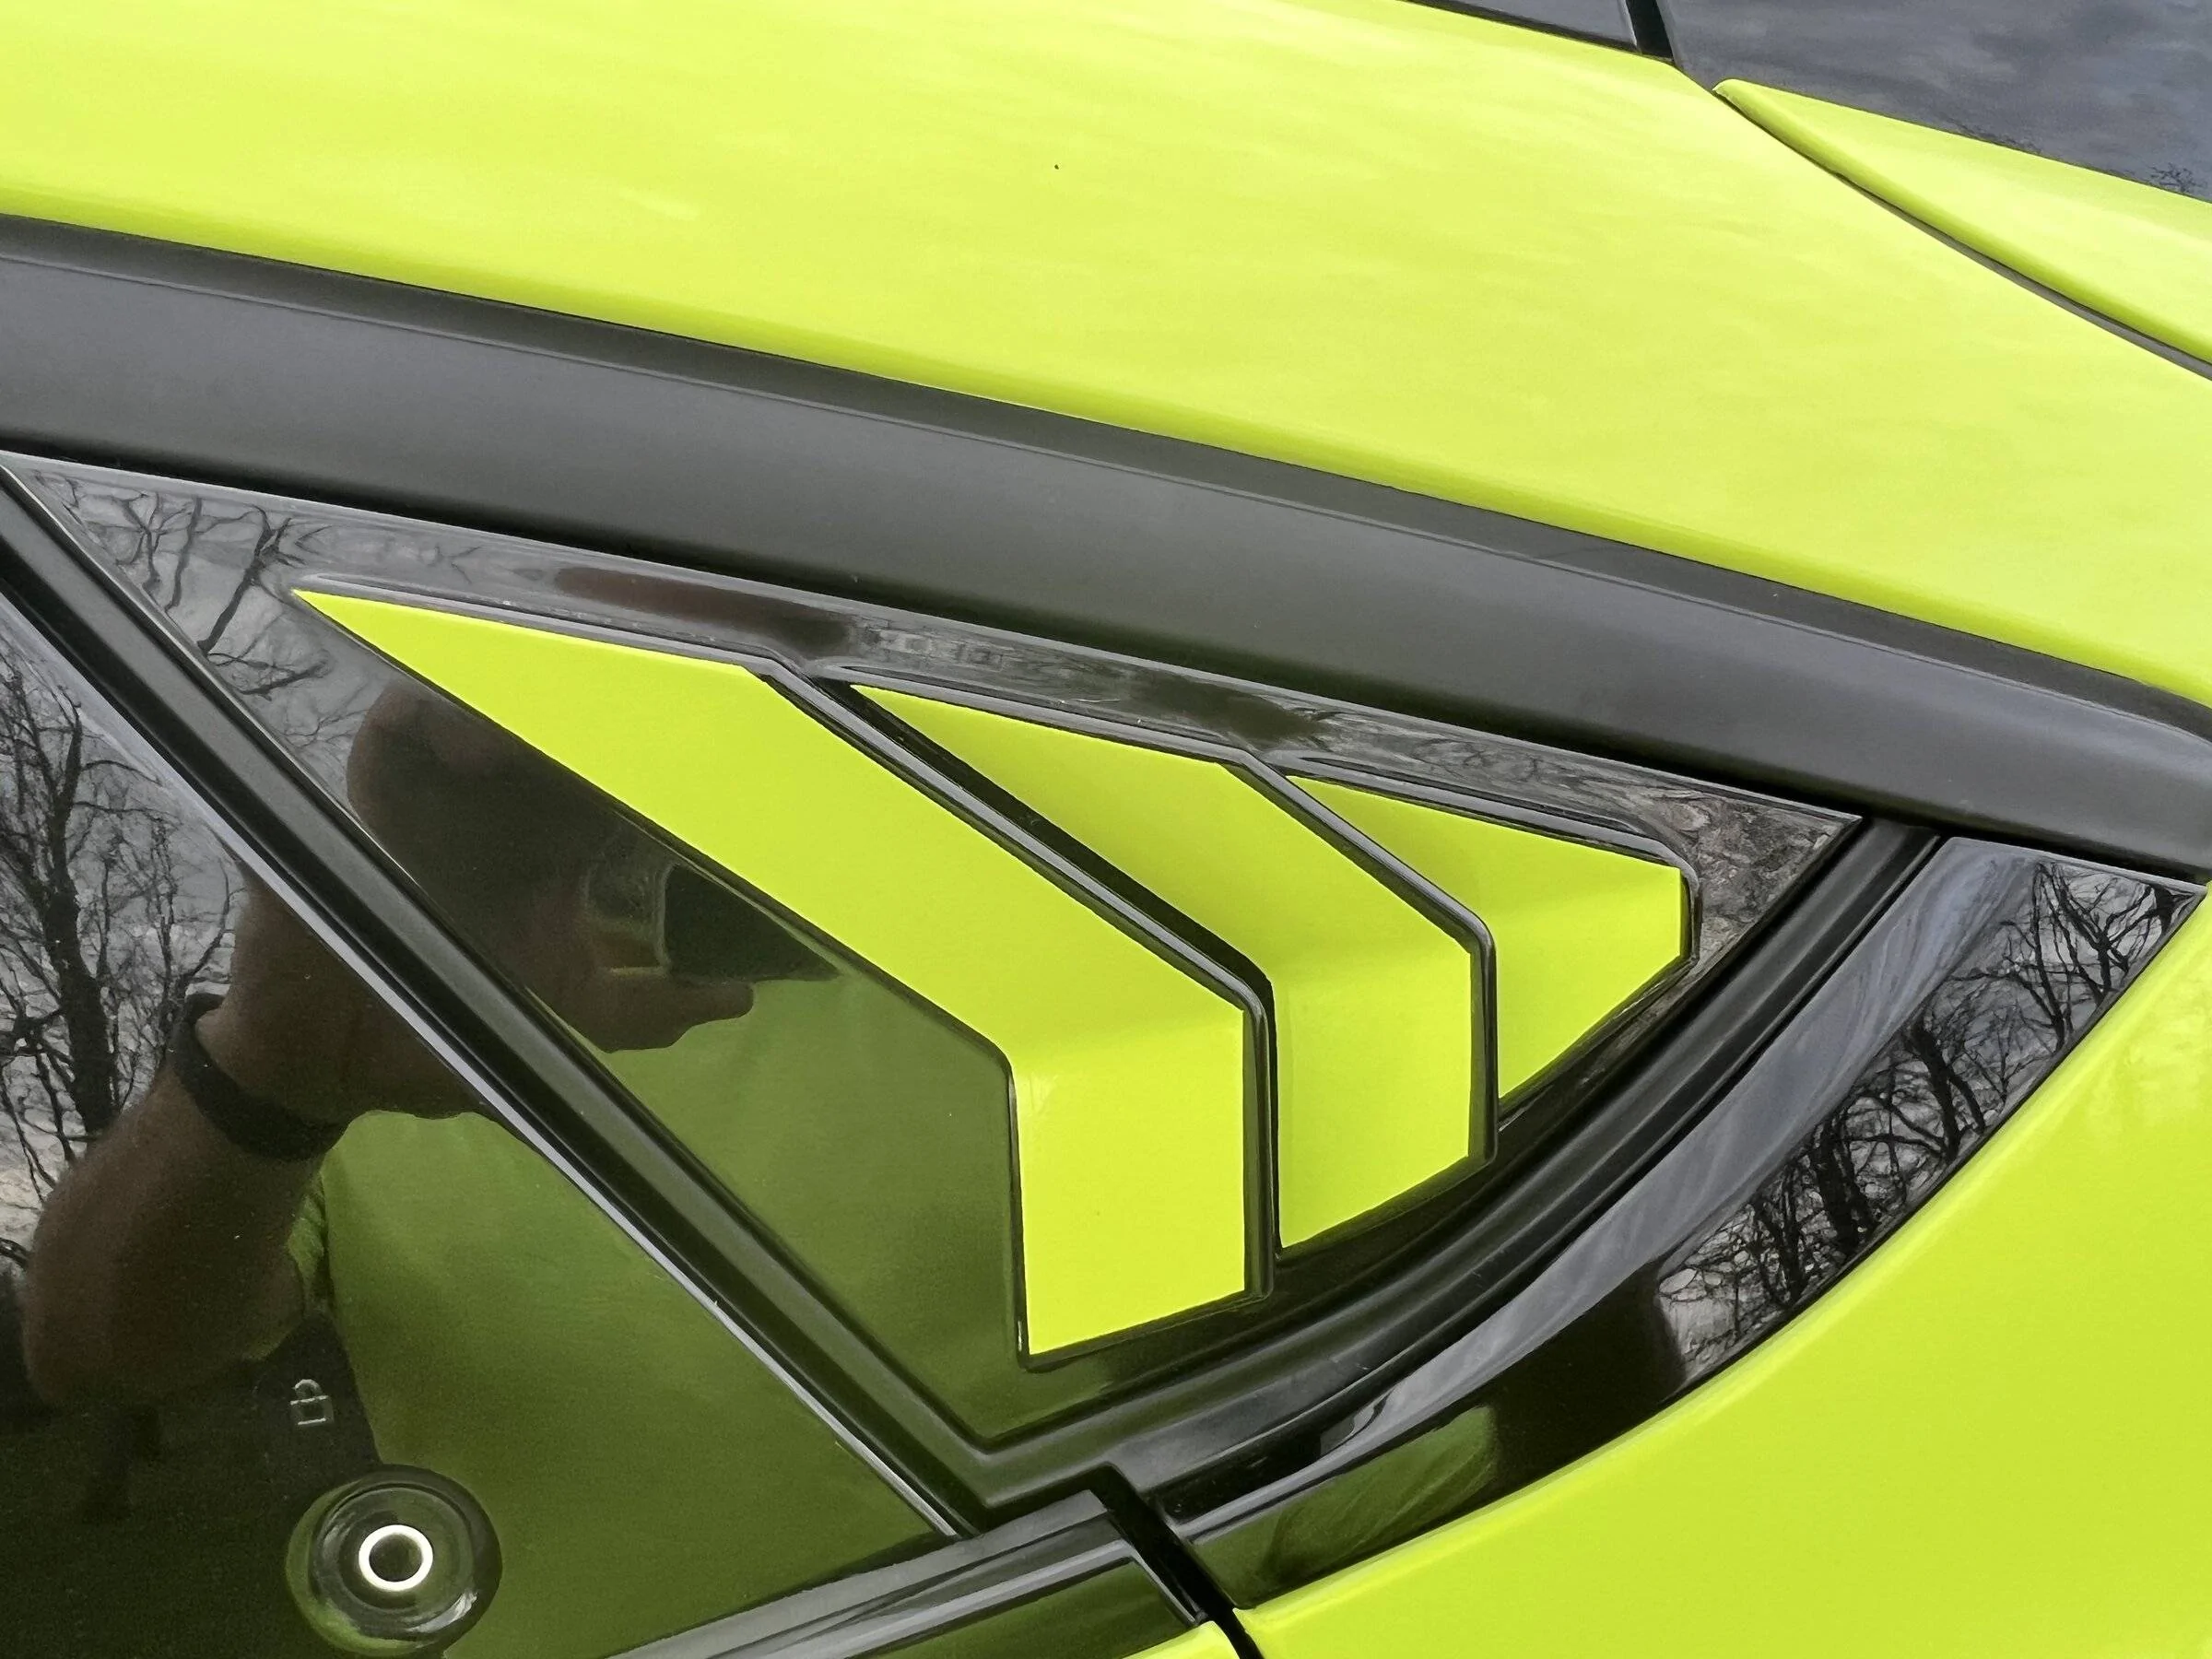
Toward the back I used the AOSK louvers I already had and highlighted them with some vinyl, after polishing off the red paint from their former life.
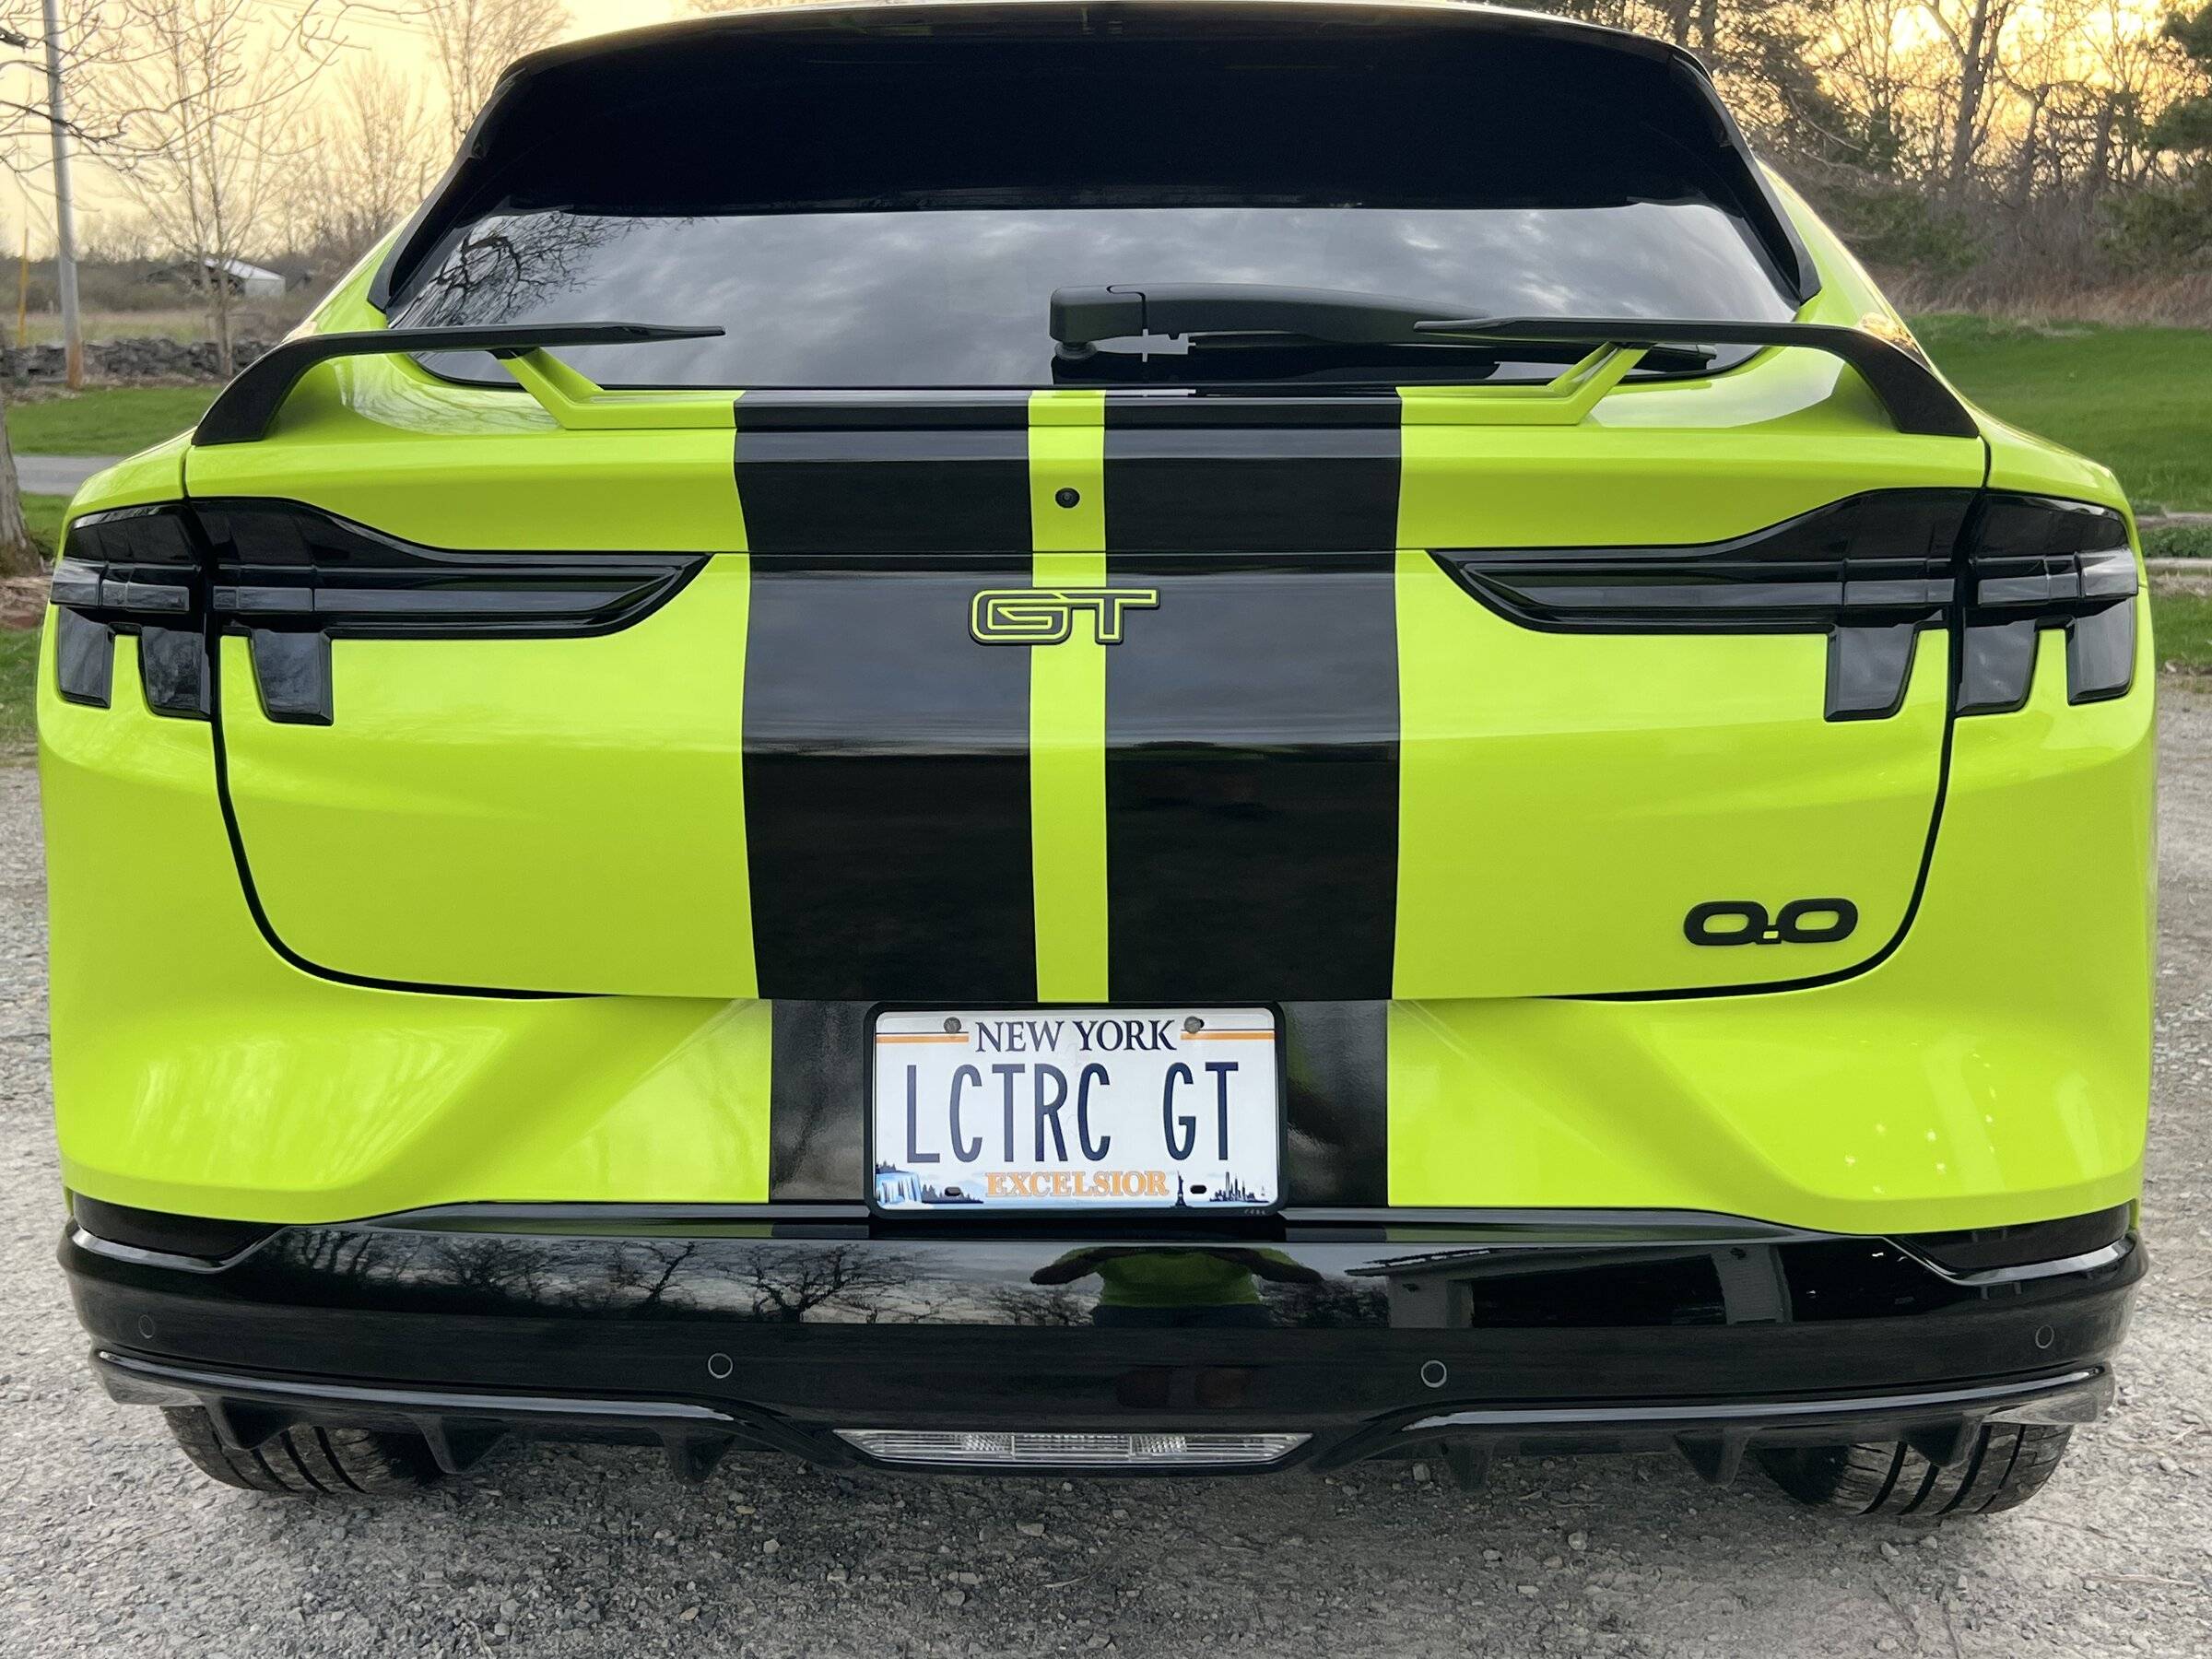
My son painted the rear GT badge with the Jeep Hypergreen paint. And I added an Etsy 0.0 badge to show off my massive displacement (also painting the decimal point to match). My Spoiler got repurposed with some Lime wrap and black stripes to maintain the continuity though I kept the winglets black for a little contrast. Tailights were tinted before it went to wrap with Vivvid dark smoke. (Now I REALLY see the elephants)
And new custom plates of course. I also did 2 coats of HALO ceramic coating for vinyl films when I got it home today. This thing is slick now with almost no friction left to the surface.
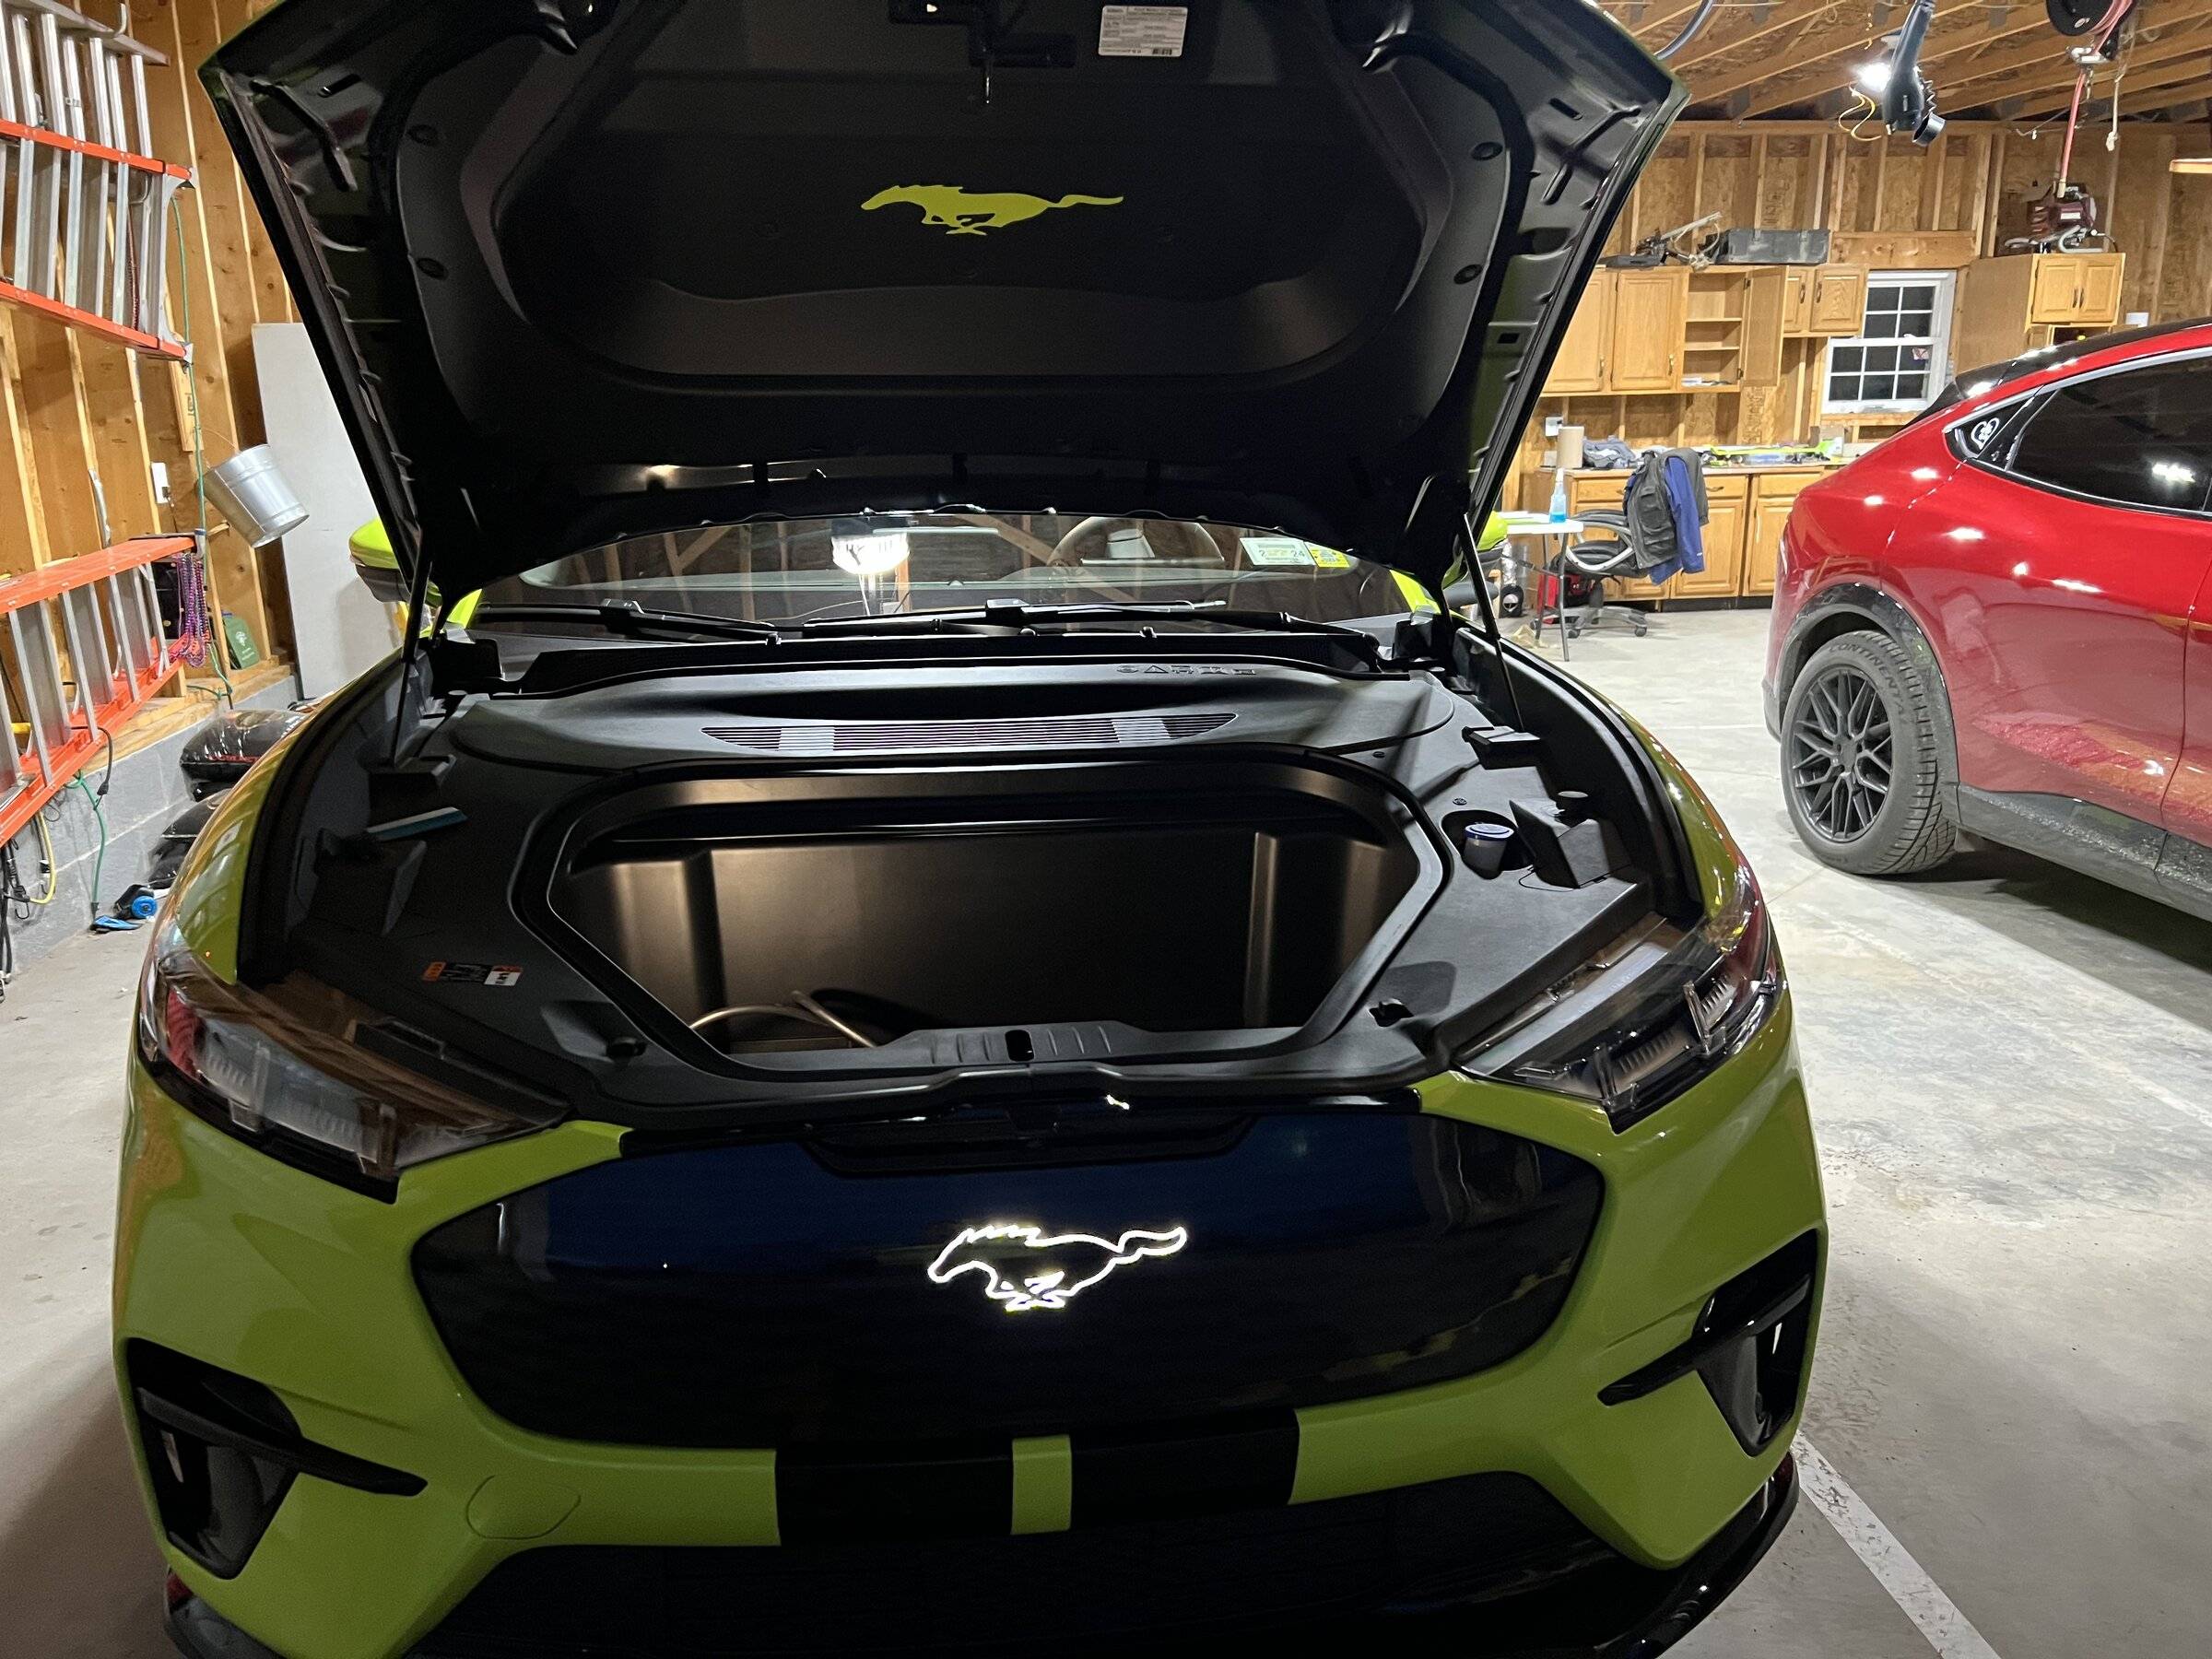
Lastly, I decided to brighten up my frunk too. I added vinyl to highlight to pony on the frunk lid.
Now it’s all done. Well….. for now. Who knows what else may happen. But I’m loving my new Green EV. Some of you will hate it for being loud, and that’s OK. I like the irony of it being visually loud while audibly silent. And I’ve always loved neon lime as a color. I love the Mopar impact colors, bright greens, yellows and oranges. So I’ve made my Mustang more eye catching and had a lot of fun doing it. I’ve been waiting to get it back from the vinyl shop and share it with all of you.
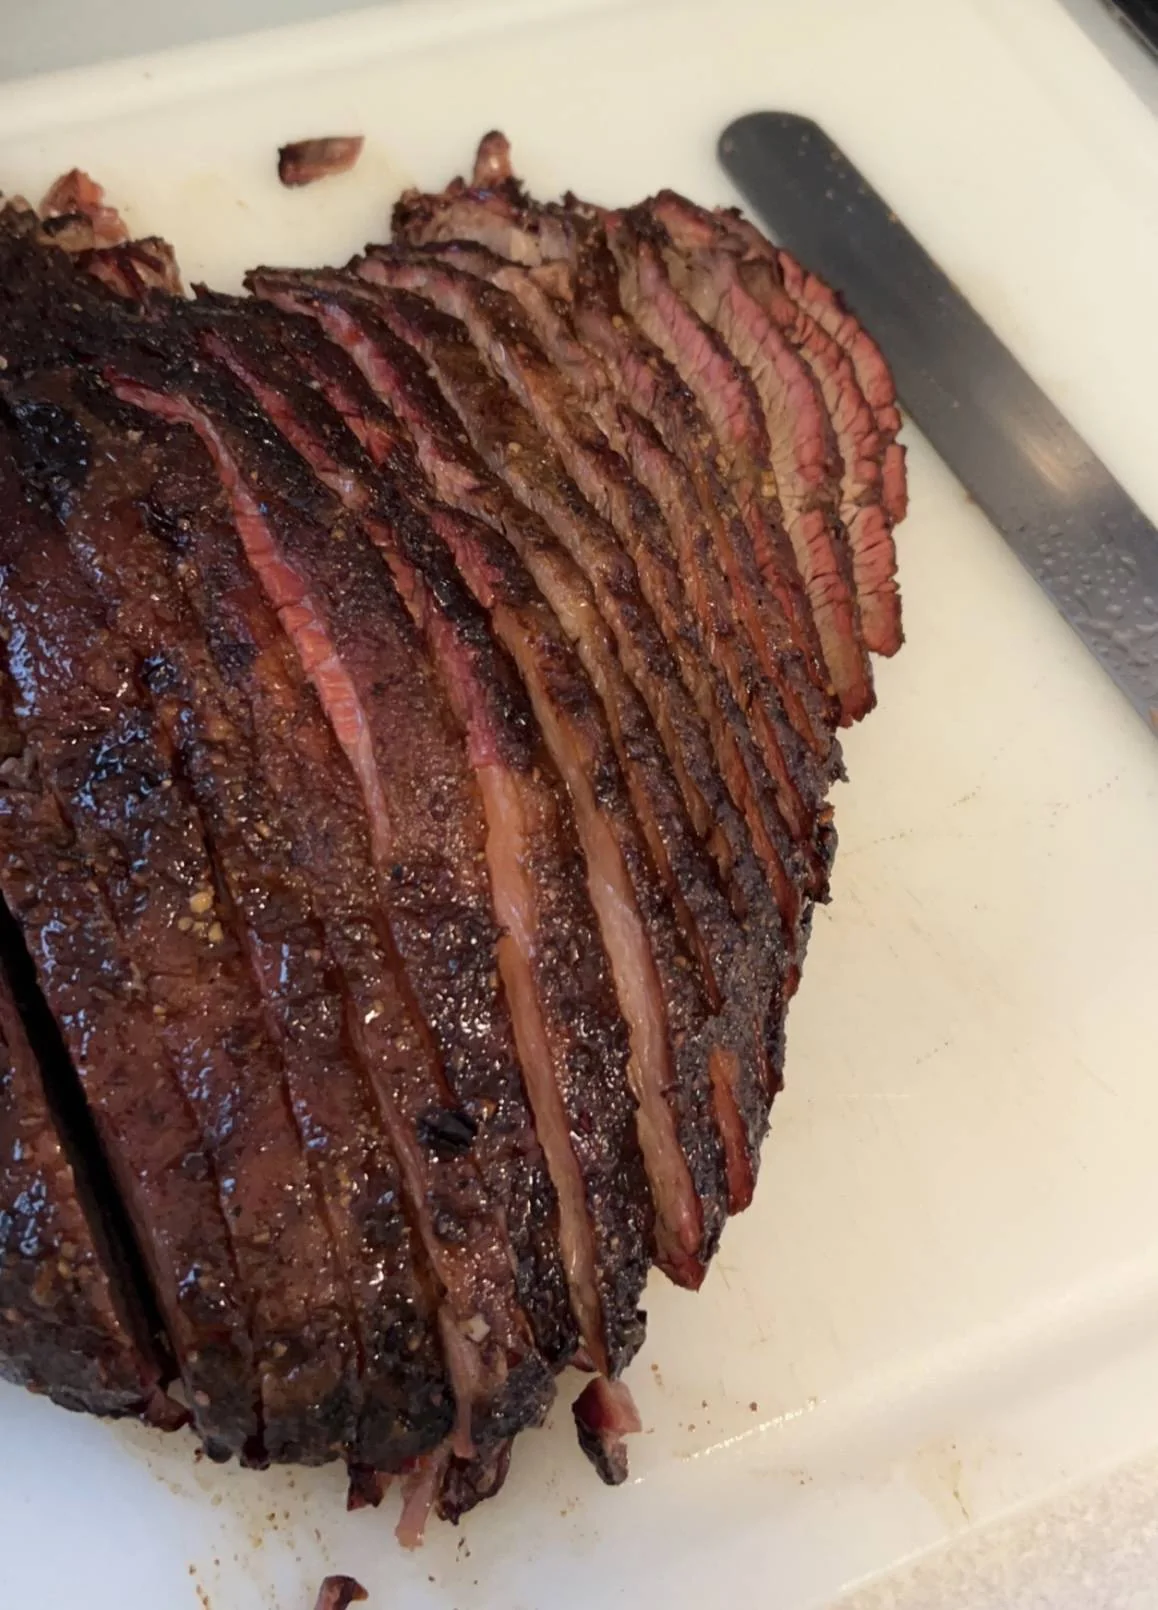
I also made smoked a Brisket Flat today. It was delicious too.


OP
OP
Murse-In-Airy
Well-Known Member
- First Name
- Rod
- Joined
- Mar 5, 2021
- Threads
- 82
- Messages
- 3,678
- Reaction score
- 8,297
- Location
- Chaumont, NY
- Vehicles
- Mach-E ER AWD
- Occupation
- Nurse
- Thread starter
- #126
Thank You Sir. I am enjoying it.That is spectacular!
stmache
Well-Known Member
- First Name
- Scott
- Joined
- Oct 24, 2019
- Threads
- 46
- Messages
- 1,076
- Reaction score
- 1,466
- Location
- Leesburg, FL
- Website
- www.sthomasphotos.com
- Vehicles
- 2023 Ford Mustang Mach-e GTP
- Occupation
- Photographer
We have got to get yours and @Murse-In-Airy together for a photo shoot. Ogdensburg might be a good place.
Can I join @Murse-In-Airy ? Still waiting to get them rims on, louvers vinyl, and side striping.
Will add pictures once those are done.
Astro19
Well-Known Member
- Joined
- Apr 9, 2022
- Threads
- 7
- Messages
- 98
- Reaction score
- 113
- Location
- Dallas
- Vehicles
- Mustang Mach E select
Is it that cheap light sandy plastic like on the select trim? I am trying to figure out how to paint the trim or vinyl it. Need suggestions on how to prep it.I’ll let you see mine before you decide if you really want that. It’s not quite the right type of plastic to be putting vinyl on. So it doesn’t look the best up close. It if you want it, we could get it done.
OP
OP
Murse-In-Airy
Well-Known Member
- First Name
- Rod
- Joined
- Mar 5, 2021
- Threads
- 82
- Messages
- 3,678
- Reaction score
- 8,297
- Location
- Chaumont, NY
- Vehicles
- Mach-E ER AWD
- Occupation
- Nurse
- Thread starter
- #129
Yes. Unfortunately it is just like the trim below the doors. And the vinyl is not sticking worth a damn. It’s already peeling off and I’ve tried to reapply it. I’m afraid without spray adhesive it’s a lost cause.Is it that cheap light sandy plastic like on the select trim? I am trying to figure out how to paint the trim or vinyl it. Need suggestions on how to prep it.
I also tried painting the license plate bracket. Which is the same type of plastic. Even with adhesion promoter, and universal bonding primer, the paint did not stick.
so I’m really not sure what to tell you about painting the plastic trim on the outside of the car. Short of replacing it with the trim from a premium that has piano black, as final would stick to that well.
Astro19
Well-Known Member
- Joined
- Apr 9, 2022
- Threads
- 7
- Messages
- 98
- Reaction score
- 113
- Location
- Dallas
- Vehicles
- Mustang Mach E select
I figured. I need to add color towards the bottom of the back but it's all that plasticYes. Unfortunately it is just like the trim below the doors. And the vinyl is not sticking worth a damn. It’s already peeling off and I’ve tried to reapply it. I’m afraid without spray adhesive it’s a lost cause.
I also tried painting the license plate bracket. Which is the same type of plastic. Even with adhesion promoter, and universal bonding primer, the paint did not stick.
so I’m really not sure what to tell you about painting the plastic trim on the outside of the car. Short of replacing it with the trim from a premium that has piano black, as final would stick to that well.
OP
OP
Murse-In-Airy
Well-Known Member
- First Name
- Rod
- Joined
- Mar 5, 2021
- Threads
- 82
- Messages
- 3,678
- Reaction score
- 8,297
- Location
- Chaumont, NY
- Vehicles
- Mach-E ER AWD
- Occupation
- Nurse
- Thread starter
- #131
I may try the license plate holder again as a test piece for you. When I painted the door trim pieces from AOSK, I sanded them first. Then adhesion promoter. Then bonding primer. Then krylon fusion that’s supposed to stick to anything. Then the color I really wanted. Then a clear coat.I figured. I need to add color towards the bottom of the back but it's all that plastic
I tried all of that except the sanding on the first try with no luck. So I believe the sanding may have been key. But sanding the textured plastic without ruining the textured look without leaving some of it too smooth might be problematic.
highland58
Well-Known Member
- First Name
- Dave
- Joined
- Jan 6, 2020
- Threads
- 22
- Messages
- 1,492
- Reaction score
- 1,803
- Location
- Seattle area - south King county
- Vehicles
- 2025 Mach-E Rally, 2023 Bolt EUV, 2018 F150 XLT
- Occupation
- IT Solutions Architect
Our tree pollen is off the charts this year. I already pressure washed the driveway once and waiting for it to stop before doing it again. Not pollen week, but working on a second month of it.Too early for pollen up here in the great white north. We’re supposed to get snow tomorrow. The trees have no leaves. But you do make a great point that “pollen week” won’t be as obnoxious now. Yay For unintended benefits.
MachSimbaaa
Active Member
- First Name
- Ari
- Joined
- Feb 28, 2022
- Threads
- 5
- Messages
- 27
- Reaction score
- 21
- Location
- Fresno, CA
- Vehicles
- Mustang Mach E GT
Sick!Those of us that have been here for a while have long lamented the lack of a good color pallet available for our beloved Mustang Mach-E. My original order was for Carbonized Grey. When I got impatient a couple days later I was able to find a Shadow Black. Boring…. but I dressed it up and brought most of you on that journey with me. When I found a GT-PE it was Dark Matter Grey. Not exciting.
In 1969 there were 37 colors available, from Calypso Coral to Spanish Gold. There was Grabber Green, Blue, Yellow, and Orange. And of course there was the iconic Groovy Green. Why couldn’t Ford’s First environmentally friendly mustang come in Groovy Green. What’s more Groovy than protecting the environment by being GREEN in a totally awesome car. But DMG was available, so I went for it.
But….. I can’t leave anything alone. You all know that. So today I reveal Ghost-E the Grey Specter has undergone an identity change. Allow me to introduce:
The Green Goblin*** (named by my wife because apparently calling it the green one isn’t acceptable.)
I found a shop in Fulton NY willing to wrap the car. Upward Graphics owner Malbert Delapena said he could do it and had an opening in a month. Everyone else was too busy to even give me date or their first opening was 6 months away. I know you’ll ask so I’ll get it out of the way and say I paid $3400 for the wrap and the stripes. I picked Avery Gloss Lime Green for the color. It’s as close to Groovy Green as I could get for commercially available wrap, taking into account that supply chain issues are present in vinyl too. And of course, I had to have stripes. The side stripes I ordered from AutoDesign.shop and the Upward Graphics folks put them on while they had the car.
While I was waiting for my turn at the wrap shop I bought some lime wrap and started playing with ideas myself. To accent the inside, I wrapped part of the dash.
Around the Charging tray I bought the trim cover from AOSK and wrapped that. I also bought their door trim covers, but those didn’t wrap worth a damn. I went searching for a paint that matched the wrap. Turns out while I was aiming for somewhere around 1971 Grabber Lime or 1969 Groovy Green, Avery Gloss Lime is actually an exact match to 2019 Jeep HyperGreen. With the correct paint I painted the button covers. Which immediatley turned into A disaster as the paint didn’t stick. So I learned about painting plastics by sanding, using adhesive primer, then a plastic adhesive paint, finally topping with the color I really wanted. But the button covers match and all is good.
I also made a custom start button pusher.
Simon at EV-Vida sold me the Mandolorian button cover designed to be flipped up before you can push your start button. I, instead, Painted it with DMG paint then added Grabber Lime stripes (I hadn’t yet found out about Jeep HyperGreen). I JB welded a screw inside the helmet and put a rubber stopper from a syringe on the end of the screw. Now I just push the helmet down a little and let it push my start button.
My next hair brained idea was to liven up the wheels. If I had an aero wheel cover, I could paint the covers to match. But I didn’t. Instead I had the OEM wheels to play with. I had them powder coated all black to get rid of the machined faces. Then I did a good old fashioned crayon rubbing of the faux spokes and gave the rubbing to a friend with one of those Cricut craft cutters. He cut some of my vinyl to lay over the spokes. I wasn’t sure how much color to the tires would be too much, so I decorated one wheel with each option, from all spokes black to all spokes lime.
I had to wait to get the car back to see how much was too much. All black was boring, a little lime wasn’t enough and all lime was too much. Number three won (after confirming with the Mrs.) So I decorated up all four tires the same. I also swapped the center caps to the weighted spinning pony center caps that light up as sold by EV-Vida. I had to plastidip the chrome ponies on them while peeling the dip from the rest so the light will show through. I’ll probbaly never know if they look cool or not as I’ll never see the backlit ponies on my center caps while I drive by. But in my mind they’re cool. Oh, yeah, I also replaced the stock lug nuts with the bigger McGard black lug nuts.
Toward the back I used the AOSK louvers I already had and highlighted them with some vinyl, after polishing off the red paint from their former life.
My son painted the rear GT badge with the Jeep Hypergreen paint. And I added an Etsy 0.0 badge to show off my massive displacement (also painting the decimal point to match). My Spoiler got repurposed with some Lime wrap and black stripes to maintain the continuity though I kept the winglets black for a little contrast. Tailights were tinted before it went to wrap with Vivvid dark smoke. (Now I REALLY see the elephants)
And new custom plates of course. I also did 2 coats of HALO ceramic coating for vinyl films when I got it home today. This thing is slick now with almost no friction left to the surface.
Lastly, I decided to brighten up my frunk too. I added vinyl to highlight to pony on the frunk lid.
Now it’s all done. Well….. for now. Who knows what else may happen. But I’m loving my new Green EV. Some of you will hate it for being loud, and that’s OK. I like the irony of it being visually loud while audibly silent. And I’ve always loved neon lime as a color. I love the Mopar impact colors, bright greens, yellows and oranges. So I’ve made my Mustang more eye catching and had a lot of fun doing it. I’ve been waiting to get it back from the vinyl shop and share it with all of you.
I also made smoked a Brisket Flat today. It was delicious too.
OP
OP
Murse-In-Airy
Well-Known Member
- First Name
- Rod
- Joined
- Mar 5, 2021
- Threads
- 82
- Messages
- 3,678
- Reaction score
- 8,297
- Location
- Chaumont, NY
- Vehicles
- Mach-E ER AWD
- Occupation
- Nurse
- Thread starter
- #134
Thank You. ?Sick!
