Mr. Toejam
Well-Known Member
- First Name
- Spence
- Joined
- Aug 12, 2021
- Threads
- 13
- Messages
- 330
- Reaction score
- 472
- Location
- So. Cal.
- Vehicles
- 22 MME Premium AWD Ext, 21 Chevy Bolt, 16 Honda Minivan
- Occupation
- Retired - Dir of MFG Eng
- Thread starter
- #1
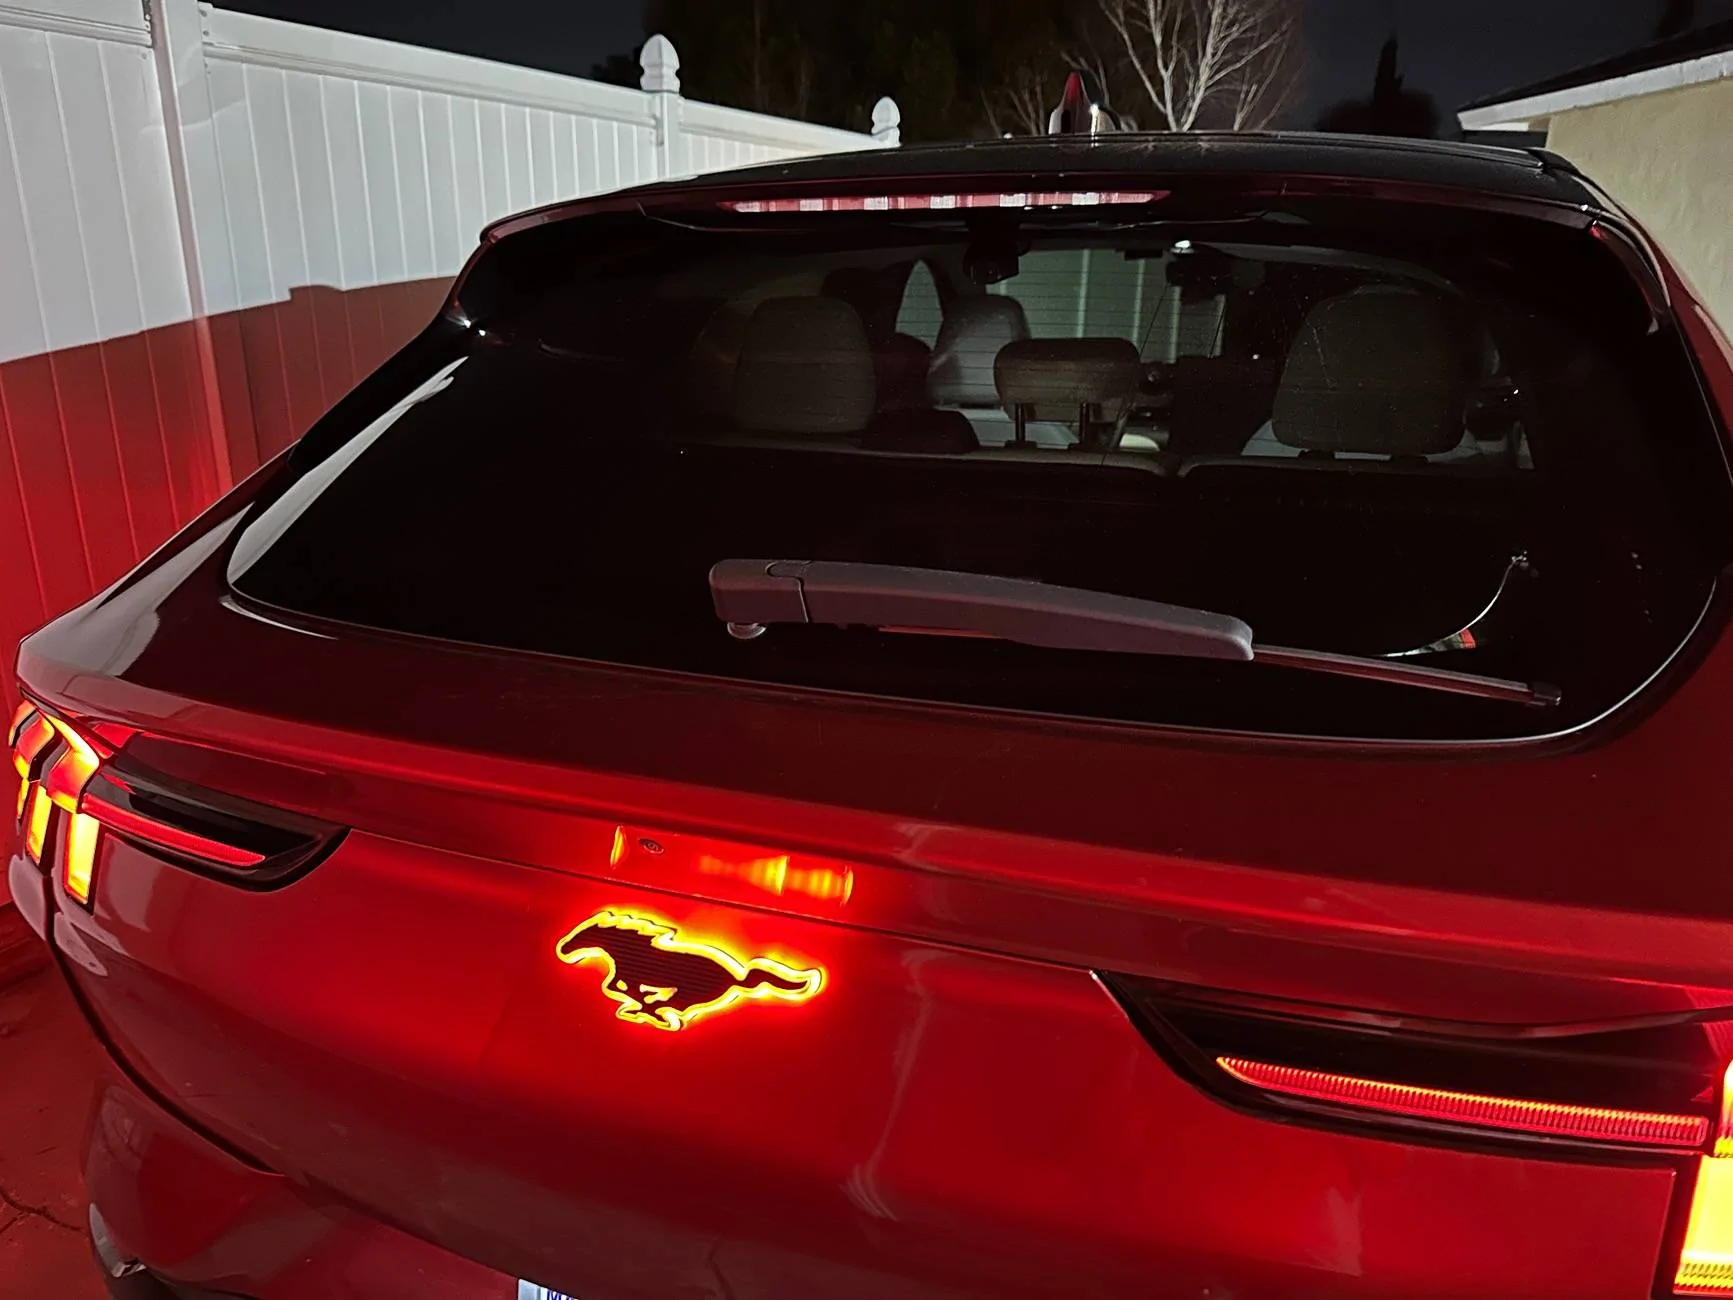
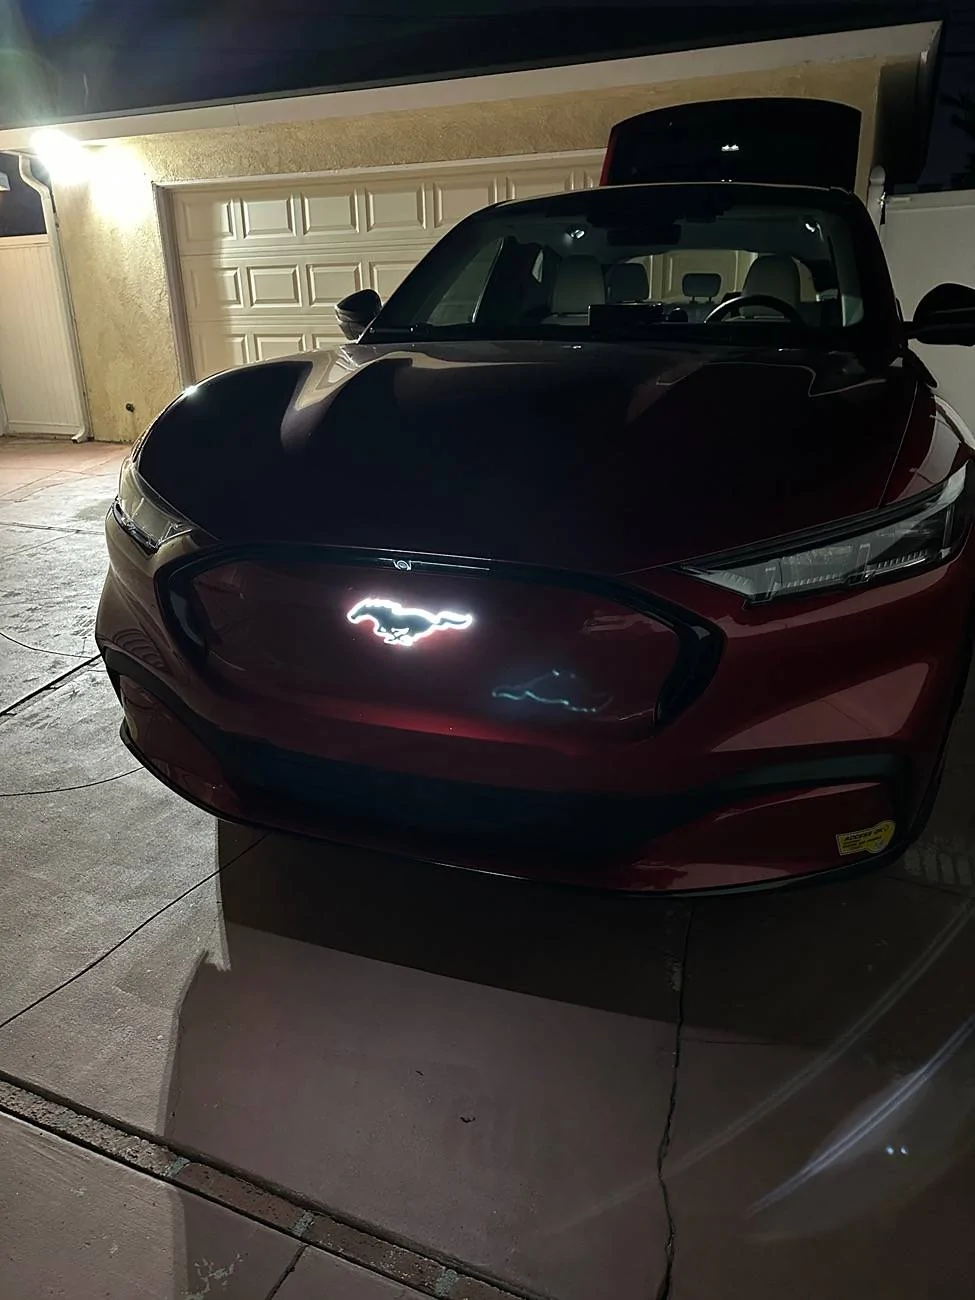
So I got very motivated after finally getting OTAs, including BC 1.3 after more than 1.5 years of nothing, so I installed the front and rear LED ponies from BSKT DESIGN.
This isn’t a how to…just a…”hey look at what I did.” Then I strut around like a peacock.
The quality of the ponies are great, the install took some effort, but not too tough. The result…very happy. Yes, the pony is on and the headlights are off. I have been chatting with BSKT Design and my plug and play harness had a wire pinned in the wrong location. They responded quickly and are sending me a replacement harness. I am a manufacturing guy. Mistakes happen. It’s how you handle things and resolve the problems that matter. BSKT DESIGN gets an A on this part.
BTW, when threading the wires through the rubber hose, use a ol’ trick i learned when I installed custom stereos in the 80’s and 90’s. Spray the wire and the interior of the hose with Windex when pulling the wires. It doesn’t take much, but it makes it real easy to pull the wires. Windex isnt that strong so it won’t break down the cloth tape or the rubber hose and it will not corrode the wires. So no 409, dish soap or WD40.


I didn’t take a pic, but the fact the rear pony switches to white lights when the Mach-e is put into reverse is nice. A little extra light for backing up is always welcome. Routing and connecting this wire to the reverse light was the hardest part, especially since I have a trailer hitch installed. I had to drop the rear belly pan to get to things.
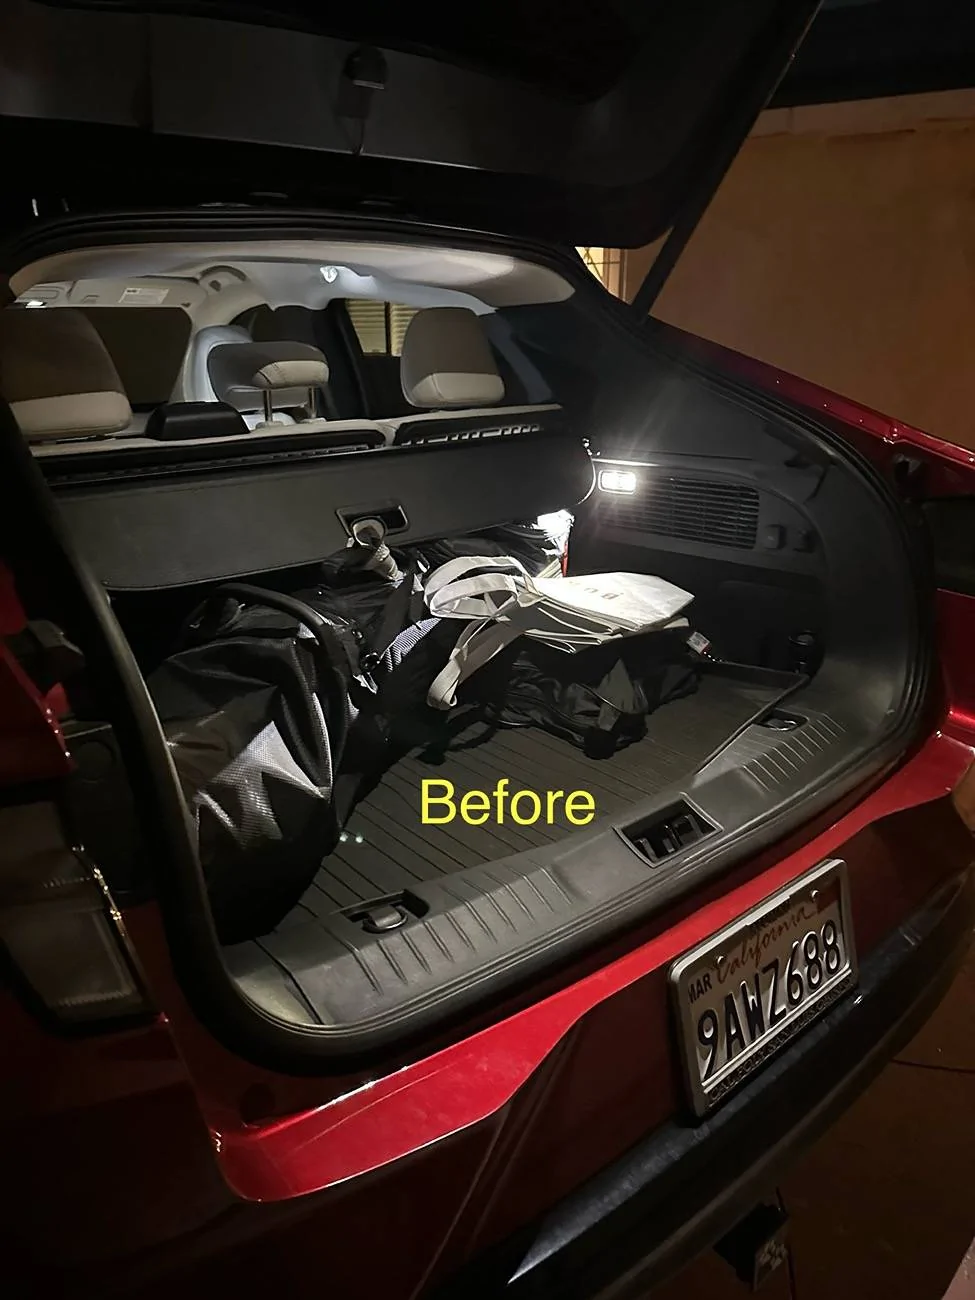
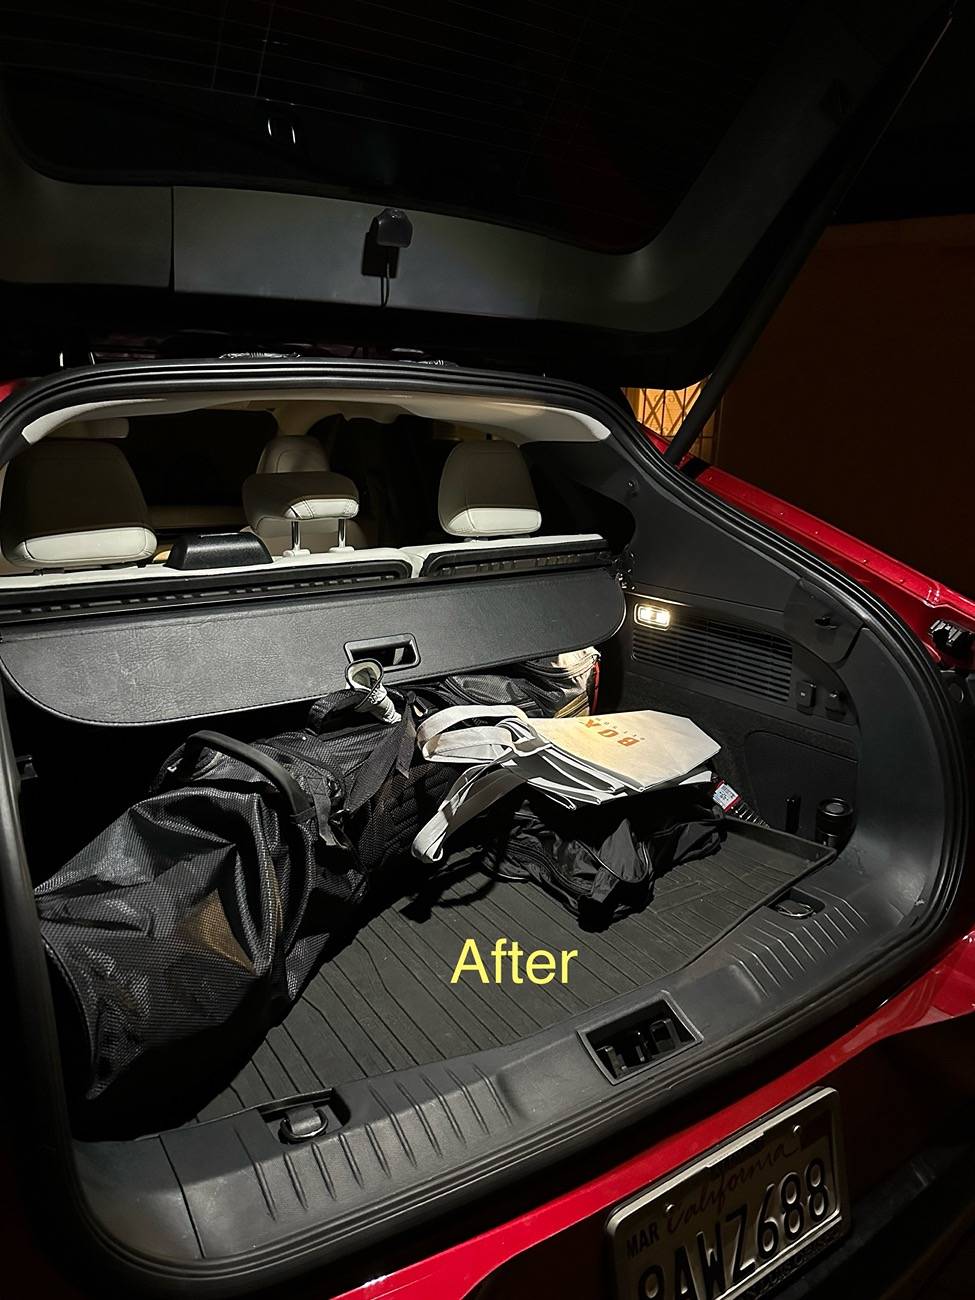
But since the interior panels were removed on the rear hatch, I finally got around to improving the lighting in the trunk. I decided to keep things simple, so I tapped into the 12v (10 min cutoff) line and added a light switch. Then I drilled some holes and mounted the lights. Same ones from my frunk lights (https://www.macheforum.com/site/threads/better-lighting-for-the-frunk-installed.31349/) It’s hard to tell the difference in the pics, but it is really dramatic.
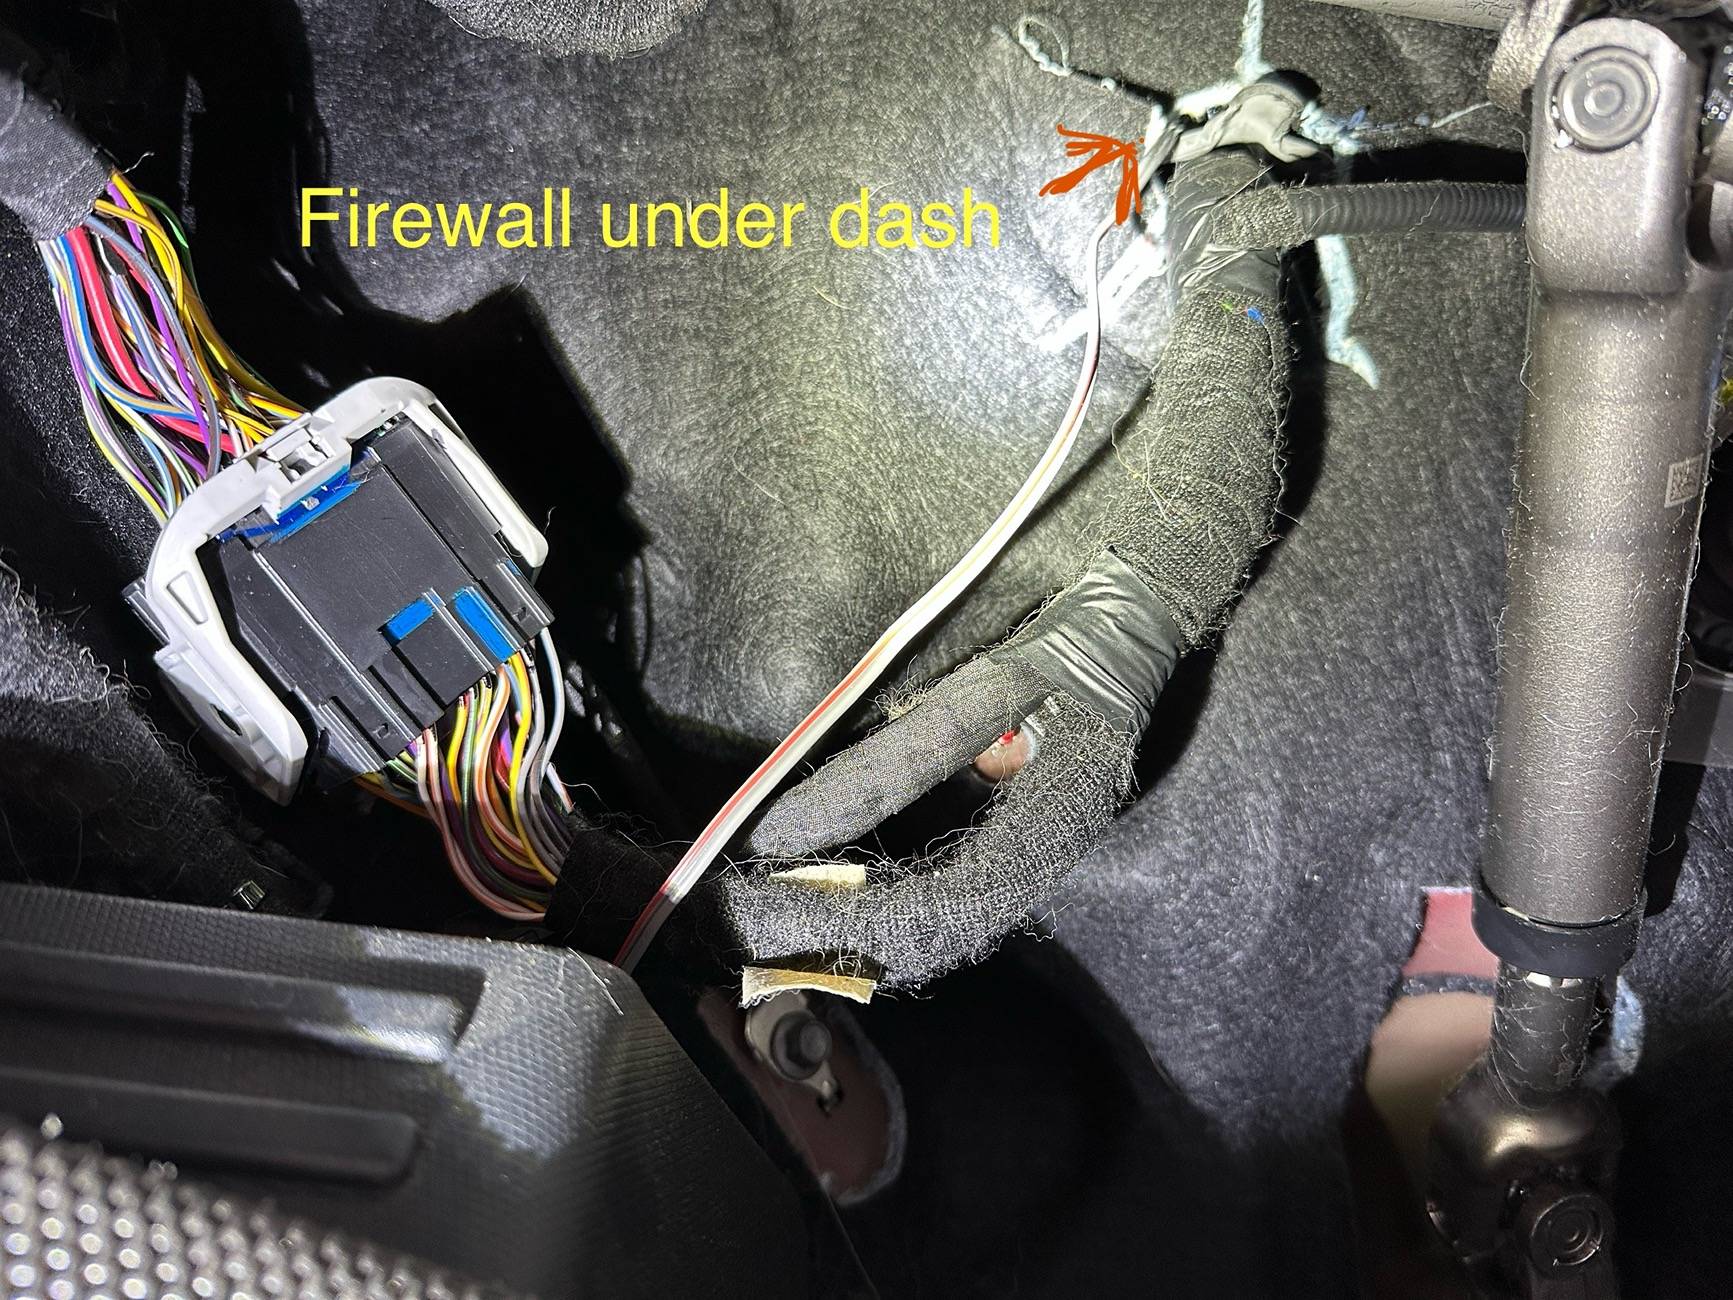
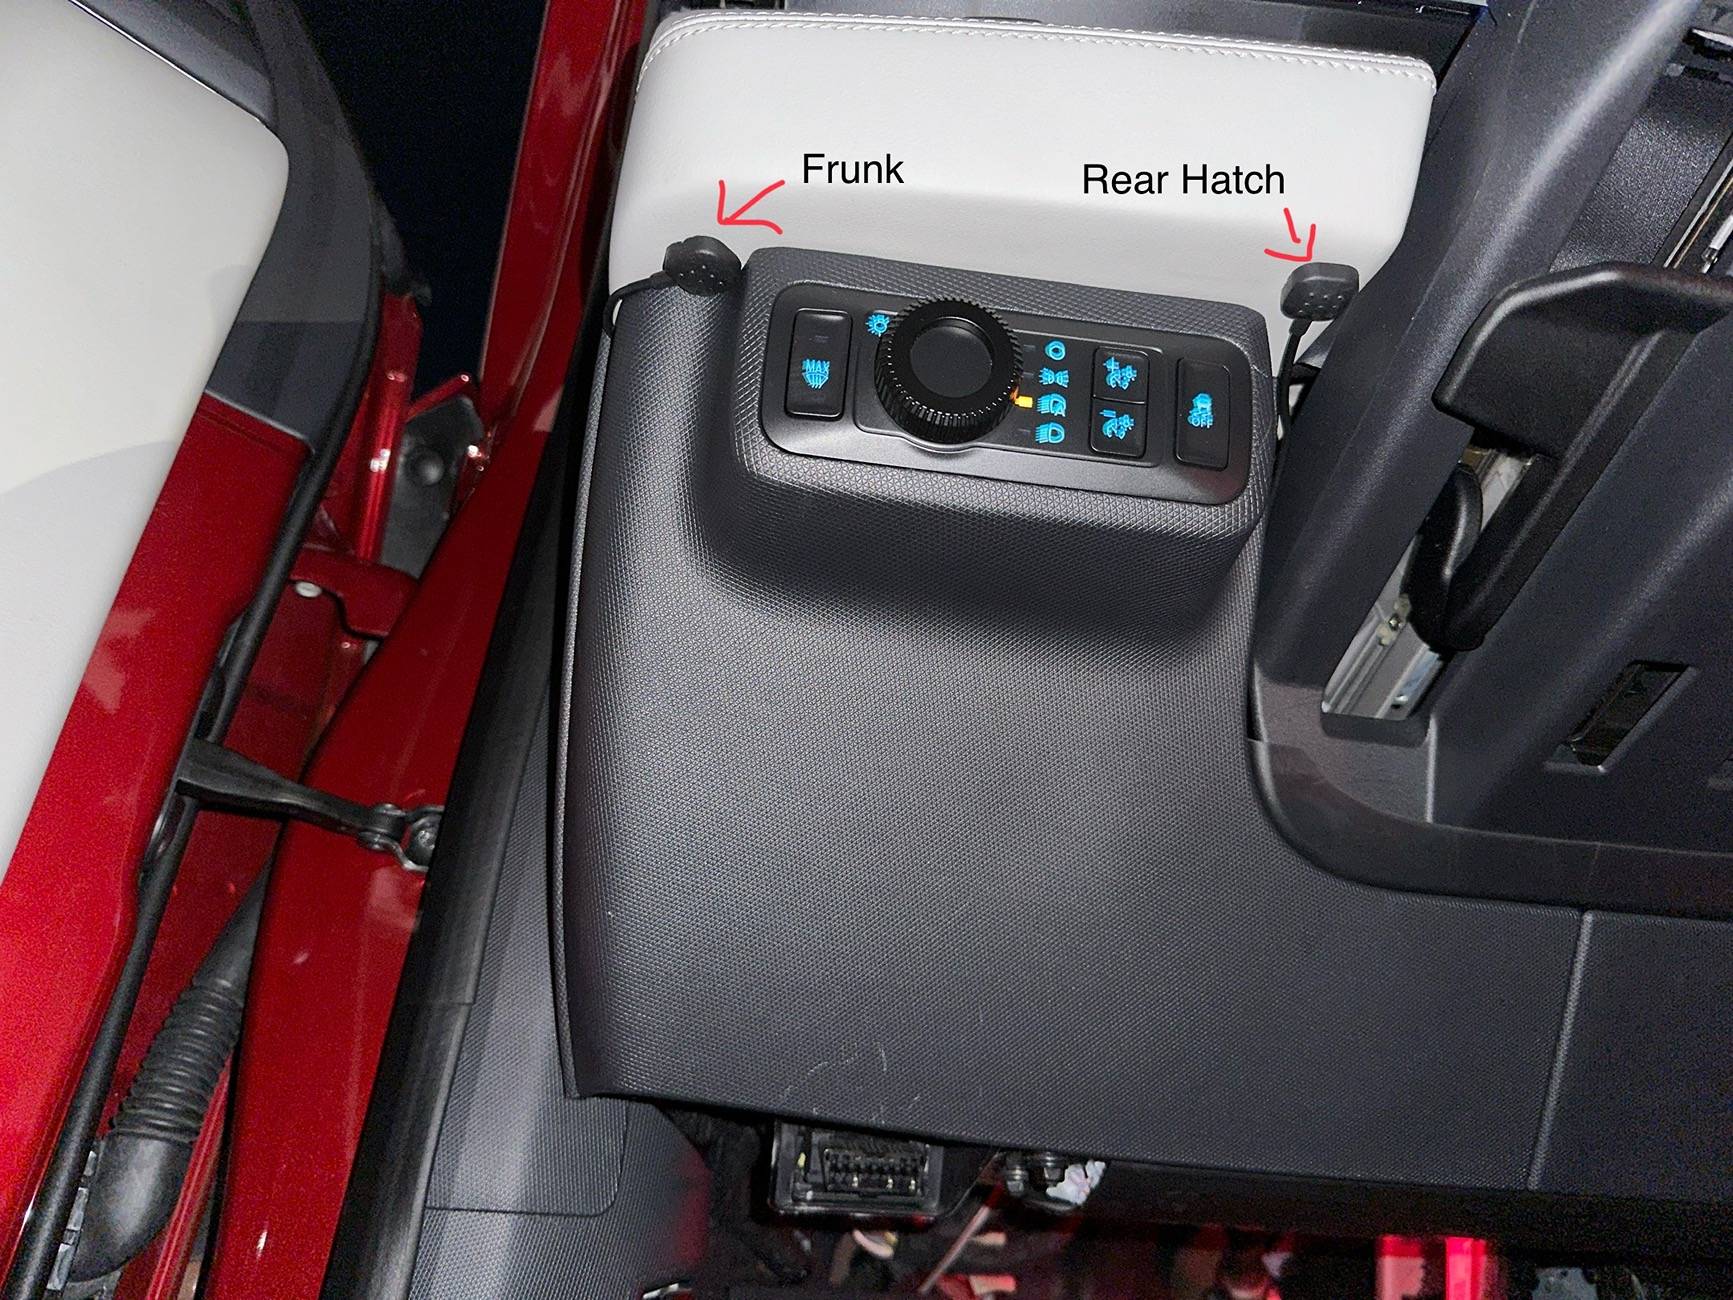
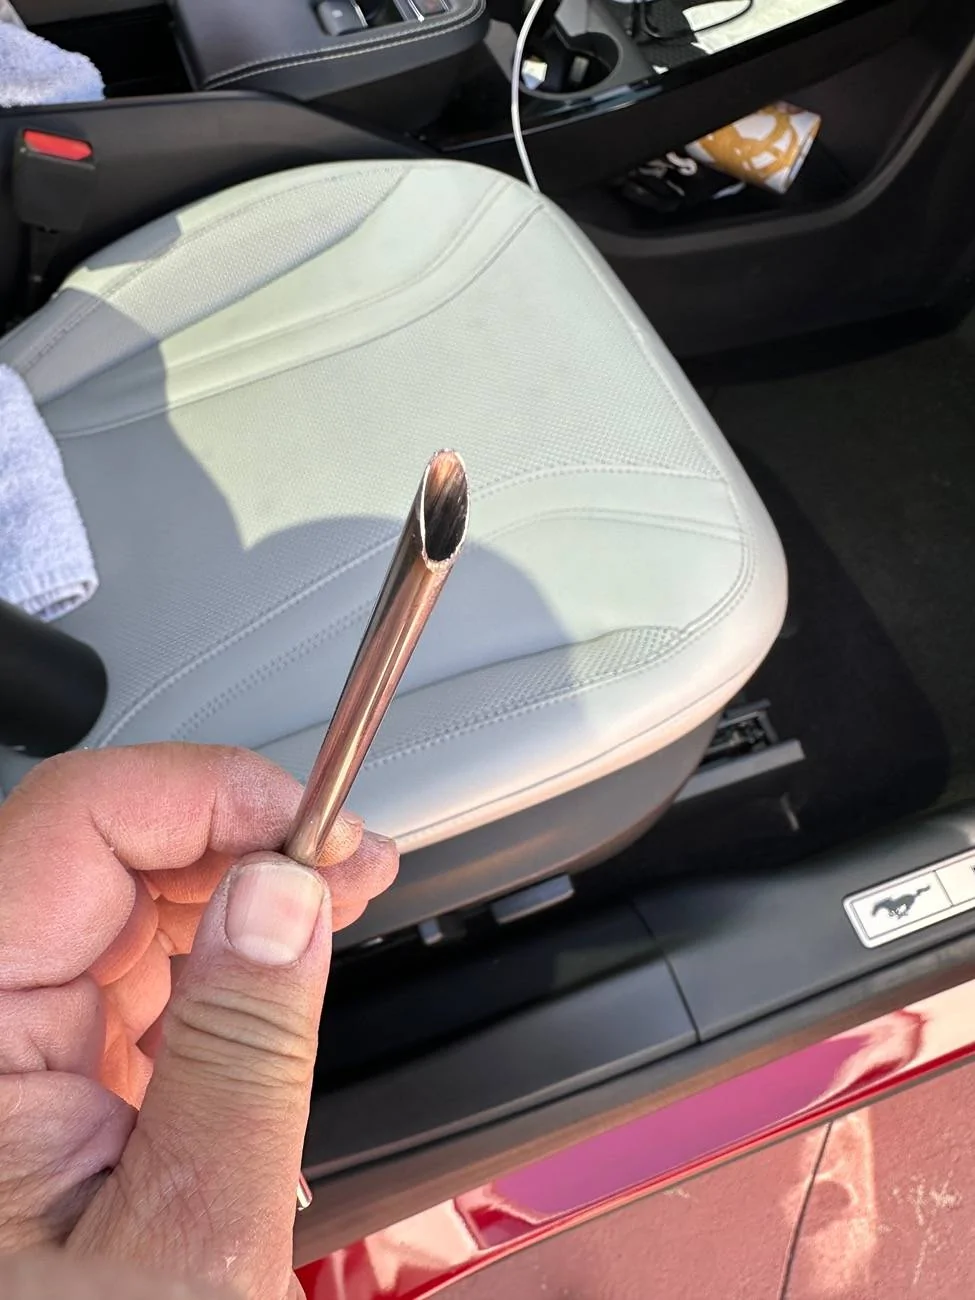
And when I was installing the front pony, I decided to tap into the frunk emergency release button. First this is a momentary switch that completes a 12v circuit, so do not ground the lines. I routed The wire through the rubber grommet for the cable bundle in the firewall right next to the steering column knuckle under the dash. To get the wire through the grommet, I took a small diameter metal straw, tapered the end and then pushed it through. Then I fed the wire through the straw and then I removed the straw. Again, Windex helped everything move much smoother. Now I have two physical switches under my dash, one for the frunk and one for the trunk. This method was very simple, but has one drawback. When I press the button, I get a message on the screen that the emergency front release button has been pushed.
So it was a productive day. A light up front pony, a light up rear pony, extra lighting for the trunk, and an interior mechanical switch to open the frunk.
Please don’t tell my wife this is how I’m spending my retirement time. She thinks I’m still cleaning up my home office.?
This isn’t a how to…just a…”hey look at what I did.” Then I strut around like a peacock.
The quality of the ponies are great, the install took some effort, but not too tough. The result…very happy. Yes, the pony is on and the headlights are off. I have been chatting with BSKT Design and my plug and play harness had a wire pinned in the wrong location. They responded quickly and are sending me a replacement harness. I am a manufacturing guy. Mistakes happen. It’s how you handle things and resolve the problems that matter. BSKT DESIGN gets an A on this part.
BTW, when threading the wires through the rubber hose, use a ol’ trick i learned when I installed custom stereos in the 80’s and 90’s. Spray the wire and the interior of the hose with Windex when pulling the wires. It doesn’t take much, but it makes it real easy to pull the wires. Windex isnt that strong so it won’t break down the cloth tape or the rubber hose and it will not corrode the wires. So no 409, dish soap or WD40.
I didn’t take a pic, but the fact the rear pony switches to white lights when the Mach-e is put into reverse is nice. A little extra light for backing up is always welcome. Routing and connecting this wire to the reverse light was the hardest part, especially since I have a trailer hitch installed. I had to drop the rear belly pan to get to things.
But since the interior panels were removed on the rear hatch, I finally got around to improving the lighting in the trunk. I decided to keep things simple, so I tapped into the 12v (10 min cutoff) line and added a light switch. Then I drilled some holes and mounted the lights. Same ones from my frunk lights (https://www.macheforum.com/site/threads/better-lighting-for-the-frunk-installed.31349/) It’s hard to tell the difference in the pics, but it is really dramatic.
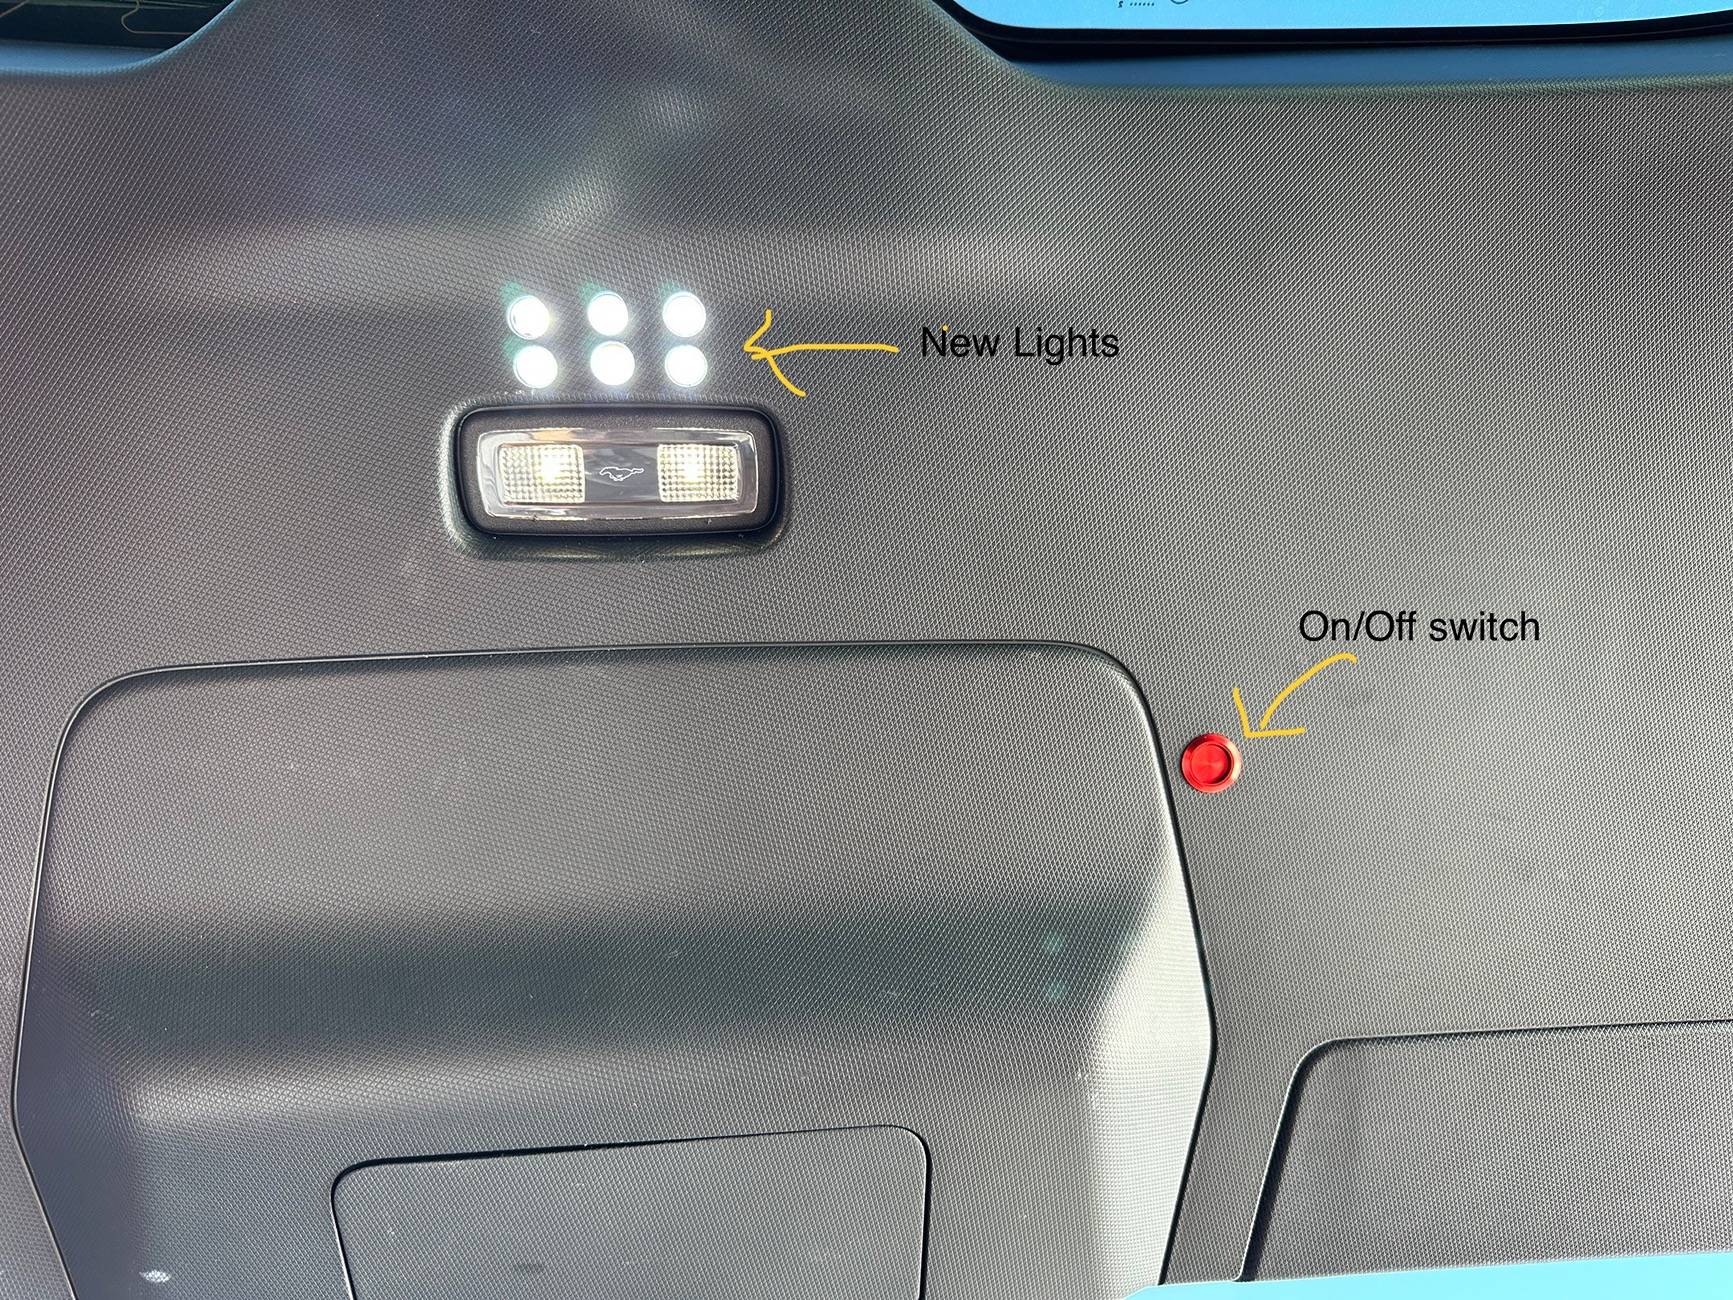
And when I was installing the front pony, I decided to tap into the frunk emergency release button. First this is a momentary switch that completes a 12v circuit, so do not ground the lines. I routed The wire through the rubber grommet for the cable bundle in the firewall right next to the steering column knuckle under the dash. To get the wire through the grommet, I took a small diameter metal straw, tapered the end and then pushed it through. Then I fed the wire through the straw and then I removed the straw. Again, Windex helped everything move much smoother. Now I have two physical switches under my dash, one for the frunk and one for the trunk. This method was very simple, but has one drawback. When I press the button, I get a message on the screen that the emergency front release button has been pushed.

So it was a productive day. A light up front pony, a light up rear pony, extra lighting for the trunk, and an interior mechanical switch to open the frunk.
Please don’t tell my wife this is how I’m spending my retirement time. She thinks I’m still cleaning up my home office.?
Sponsored


")