Garbone
Well-Known Member
- First Name
- Gary
- Joined
- Dec 16, 2020
- Threads
- 34
- Messages
- 1,280
- Reaction score
- 1,757
- Location
- Florida
- Vehicles
- 21 Mach E , 22 MachE, 62 C10 Big window long bed
- Occupation
- Loafer
- Thread starter
- #1
So spent the morning with my test light and figured out things.
I installed mine so the flat is inside the hatch since it will rarely be used at best.

Install required taking out the center sill and both lower side panels.
I mounted the unit behind the passenger side panel as there is plenty of space and easy access to the power wire that supplies the accessory outlet.
I pulled both tail lamps and with the assistance of my 8 year old daughter running the signals from the drivers seat noodled out the colors of each wire using my test light.
On the right side (passenger)
Green w Orange tracer is Right turn
Slate w Violet tracer is Stop
White with Orange tracer is Tail lamps
One the left side
Slate w Orange tracer(red maybe) left turn
I then carefully cut open the harnesses and splice in my unit after verifying I had the correct wire with my test light.
On the left side I opened up the harness at the red in this drawing I lifted from the Ford Europe install manual.

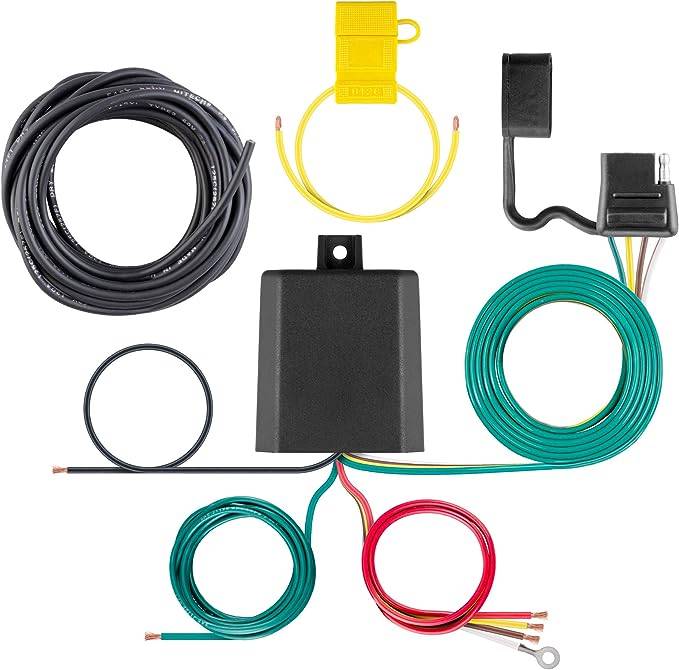
There is a lot going on in the left side so it is good that only one wire is spliced here, I used the supplied wire with the kit to run it to the unit on the right under the sill.
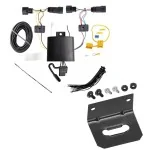
I used the supplied double sided tape and zip tie to fix the Kurt module to the bracing, the ground ring reached the factory ground on the wheel well so I just used that and did not tap any new holes.
Sorry, did not take any photos of behind the right hand panel.
My one suggestion is a very sharp utility knife and cut along the loom gently not to cut the contents as the factory wire is fairly thin.
**installers note- I have transition glasses that tint when exposed to UV. It was sunny in the driveway this morning and I noticed the tinting makes my Red or Orange tracer identification sketchy. I would verify each wire using a test light before crimping.**
I installed mine so the flat is inside the hatch since it will rarely be used at best.
Install required taking out the center sill and both lower side panels.
I mounted the unit behind the passenger side panel as there is plenty of space and easy access to the power wire that supplies the accessory outlet.
I pulled both tail lamps and with the assistance of my 8 year old daughter running the signals from the drivers seat noodled out the colors of each wire using my test light.
On the right side (passenger)
Green w Orange tracer is Right turn
Slate w Violet tracer is Stop
White with Orange tracer is Tail lamps
One the left side
Slate w Orange tracer(red maybe) left turn
I then carefully cut open the harnesses and splice in my unit after verifying I had the correct wire with my test light.
On the left side I opened up the harness at the red in this drawing I lifted from the Ford Europe install manual.
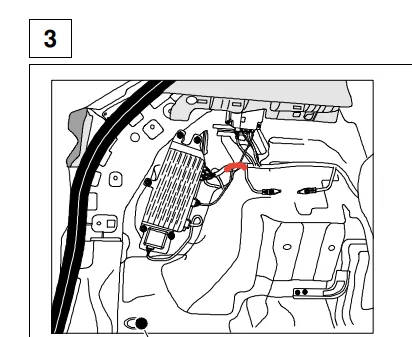
There is a lot going on in the left side so it is good that only one wire is spliced here, I used the supplied wire with the kit to run it to the unit on the right under the sill.
I used the supplied double sided tape and zip tie to fix the Kurt module to the bracing, the ground ring reached the factory ground on the wheel well so I just used that and did not tap any new holes.
Sorry, did not take any photos of behind the right hand panel.
My one suggestion is a very sharp utility knife and cut along the loom gently not to cut the contents as the factory wire is fairly thin.
**installers note- I have transition glasses that tint when exposed to UV. It was sunny in the driveway this morning and I noticed the tinting makes my Red or Orange tracer identification sketchy. I would verify each wire using a test light before crimping.**
Sponsored
Last edited: