West1134
Well-Known Member
- First Name
- Kris
- Joined
- Jul 19, 2022
- Threads
- 36
- Messages
- 274
- Reaction score
- 287
- Location
- Portland, OR
- Vehicles
- 22 MME Premium AWD, ER,06 Duramax,16 Acadia Denali
- Thread starter
- #1
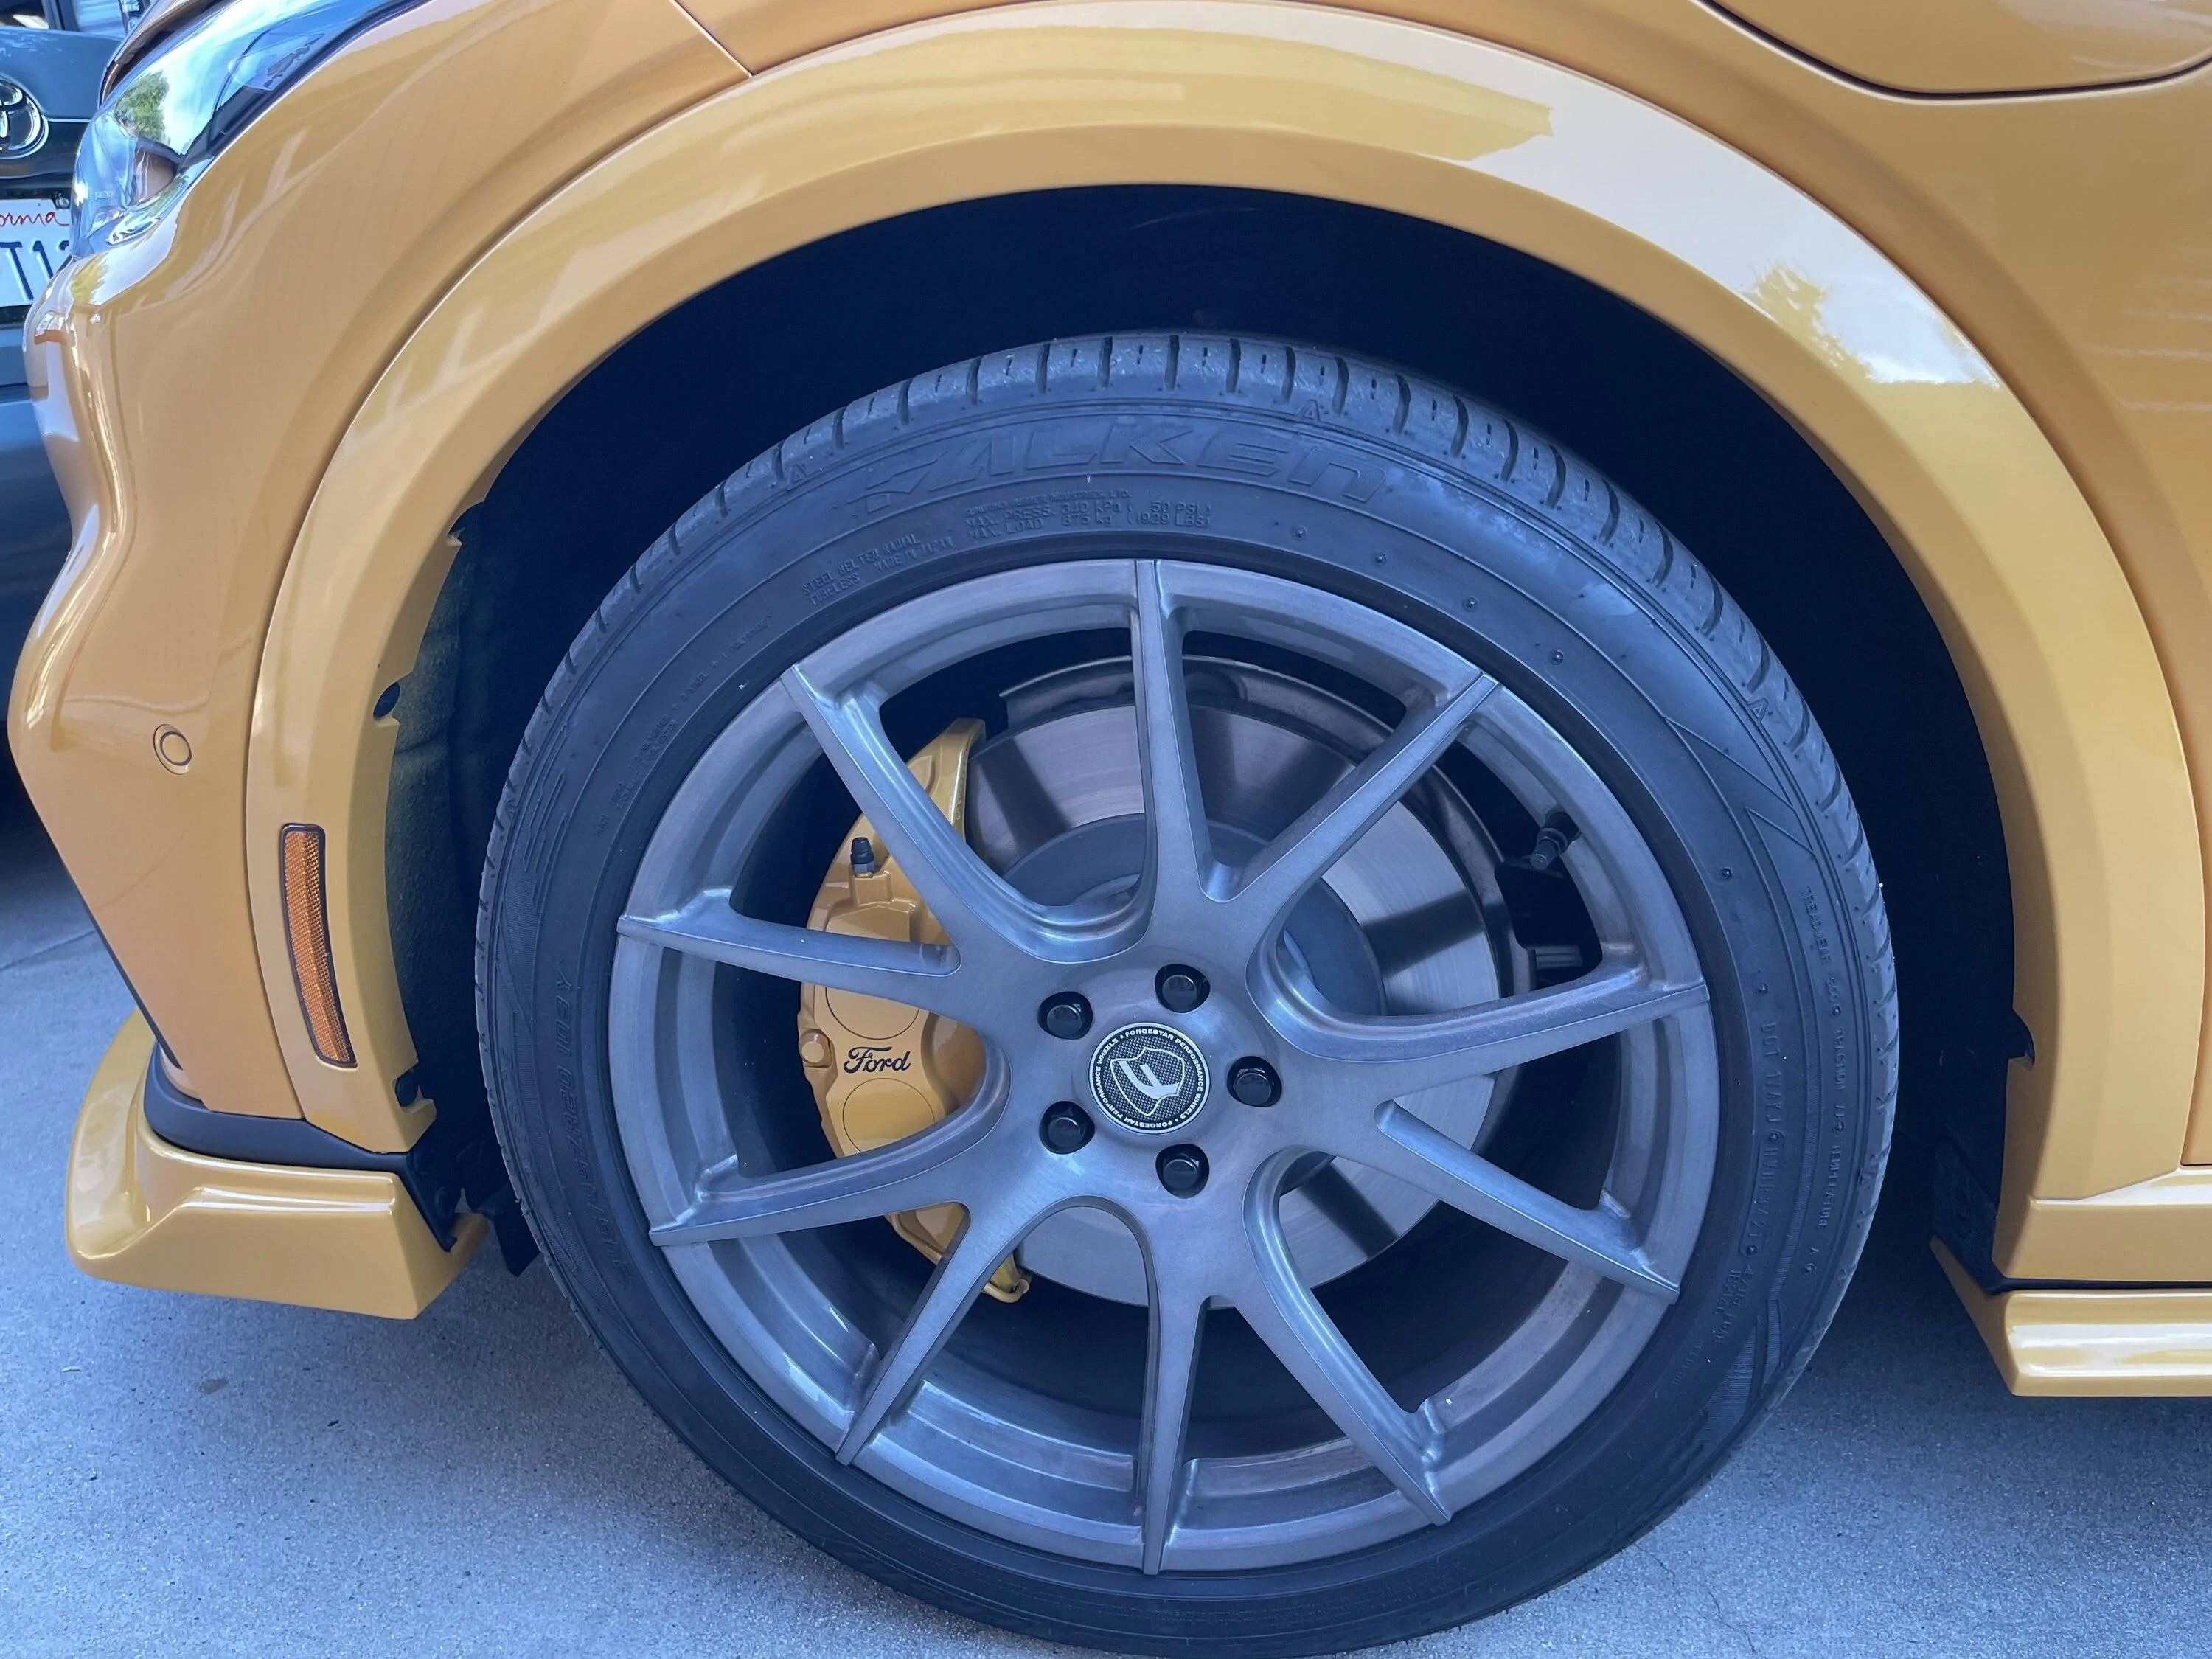
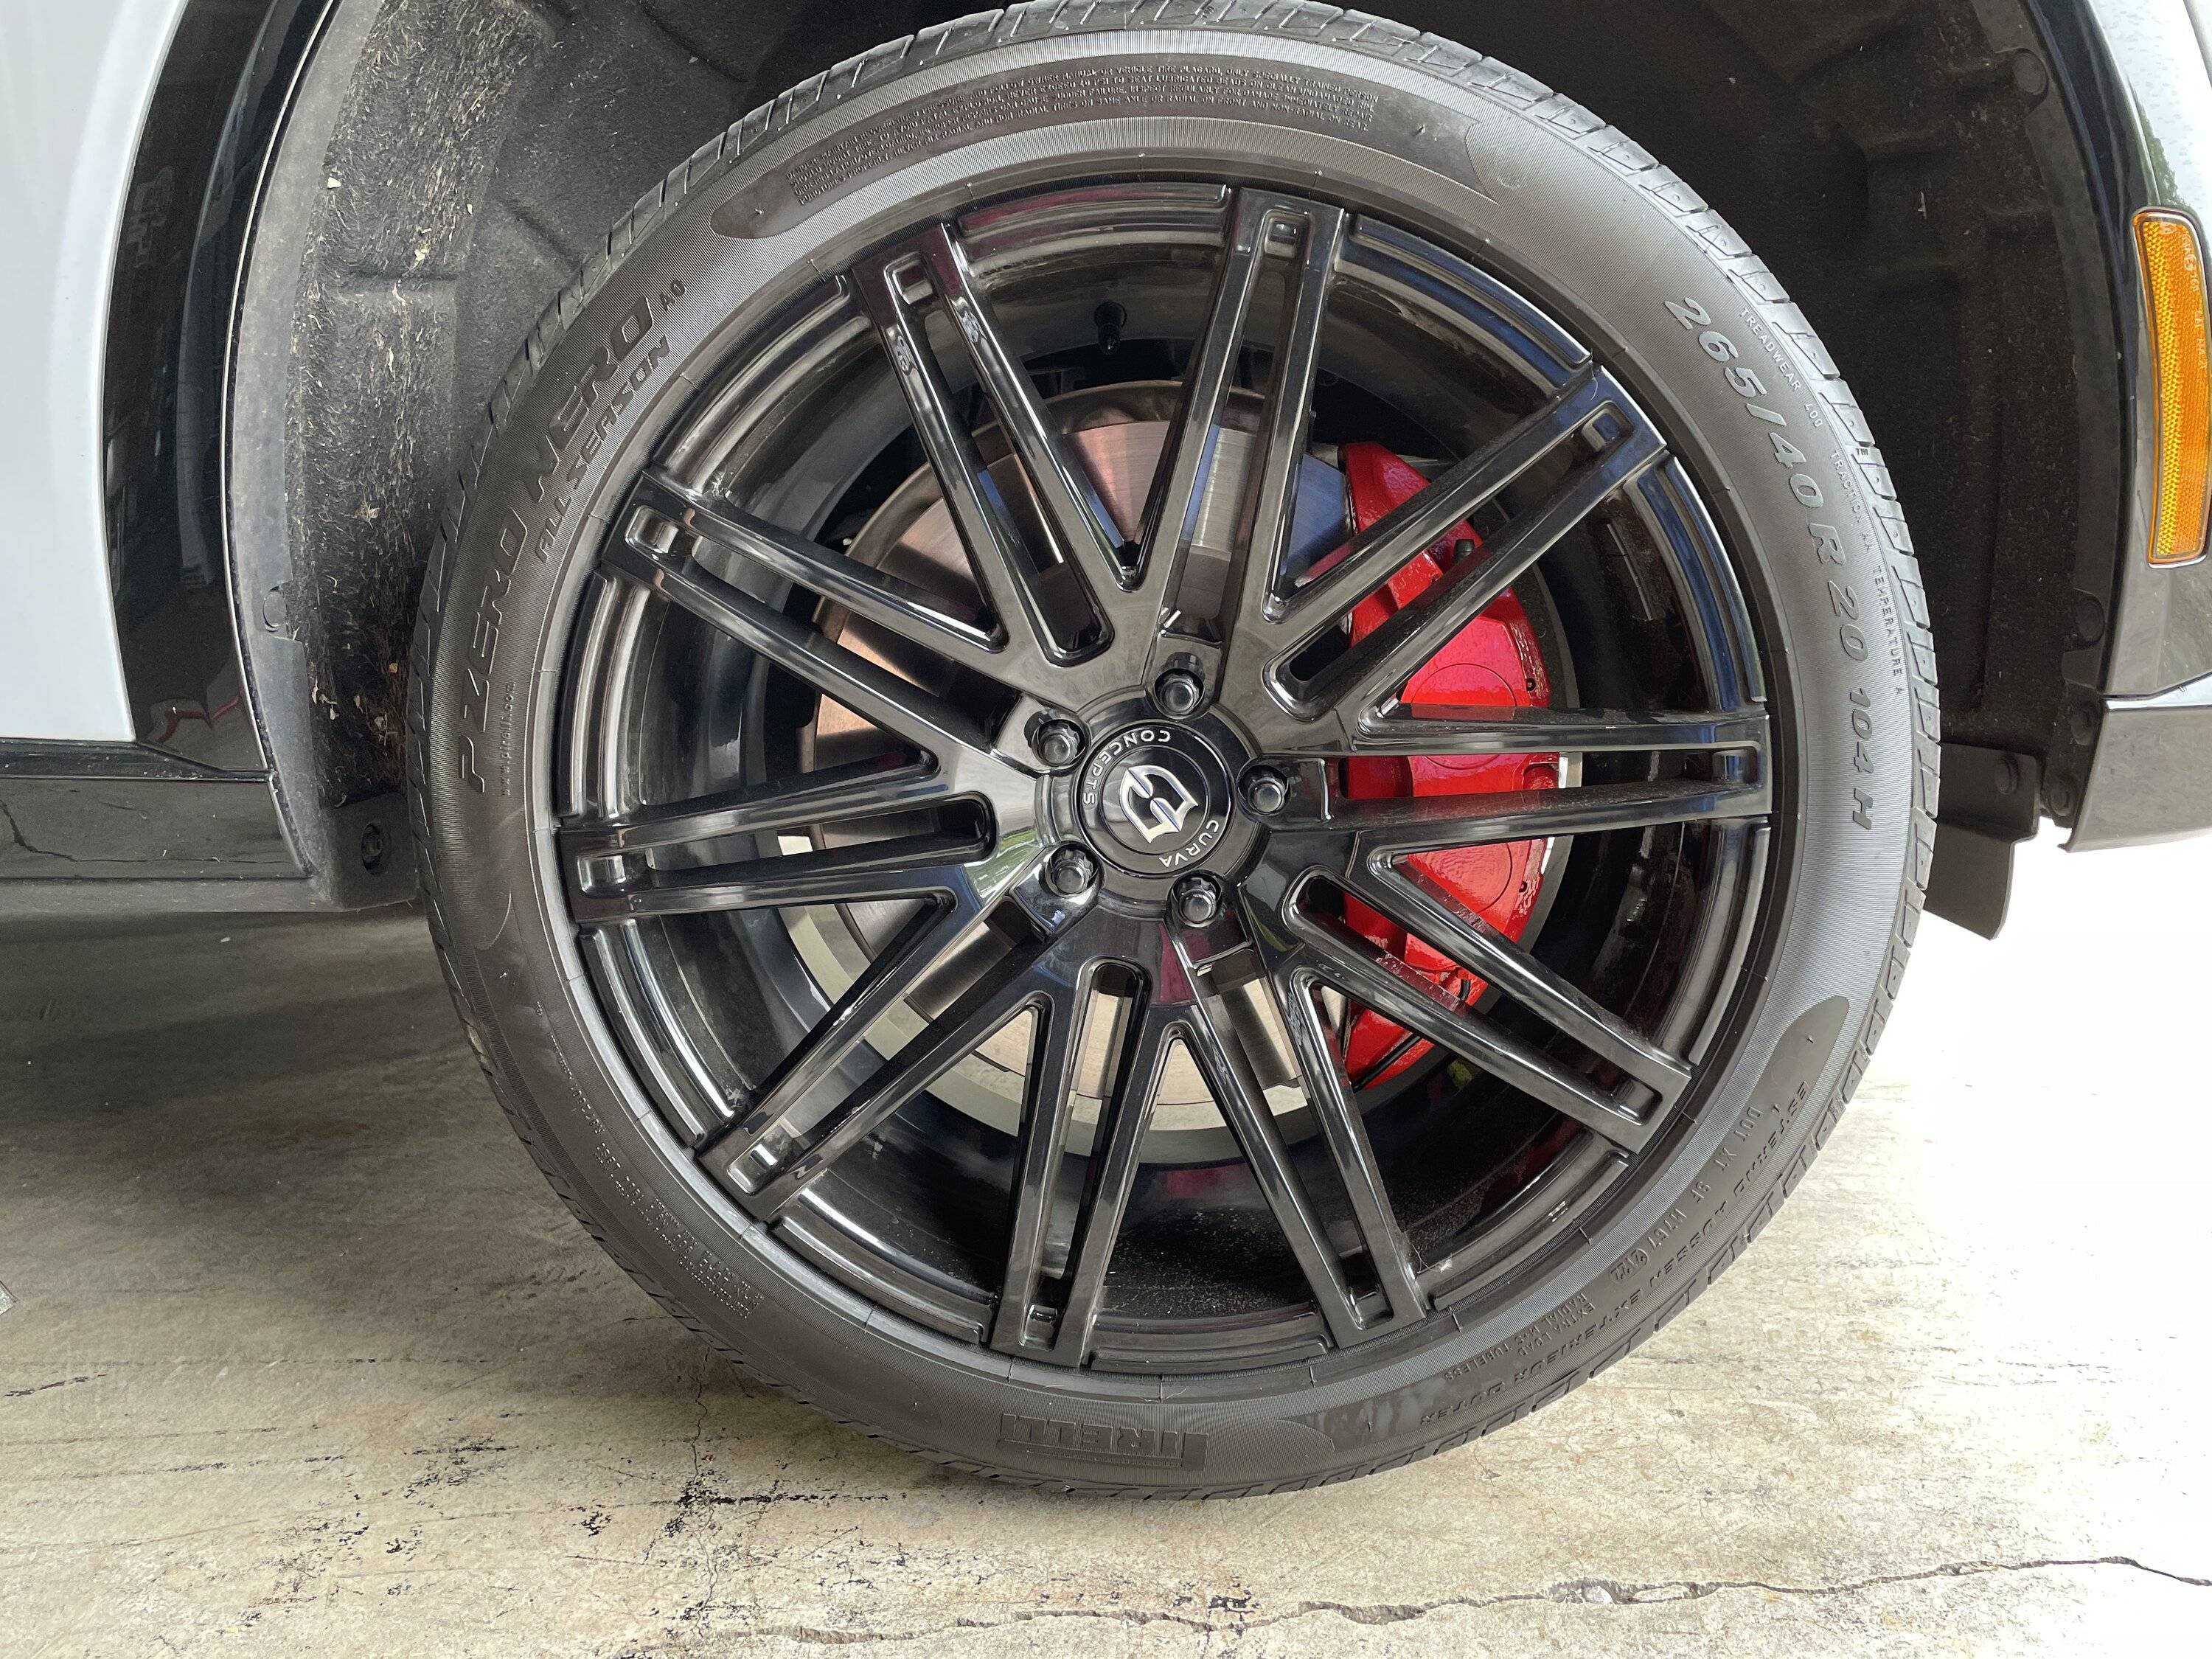
Since I learned that the brakes on this car are actually Brembo's coupled with the fact that I thought it would look better, I decided to paint my brake calibers during the time I was taking to rotate my tires.
I bought the G2 High Temp Brake caliper paint system on Amazon. The kit and instructions are great, only thing I would add is buying some additional paint brushes as the hardening agent makes the brush essentially useless after a bit. I just got some dollar store ones and threw them away after the project.
I did also get some Brembo decals but held off on installing them just yet. I may do so down the road, but haven't decided yet.
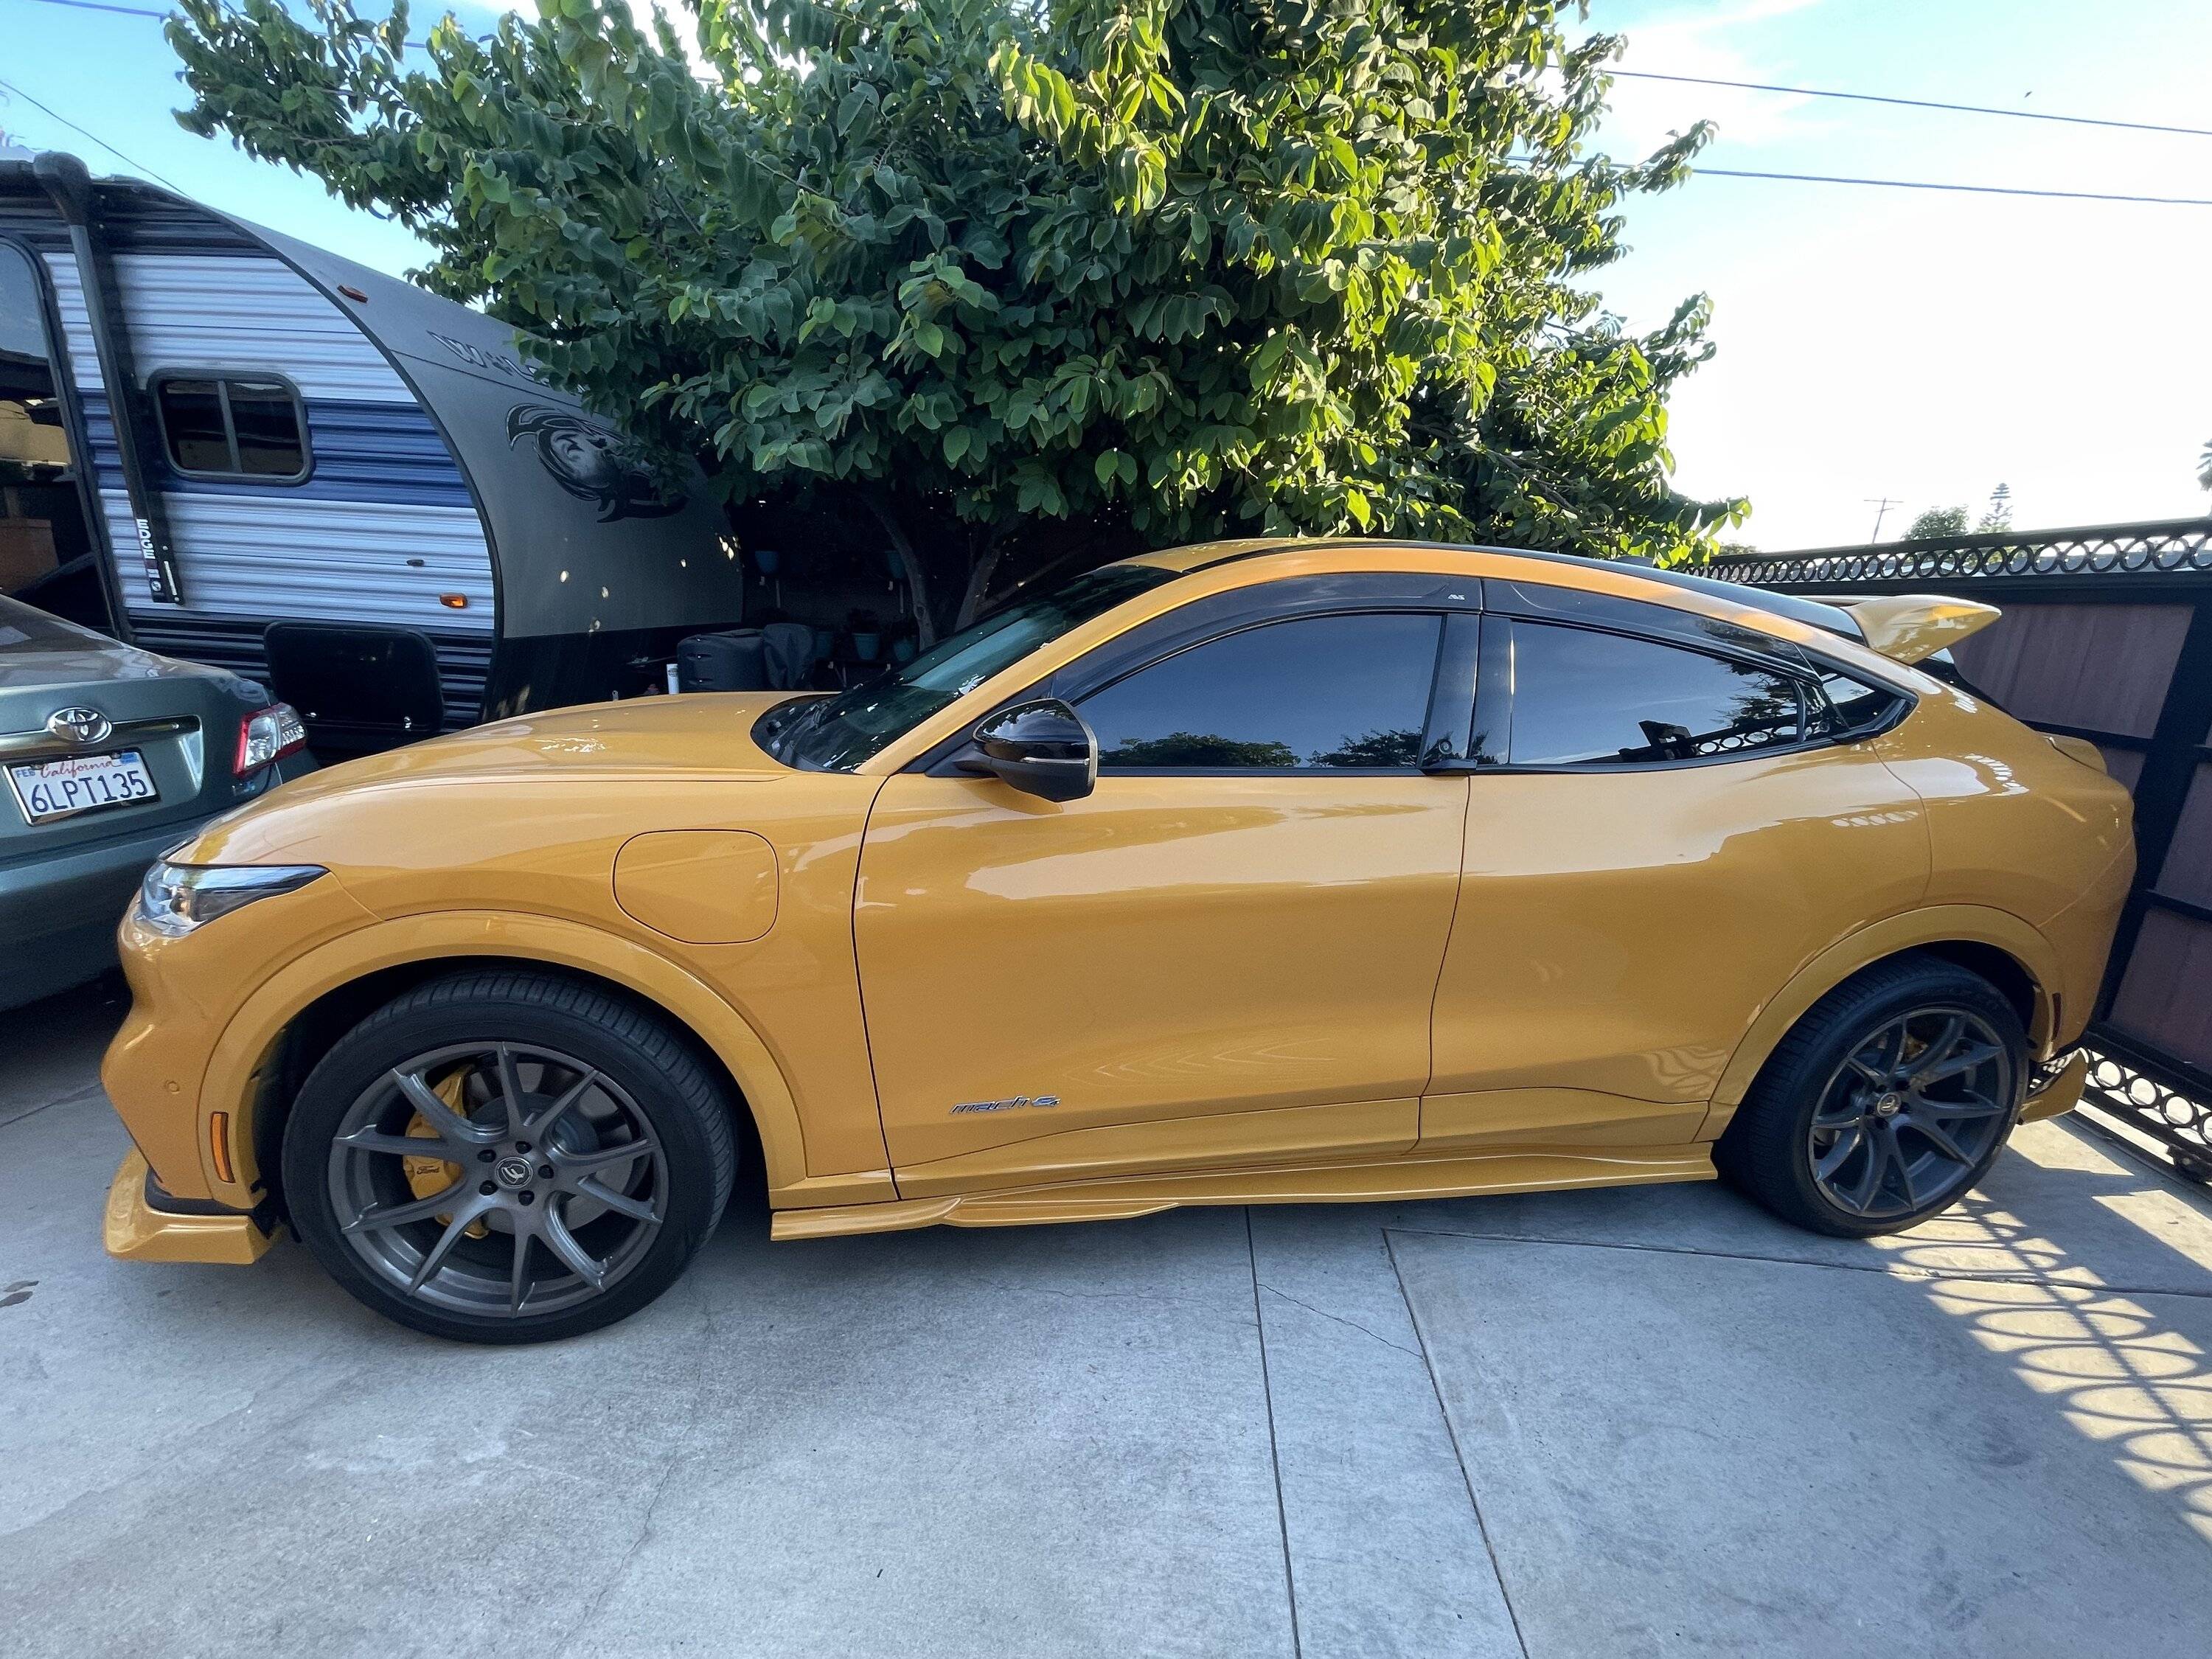
I snapped this because I realize I have a "type"

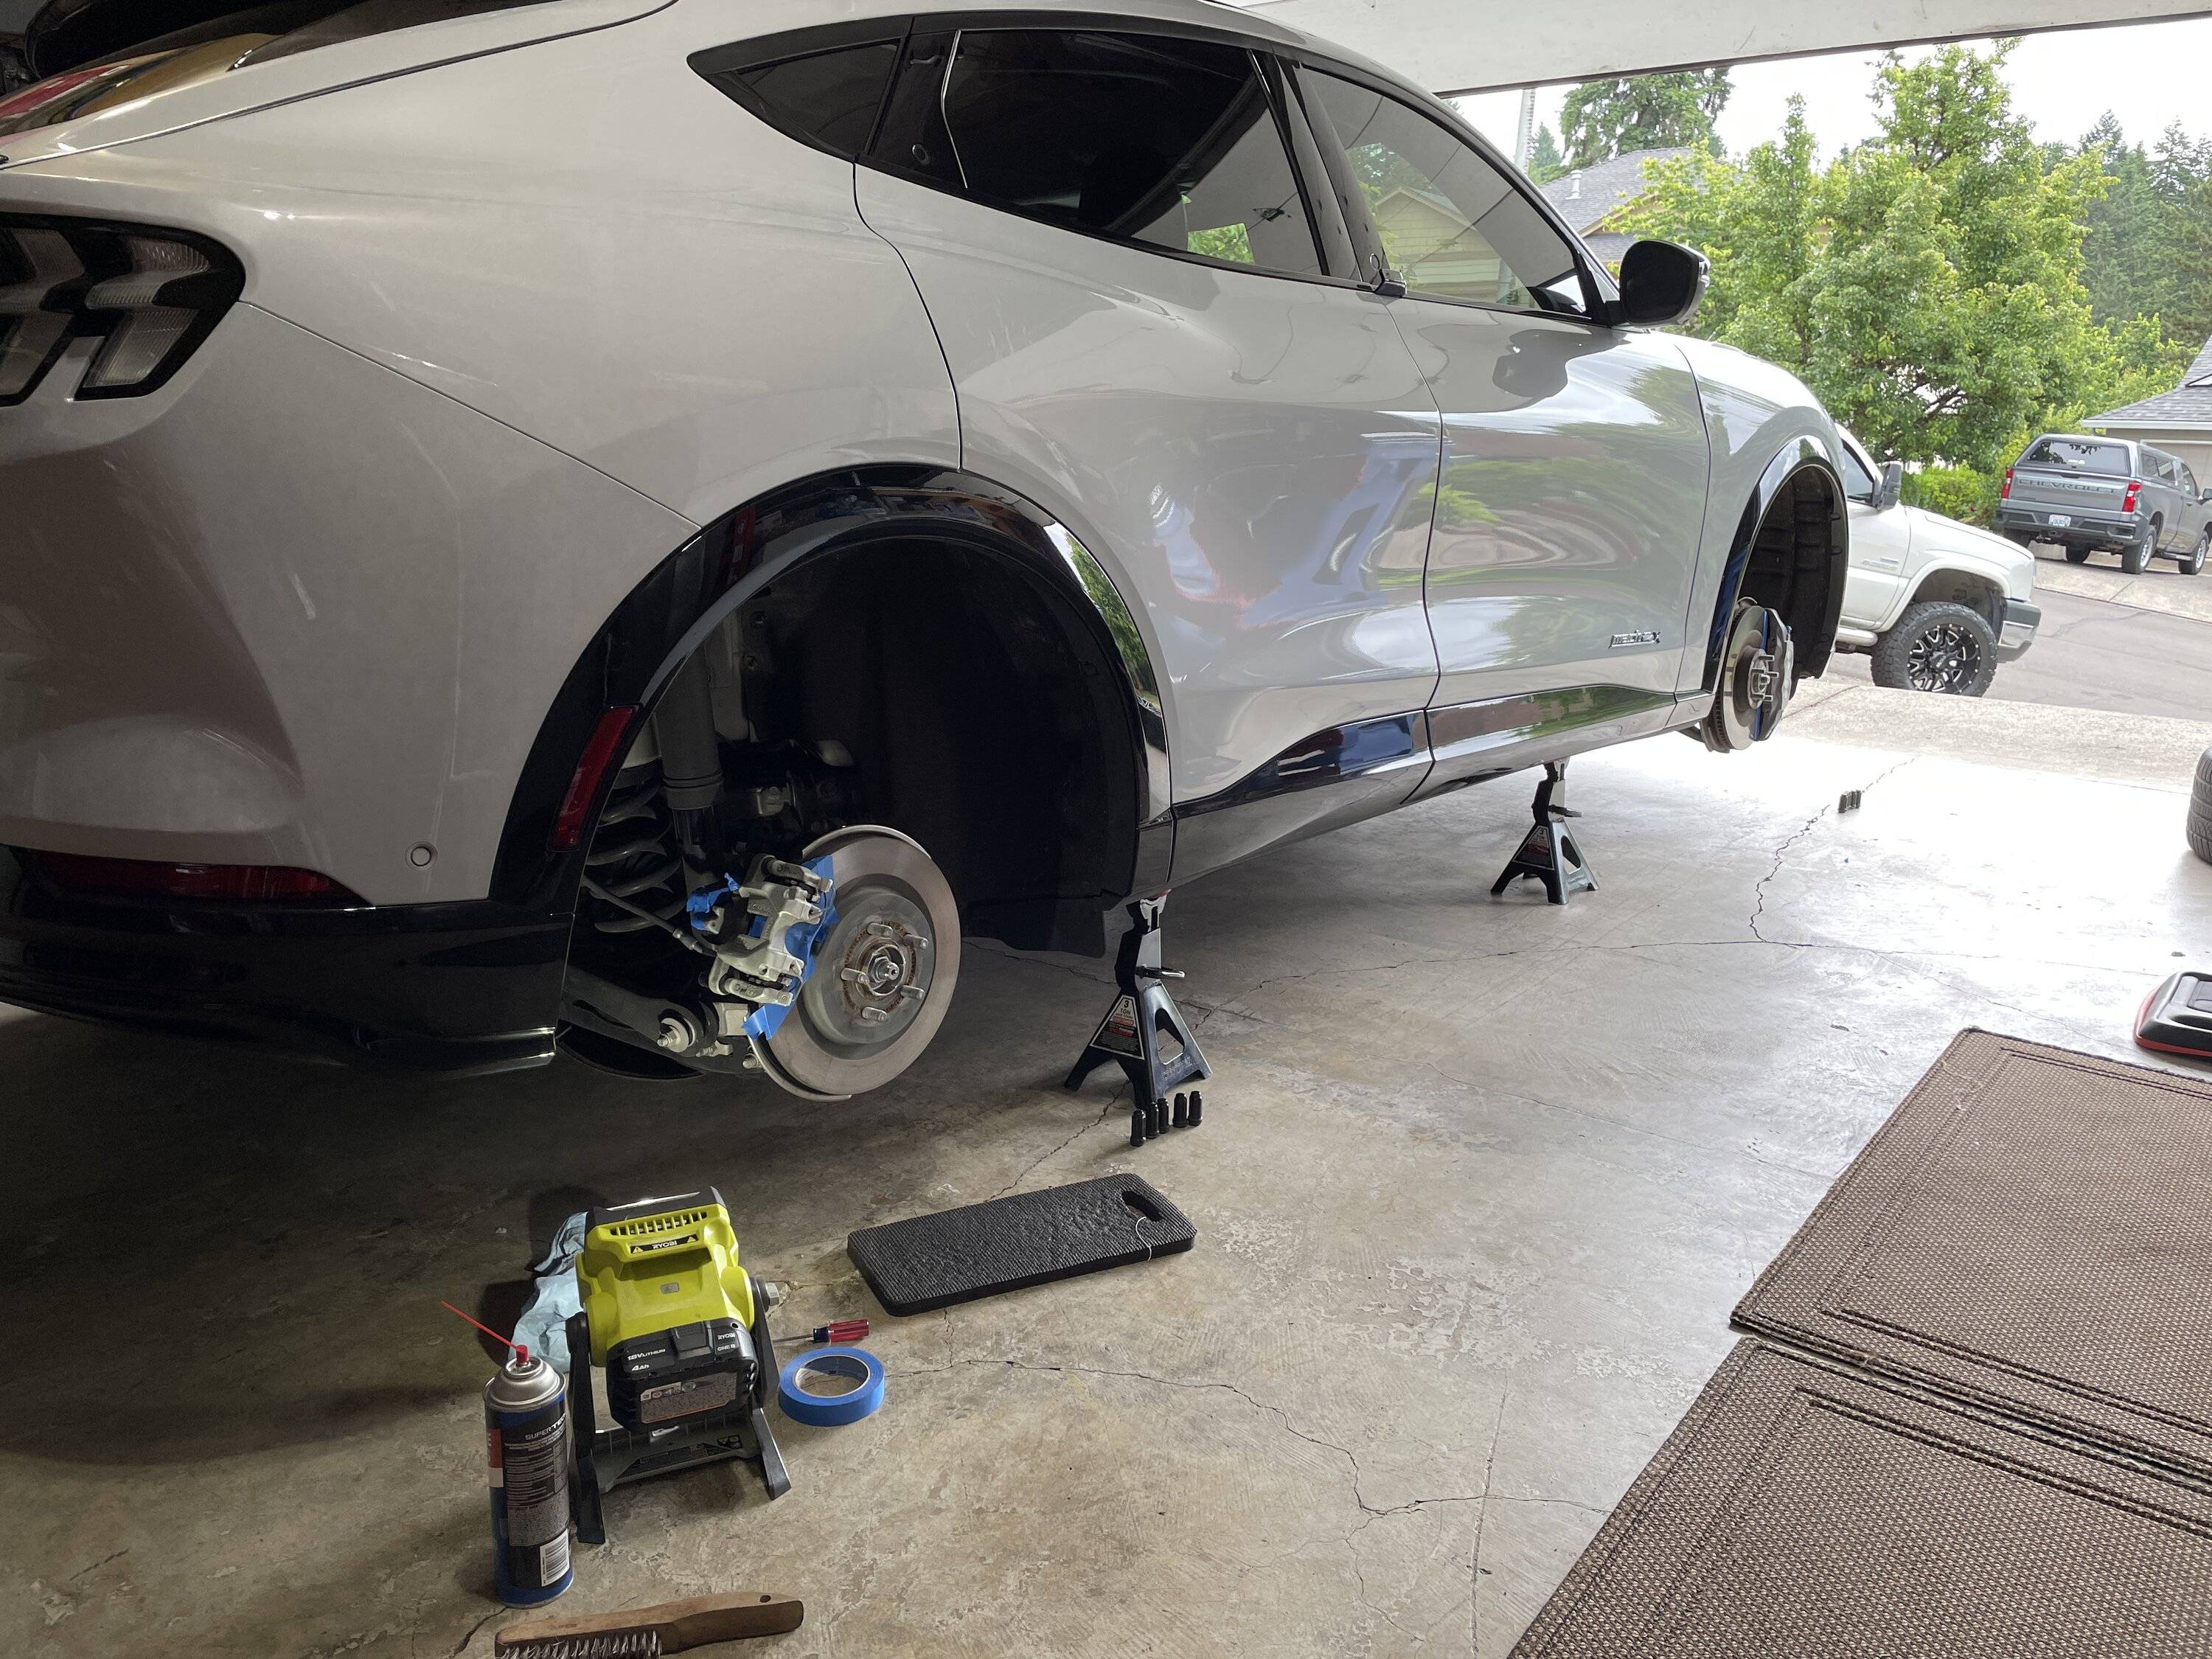
Jacking up the car was interesting since I the Mach E only has those four, narrow and very specific lift points. So here's how I approached it since I needed to rotate the tires and thus have all the wheels off the ground at the same time. I also have the Corvette pucks installed, which had an added benefit to them that I didn't realize until this project, which is the edges of the pucks are angled such that when placing a jack stand under them the cradle perfectly in the angled groove of the jack stand for a solid hold.
Here's the procedure I used to jack it up:
1) Jacked up the rear passenger corner and the car being as rigid as it is, it also lifted up the front passenger side. I placed a jack stand under the front passenger, then lowered the back down in the rear.
2) Jacked up the drivers side rear, and jacked up enough to lift the entire rear of the car off the ground. This allowed me to place a jack stand under the passenger rear, so that the car was now on jacks on the passenger side.
3) Jacked the drivers front, and jacked until the rear drivers wheel was off the ground and placed a stand there as well.
This left me with three corners on jack stands, and the jack under the driver front, and the entire car off the ground. From here I placed a jack stand under the lower control arm as a safety measure and left the jack in place under the drivers front. Perhaps there was a better way to do this, but this is what worked for me.
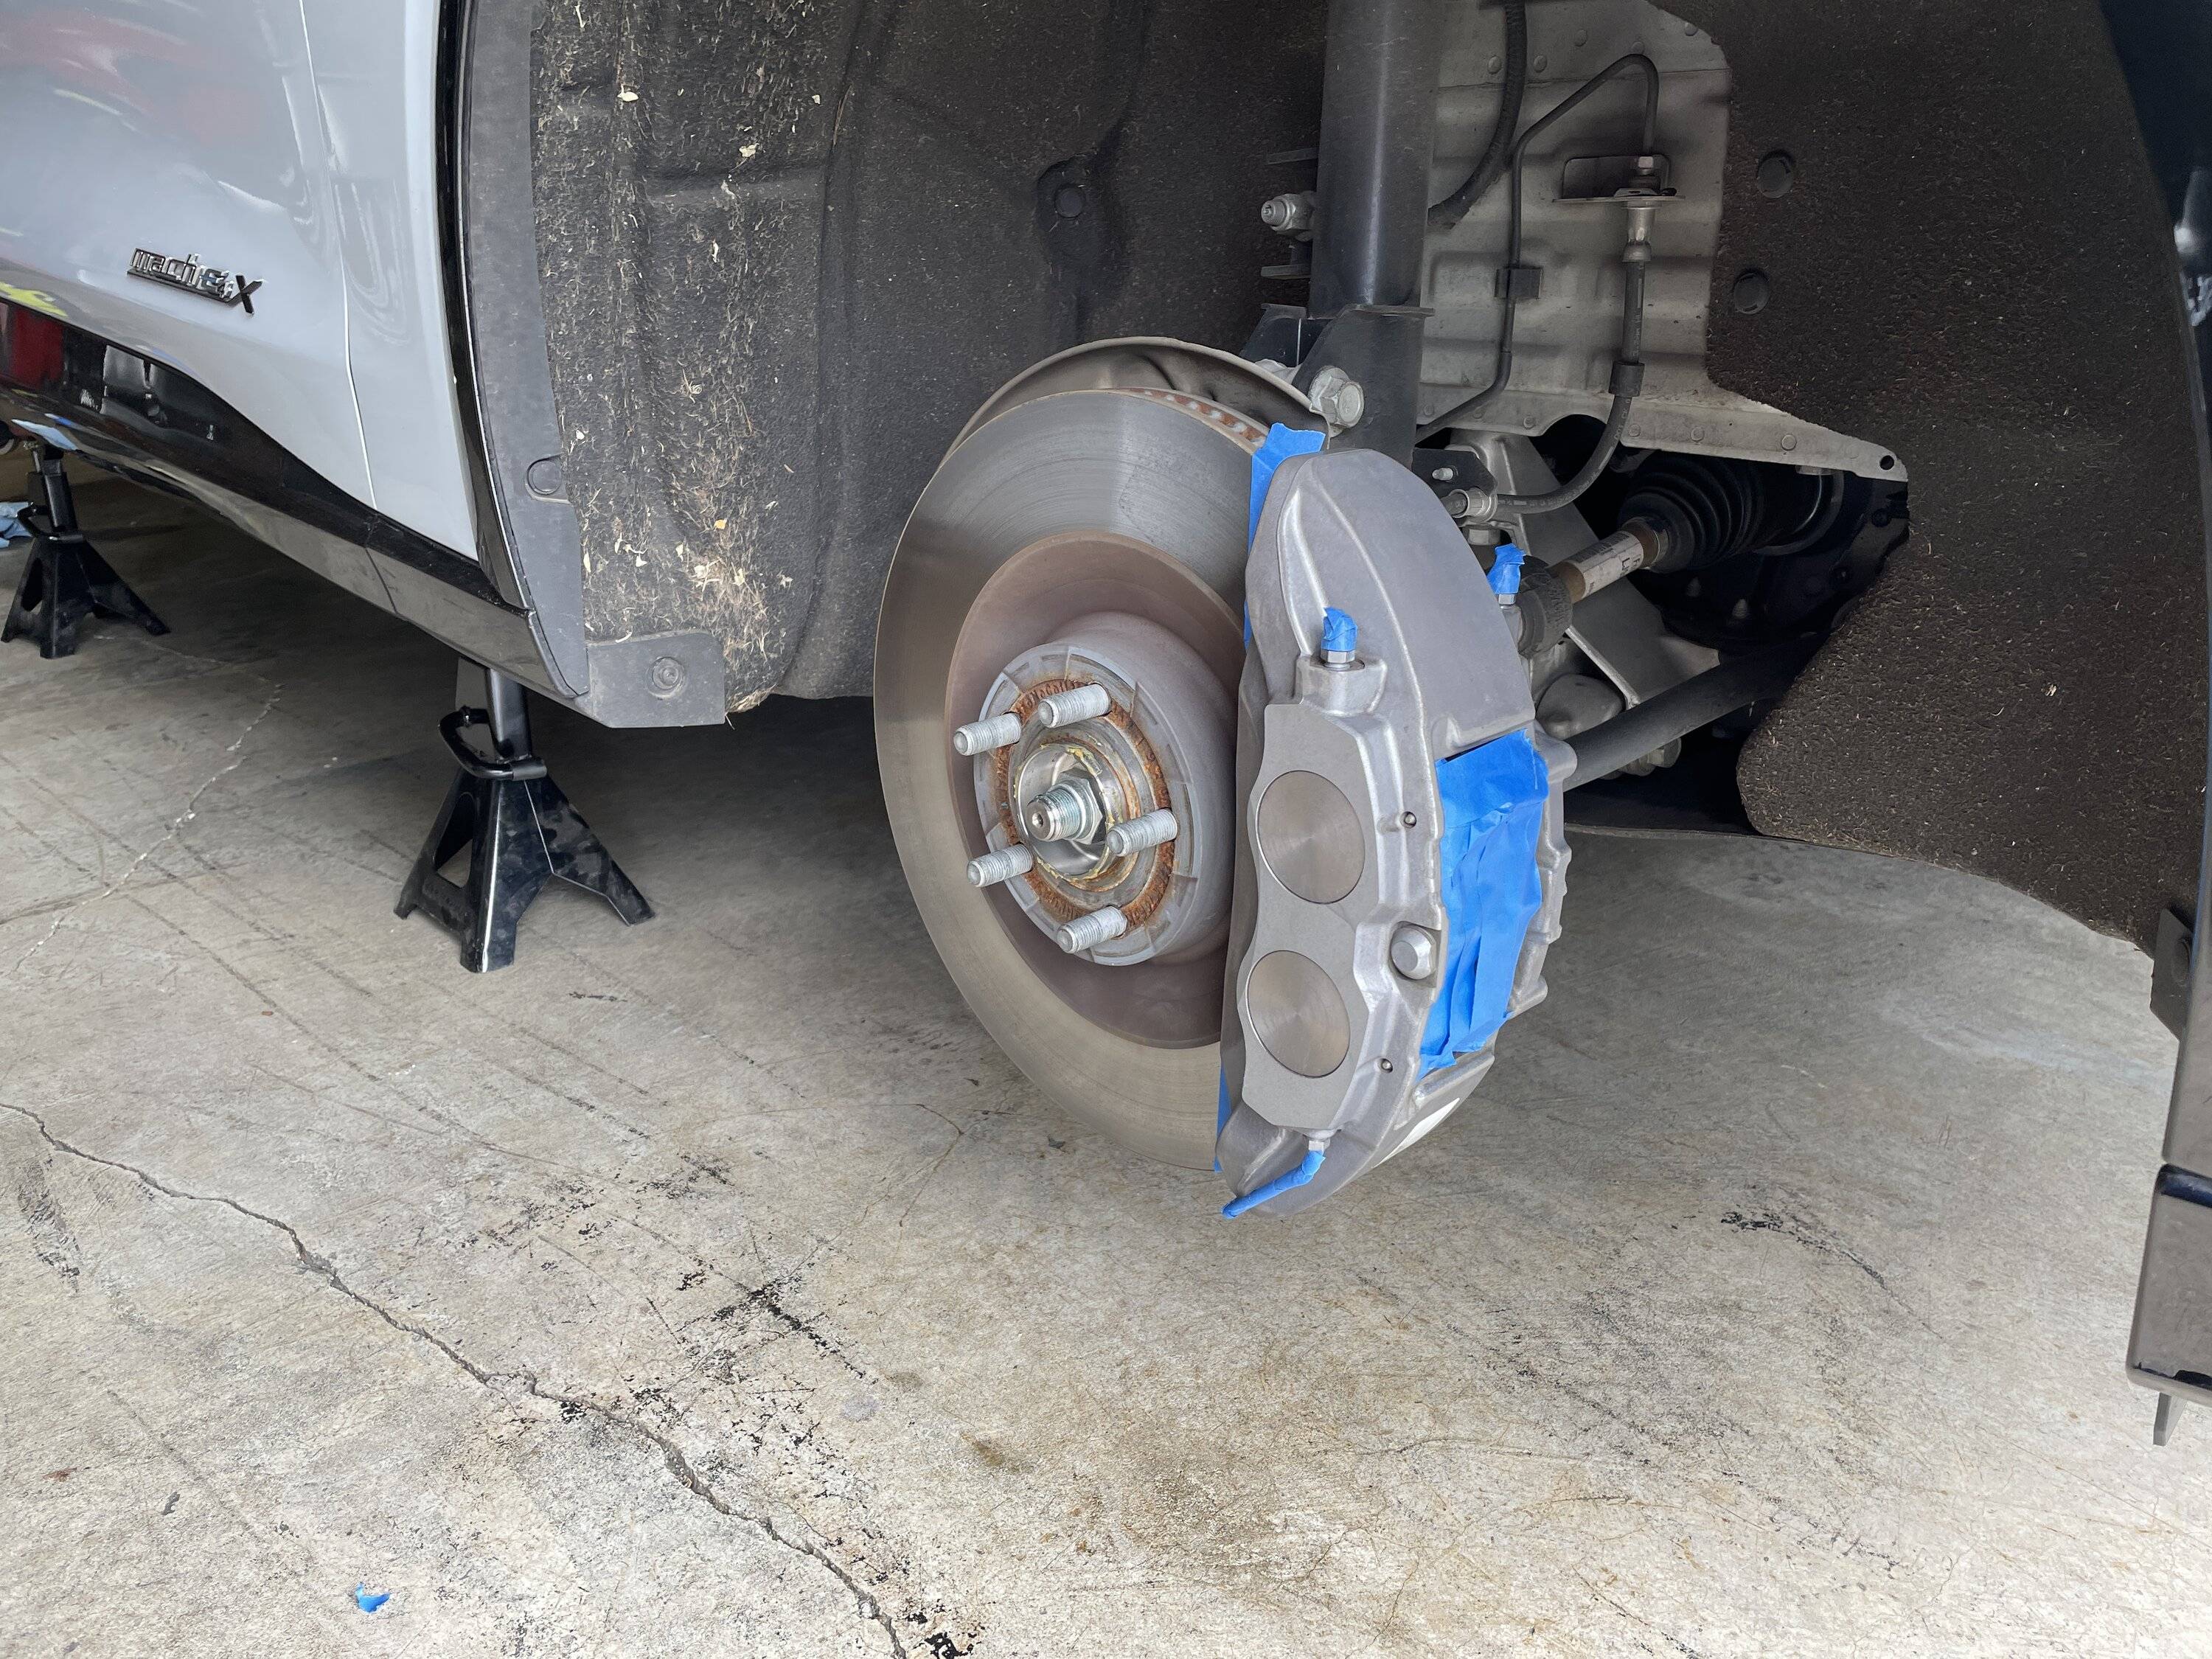
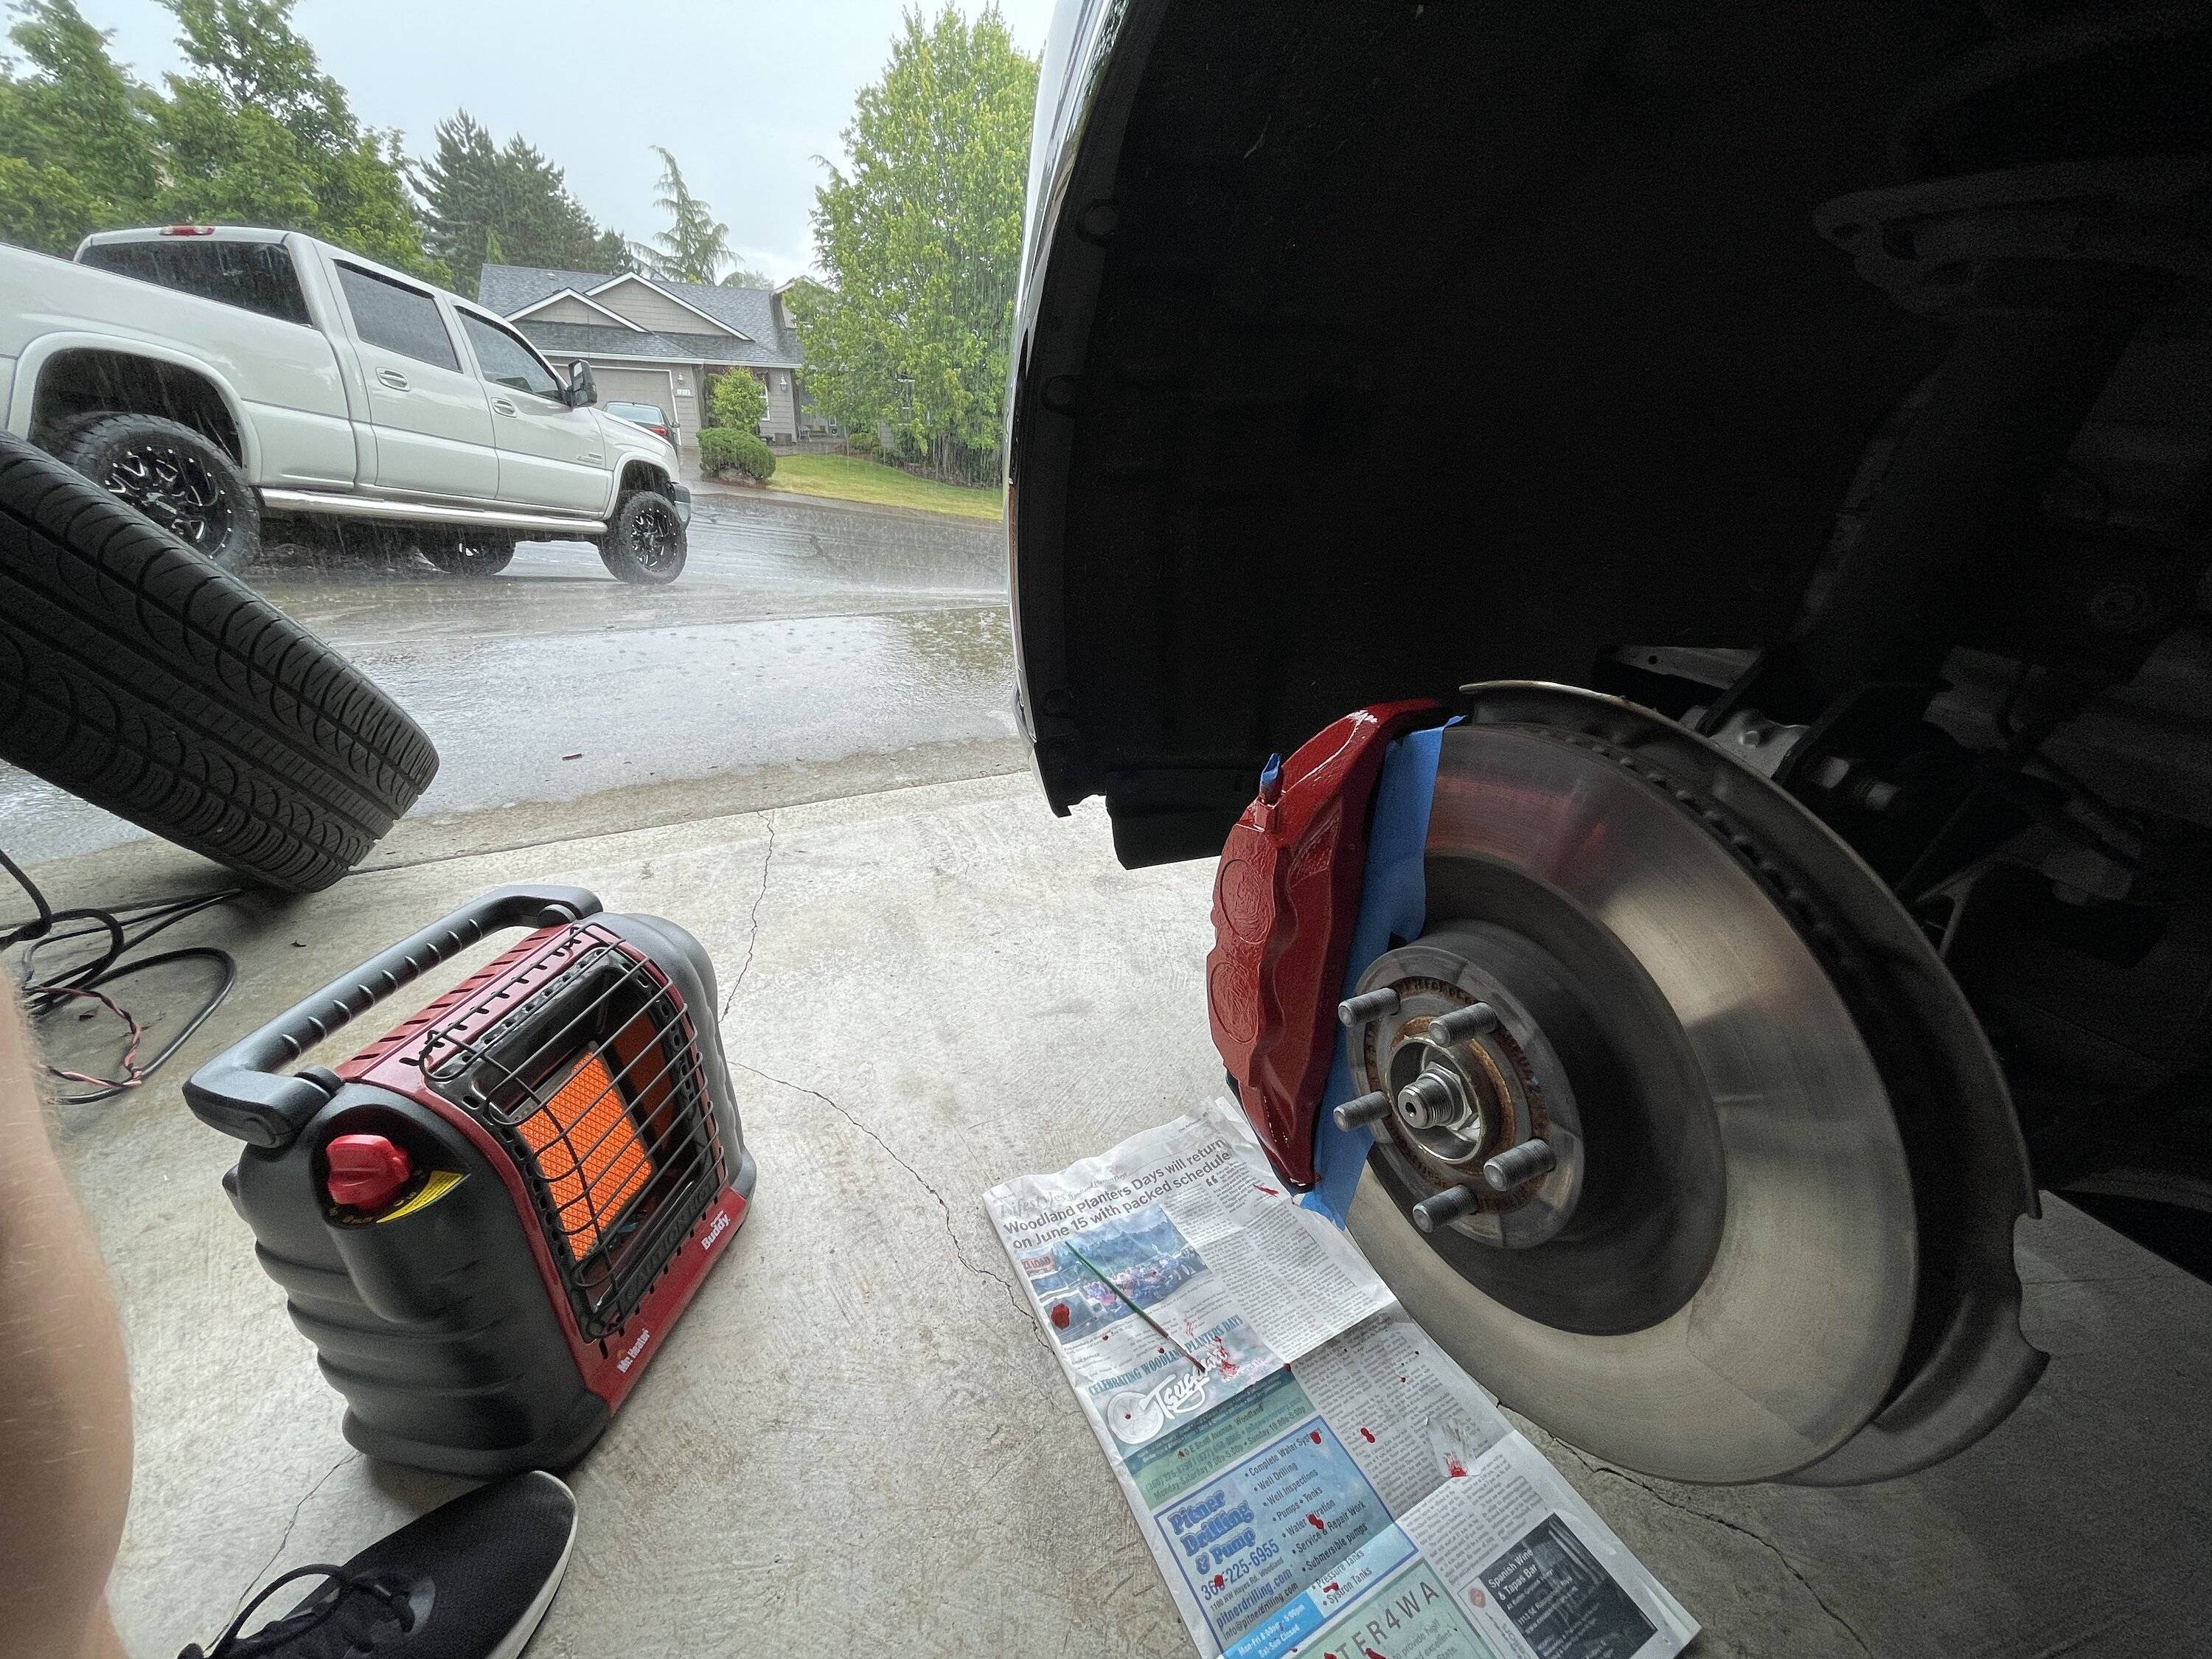
Next was taping off the rotors, and other items I didn't want to get painted. Then get going on painting. Two coats is necessary and overall the entire project took me about 4.5-5hrs with some dry time between coats. The instructions say 15mins but it was closer to 45 for me and the temps I was dealing with.
I had initially taped over the metal "wire" then decided to paint, so removed the tape and finished it after taking this pic.
Was a weird weather day with vastly changing temperatures and I did the driver front last. Thunderstorm came through and dropped the temps a ton during the drying process so had to get creative.
Final product.

Overall, I'm really happy with the way it turned out.
I bought the G2 High Temp Brake caliper paint system on Amazon. The kit and instructions are great, only thing I would add is buying some additional paint brushes as the hardening agent makes the brush essentially useless after a bit. I just got some dollar store ones and threw them away after the project.
I did also get some Brembo decals but held off on installing them just yet. I may do so down the road, but haven't decided yet.
I snapped this because I realize I have a "type"

Jacking up the car was interesting since I the Mach E only has those four, narrow and very specific lift points. So here's how I approached it since I needed to rotate the tires and thus have all the wheels off the ground at the same time. I also have the Corvette pucks installed, which had an added benefit to them that I didn't realize until this project, which is the edges of the pucks are angled such that when placing a jack stand under them the cradle perfectly in the angled groove of the jack stand for a solid hold.
Here's the procedure I used to jack it up:
1) Jacked up the rear passenger corner and the car being as rigid as it is, it also lifted up the front passenger side. I placed a jack stand under the front passenger, then lowered the back down in the rear.
2) Jacked up the drivers side rear, and jacked up enough to lift the entire rear of the car off the ground. This allowed me to place a jack stand under the passenger rear, so that the car was now on jacks on the passenger side.
3) Jacked the drivers front, and jacked until the rear drivers wheel was off the ground and placed a stand there as well.
This left me with three corners on jack stands, and the jack under the driver front, and the entire car off the ground. From here I placed a jack stand under the lower control arm as a safety measure and left the jack in place under the drivers front. Perhaps there was a better way to do this, but this is what worked for me.
Next was taping off the rotors, and other items I didn't want to get painted. Then get going on painting. Two coats is necessary and overall the entire project took me about 4.5-5hrs with some dry time between coats. The instructions say 15mins but it was closer to 45 for me and the temps I was dealing with.


I had initially taped over the metal "wire" then decided to paint, so removed the tape and finished it after taking this pic.

Was a weird weather day with vastly changing temperatures and I did the driver front last. Thunderstorm came through and dropped the temps a ton during the drying process so had to get creative.
Final product.
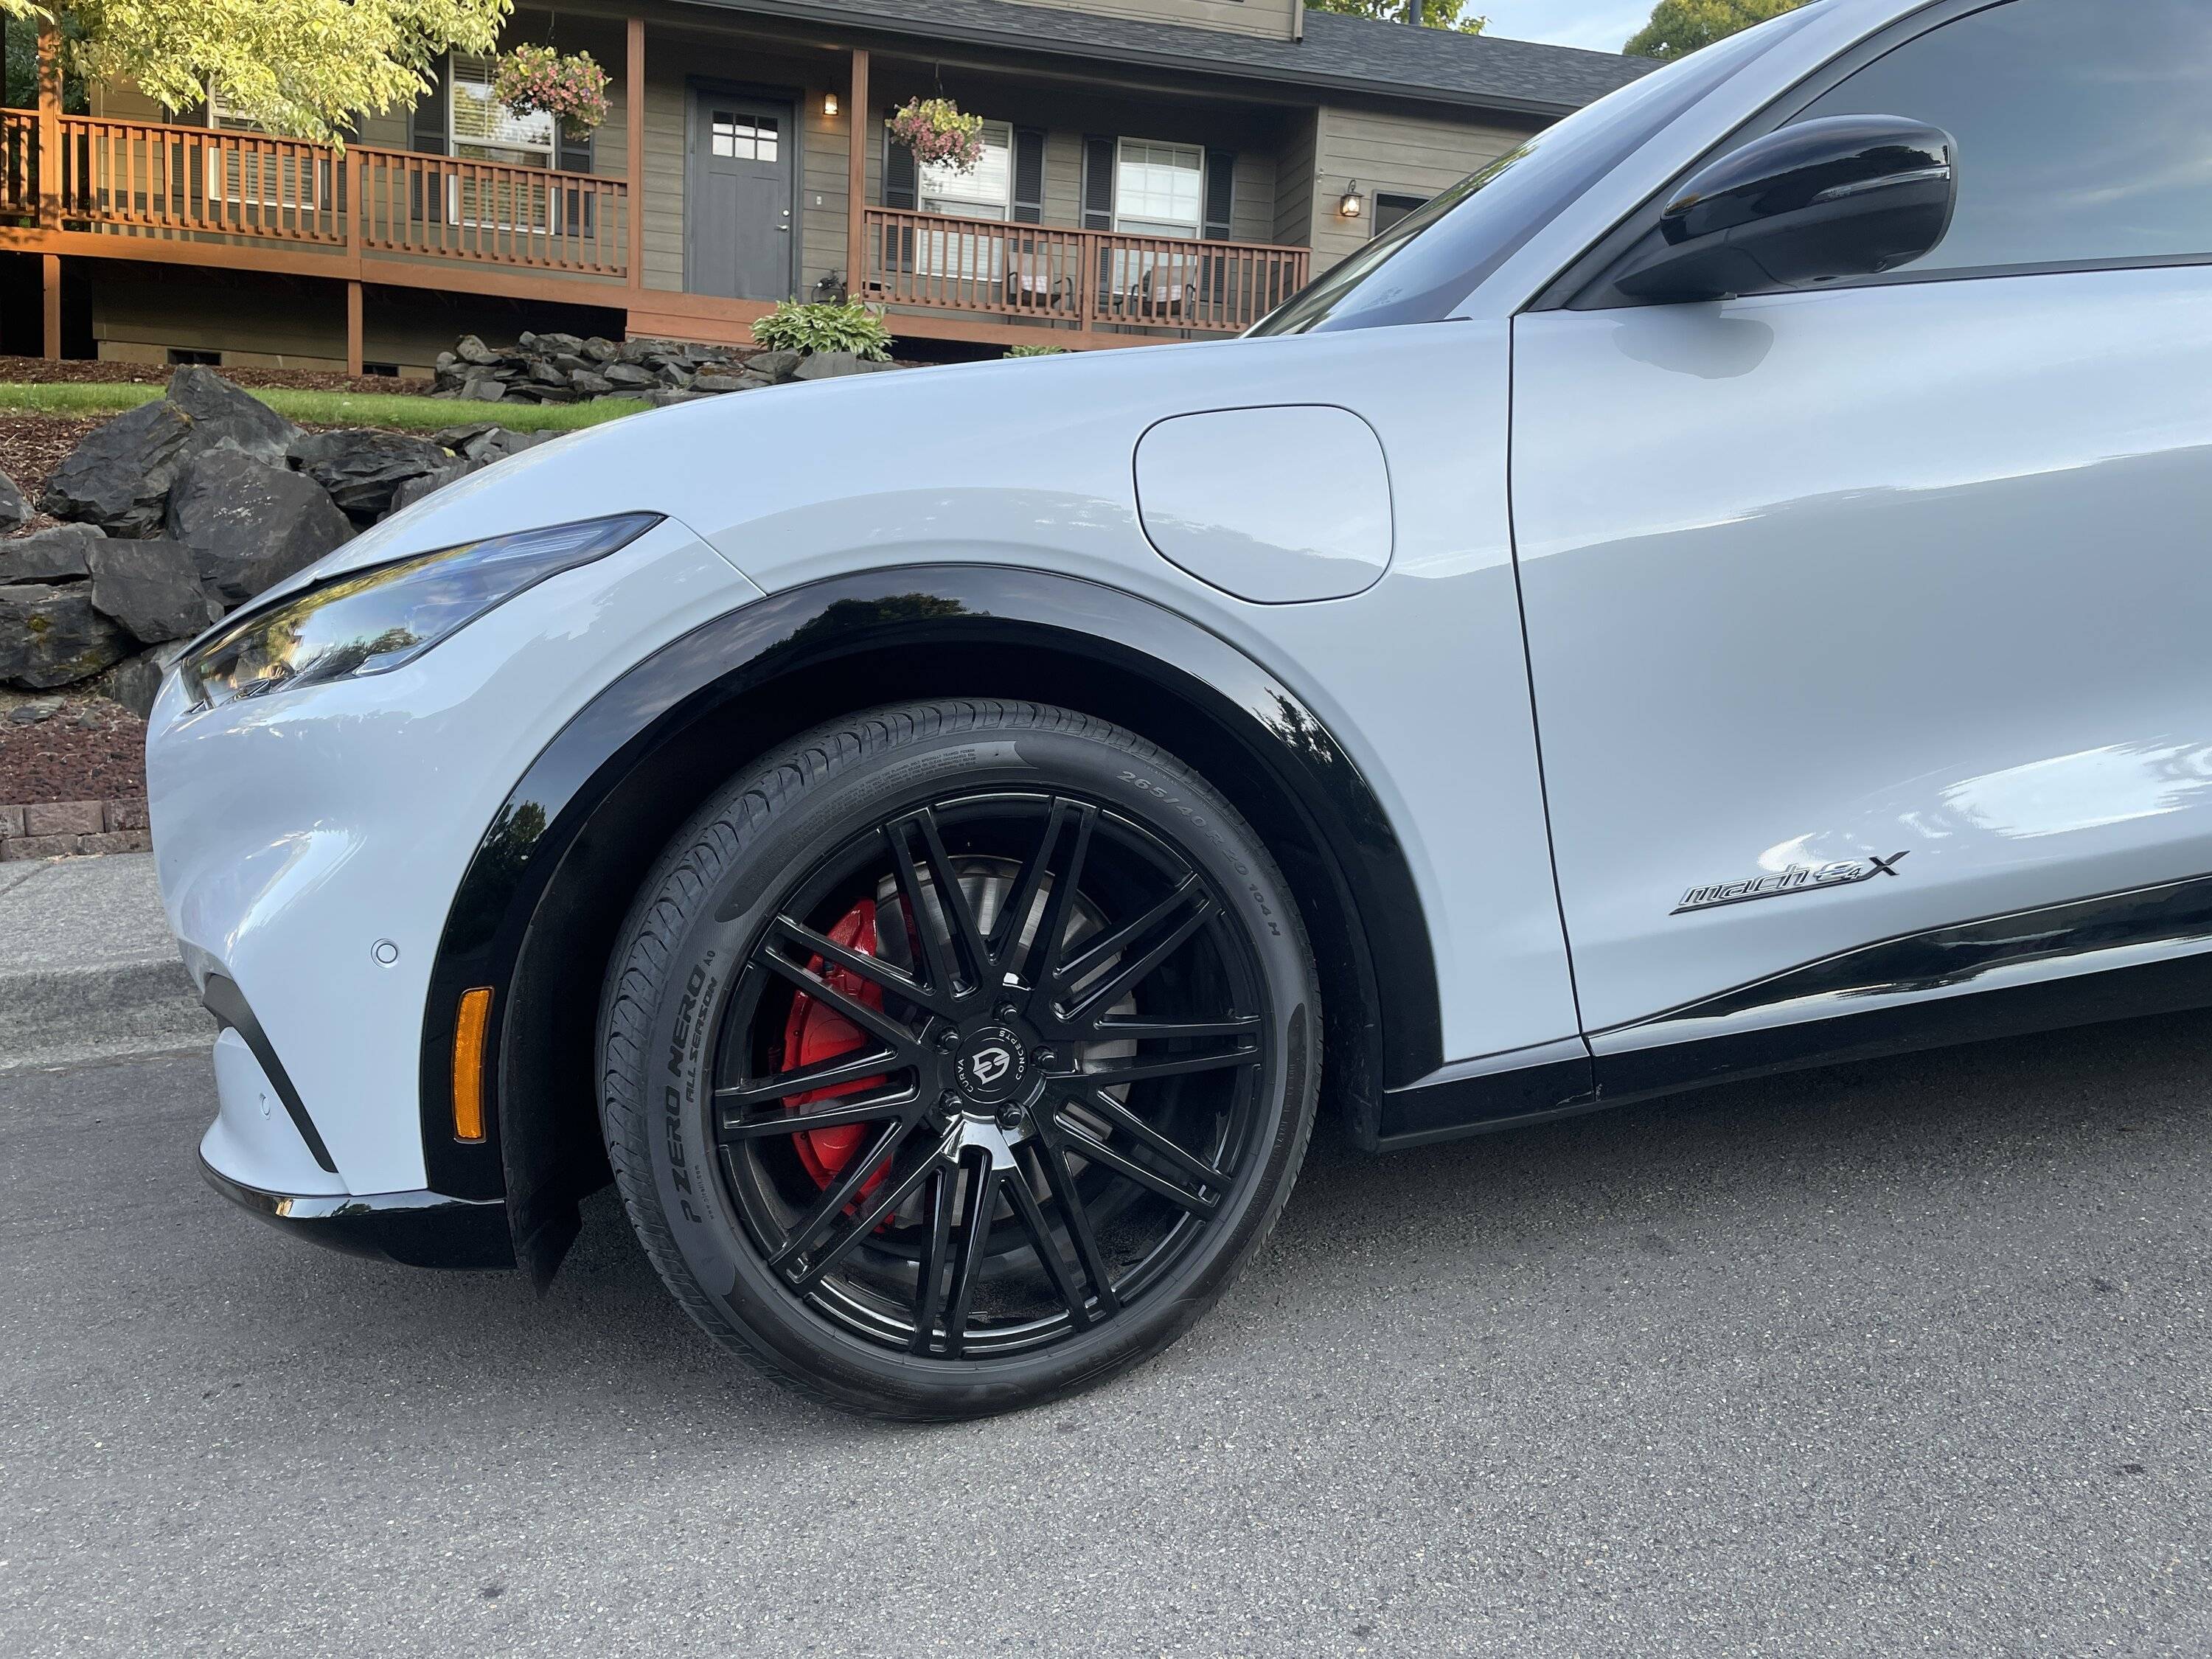

Overall, I'm really happy with the way it turned out.
Sponsored