tyler524
New Member
- First Name
- Tyler
- Joined
- Apr 14, 2025
- Threads
- 1
- Messages
- 3
- Reaction score
- 20
- Location
- Royal Oak, MI
- Vehicles
- 2024 Mach-E Premium, 2013 Fusion, 2000 Miata, 1994 3000GT, 2011 Ducati 848
- Occupation
- Product Line Manager
- Thread starter
- #1
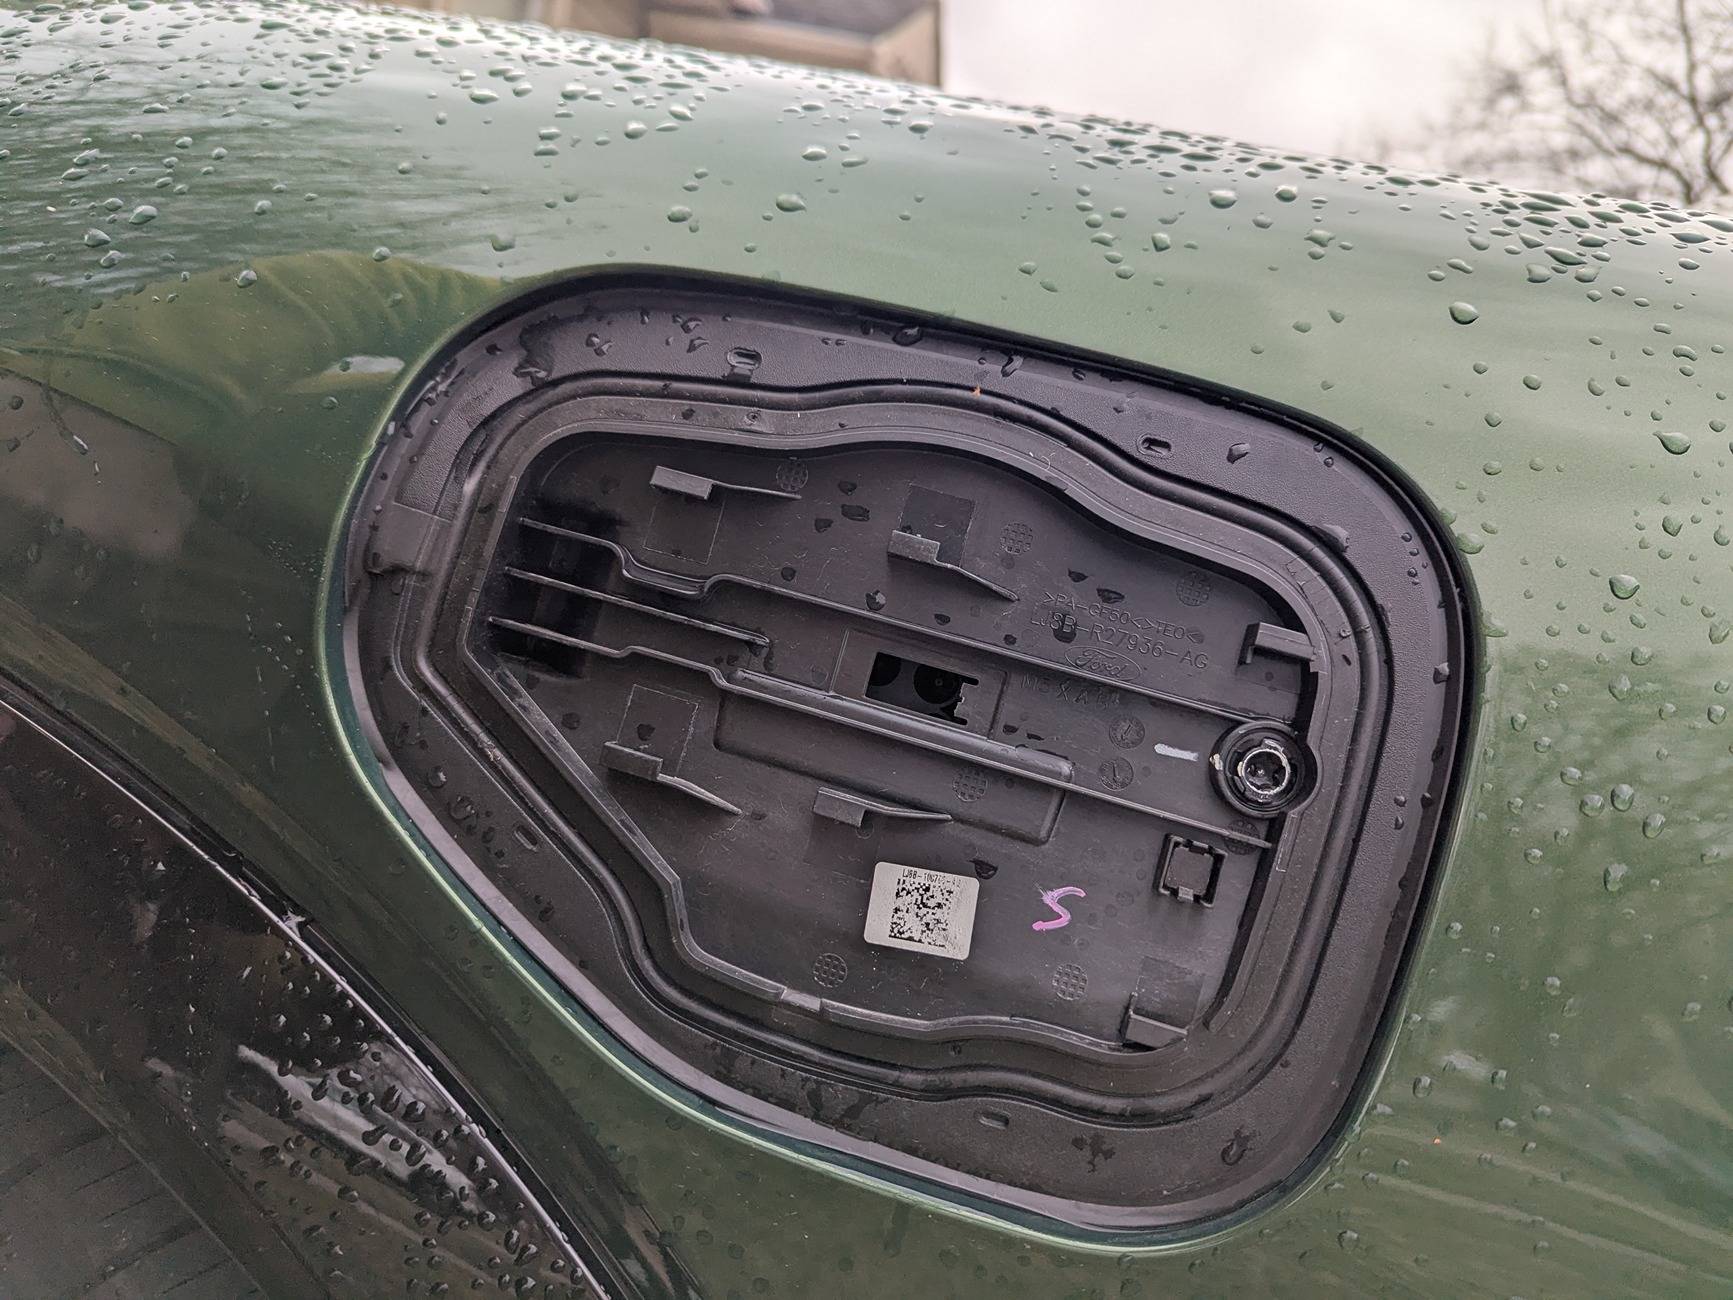
I recently had an issue where someone fell into my charge port door while it was open, and it cracked the hinge and knocked the cover off. The cover is easy to pop back on, but it would no longer sit flush as the plastic housing of what Ford calls the charge pocket was cracked and pushed in too far. I tried searching online for some information on replacing the charge pocket. Still, I only found stories of people taking it to the dealer and paying approximately $800 to have it replaced.
I decided to replace it myself and wanted to document it along the way to help others who may want to try this repair on their own. It is a relatively easy job, and it only took me about an hour or so to complete the whole project. I was able to get the part shipped for about $275.
Someone on the Mach-E FB group said that it is possible to do this without removing the liner, but I don’t know how that would be possible. You may be able to shortcut this by loosening only one side of the liner, but I decided to pull out the whole thing.
Basic Disclaimer:
I am not responsible for any damage to your car, and this is a general guide. If you have any mechanical aptitude and common sense, this is an easy project to tackle. If you are unsure of your ability to do this job safely, take it to a professional.
Part Needed
Ford Part# LJ8Z-10370-B – Charge Pocket
Tools Needed


Step 1: Remove the wheel
Step 2: Remove the wheel well liner
Step 3: Remove the charge pocket
Step 4: Reinstall the charge pocket
Step 8: Drink a beer after saving yourself over $500
I decided to replace it myself and wanted to document it along the way to help others who may want to try this repair on their own. It is a relatively easy job, and it only took me about an hour or so to complete the whole project. I was able to get the part shipped for about $275.
Someone on the Mach-E FB group said that it is possible to do this without removing the liner, but I don’t know how that would be possible. You may be able to shortcut this by loosening only one side of the liner, but I decided to pull out the whole thing.
Basic Disclaimer:
I am not responsible for any damage to your car, and this is a general guide. If you have any mechanical aptitude and common sense, this is an easy project to tackle. If you are unsure of your ability to do this job safely, take it to a professional.
Part Needed
Ford Part# LJ8Z-10370-B – Charge Pocket
Tools Needed
- Wheel Removal
- 3-ton jack
- Jack stands
- Jack pads https://www.amazon.com/dp/B0C6QT4BBN/
- 21mm socket for lug nuts
- Wheel Well Liner
- Torx T30
- 7mm socket
- 10mm socket
- Auto Trim Tools https://www.amazon.com/Tresalto-Auto-Trim-Removal-Tool/dp/B01L8GHB7O/
Step 1: Remove the wheel
- I had purchased a set of jack pads for my car that made it easy to use the jack point and to make sure that I wasn’t putting any pressure on anything that I didn’t want to. Given the weight of the car, I used a 3-ton jack. The lug nuts are a 21mm socket.
Step 2: Remove the wheel well liner
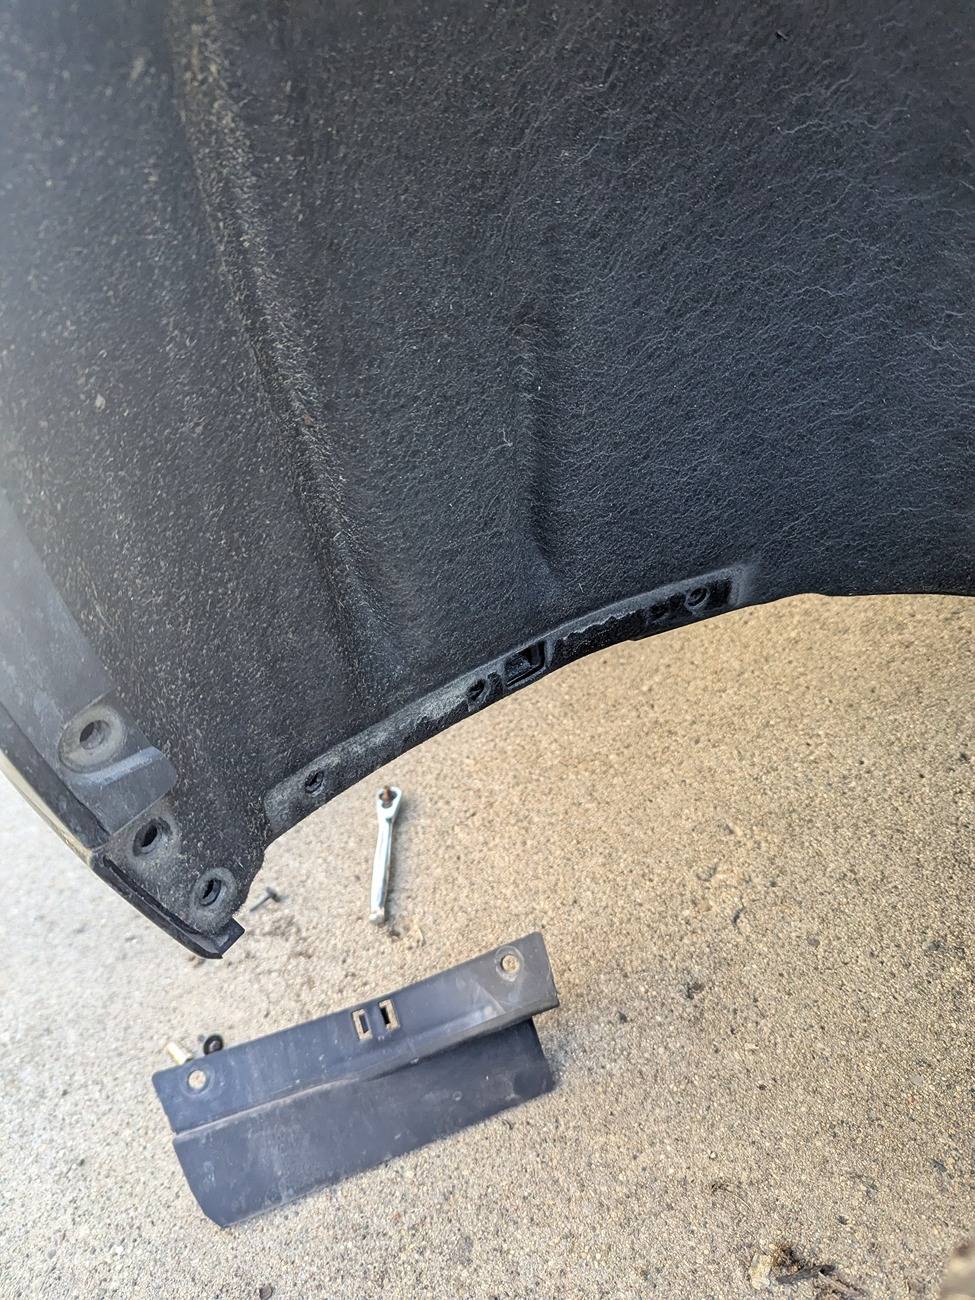
- Removing the wheel well liner was the most time-consuming part of this repair. While it is not necessarily hard, you need to take your time with this step. There are tons of body trim fasteners to remove all throughout the wheel well. You will want a set of auto-trim tools to remove these fasteners.
- Take your time with this step and double-check that you have all of them removed before trying to pull the wheel well.
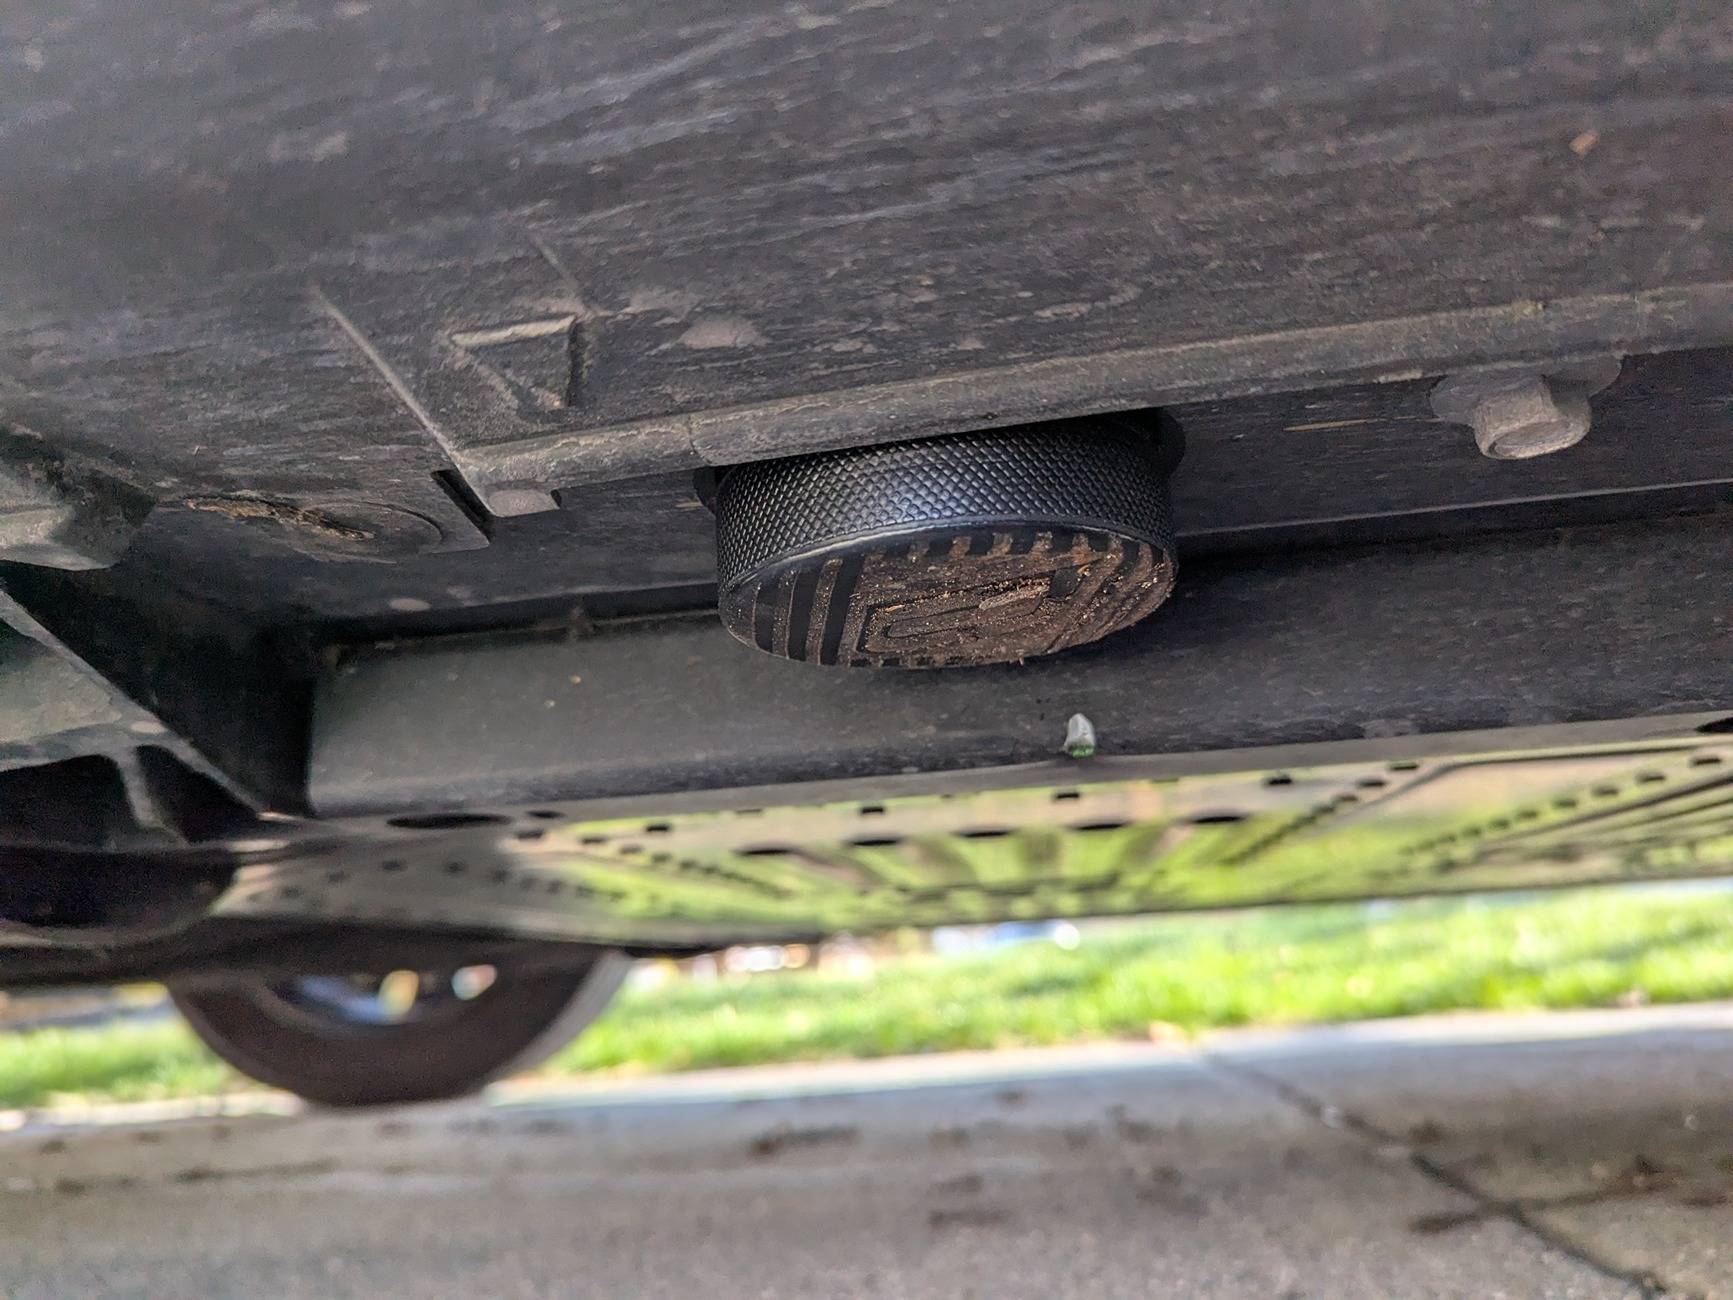
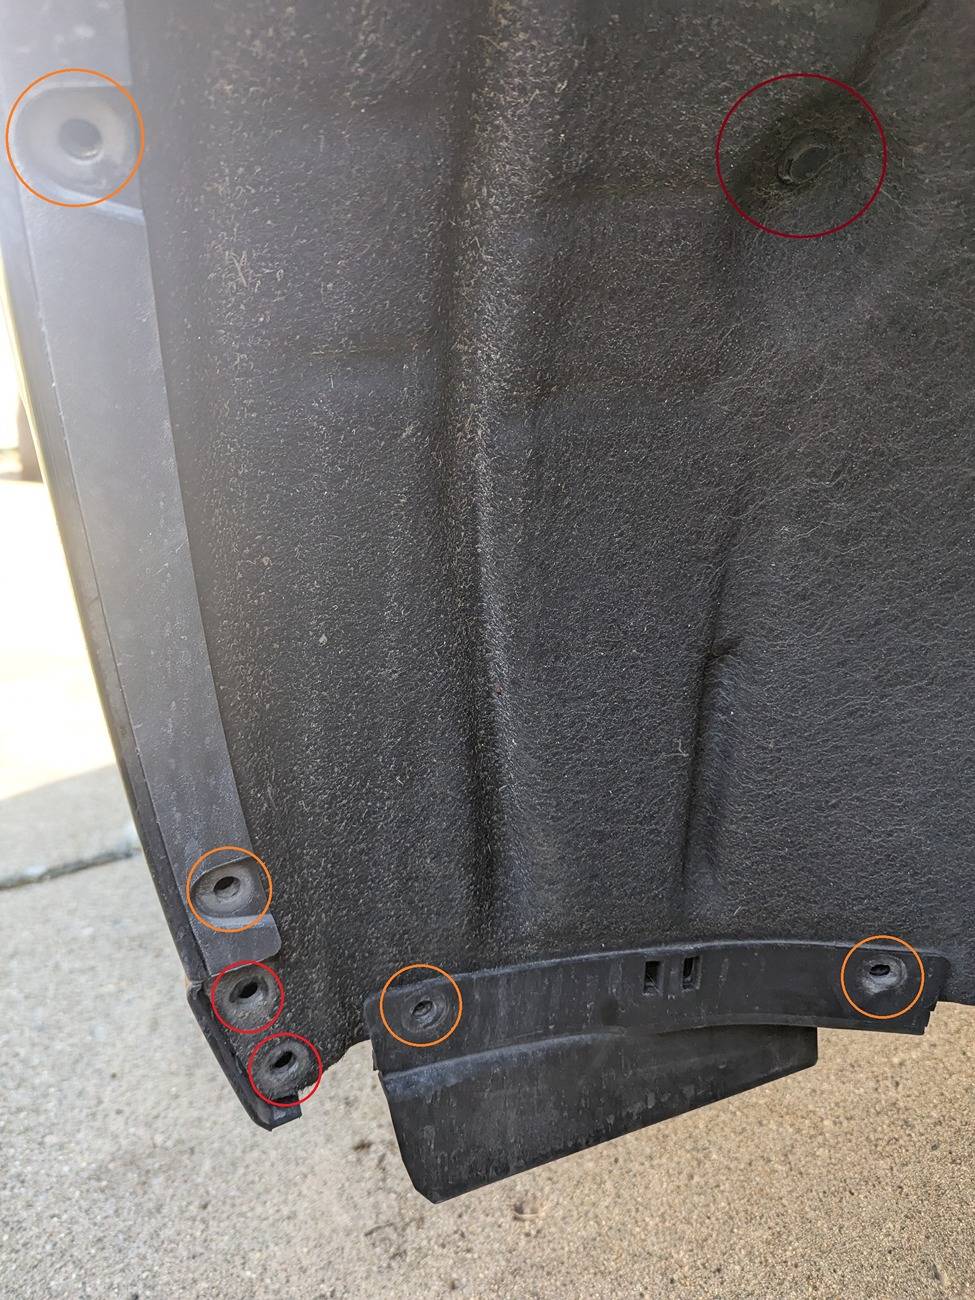
- There are two different types of auto trim fasteners that need to be removed, and I would keep track of them for when you put them back together. I circled the image in red with the most common type of fastener and orange, where a second type of two-piece fastener is used. The single-piece fasteners are only used with the liner itself, and the two-piece fasteners are used when it goes through a piece of plastic and the wheel liner together.
- There is a small deflector in front of the wheel that will need to be removed; which is secured by two trim fasteners in the wheel well and two screws underneath, which require a 7mm socket. Once the fasteners are out, it is held in with a plastic clip that is molded in the part. Be careful not to break this clip as you pull the deflector off.
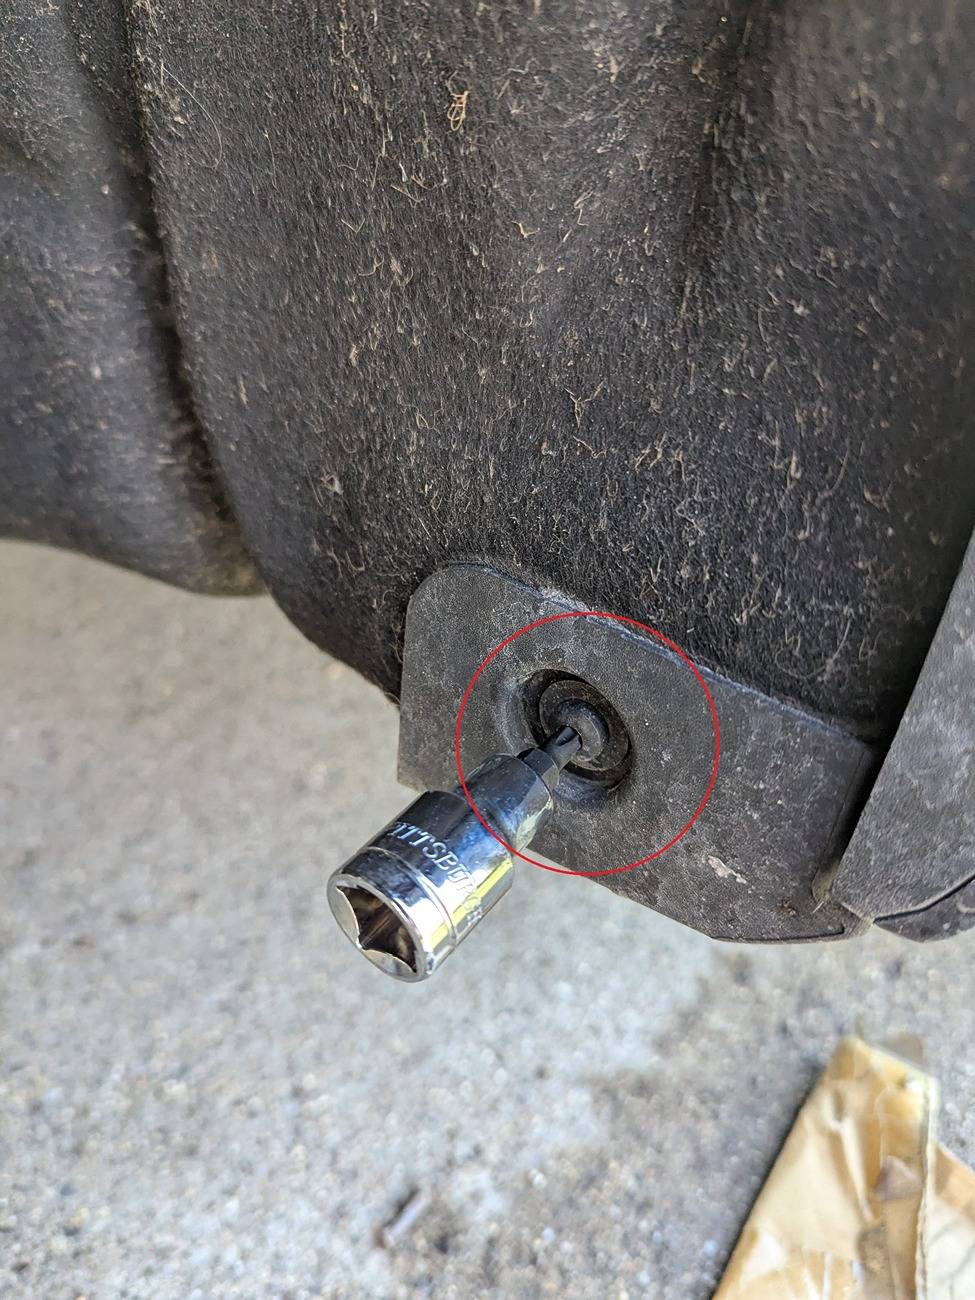
- There is one screw that requires a torx T30 bit to remove on the bottom corner.
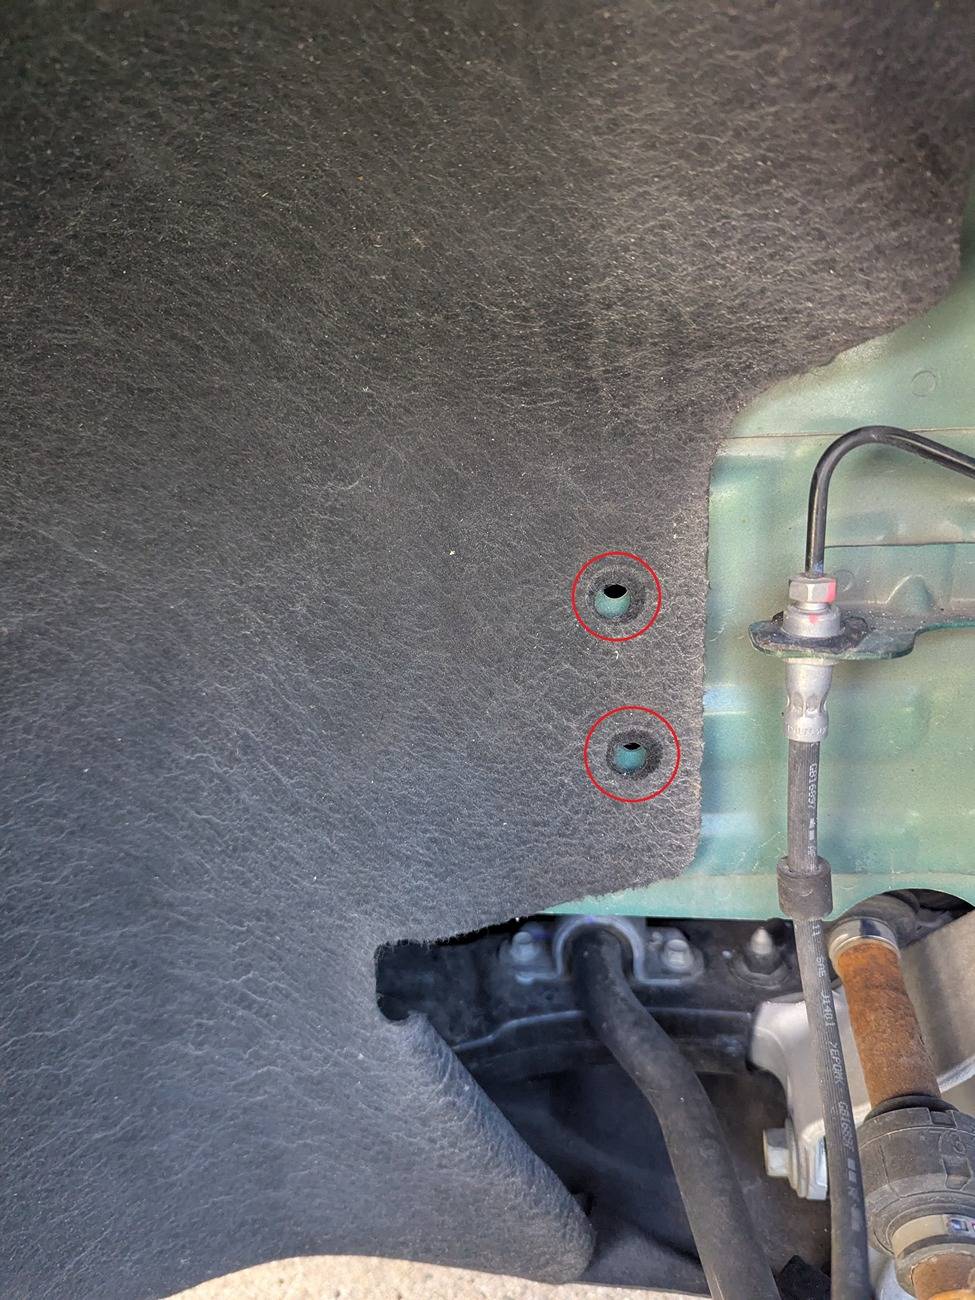
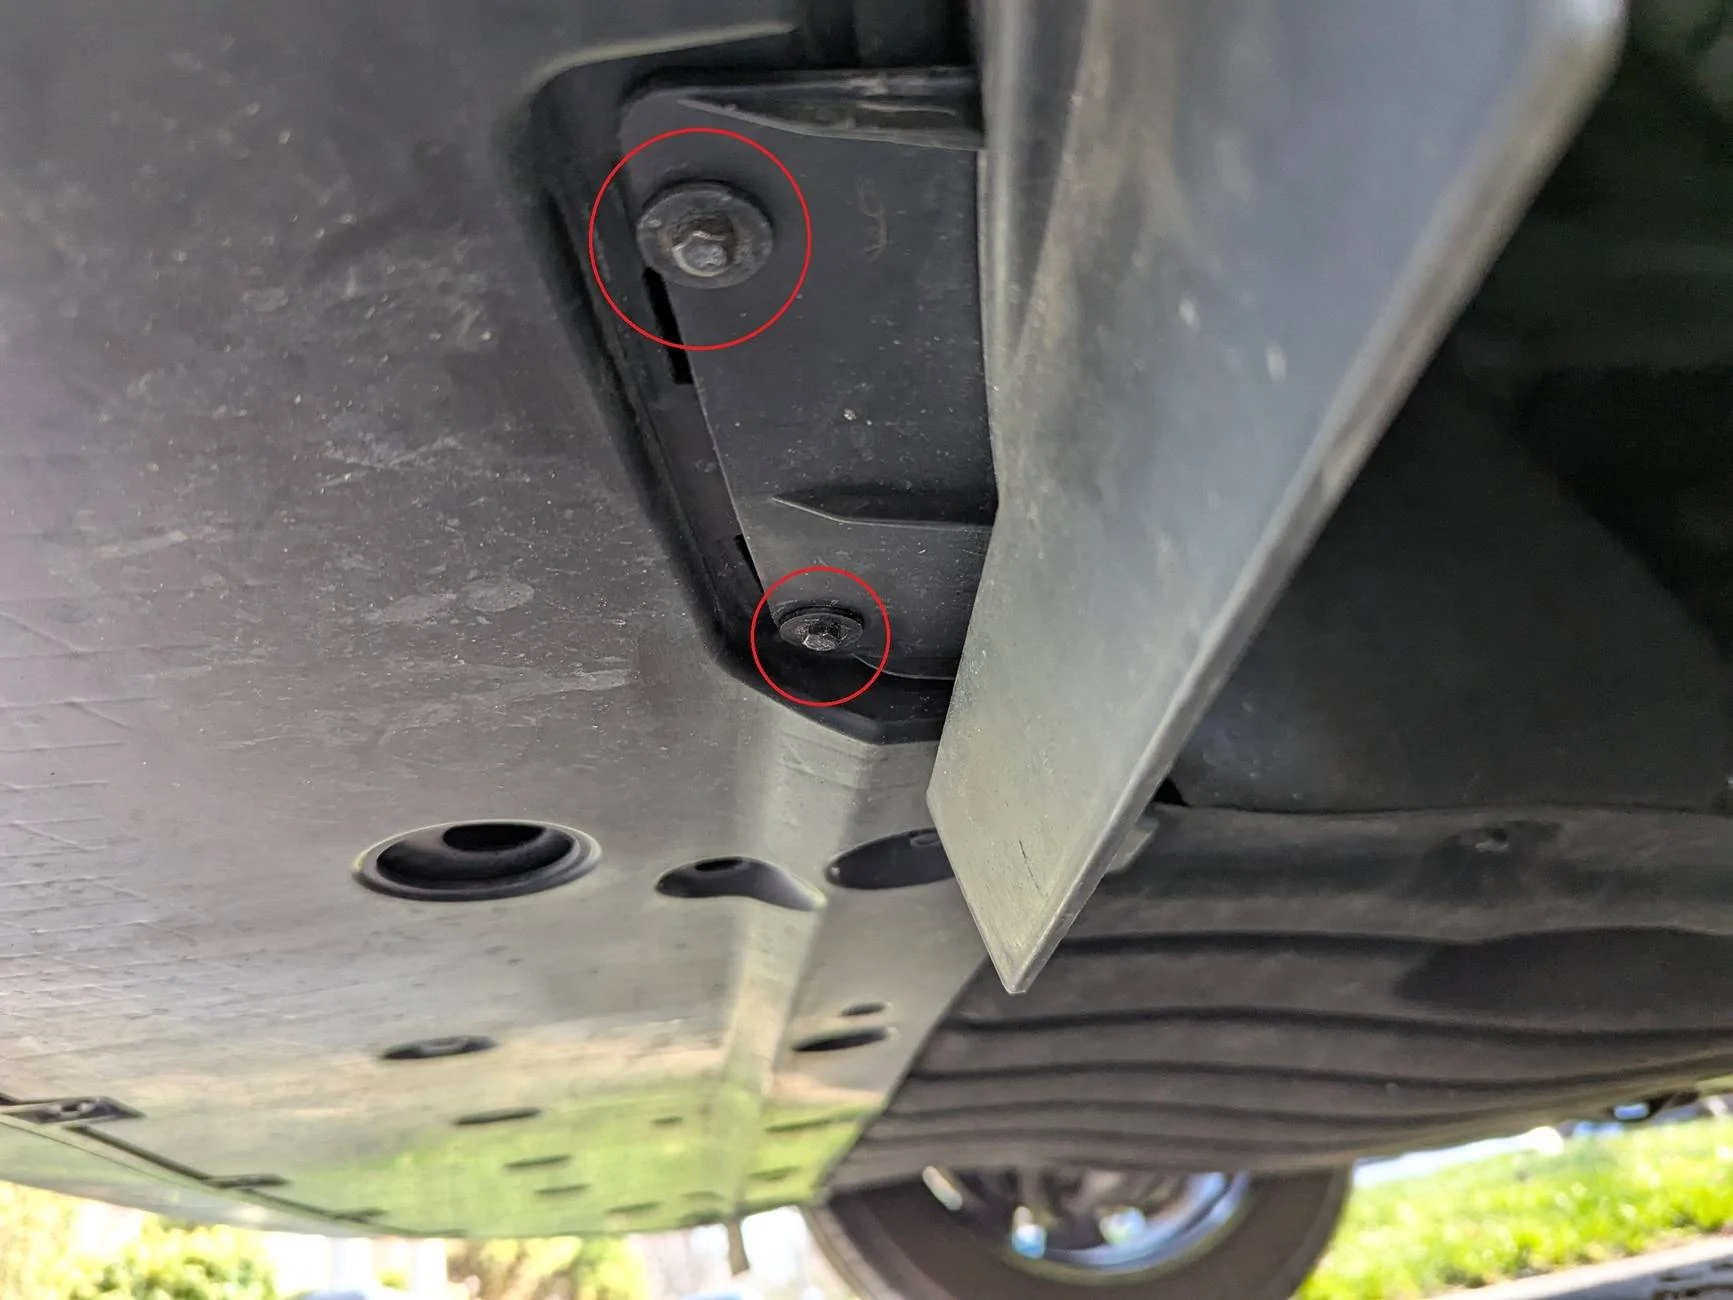
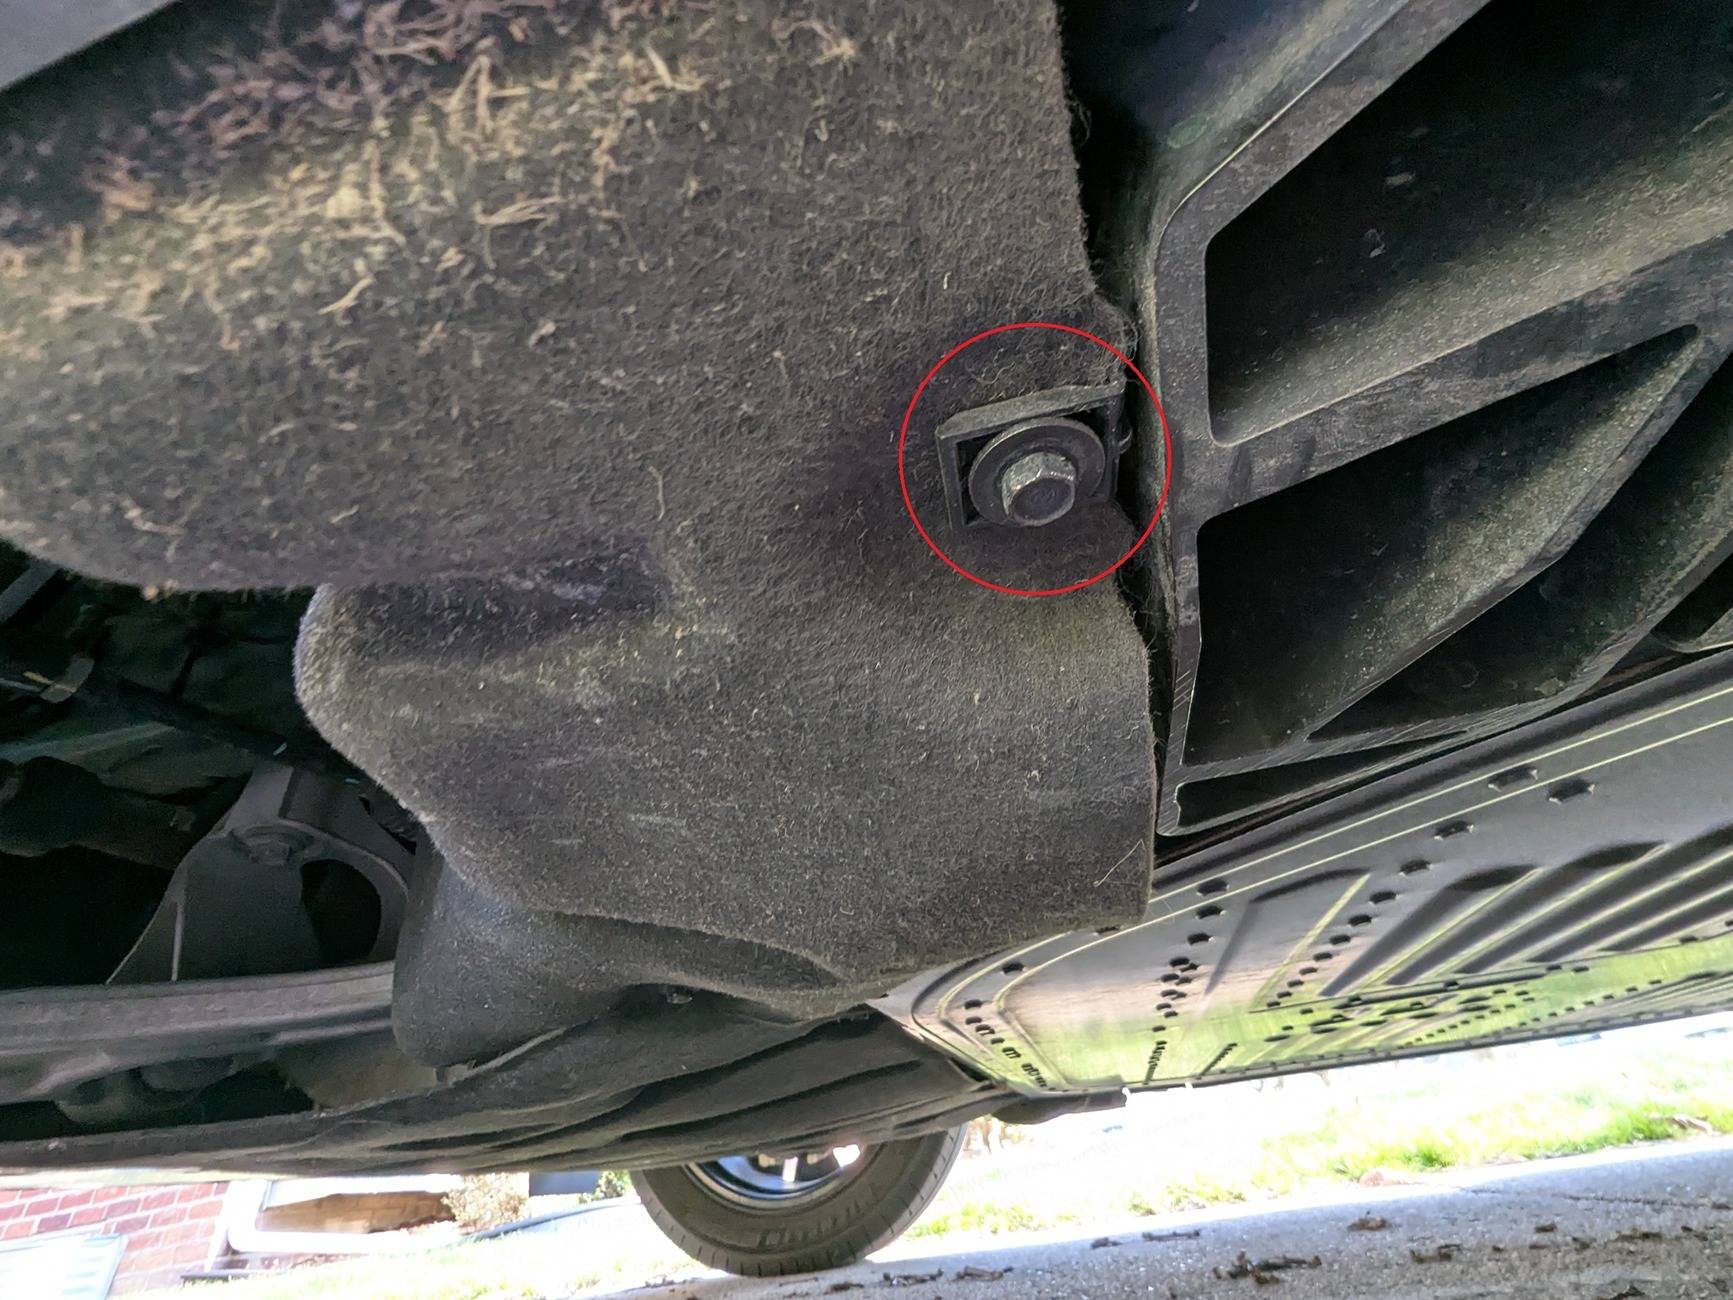
- Four bolts that take a 10mm socket must also be removed from the underside of the car to hold the wheel well liner in place. The liner is sandwiched between two plastic clips in the back, and you must slide it loose out of these areas, being careful not to tear the liner.
- Pull the liner out carefully and slowly to make sure that you have removed all of the fasteners and do not tear it. I found a couple of fasteners that I missed when trying to pull it out the first time.


Step 3: Remove the charge pocket
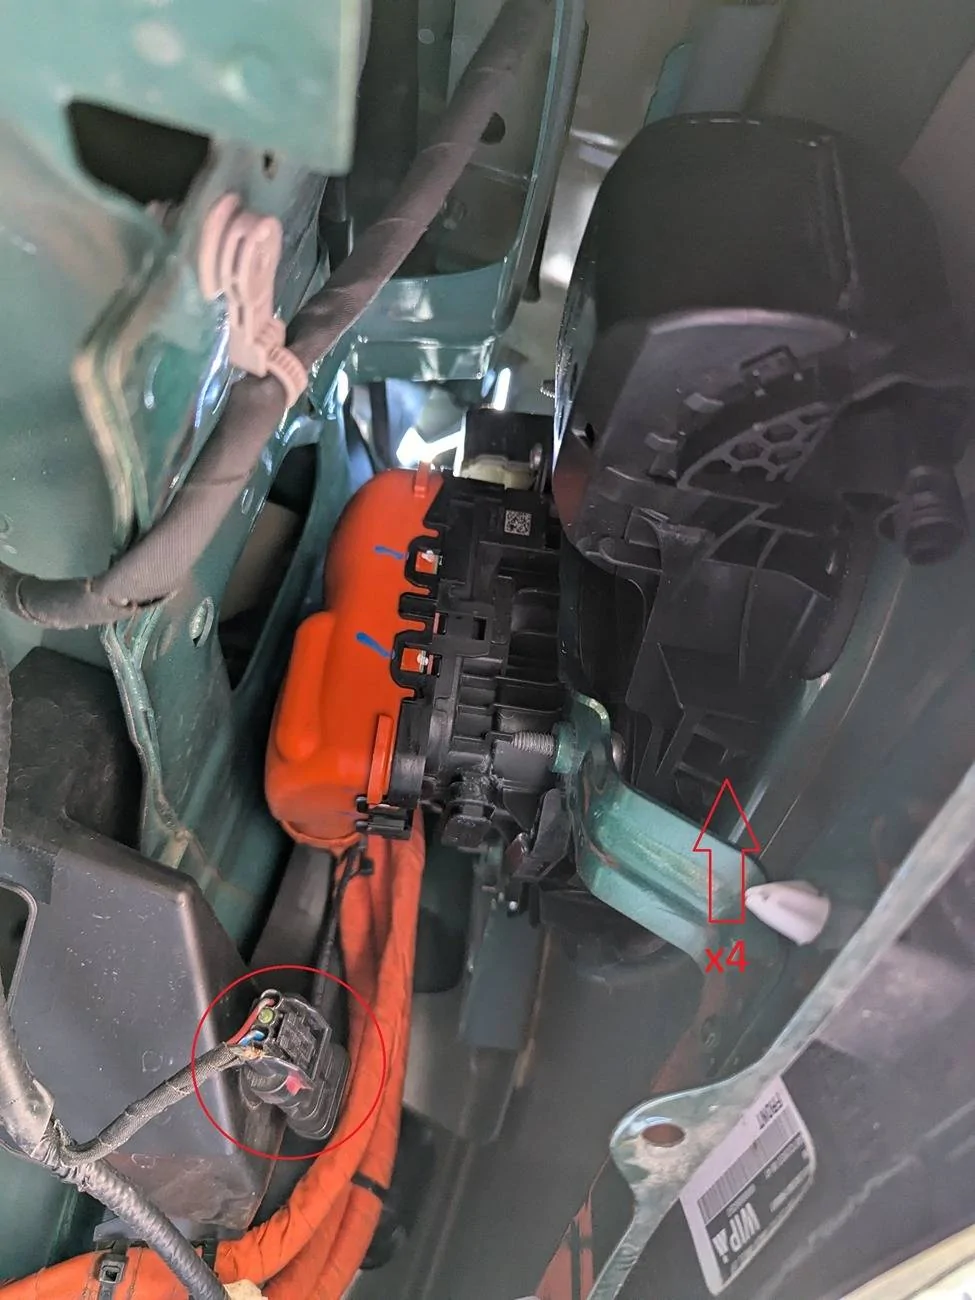
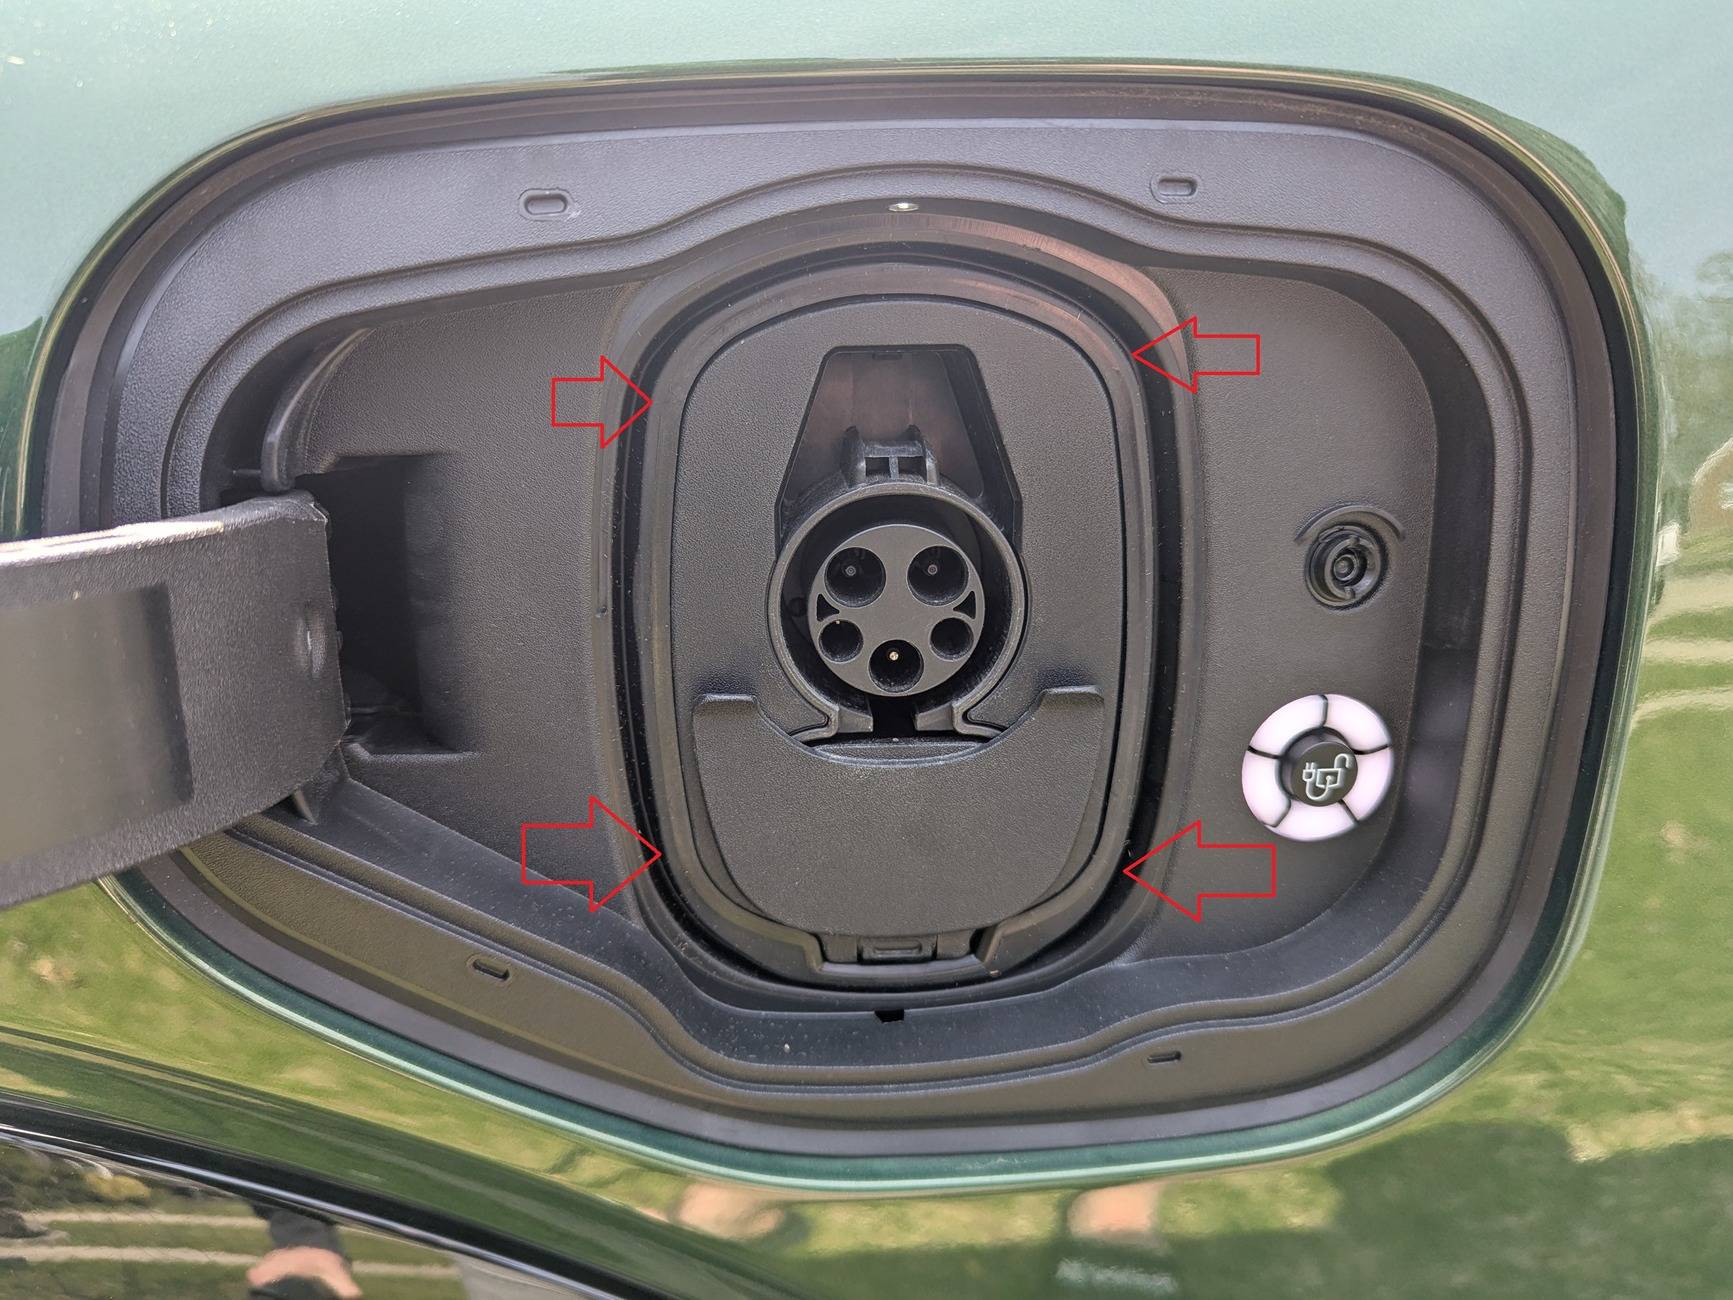
- Once the wheel well liner is removed, you should be able to look up into the fender and see the back of the charge port.
- There are four clips built into the housing that you need to press in so that you can pull the charge pocket assembly toward the outside of the car. I used my fingers on these clips and slightly pulled from the outside once each one was loose.
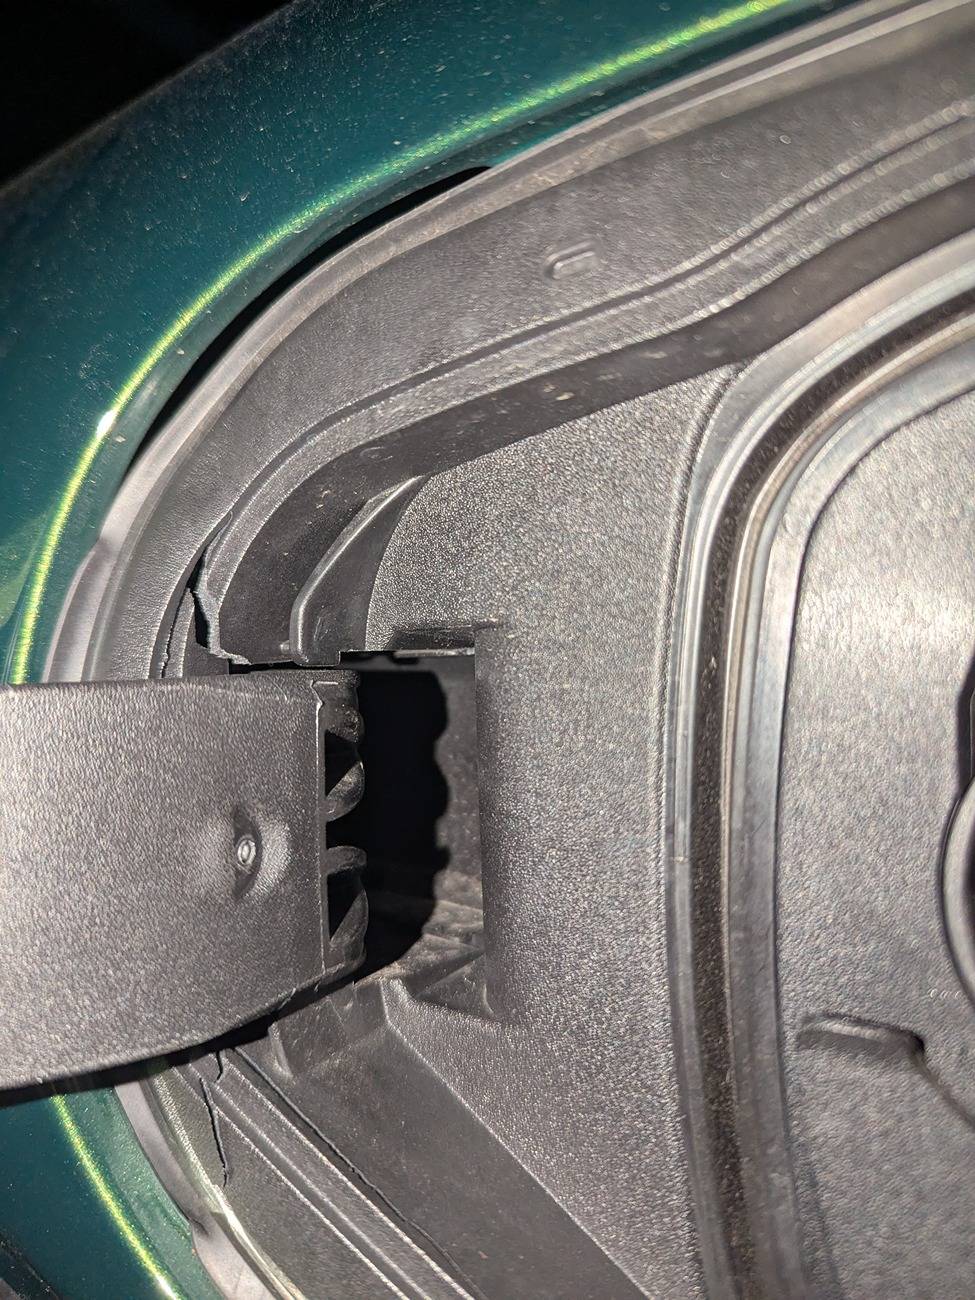
- I took one of my plastic auto trim tools and placed it between the fender and the charge pocket assembly once one side was released so that they didn’t clip back into place.
- You will need to swing the assembly out at an angle as the hinge portion tucks back behind the fender. Once it is loose, there are four areas around the charge port where the pocket snaps into place. These will pop loose with a little bit of pressure.
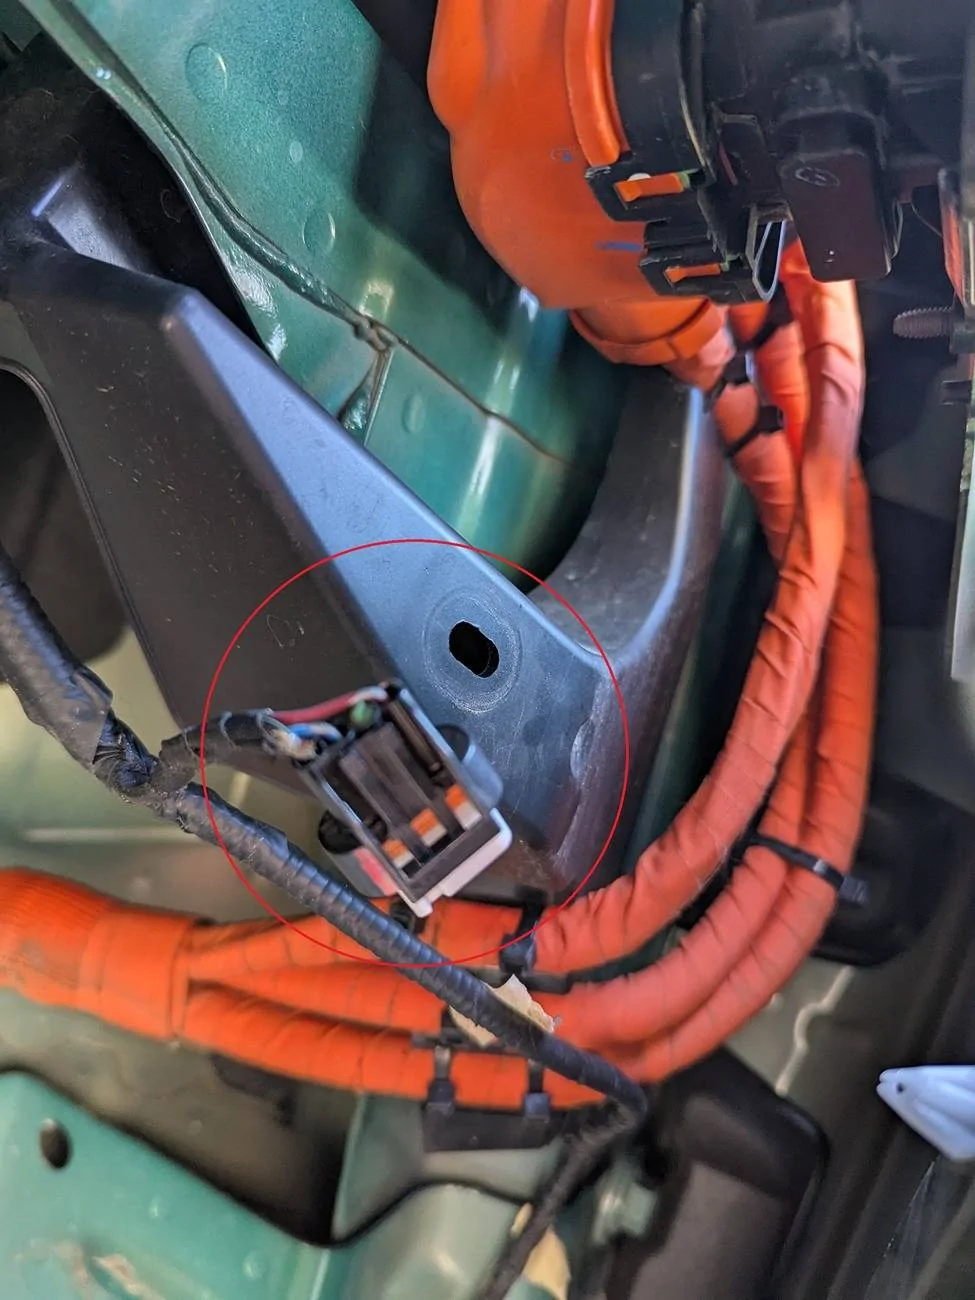
- The new charge pocket comes with the charge indicator already included. You will need to follow the wire back and disconnect the wire, which is located just behind the fender.
Step 4: Reinstall the charge pocket
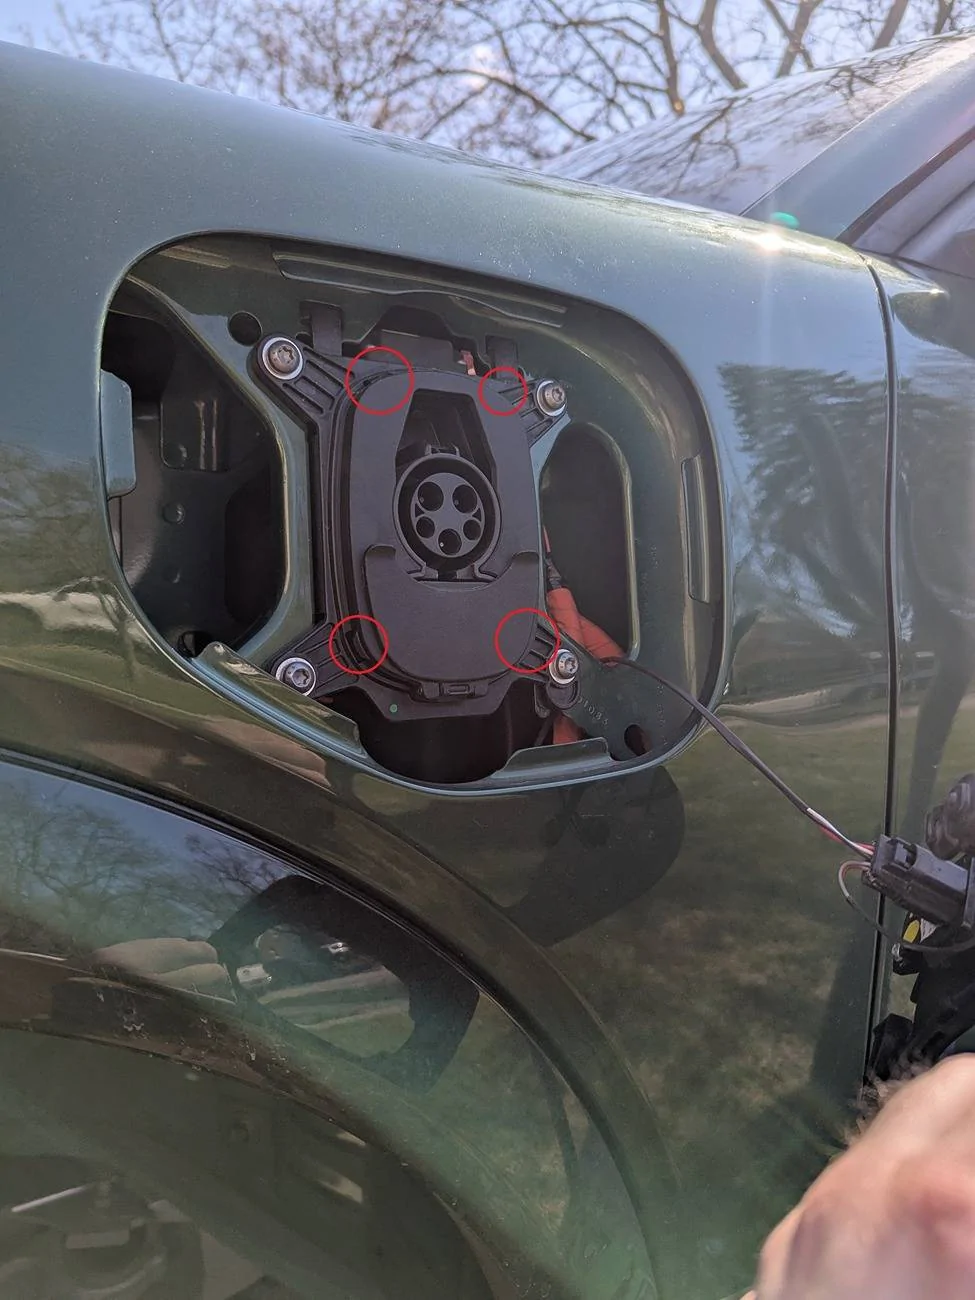
- The reassembly is easy and is essentially a reverse order.
- Slide the new charge pocket assembly in from the outside, and it will just clip in place. You will also need to snap the plastic ring around the charge port back into place.
- Reconnect the charge indicator wiring.
- I found it easiest to get the liner into a rough place and insert a couple of the fasteners at the top of the wheel well to hold it in place.
- I had to pay extra attention to the outer perimeter of the wheel well to make sure that I had the liner between the fender and the trim molding. It is a bit of a pain, but make sure that the liner is in between the trim and the fender itself.
- Be careful when pulling the liner back into the two clips underneath the car, as I could see this being a point where you could damage the liner.
- Self-explanatory and the lug nut torque spec is 150 ft/lbs.
- Slide the painted cover panel back into place on the new charge port door.
Step 8: Drink a beer after saving yourself over $500
Sponsored
