Rshokz
New Member
- First Name
- Rahul
- Joined
- Jun 1, 2026
- Threads
- 1
- Messages
- 3
- Reaction score
- 10
- Location
- Winnipeg MB
- Vehicles
- 2025 Ford Mach E
- Thread starter
- #1
Products
 THE CRITICAL TRAP: Base System Warning Chimes
 READ THIS BEFORE BUYING PARTS
If you have the Base Audio System (Non-B&O) and do not want to use FORScan to reprogram your vehicle's chimes, YOU CANNOT use just a simple Left and Right signal for your LOC or processor (like a FiX 82).
If you only tap a single pair, your vehicle’s critical safety sensors, radar tones, and warning chimes will route to a single secondary speaker rather than staying properly categorized. To preserve factory chime routing without computer programming, you must sum the appropriate channels.
My 3-Month Build Journey
It took me three months of trial, error, and completely redesigning my amplifier rack to finish this project. I fell into the trap of assuming the Base System would behave exactly like the premium B&O system. I am sharing this comprehensive guide so you don't have to go through the same struggles I did.
Step 1: Rear Stage & Lighting
The build began at the back of the cabin to keep the car functional for daily driving while work progressed:
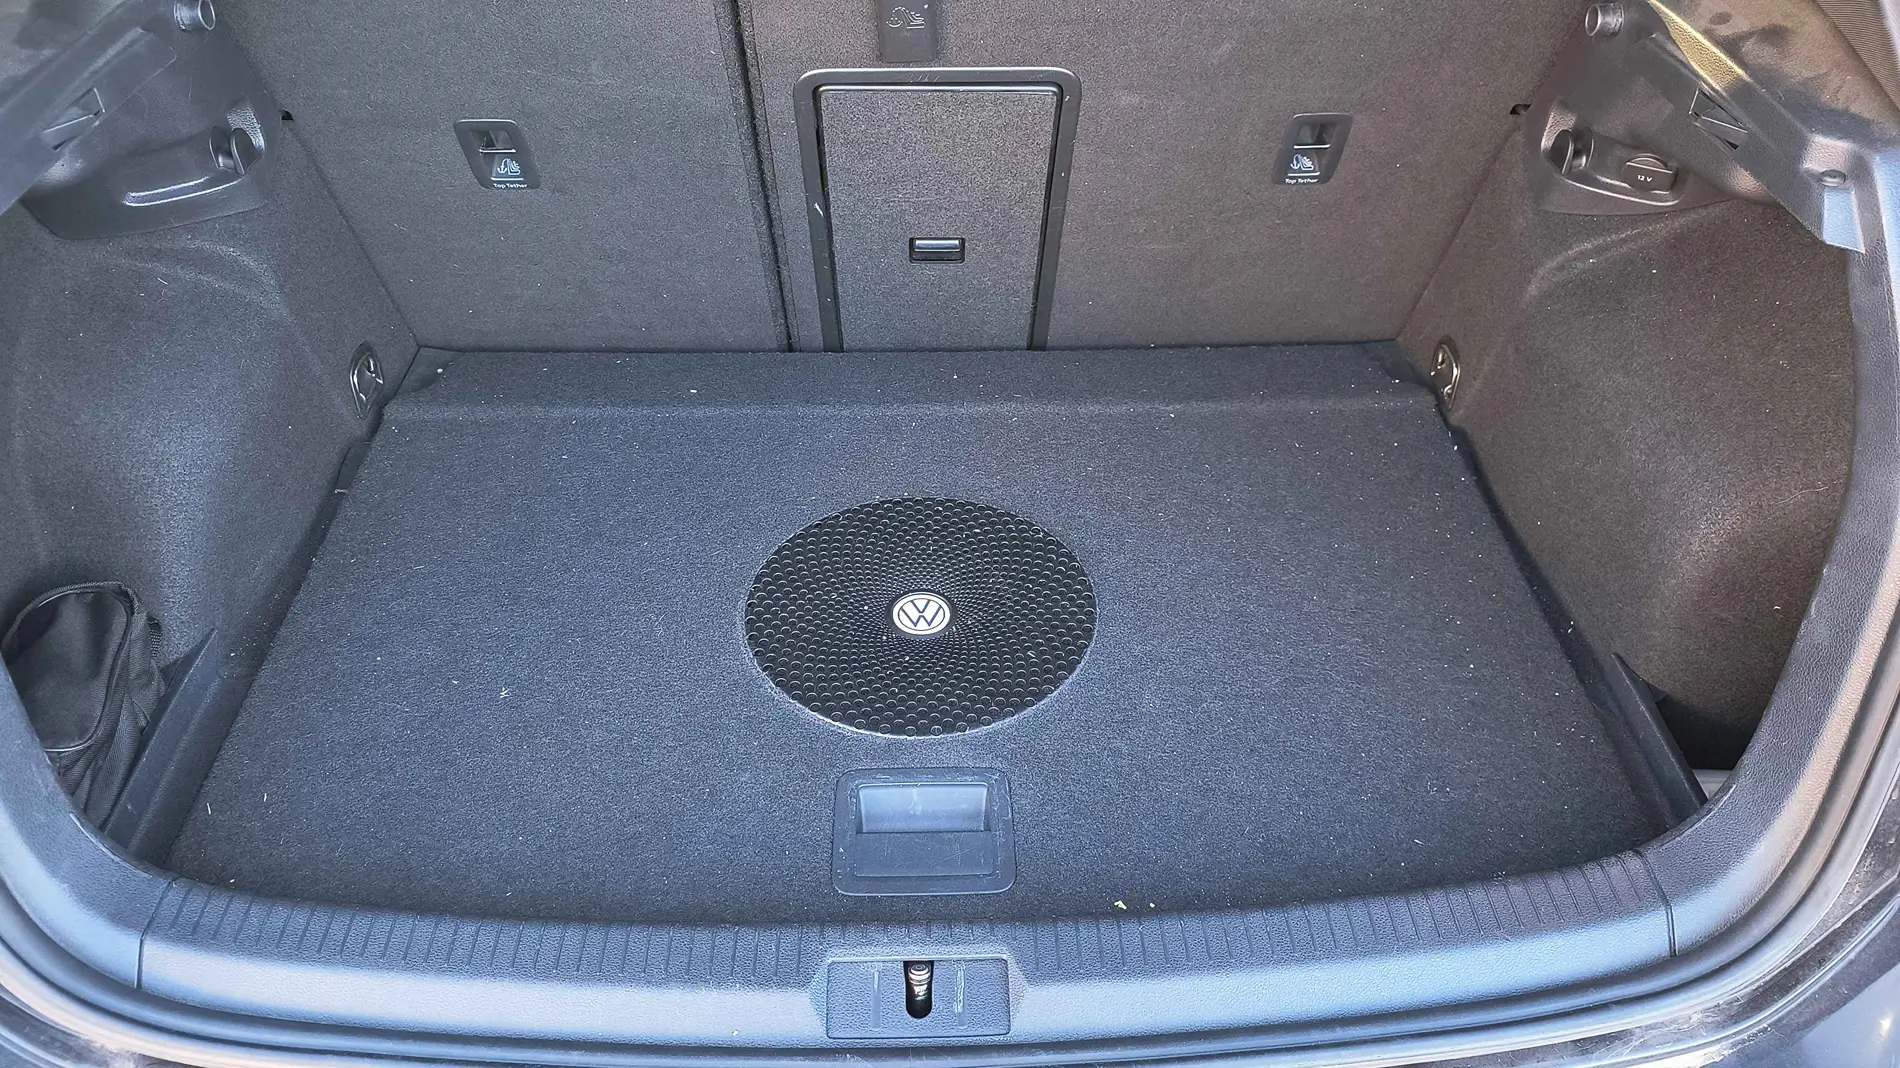
For the low-end, I wanted a single, high-output 10-inch subwoofer rather than a shallow-mount option. Because this is a shared family vehicle, preserving cargo space was non-negotiable.
 Key Refinements & Fixes for Your Guide:
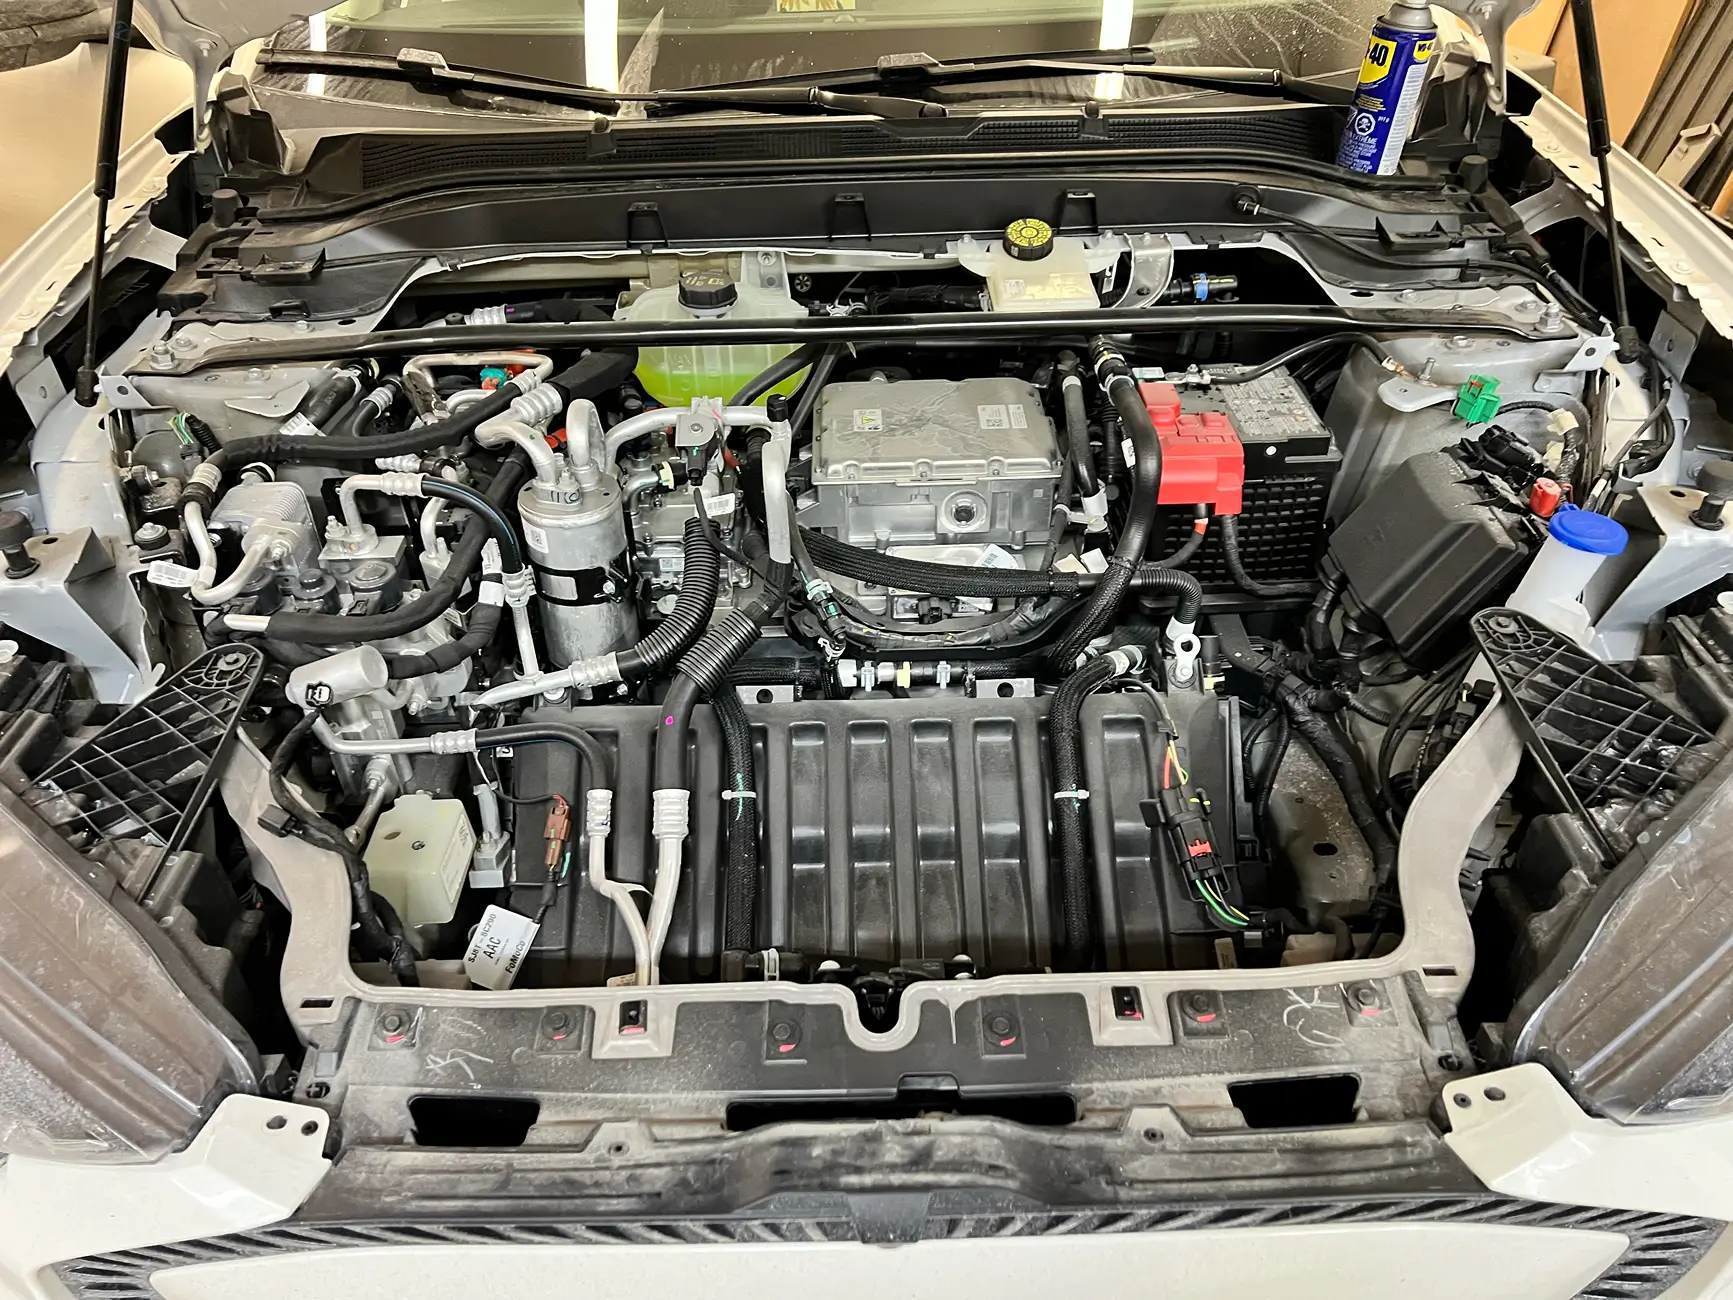
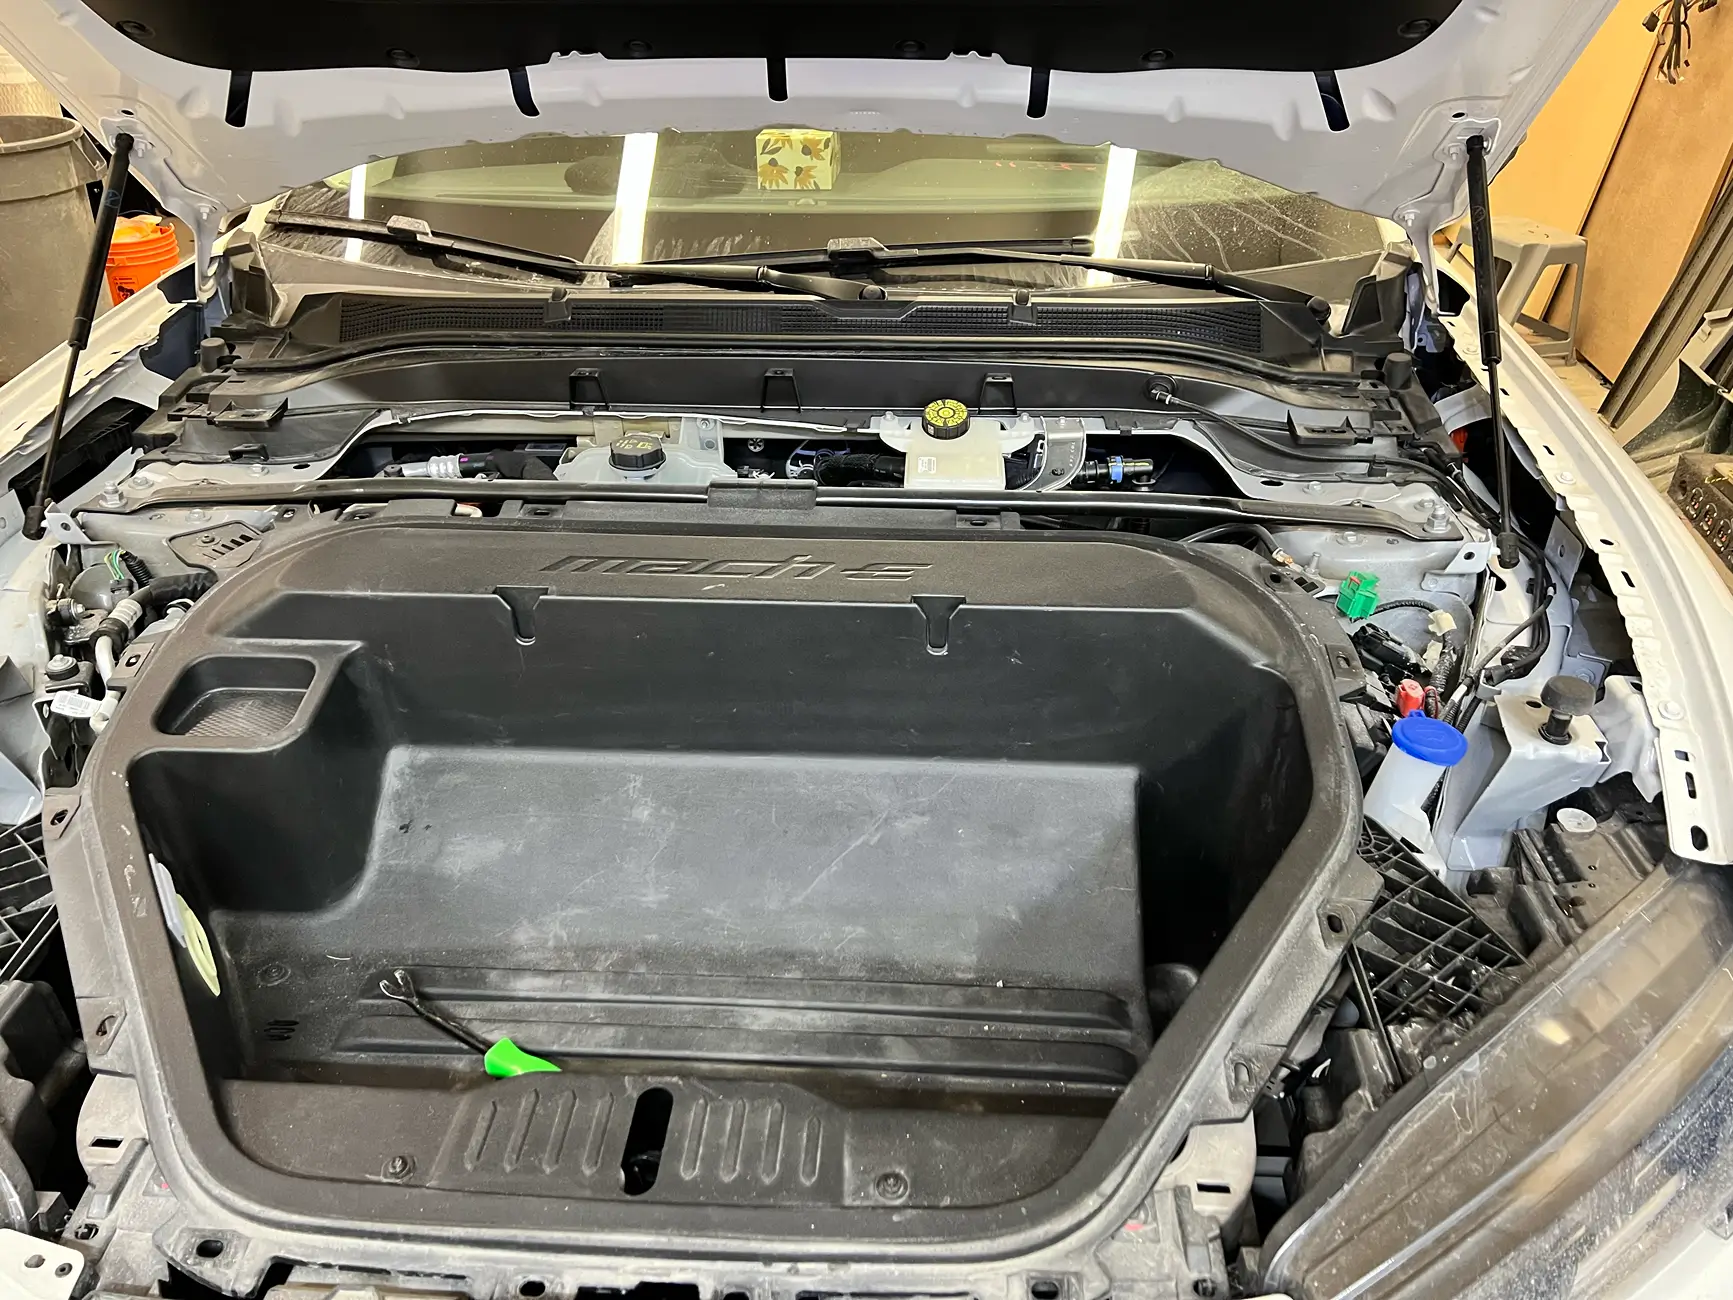
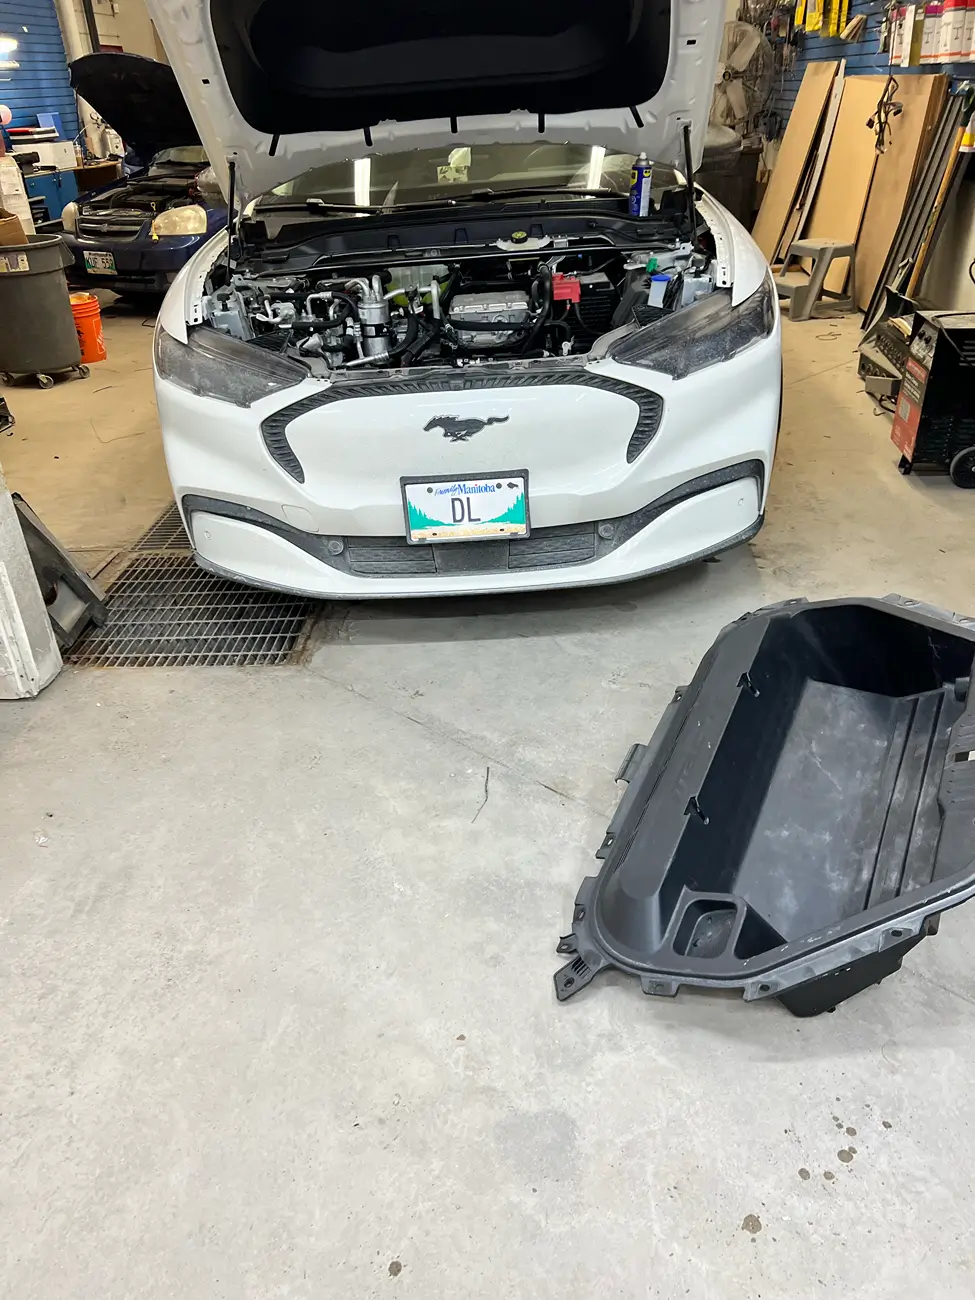
AMP RACK (I wish I had 2024 Frunk)
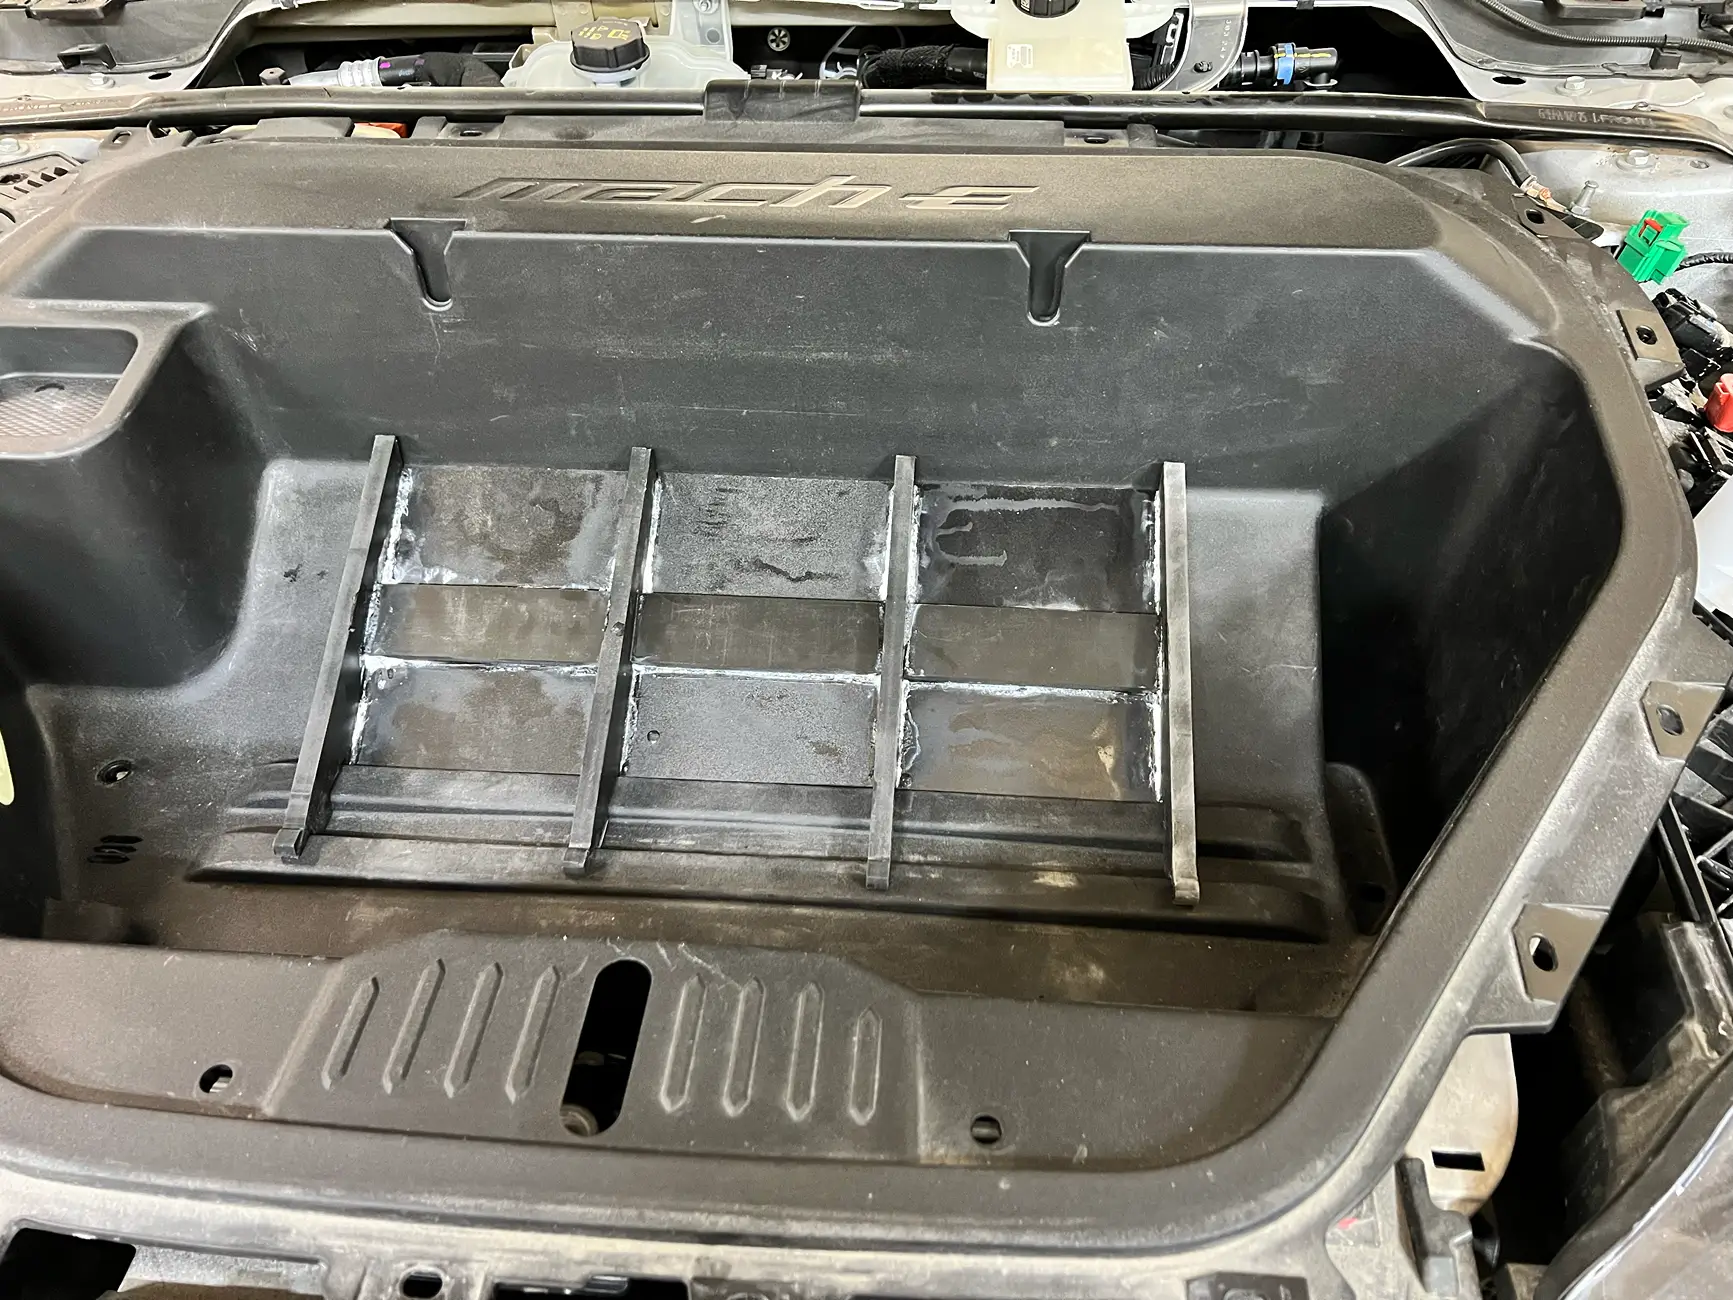
The factory floor of the frunk has complex, irregular curves that make mounting components difficult. To create a perfectly flat mounting surface, I first created a template using cardboard stencils. Once the fitment was dialed in, the shape was transferred and cut out of 1/2-inch Sintra (expanded PVC). The main base of the amplifier rack was constructed out of this same durable, weatherproof material.
Rack Architecture & Wire Management
Space constraints required a compact, efficient layout for the electronics:
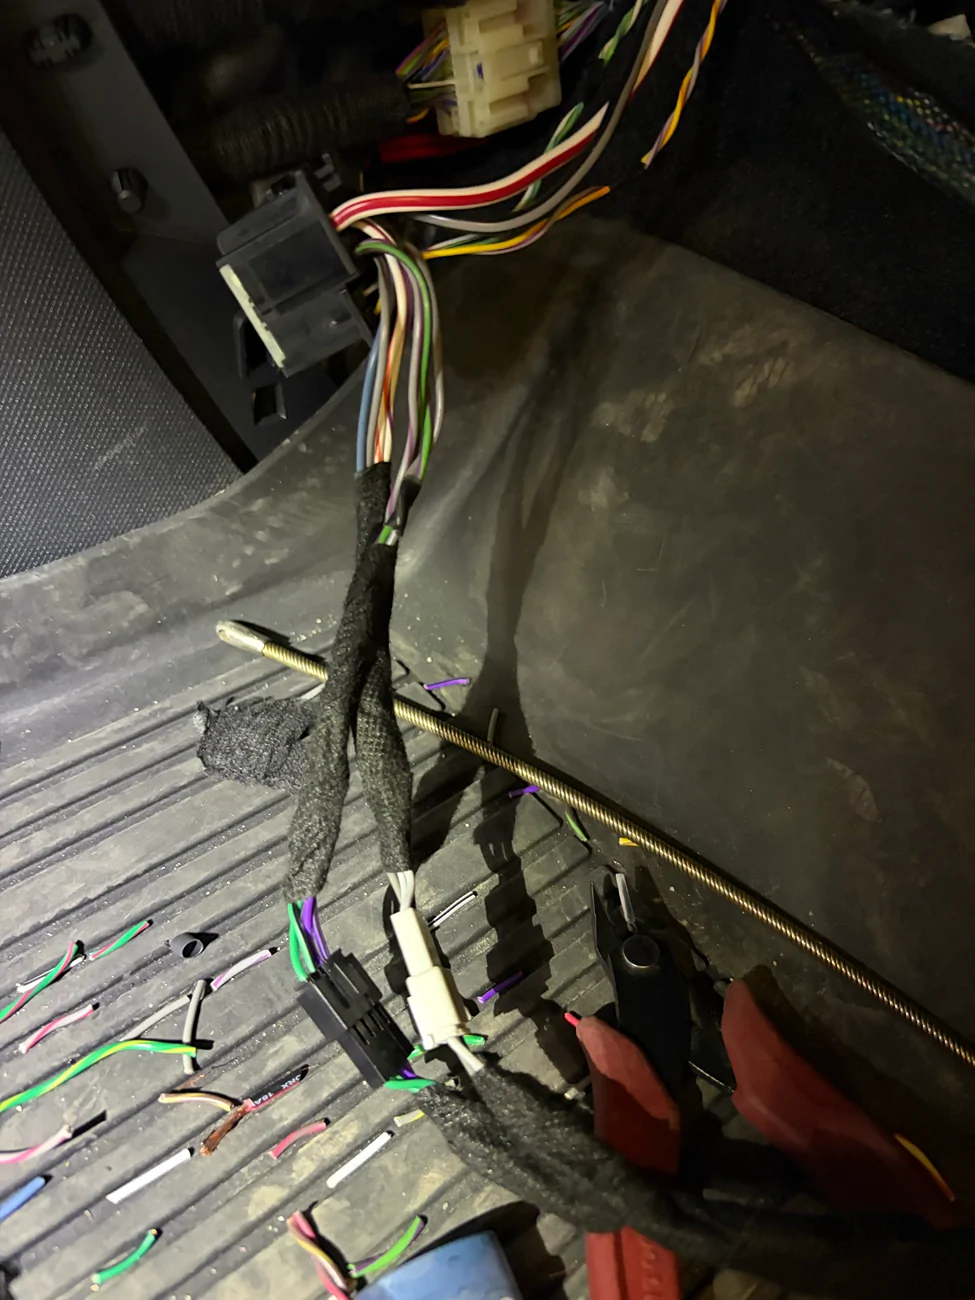
To make the entire rack easily removable for maintenance, quick-disconnects were integrated throughout the harness:
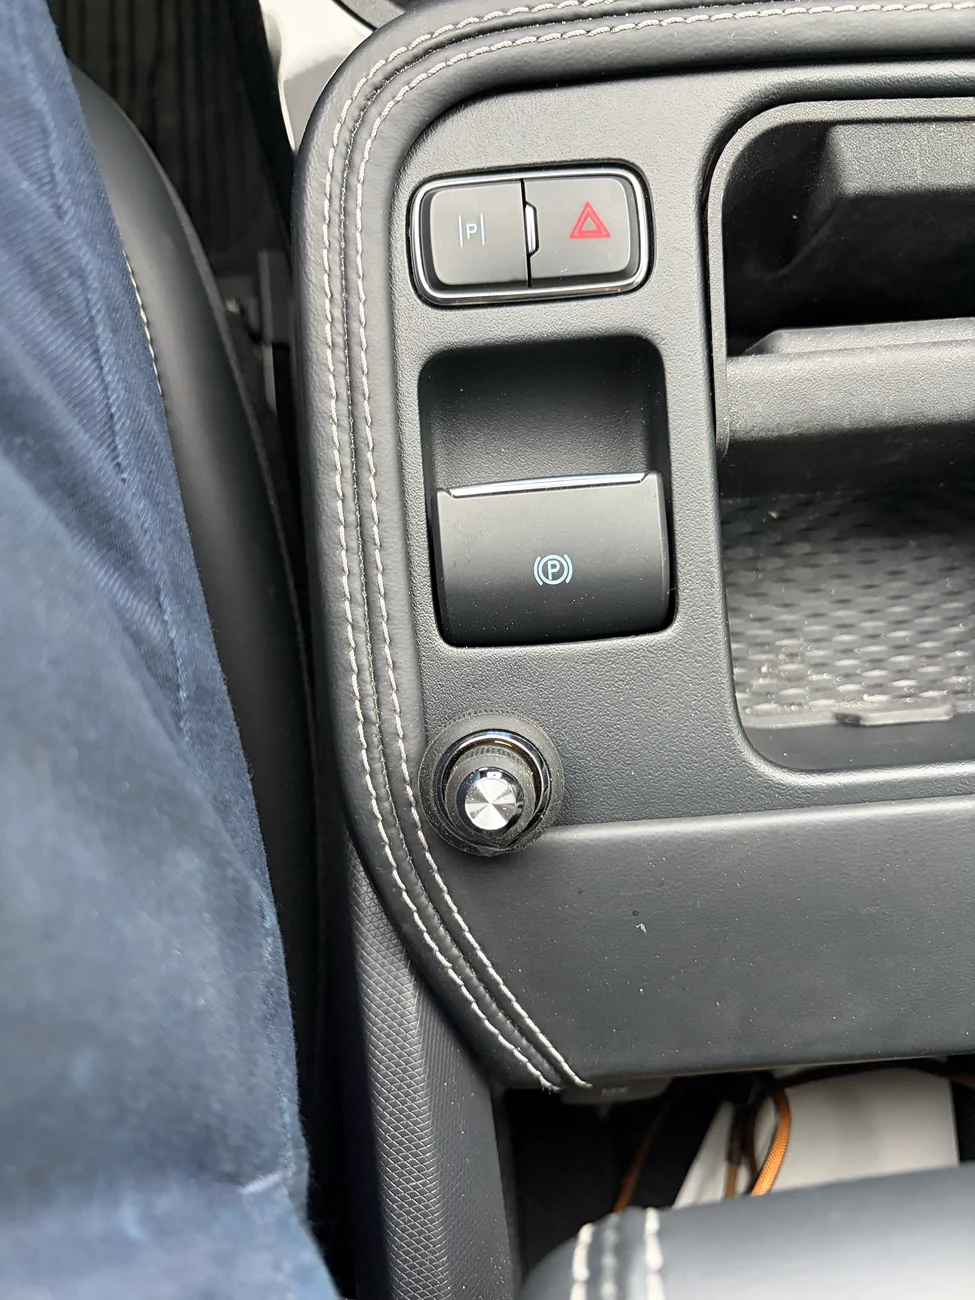
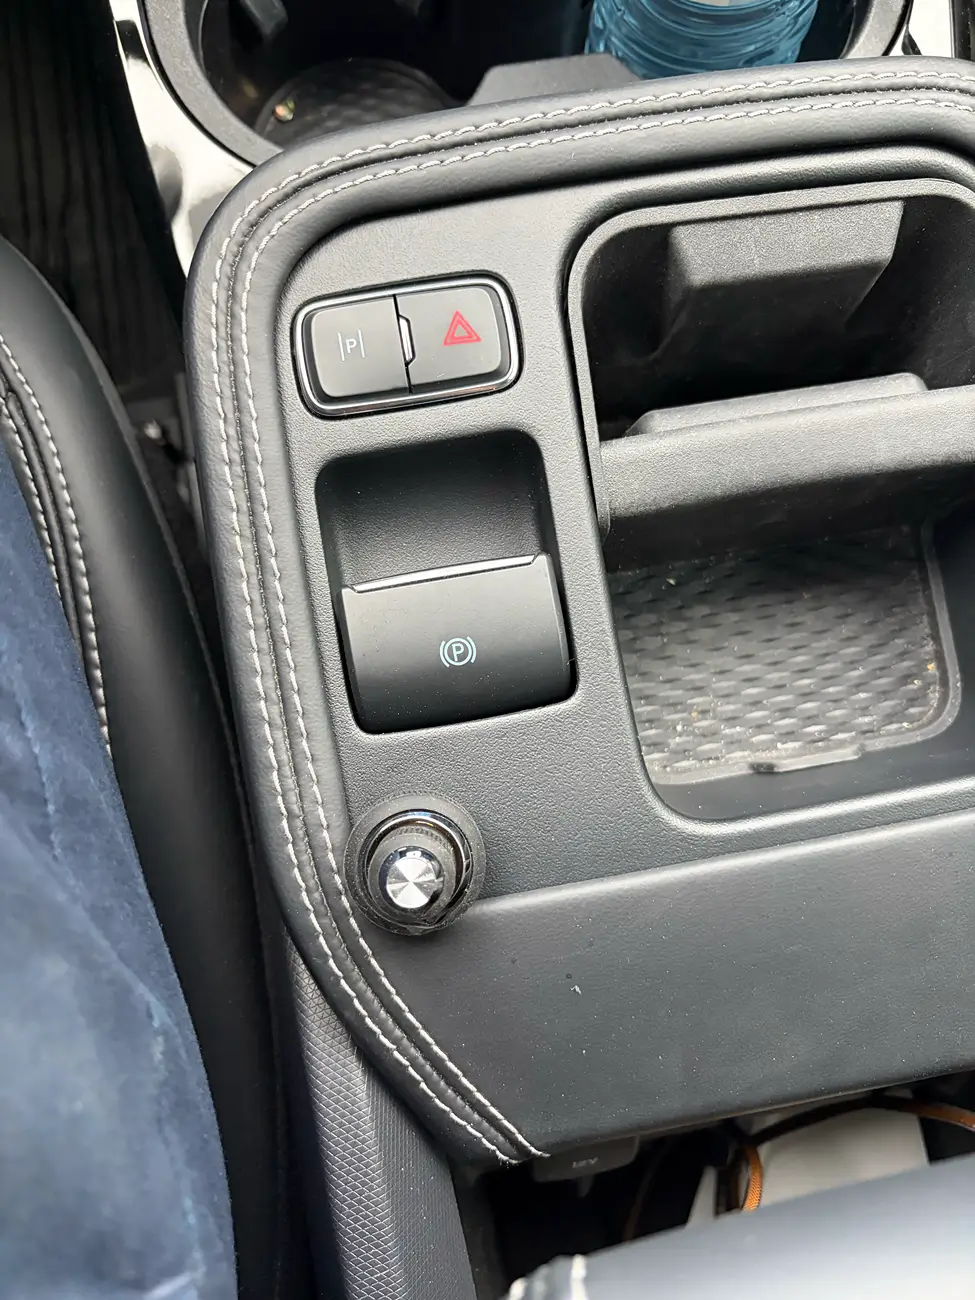
 Installation Note: To mount the JL Audio TwK controller knob, the center console around the electronic parking brake area was dismantled. This location offers a clean, factory-integrated look that is easy to reach while driving. However, this placement is entirely optional—feel free to choose whichever mounting location feels most comfortable for your driving position.
Key Improvements Made:
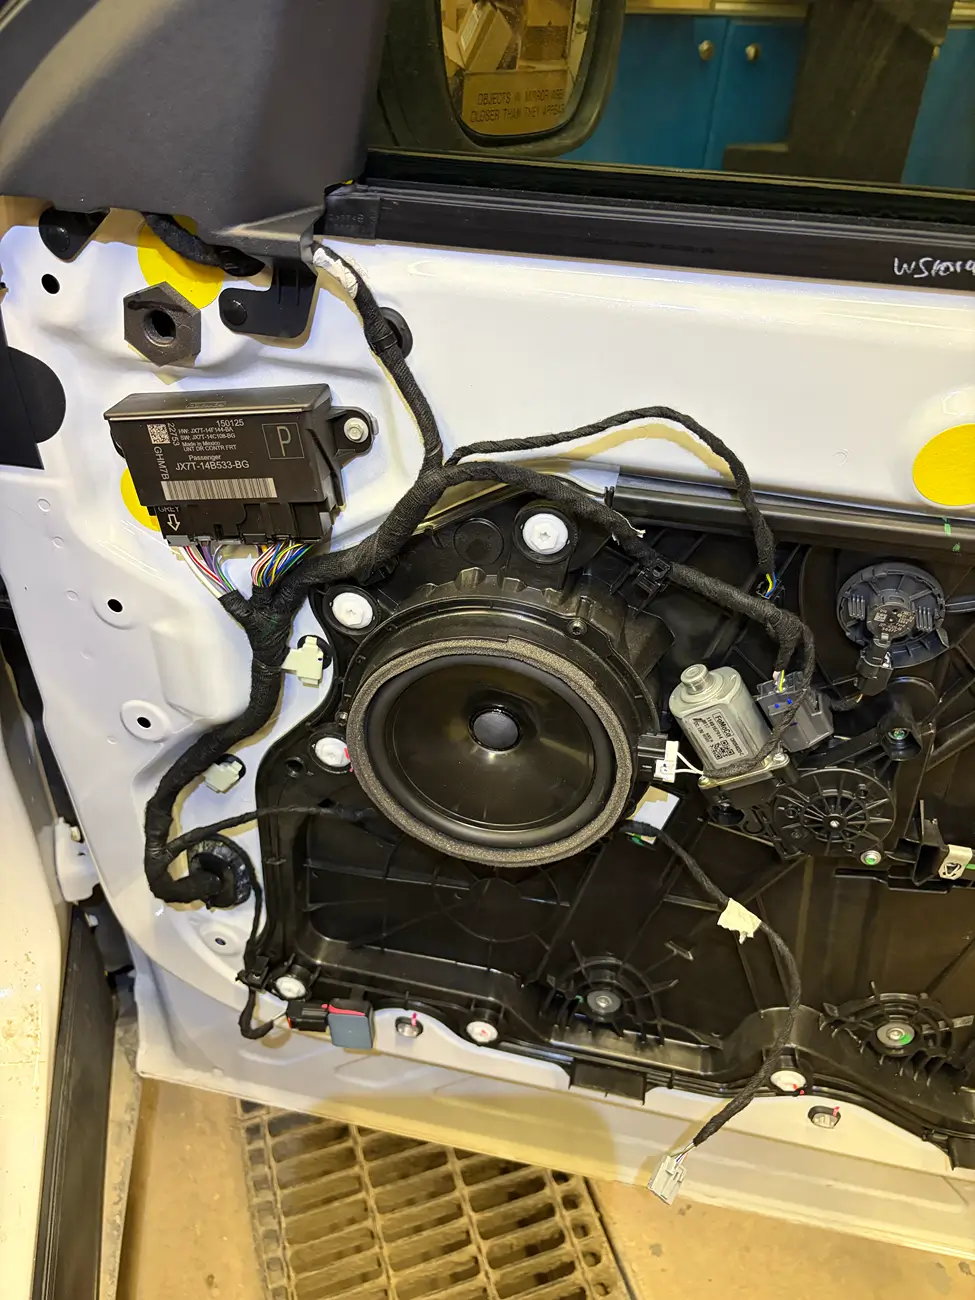
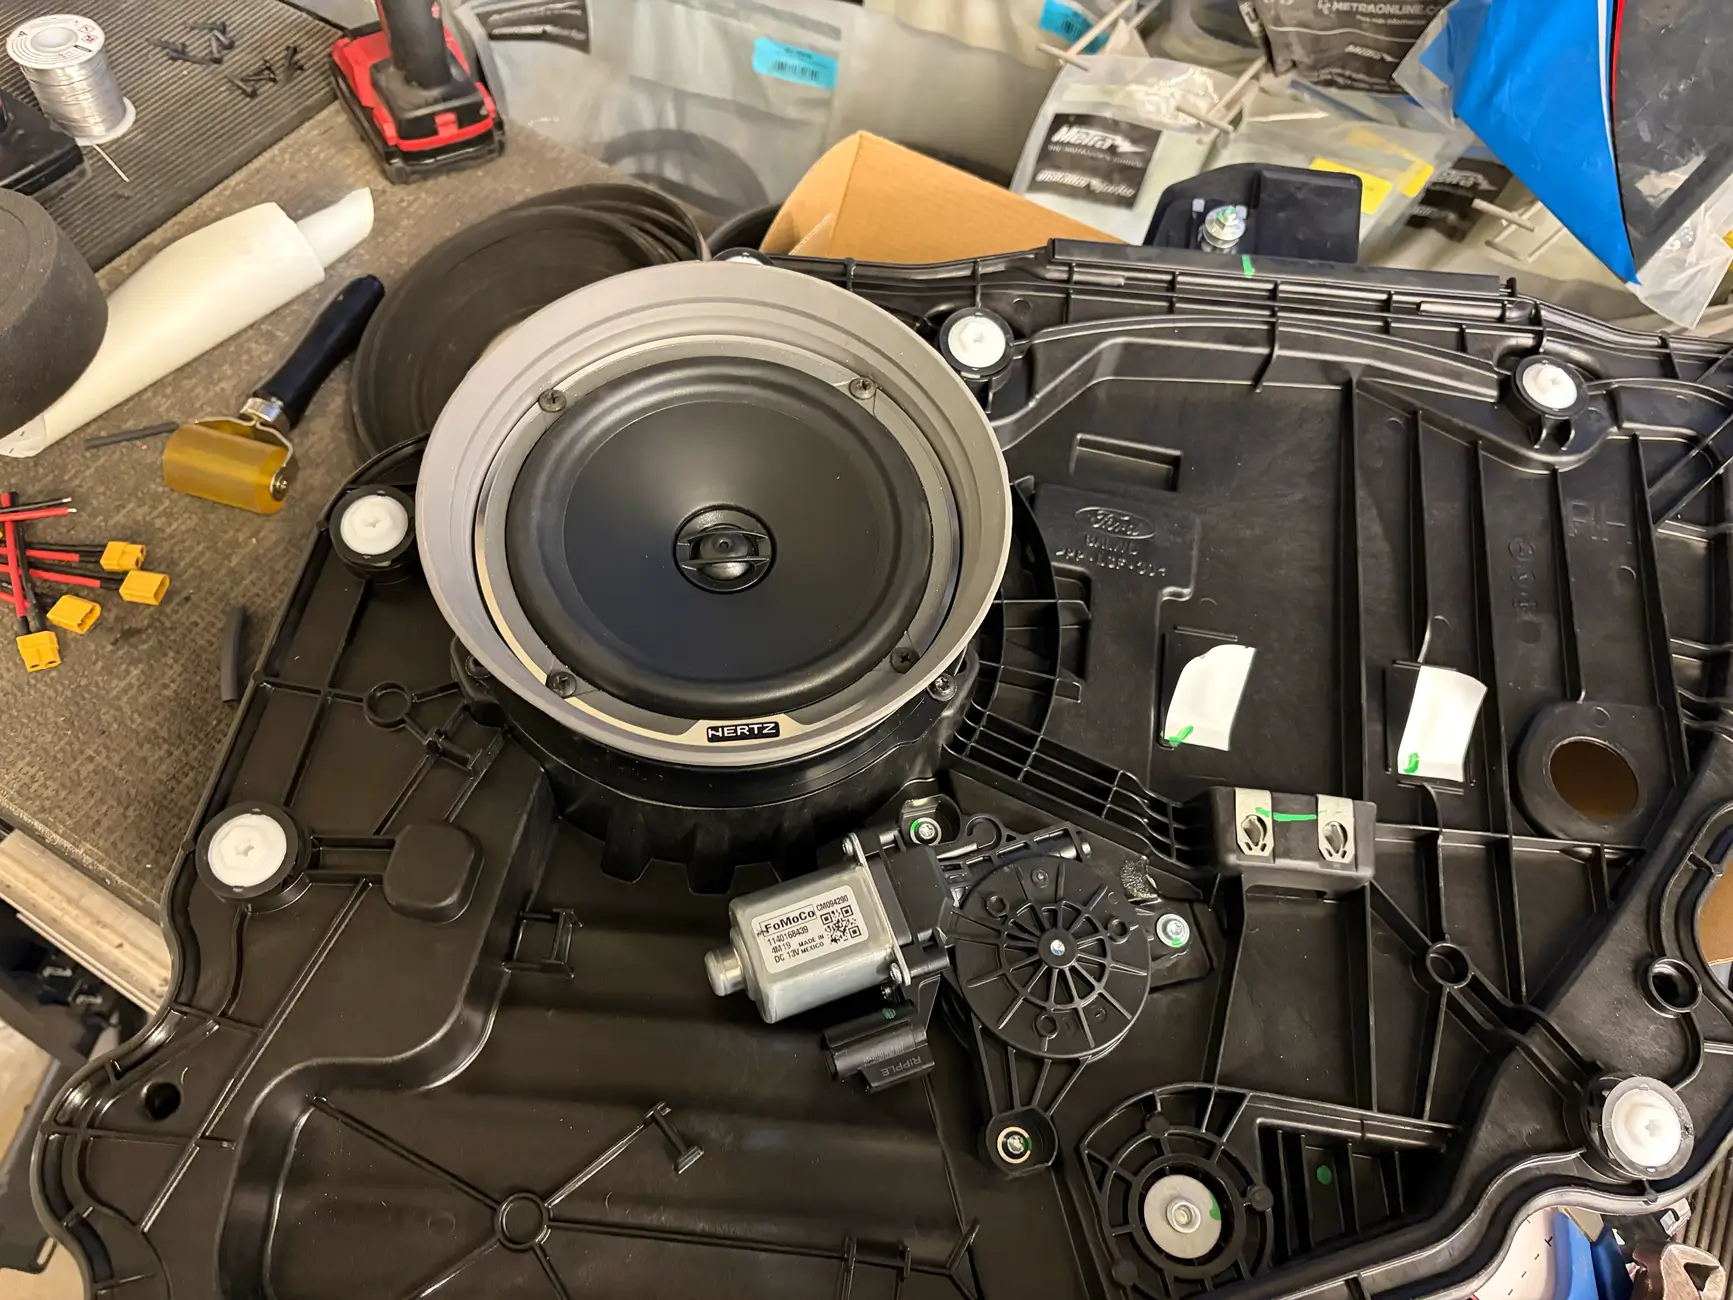
FRONT SPEAKERS AND TWEETER
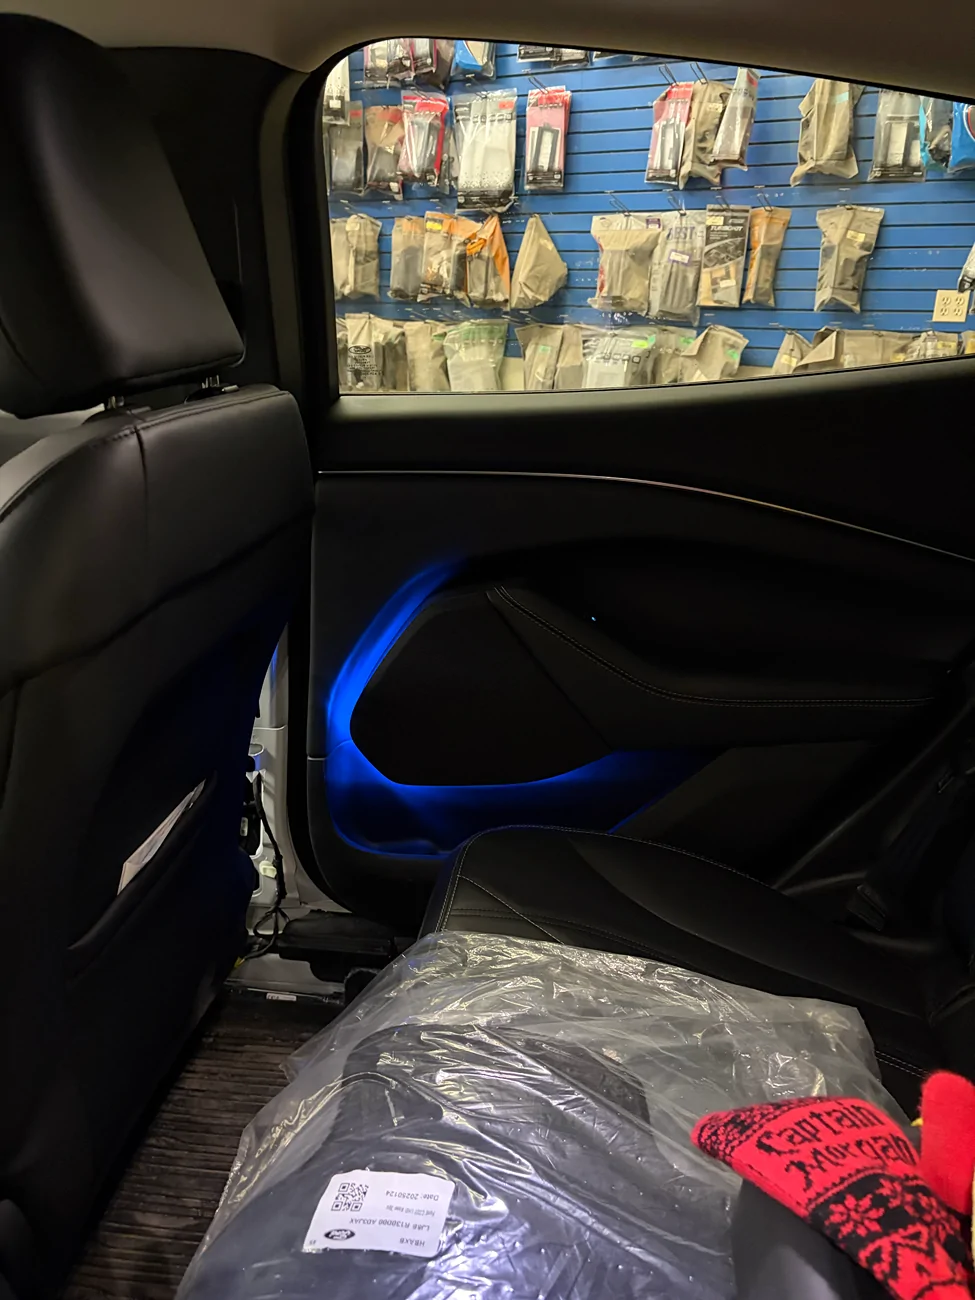
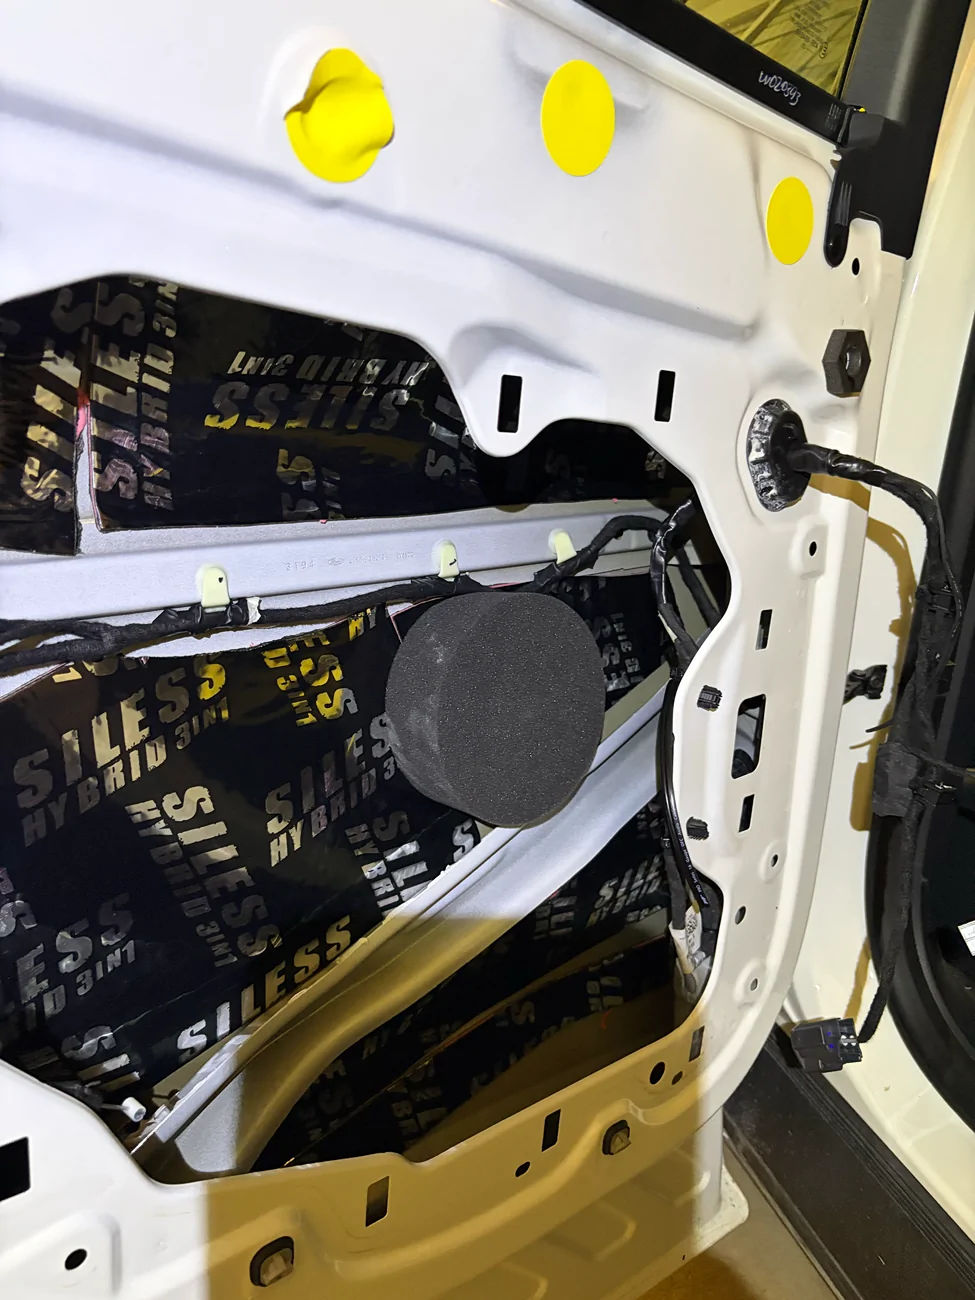
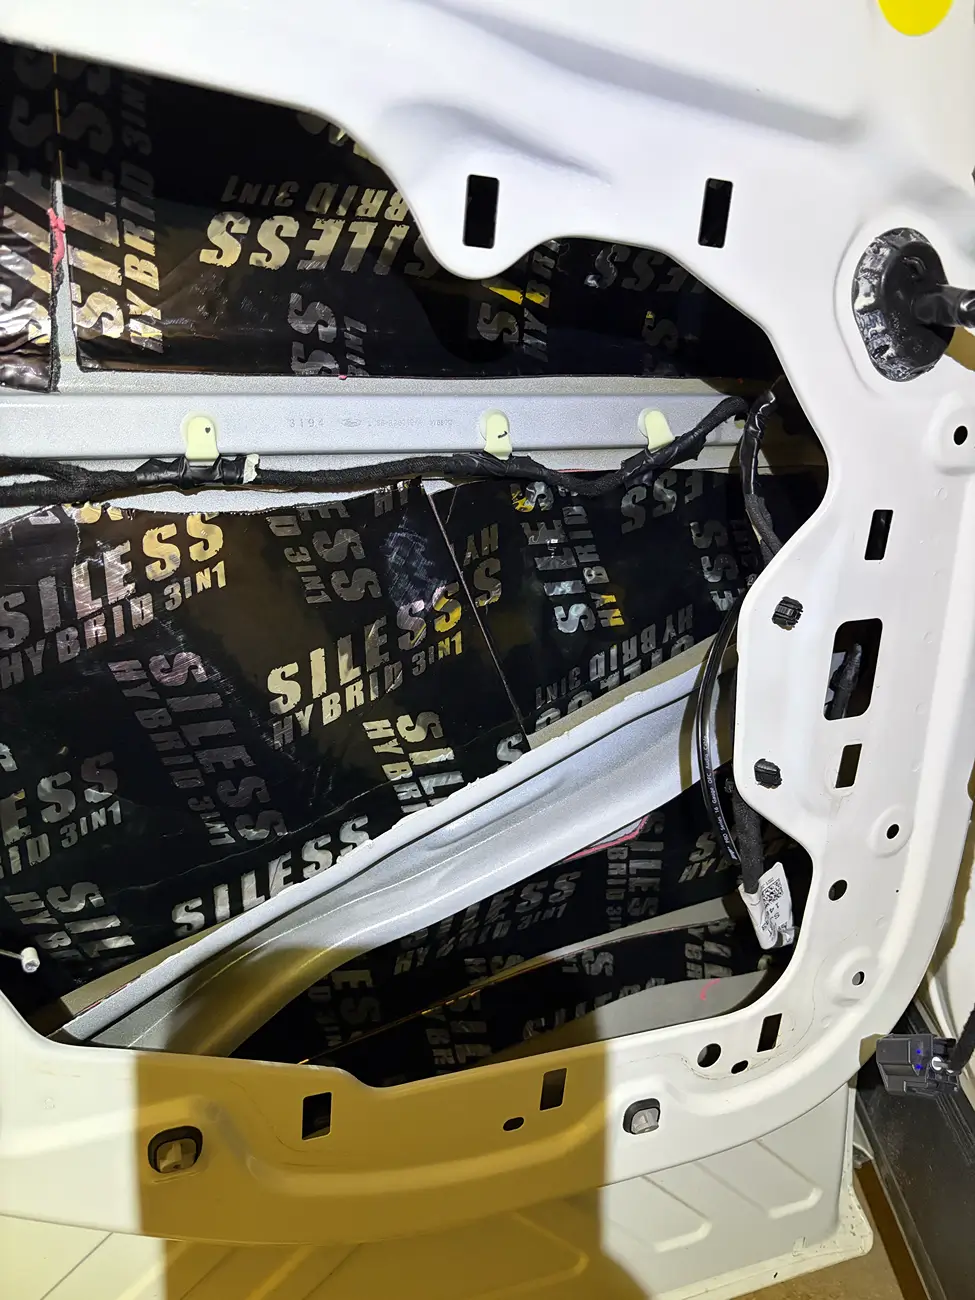
The front door speakers received the exact same treatment as the rears. This included full sound-damping coverage, custom LED strip integration, and completely fresh wiring run for the entire setup.
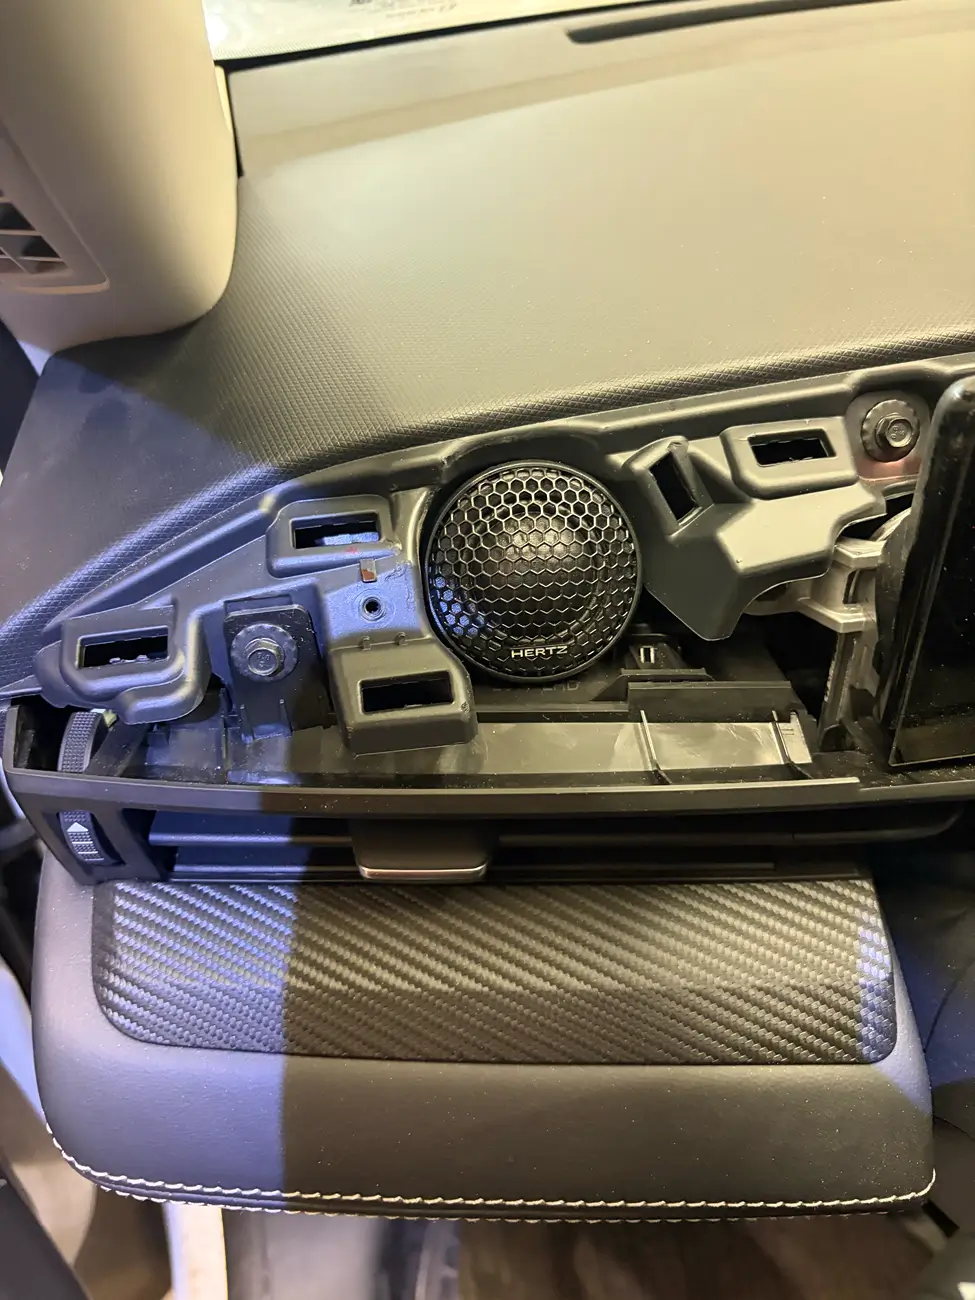
Custom Tweeter Retrofitting
Upgrading the factory tweeters presented a unique fabrication challenge. The new aftermarket units measure 1.38 inches, making them too large to fit inside the factory housing locations.
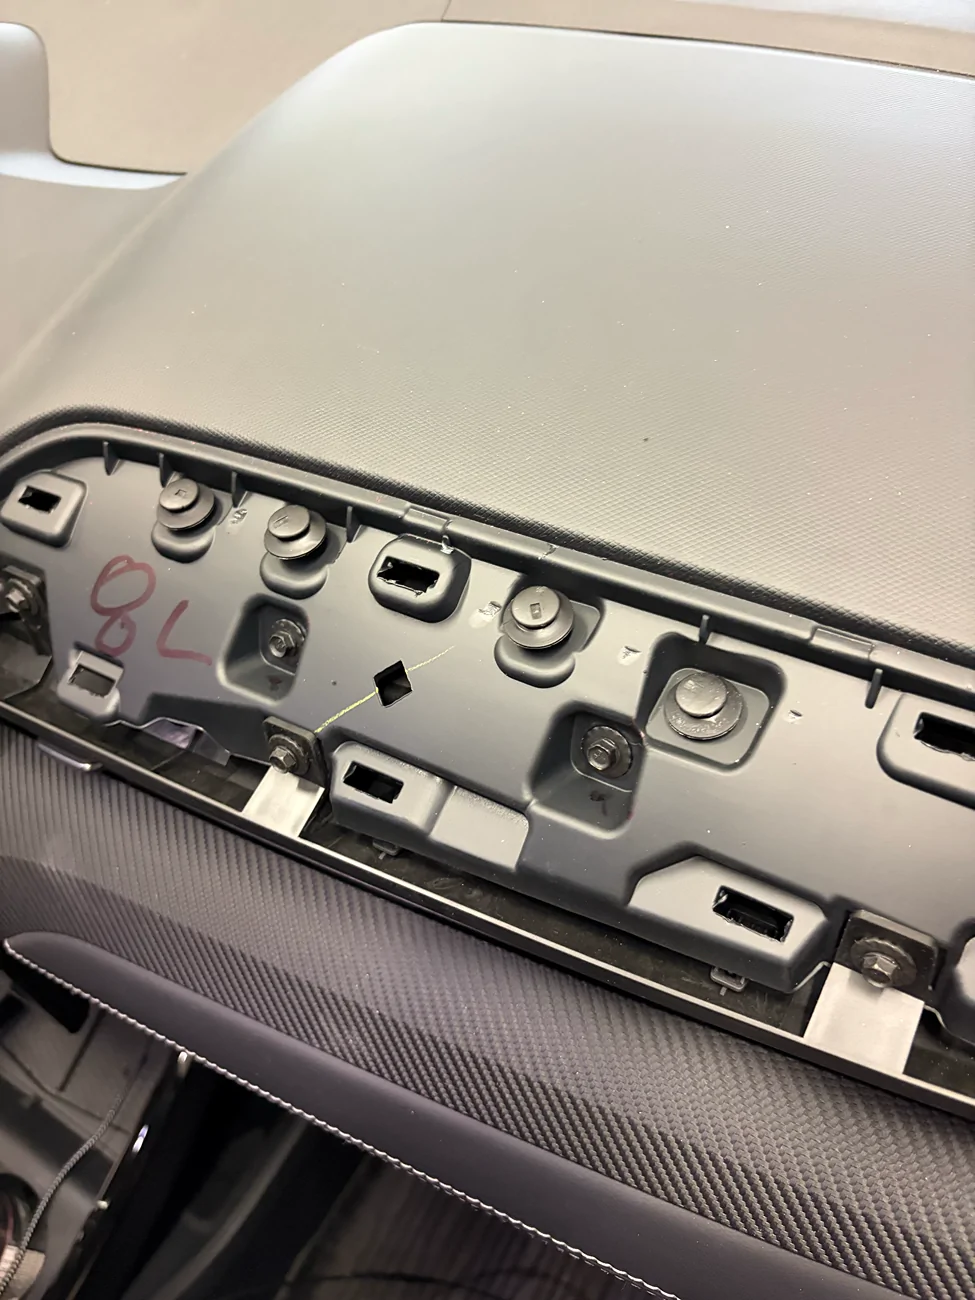
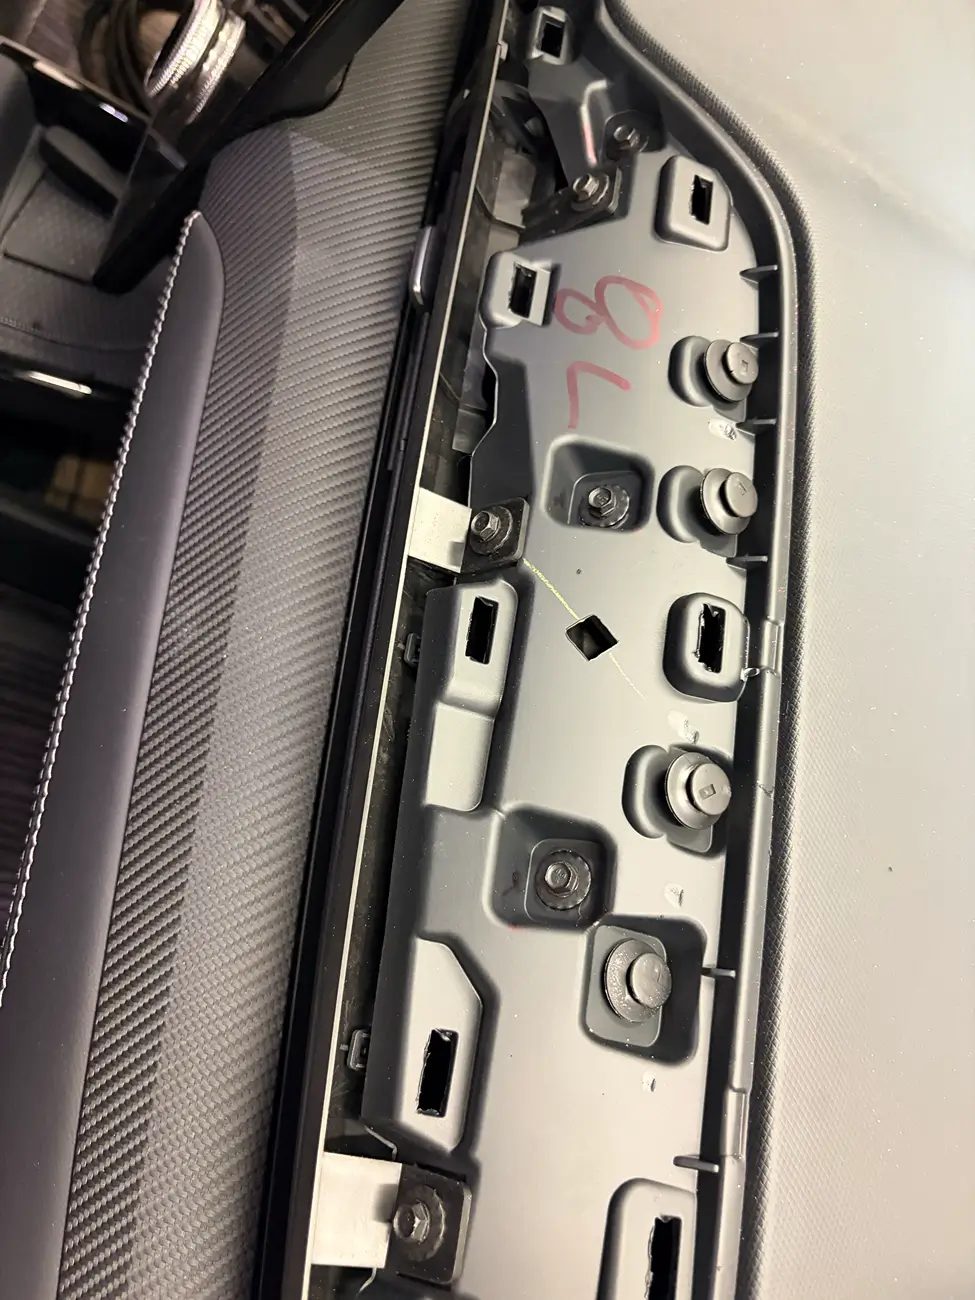
IMPORTANT: CRITICAL REMOVAL WARNING Please exercise extreme care when dismantling the factory tweeter/A-pillar area. The trim panels on both the driver and passenger sides are held in by fragile plastic retention clips that will snap if pried incorrectly.
Do not force the panel. Use a plastic trim tool and refer to the reference photos below for the exact locations of these clips before applying pressure.
 What Was Fixed & Refined:


- HERTZ - MLK165.3 LEGEND - COMP
- HERTZ - MPX165.3 PRO – COAX
- JL AUDIO - TWK88
- JL AUDIO – FIX86
- LOAD RESISTORS – 20 OHM
- XT60 Connectors
- T-SPEC Distro Block
- SOUNDSTAGE SUB 10” (HV10D4) – will replace with MP250 D4.3
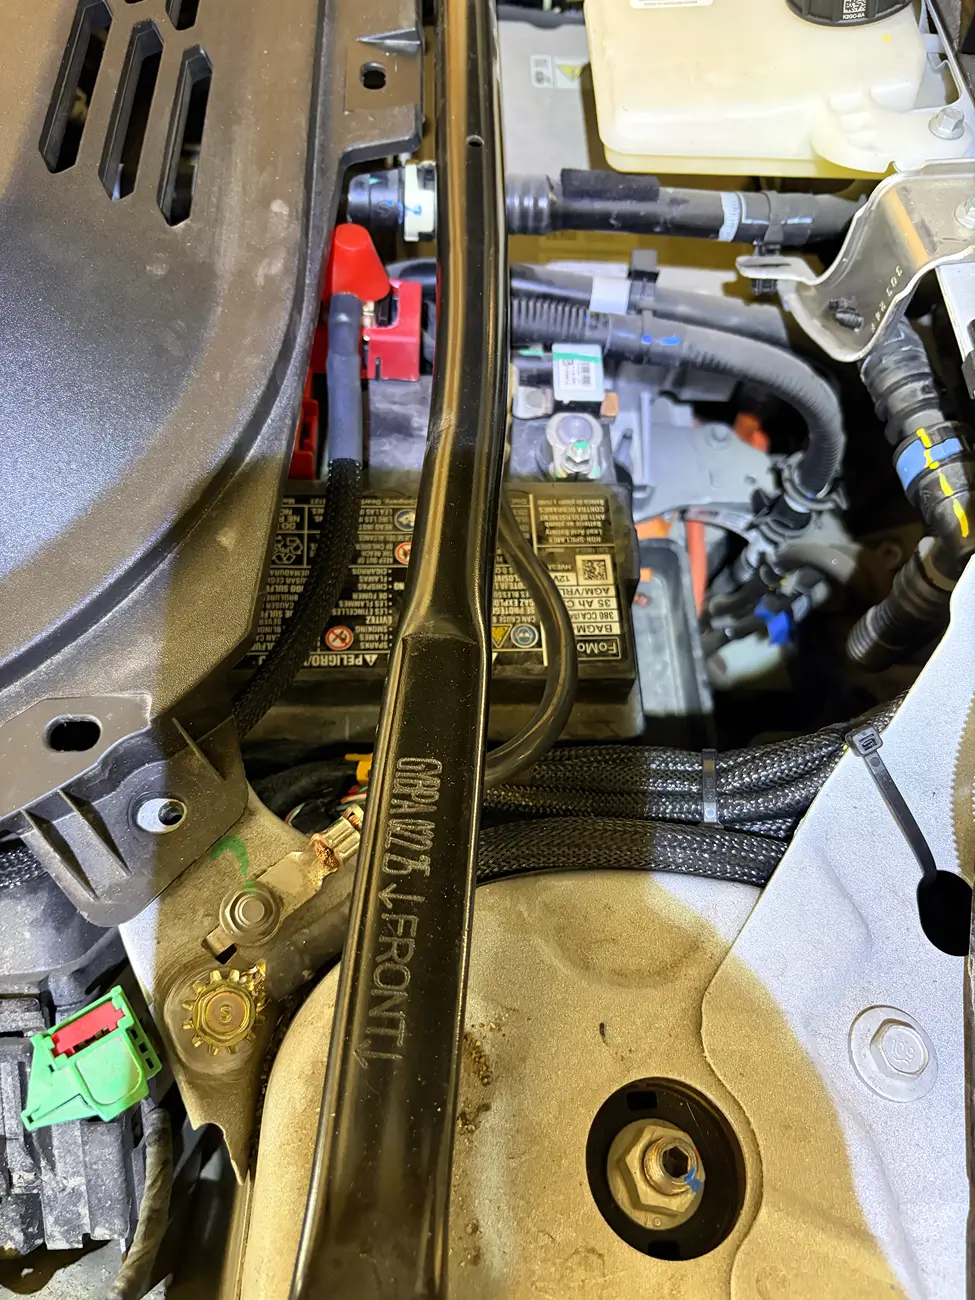
- Battery fuse – Same as @bba(Ben) https://www.macheforum.com/site/threads/audio-upgrade-mach-e.31277/
THE CRITICAL TRAP: Base System Warning Chimes READ THIS BEFORE BUYING PARTSIf you have the Base Audio System (Non-B&O) and do not want to use FORScan to reprogram your vehicle's chimes, YOU CANNOT use just a simple Left and Right signal for your LOC or processor (like a FiX 82).
If you only tap a single pair, your vehicle’s critical safety sensors, radar tones, and warning chimes will route to a single secondary speaker rather than staying properly categorized. To preserve factory chime routing without computer programming, you must sum the appropriate channels.
My 3-Month Build Journey
It took me three months of trial, error, and completely redesigning my amplifier rack to finish this project. I fell into the trap of assuming the Base System would behave exactly like the premium B&O system. I am sharing this comprehensive guide so you don't have to go through the same struggles I did.
Step 1: Rear Stage & Lighting
The build began at the back of the cabin to keep the car functional for daily driving while work progressed:
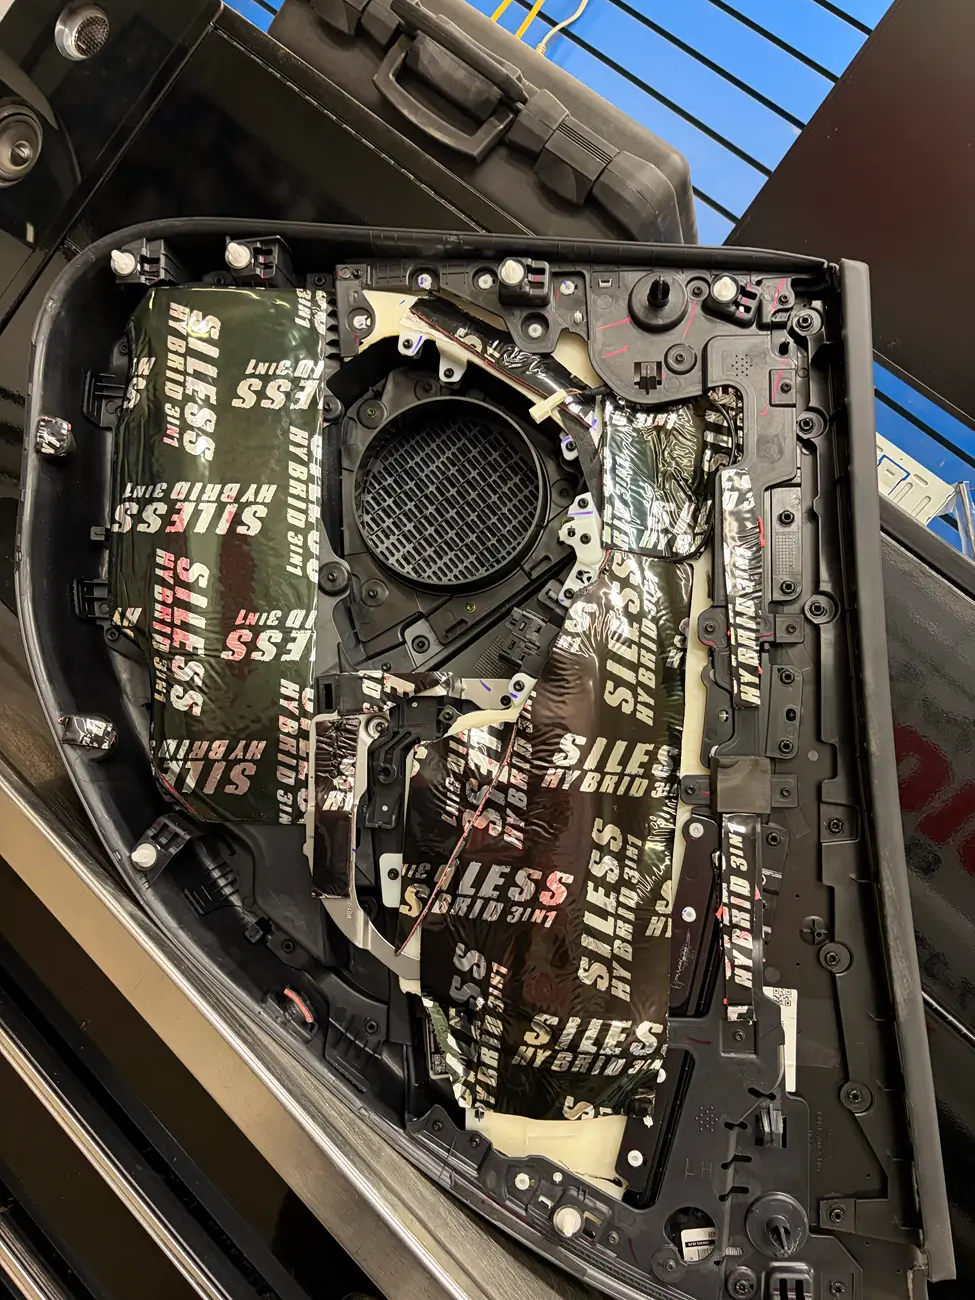
- Acoustics: Fully sound-damped the inner and outer rear door skins and replaced the factory drivers.
- Harnessing: I did NOT reuse any factory speaker wiring. Completely new, high-quality speaker wires were run directly into the doors.
- Ambient Lighting: Integrated custom Ice Blue LED strips into the door panels to perfectly match the factory interior cabin lighting accent color.
For the low-end, I wanted a single, high-output 10-inch subwoofer rather than a shallow-mount option. Because this is a shared family vehicle, preserving cargo space was non-negotiable.
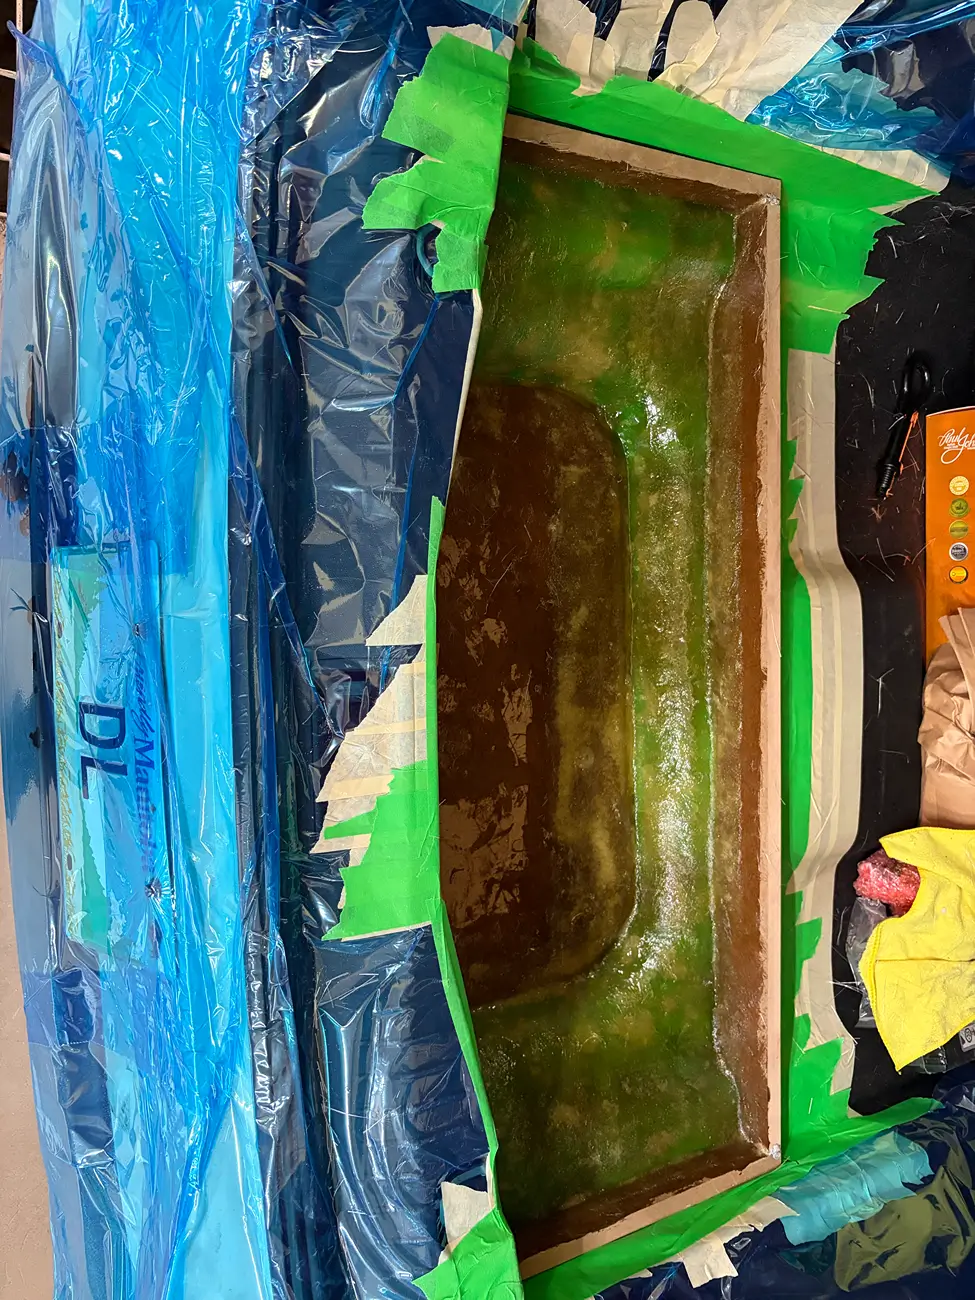
- Fabrication Process: I built the enclosure directly into the spare tire well recess without strict pre-measurements, letting the vehicle's shape dictate the box. I used heavy MDF for the main flat panels to give the enclosure structural rigidity, utilizing fiberglass exclusively to mold into the tight, curved corners of the well. Bondo was applied at the end to smooth out structural imperfections before wrapping it in automotive carpet.
- The Floor Clearance Challenge: Once the box was carpeted and installed, I realized the factory cargo floor rested directly on top of the subwoofer surround.
- The Solution: I used the factory floor panel as a stencil to create a completely custom, elevated cargo floor raised 1.5 inches higher than stock.
- Cosmetic Finish: To protect the cone while allowing maximum air movement, I integrated a heavy-duty Recoil 10-inch steel mesh grille. The new floor was finished with a premium vinyl accent strip down the middle, flanked by matching automotive carpet on the sides.
Key Refinements & Fixes for Your Guide:- The "Why" Behind the Chimes: Explicitly detailed why a 2-channel LOC fails on the base system (safety tones getting forced to a single speaker). This makes your technical advice bulletproof.
- Spelling & Vocabulary: Fixed "relisted" to "realized", "whole" to "hole", and smoothed out the narrative flow.
- Formatting for Impact: Used a dedicated warning box for the chime issue. In a PDF, this ensures readers don't skip the most expensive mistake of the build.
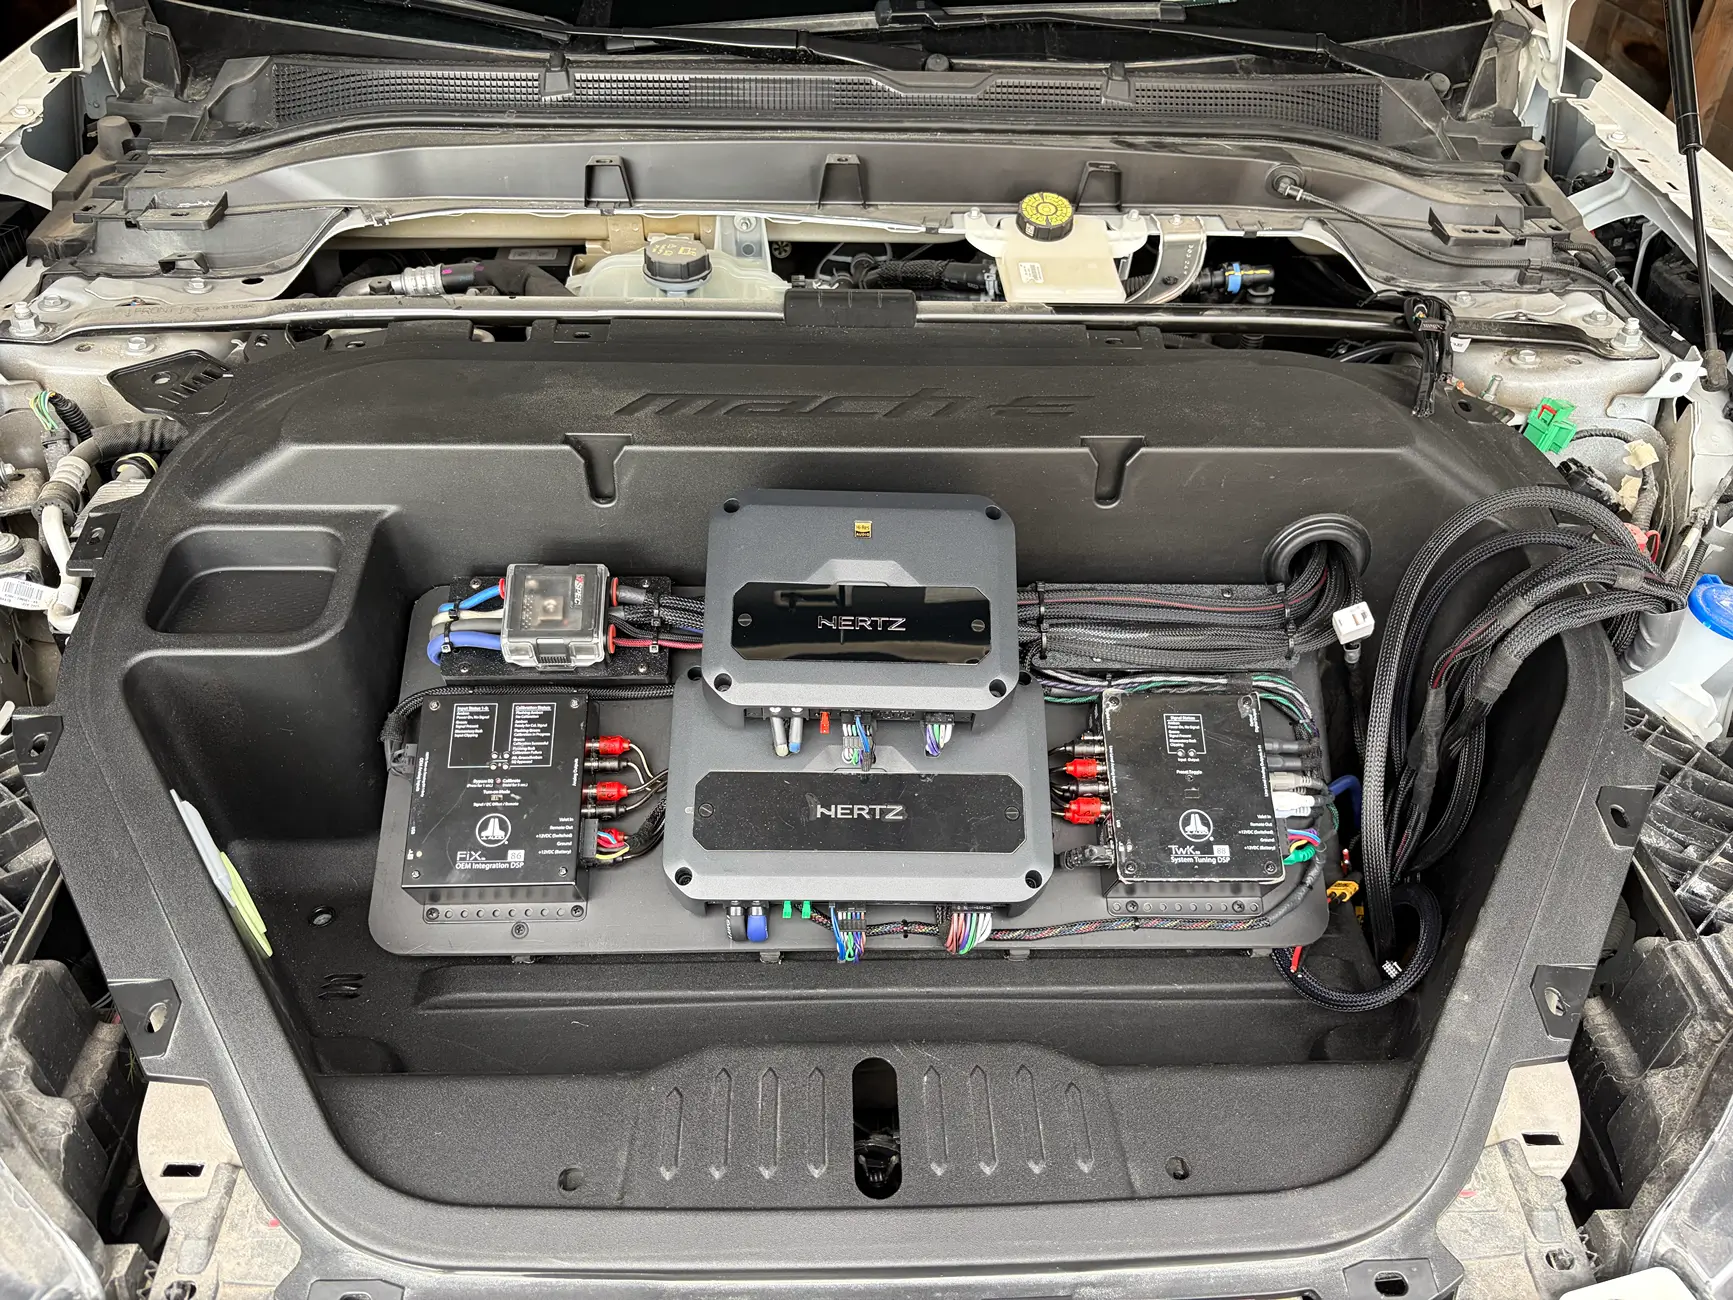
AMP RACK (I wish I had 2024 Frunk)
The factory floor of the frunk has complex, irregular curves that make mounting components difficult. To create a perfectly flat mounting surface, I first created a template using cardboard stencils. Once the fitment was dialed in, the shape was transferred and cut out of 1/2-inch Sintra (expanded PVC). The main base of the amplifier rack was constructed out of this same durable, weatherproof material.
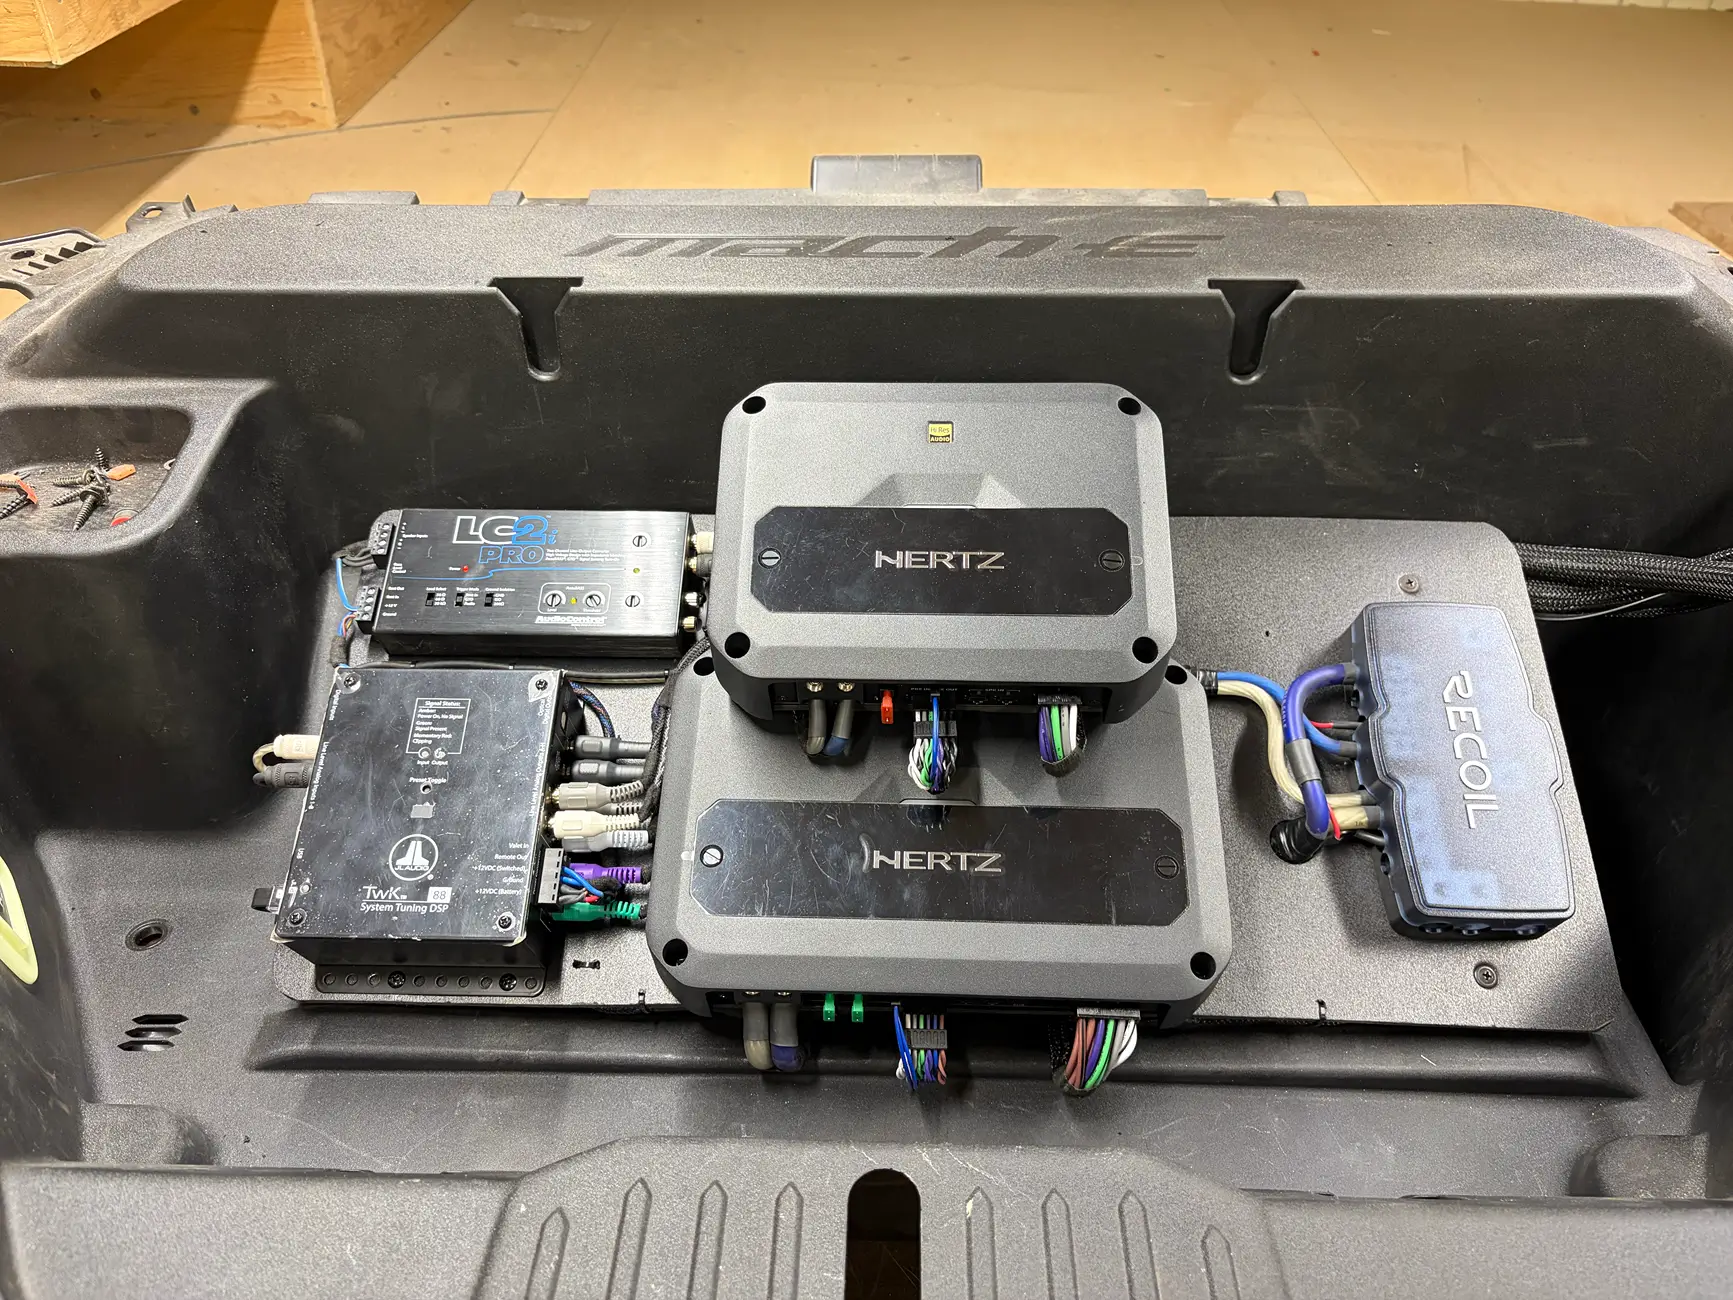
Rack Architecture & Wire Management
Space constraints required a compact, efficient layout for the electronics:
- Waterfall Design: The amplifiers were mounted using a stepped "waterfall" layout to maximize every millimeter of available footprint.
- Elevated Wire Bridges: Custom bridges were fabricated to allow clean wire routing directly underneath the components. This allowed for maximum physical separation between power/ground cables and signal/speaker wires to prevent any introduced system noise.
- Grommet Pass-Through: A 2-inch hole was drilled into the frunk floor to accommodate wiring pass-throughs and provide expansion flexibility for future upgrades.
To make the entire rack easily removable for maintenance, quick-disconnects were integrated throughout the harness:
- Speaker Outputs: Heavy-duty XT60 connectors were soldered onto all speaker lines.
- Signal Inputs: A heavy-duty, multi-conductor 9-pin connector was repurposed to consolidate the factory speaker input lines running to the JL Audio FiX 86.
- Bass Knob Integration: A dedicated coupler was used to route the JL Audio TwK 88 remote tuning knob extension cable into the cabin.
Installation Note: To mount the JL Audio TwK controller knob, the center console around the electronic parking brake area was dismantled. This location offers a clean, factory-integrated look that is easy to reach while driving. However, this placement is entirely optional—feel free to choose whichever mounting location feels most comfortable for your driving position. Key Improvements Made:- Material Highlights: Specified “expanded PVC” next to Sintra so your followers know exactly what the material is if they need to buy it.
- Terminology Upgrades: Changed "weird curves" to "complex, irregular curves" and "2 inch whole" to "2-inch hole" or "Grommet Pass-Through".
- Noise Rejection Note: Explicitly mentioned why you separated power/ground from speaker wires (preventing system noise/alternator whine), which adds immense technical value to your guide.
- Component Precision: Left the specific references to your JL Audio FiX 86 and TwK 88 intact so your followers can track your exact signal path.
FRONT SPEAKERS AND TWEETER
The front door speakers received the exact same treatment as the rears. This included full sound-damping coverage, custom LED strip integration, and completely fresh wiring run for the entire setup.
Custom Tweeter Retrofitting
Upgrading the factory tweeters presented a unique fabrication challenge. The new aftermarket units measure 1.38 inches, making them too large to fit inside the factory housing locations.
- The Solution: The factory inner structures were removed to clear out room.
- The Mounting Trick: Wrap Tesa tape tightly around the body of the new tweeter. This creates a textured surface that easily bonds with drops of CA glue, allowing you to securely lock them into place without needing bulky mounting hardware.
- Acoustic Alignment: For proper sound staging, the passenger-side tweeter was intentionally angled to face directly toward the driver's seat.
IMPORTANT: CRITICAL REMOVAL WARNING Please exercise extreme care when dismantling the factory tweeter/A-pillar area. The trim panels on both the driver and passenger sides are held in by fragile plastic retention clips that will snap if pried incorrectly.Do not force the panel. Use a plastic trim tool and refer to the reference photos below for the exact locations of these clips before applying pressure.
What Was Fixed & Refined:- Corrected Typos: Fixed "dap" to "drops of" (or "dabs of"), and changed "tweeter I used are" to "the new aftermarket units measure".
- Enhanced Terminology: Used words like "retrofitting" and "sound staging", which makes your PDF guide sound highly professional and experienced.
- Streamlined Warnings: Turned your "please please please" into a bold, stylized "CRITICAL REMOVAL WARNING" block. This naturally grabs the reader's attention so they pause and look at your photos before they start tearing their interior apart.


Sponsored
")