Garbone
Well-Known Member
- First Name
- Gary
- Joined
- Dec 16, 2020
- Threads
- 34
- Messages
- 1,280
- Reaction score
- 1,757
- Location
- Florida
- Vehicles
- 21 Mach E , 22 MachE, 62 C10 Big window long bed
- Occupation
- Loafer
- Thread starter
- #1
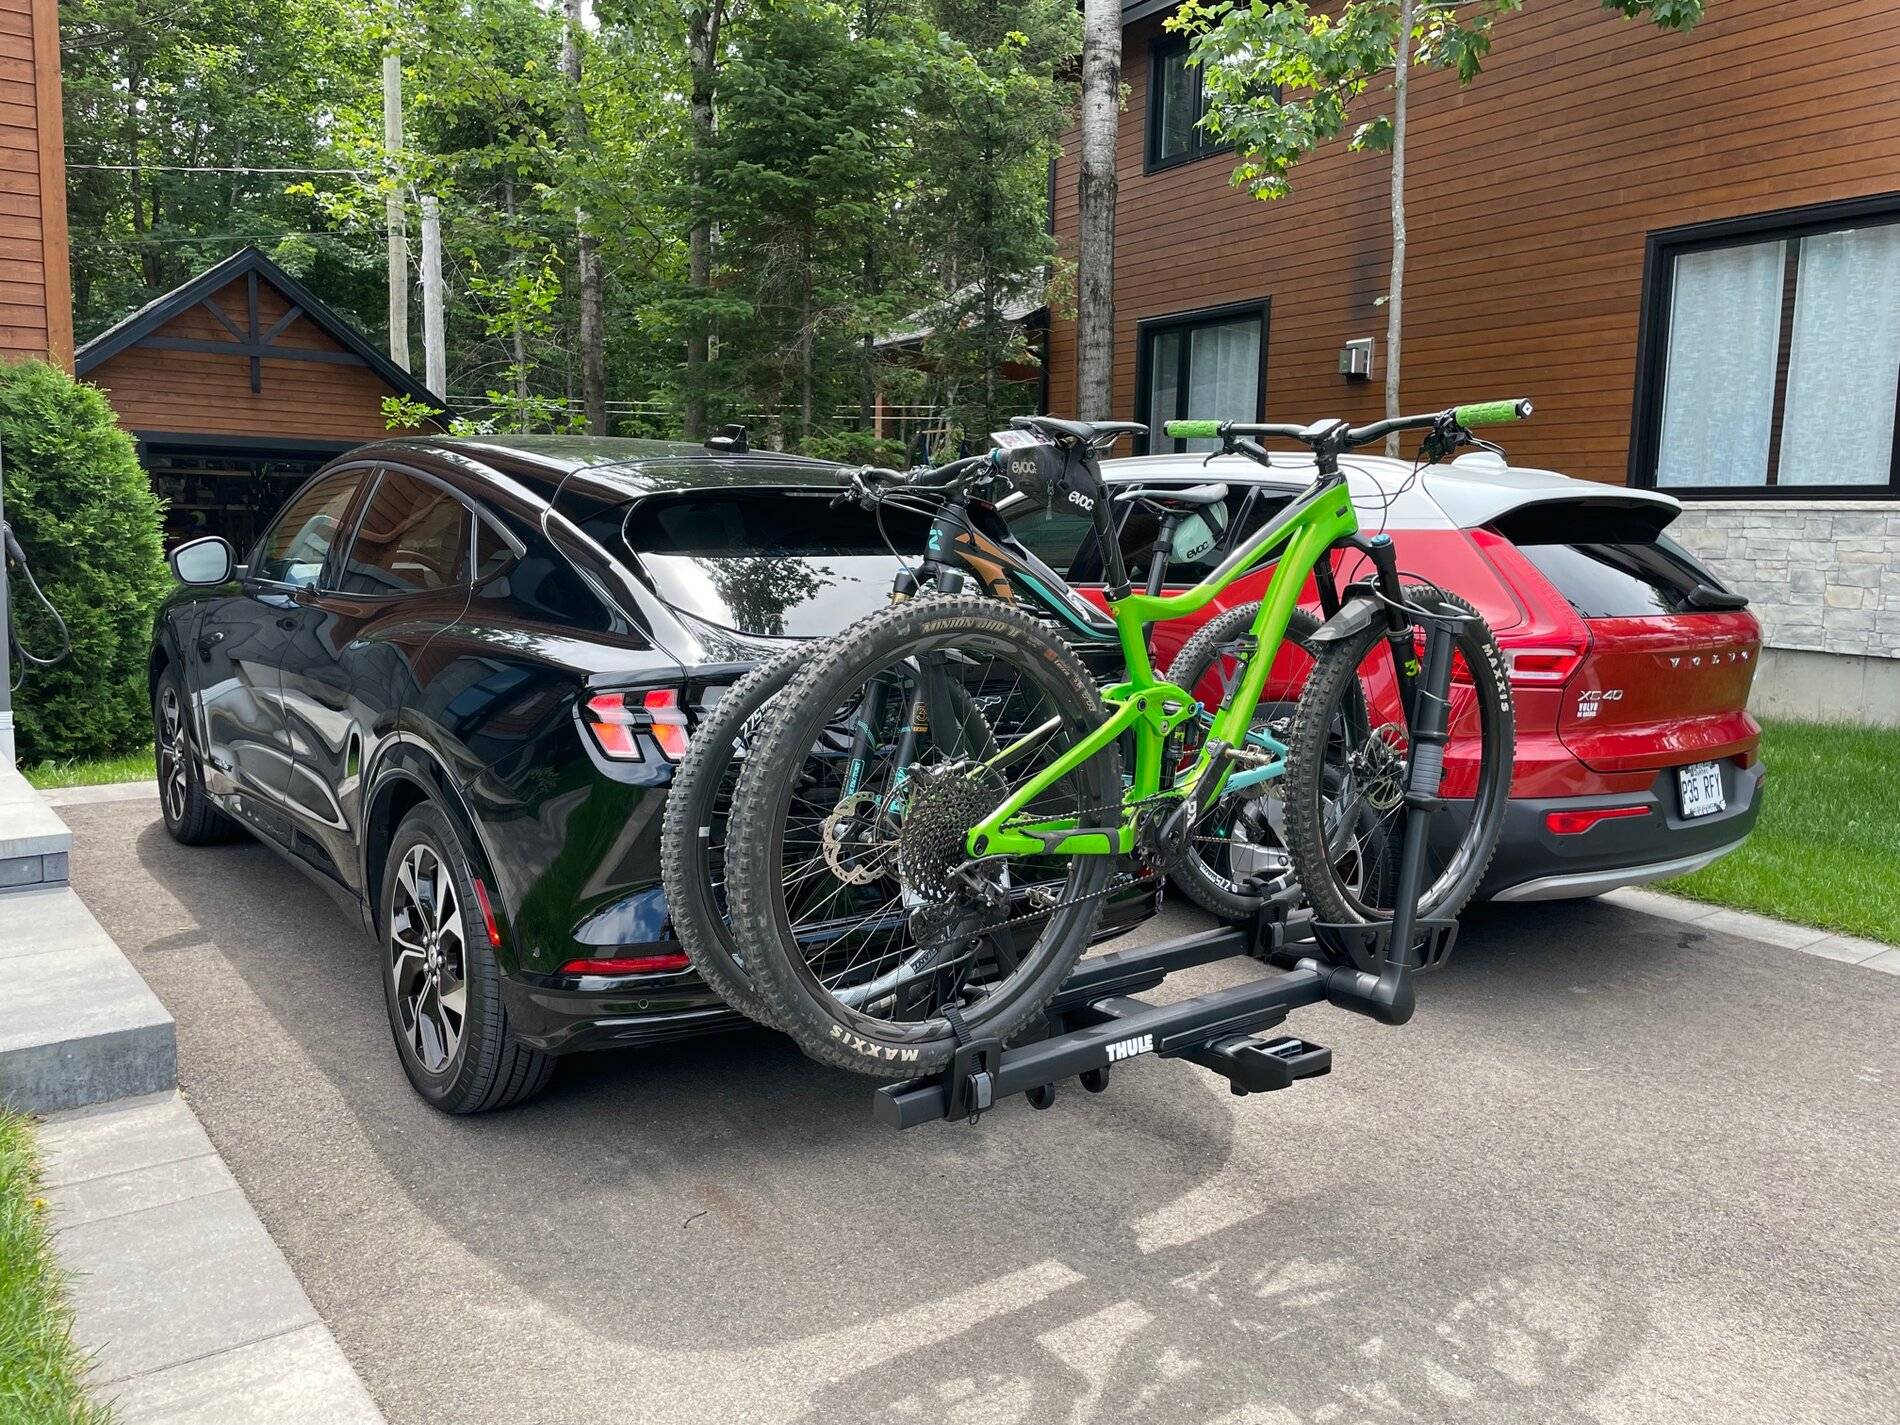
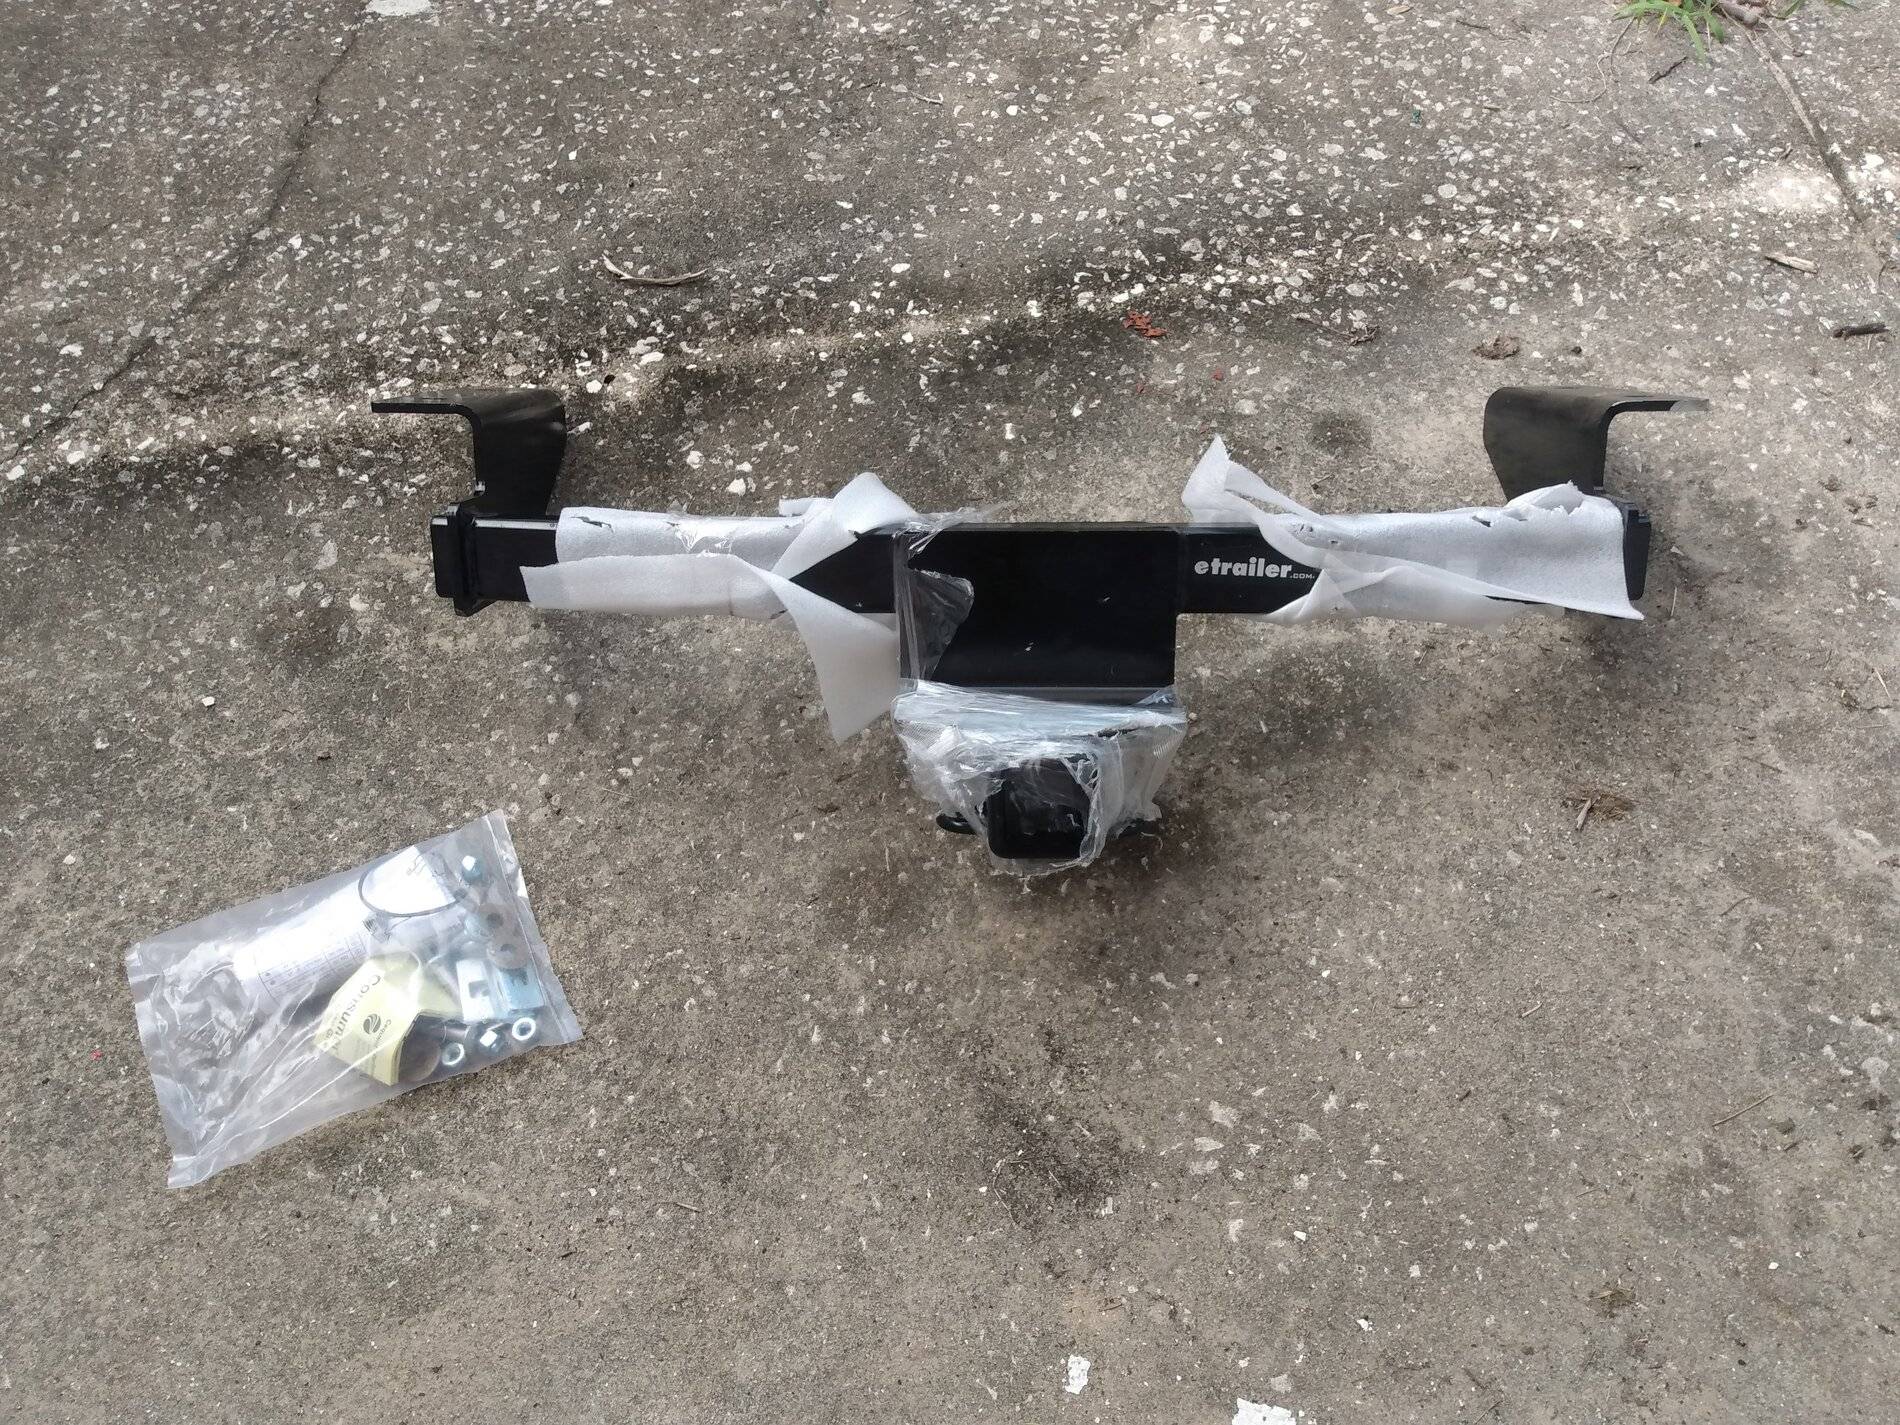
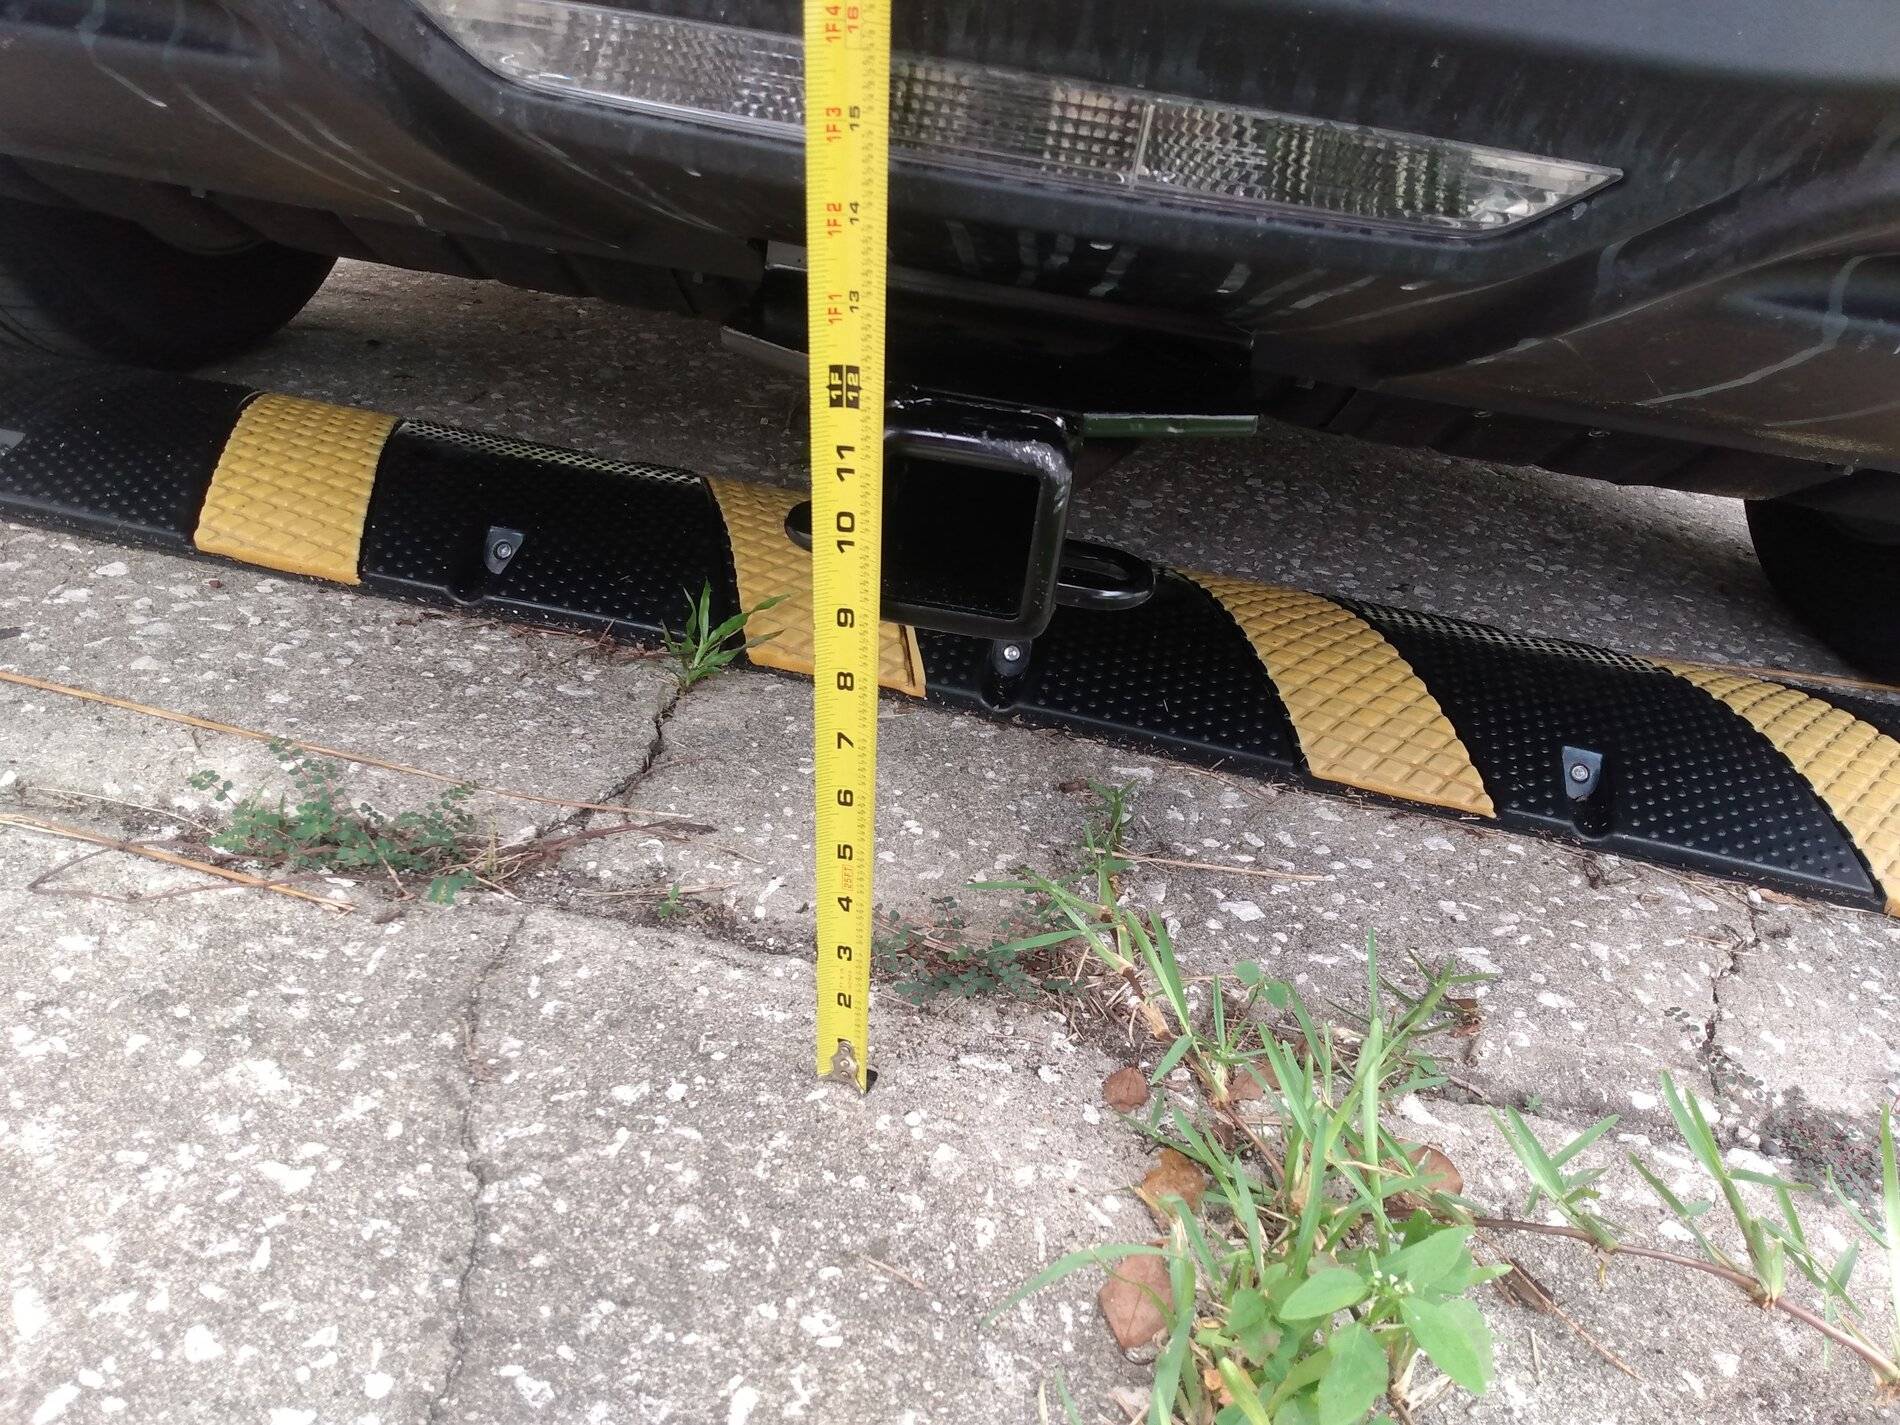
To Etrailer I went and bought the Draw-Tite Hitch for my MachE. Decided on it because of the price and higher tongue weight than the Curt. I have no plans on towing but who knows what type of stuff I may load on the hitch platform. Hauling gasoline. grills, coolers, bikes are the reason for this install.
The instructions were pretty good. The list the number and type of fasteners to be removed and the dimensions of the cut needed.

I purchased a set of Rino-Ramps from Amazon for this. I own a crawler and all the other tools used.
If a person does not own a torque wrench I believe you can borrow them from the local automotive store much like a loan a tool. Installation to the correct spec on torque is really important here. I started at 25lbs and increased the setting on the wrench until 50lbs specified was reached. The crush washers supplied with the hitch require the torque to work. I think I got at about 1/8 to 1/4 turn of crush out of the supplied washers between 25lbs and 50lbs.
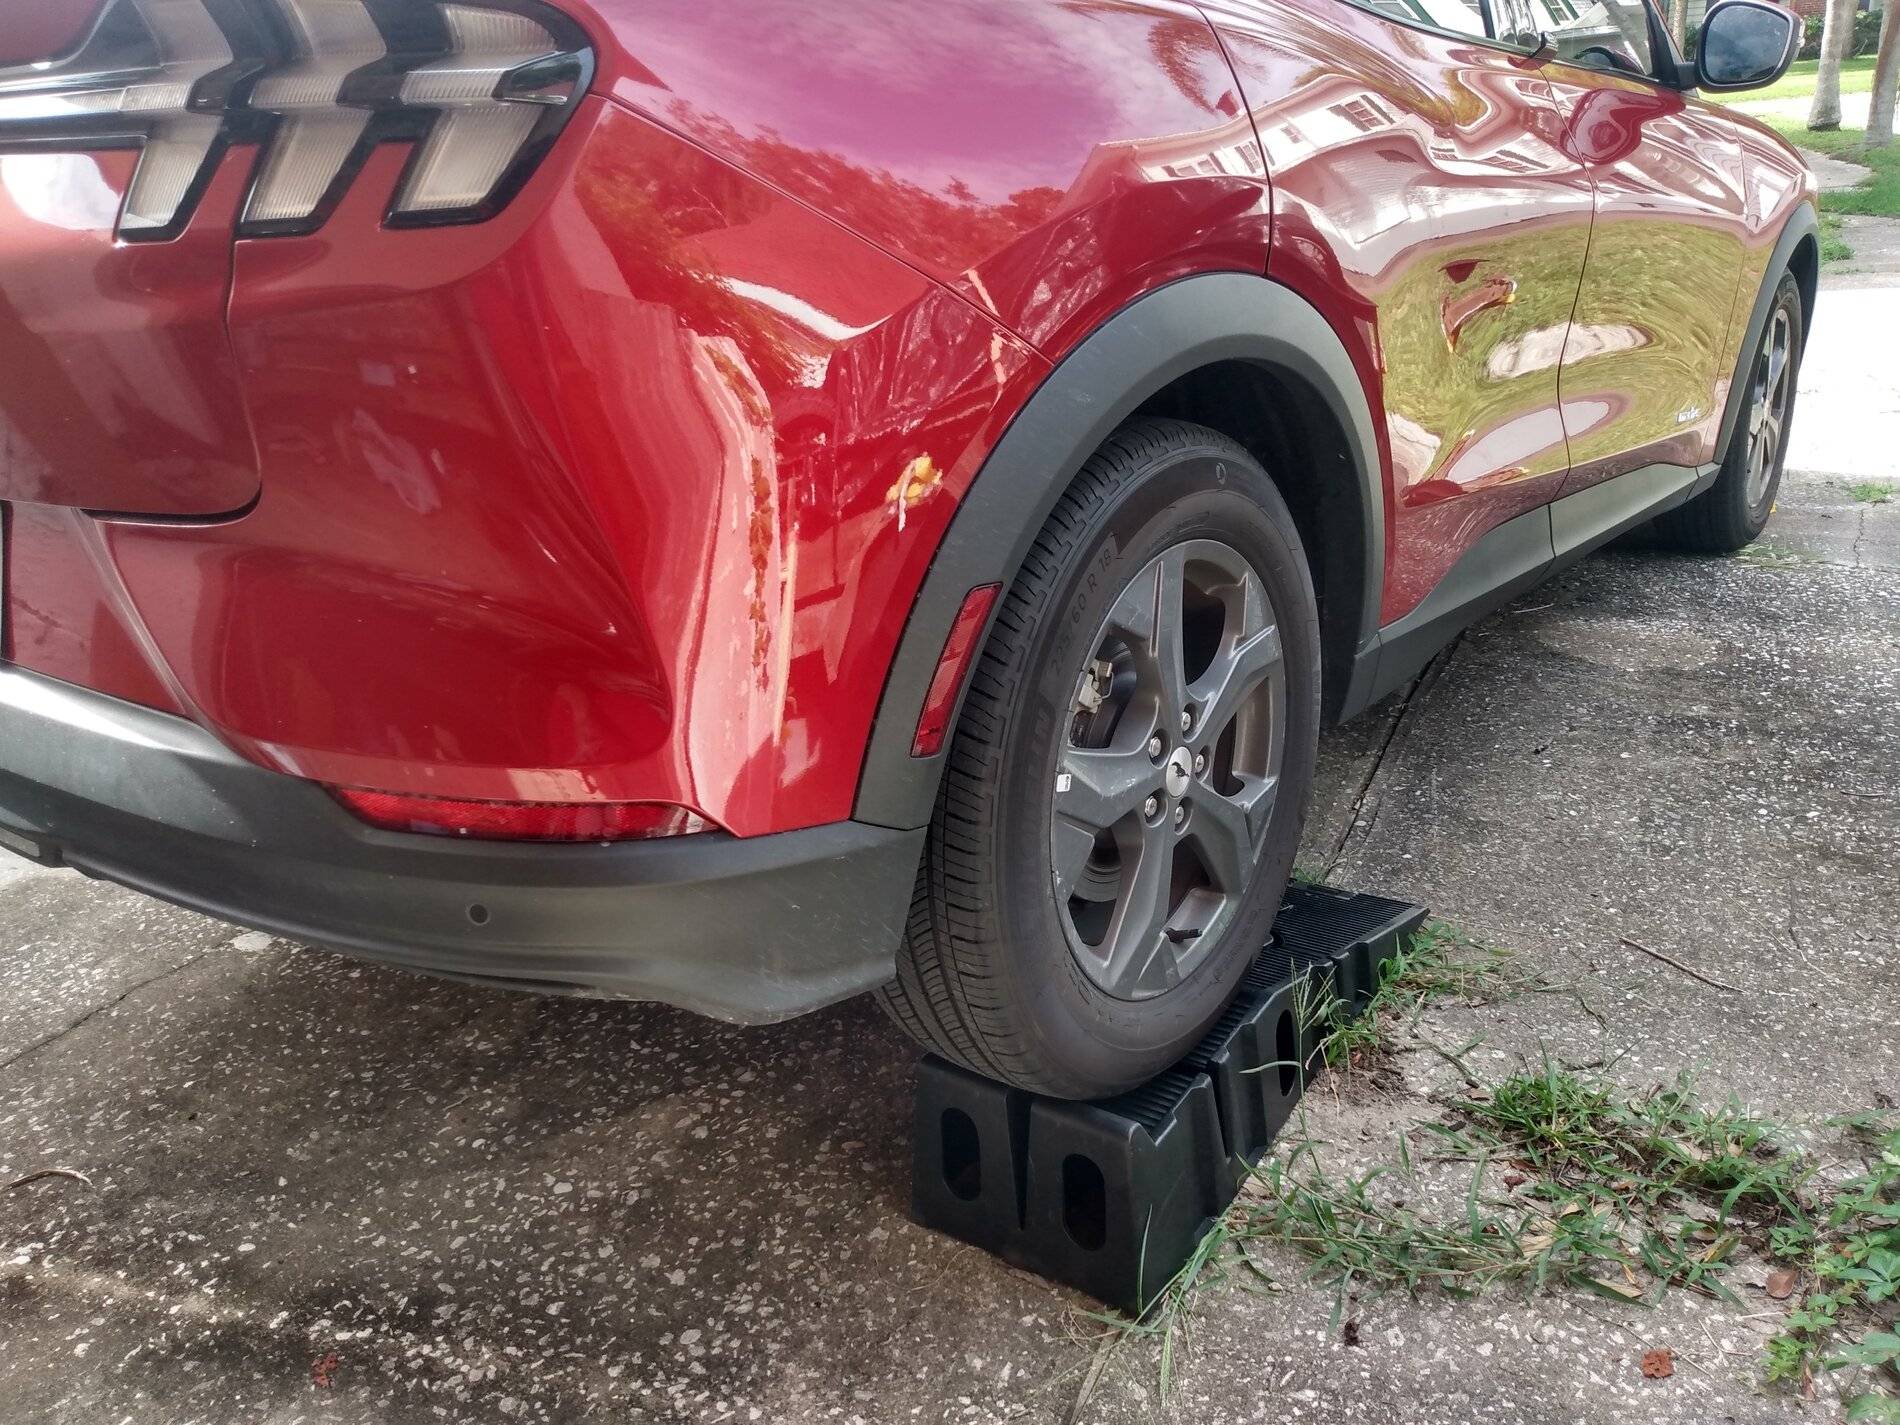
Backing the Mustang onto the ramp was actually pretty nice, I have done ICE cars on ramps and always have had stress about falling off. Be it an automatic or clutch you really do not get the feel of the ramp and I always worried. The nature of the electric motors in the MachE make it very easy to feel I actually stopped on the flat and did not hit the rear stop on the ramp having to back until it I did. With one peddle there is no movement and it is very sure footed. Put on the parking brake and chocked the front tires, just because.
The 16 10mm's holding on the cover are not in there tight. I just used the socket on the extension and no wrench handle when removing and installing. Just hand snug. The 4 plastic rivets are of two types and removed after the 10mm 's and it helps for the forward ones to reach above the cover, the rear plastic rivets you pull out a the center to remove them.
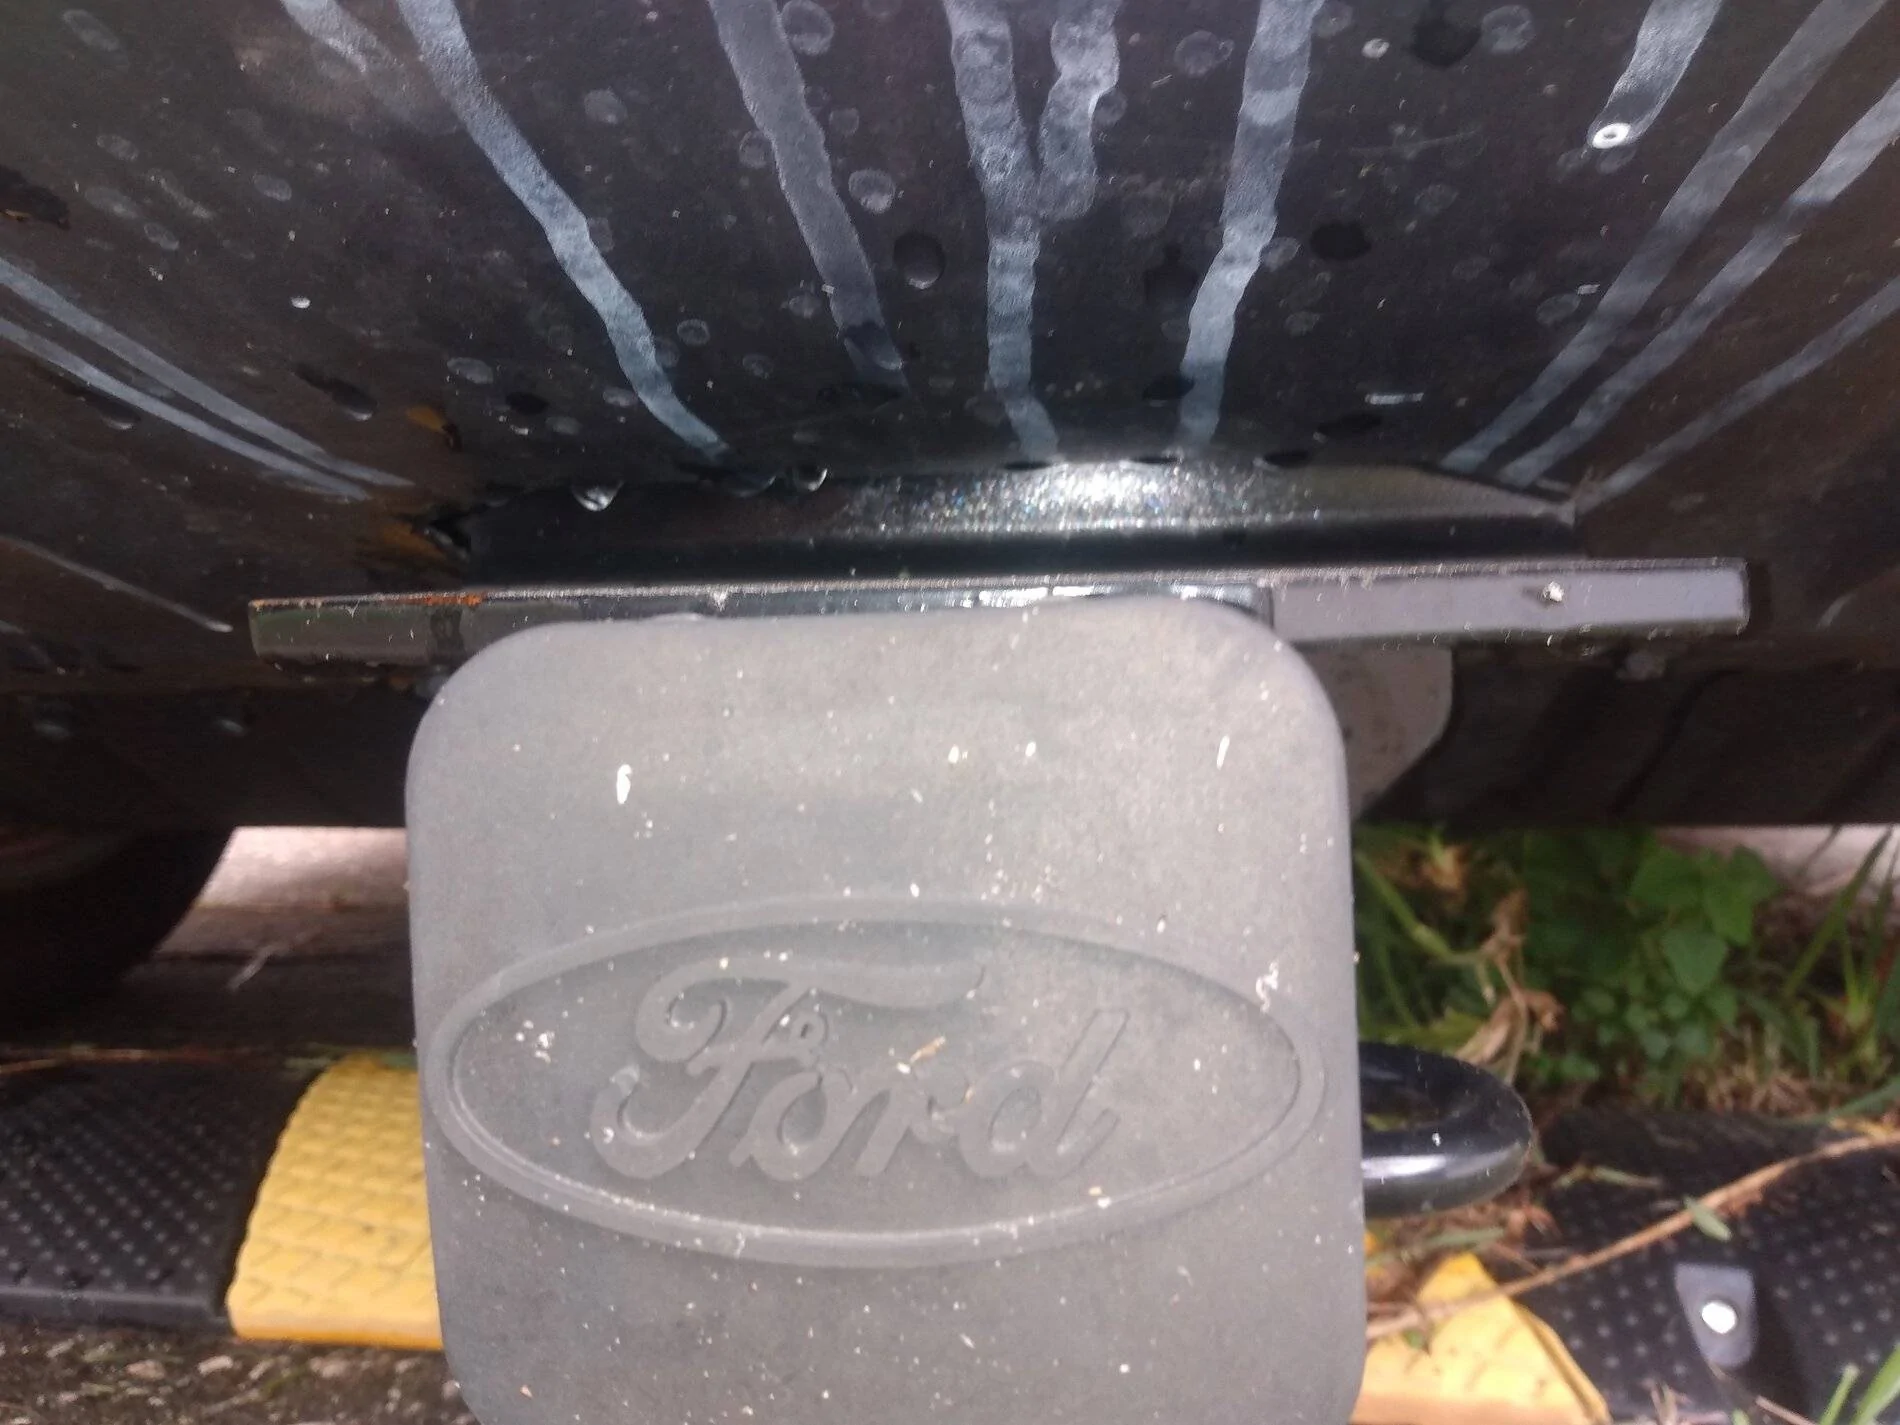
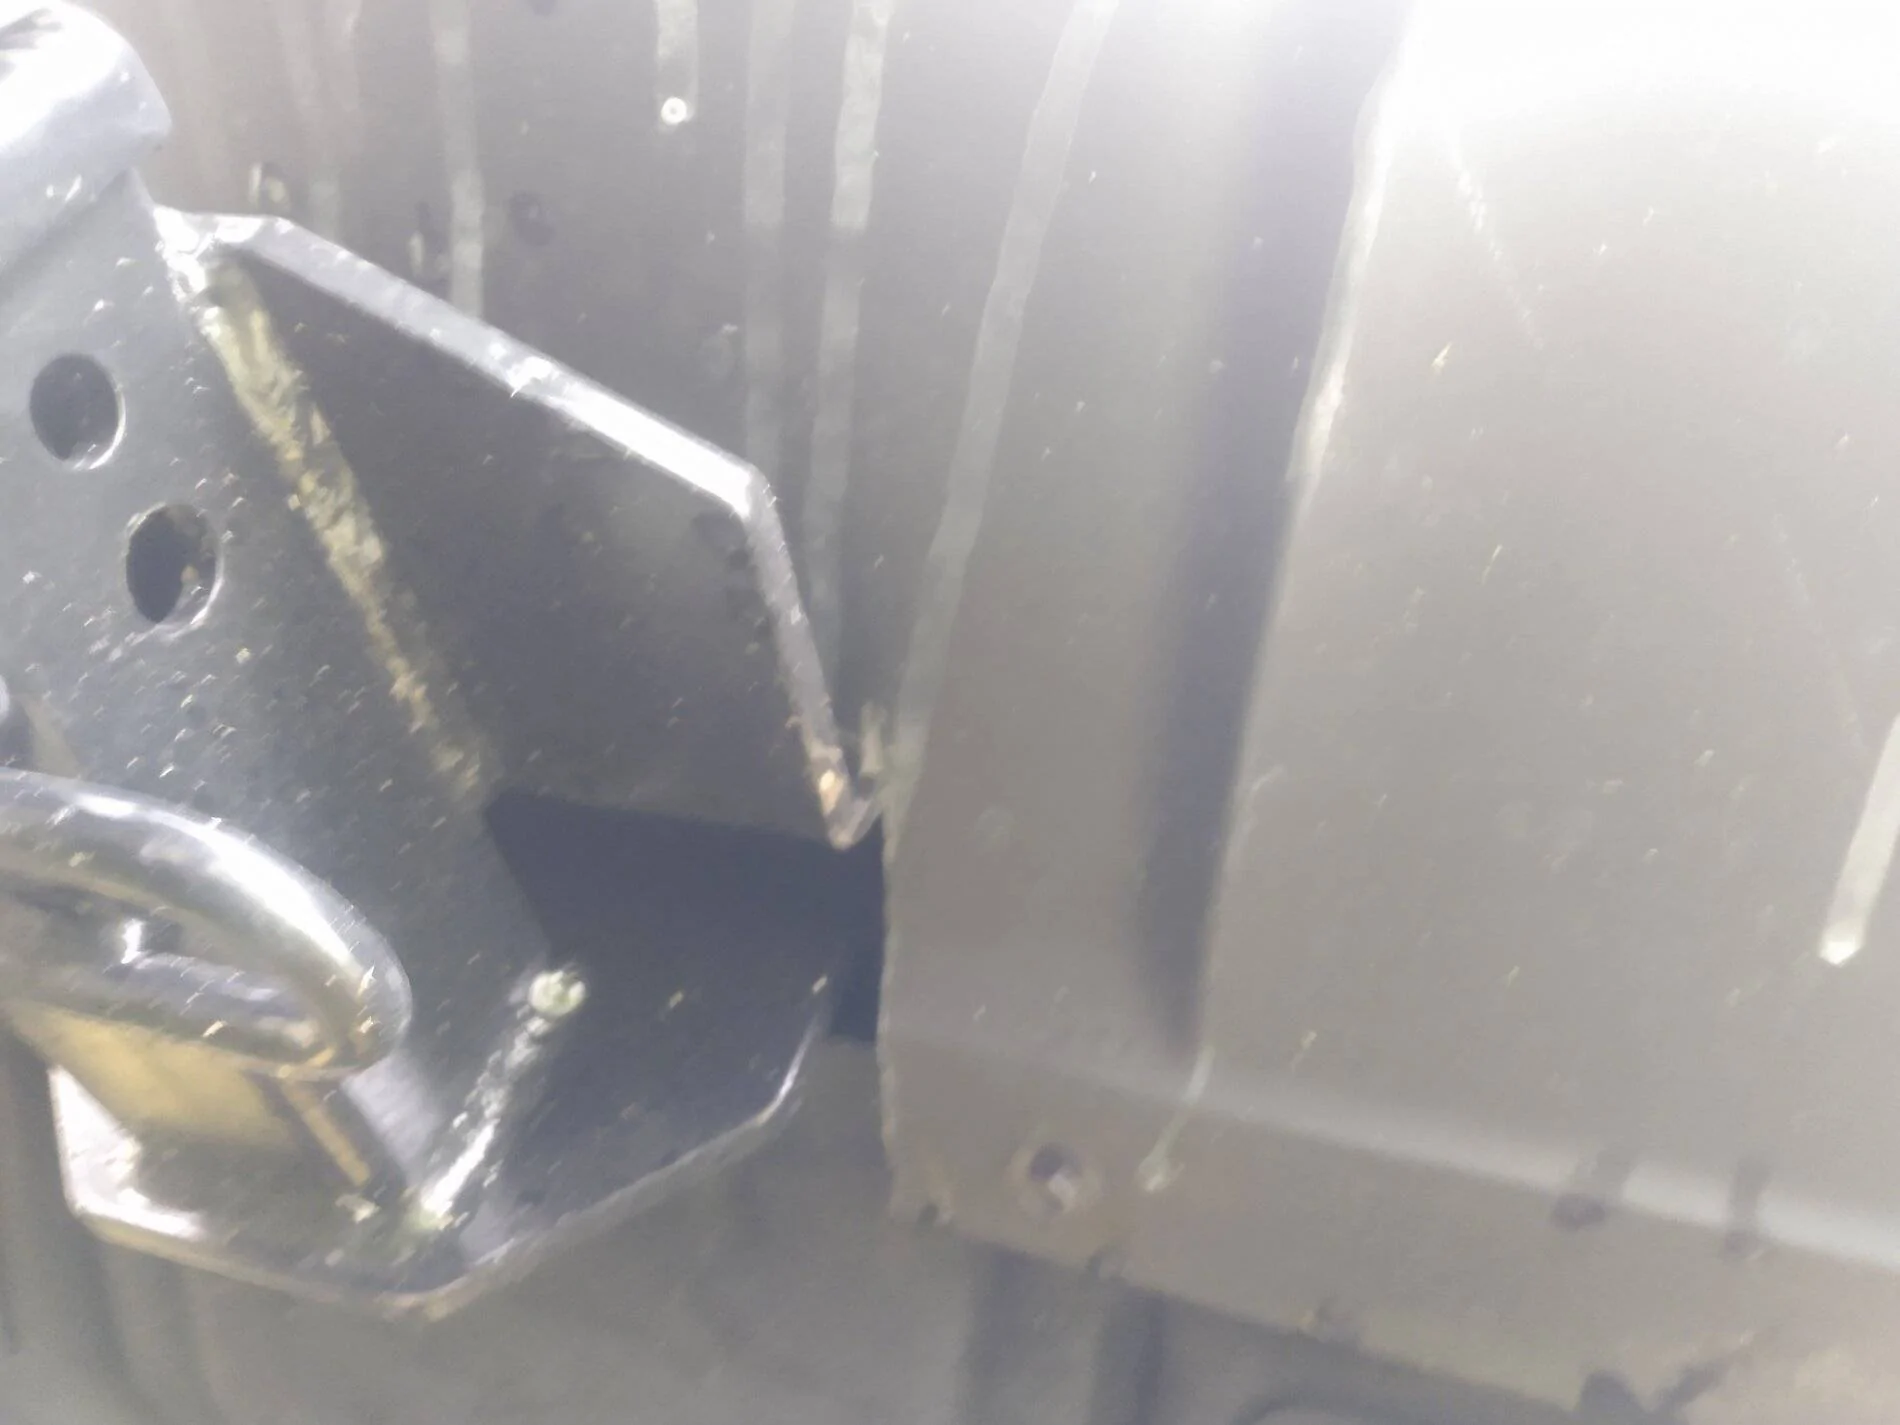
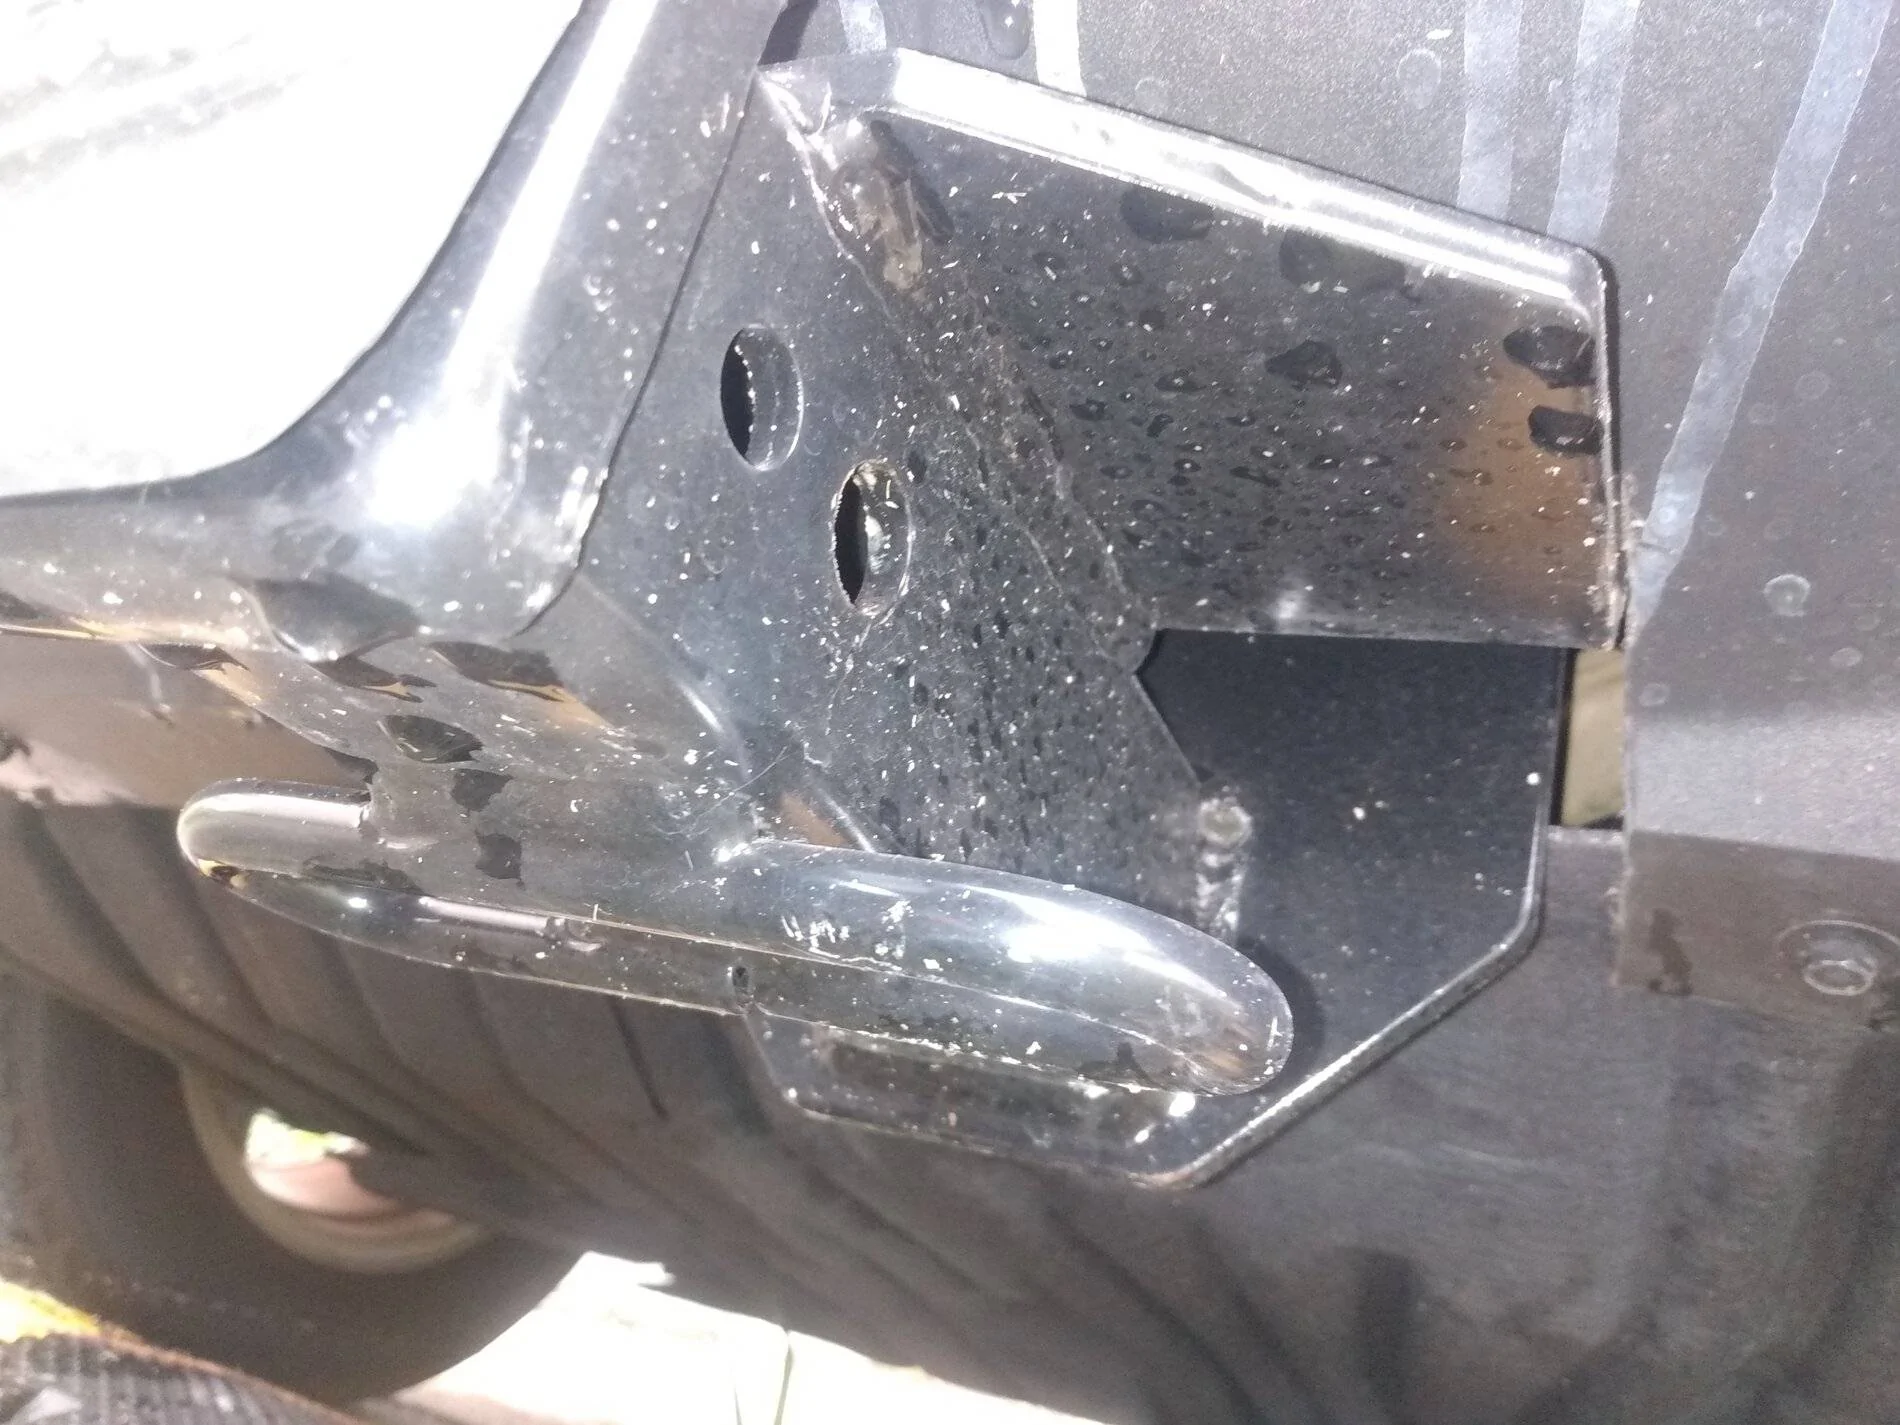
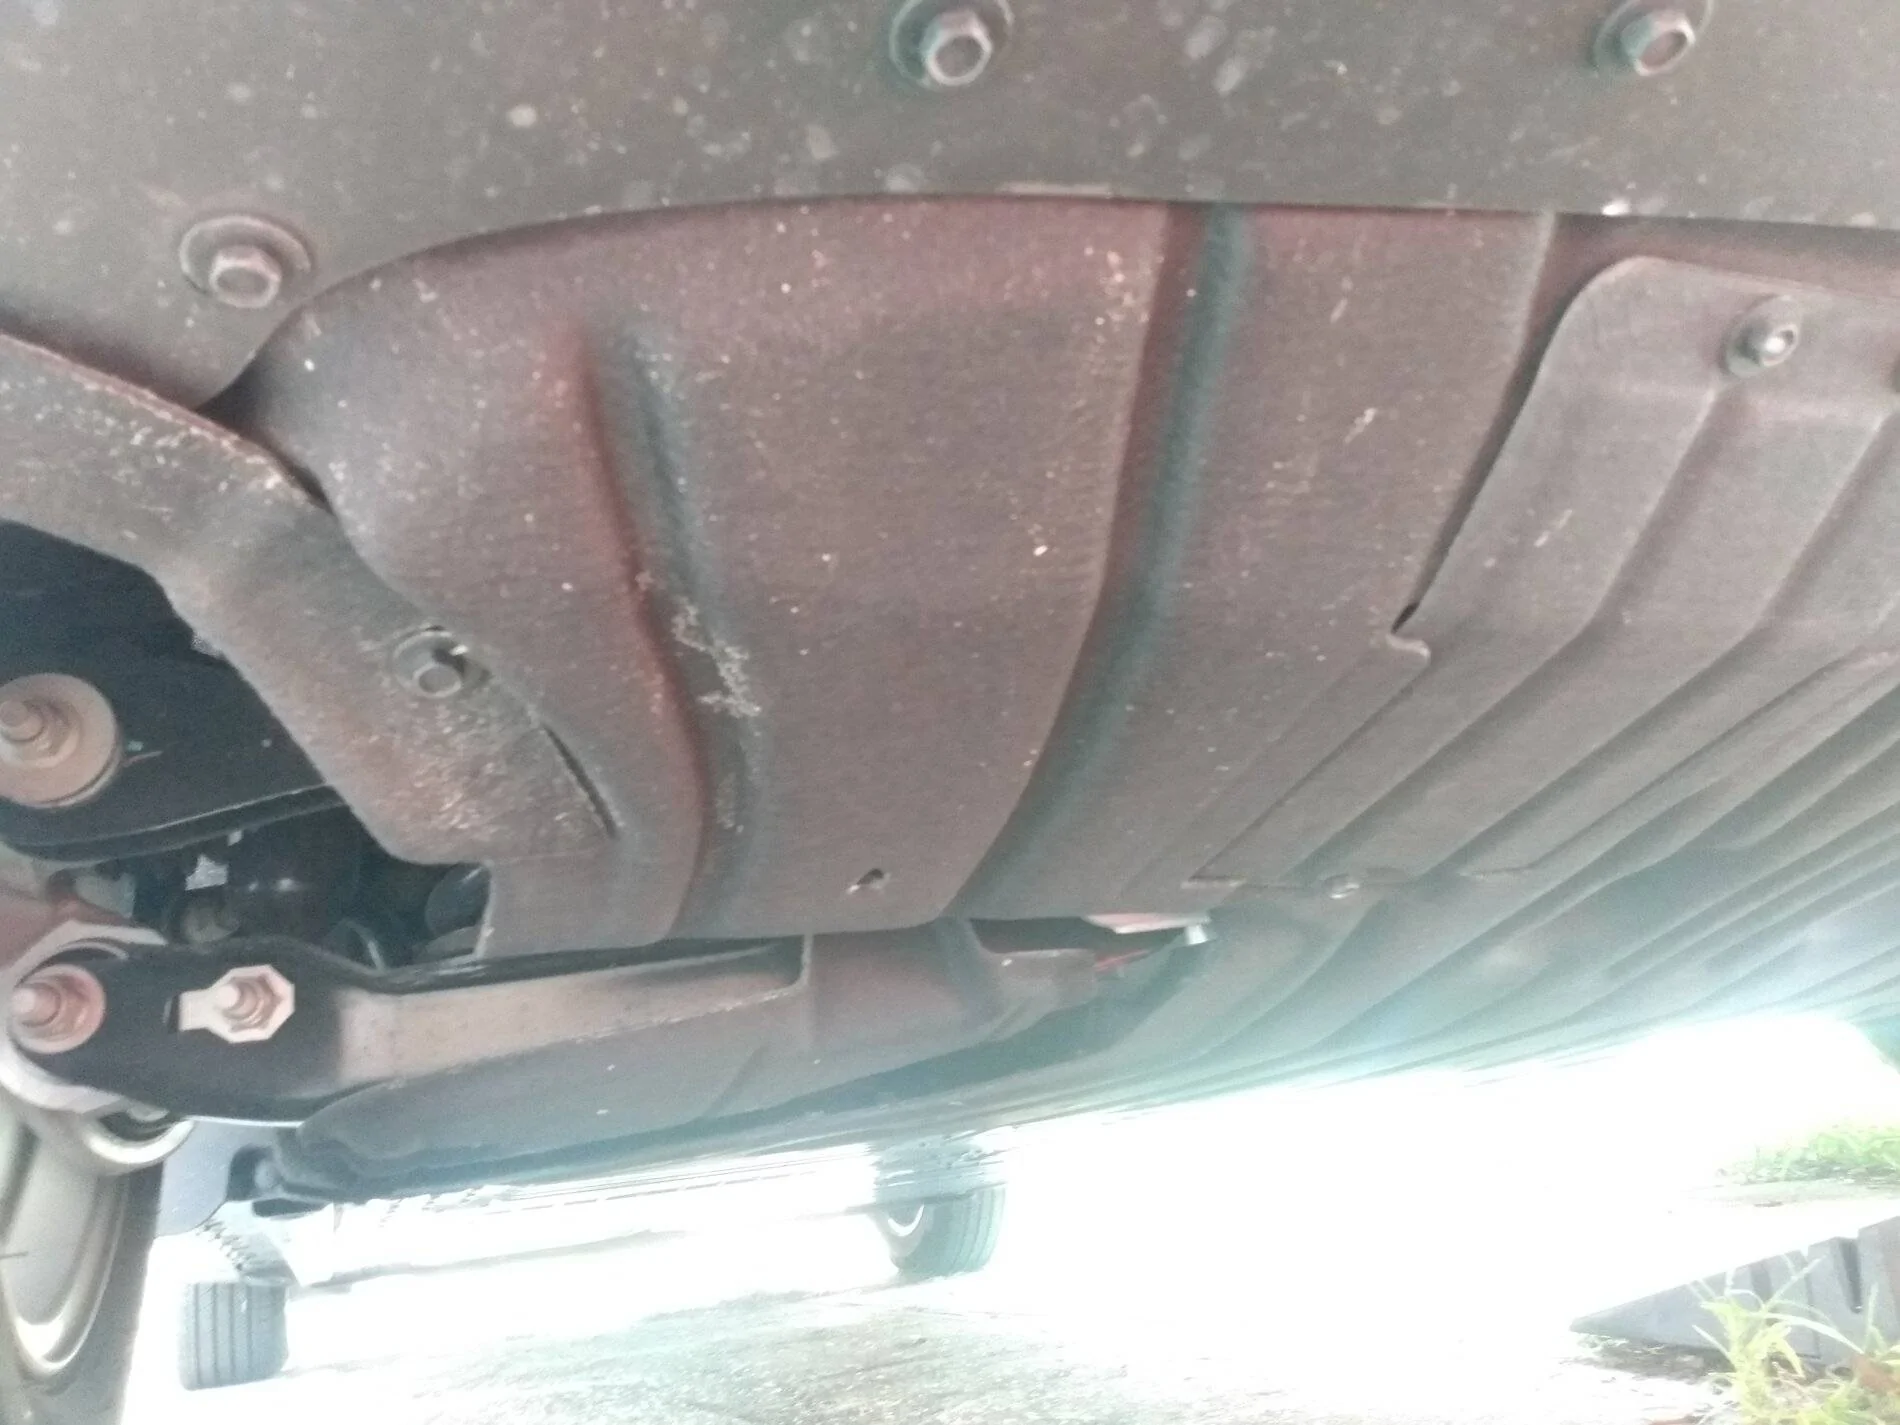
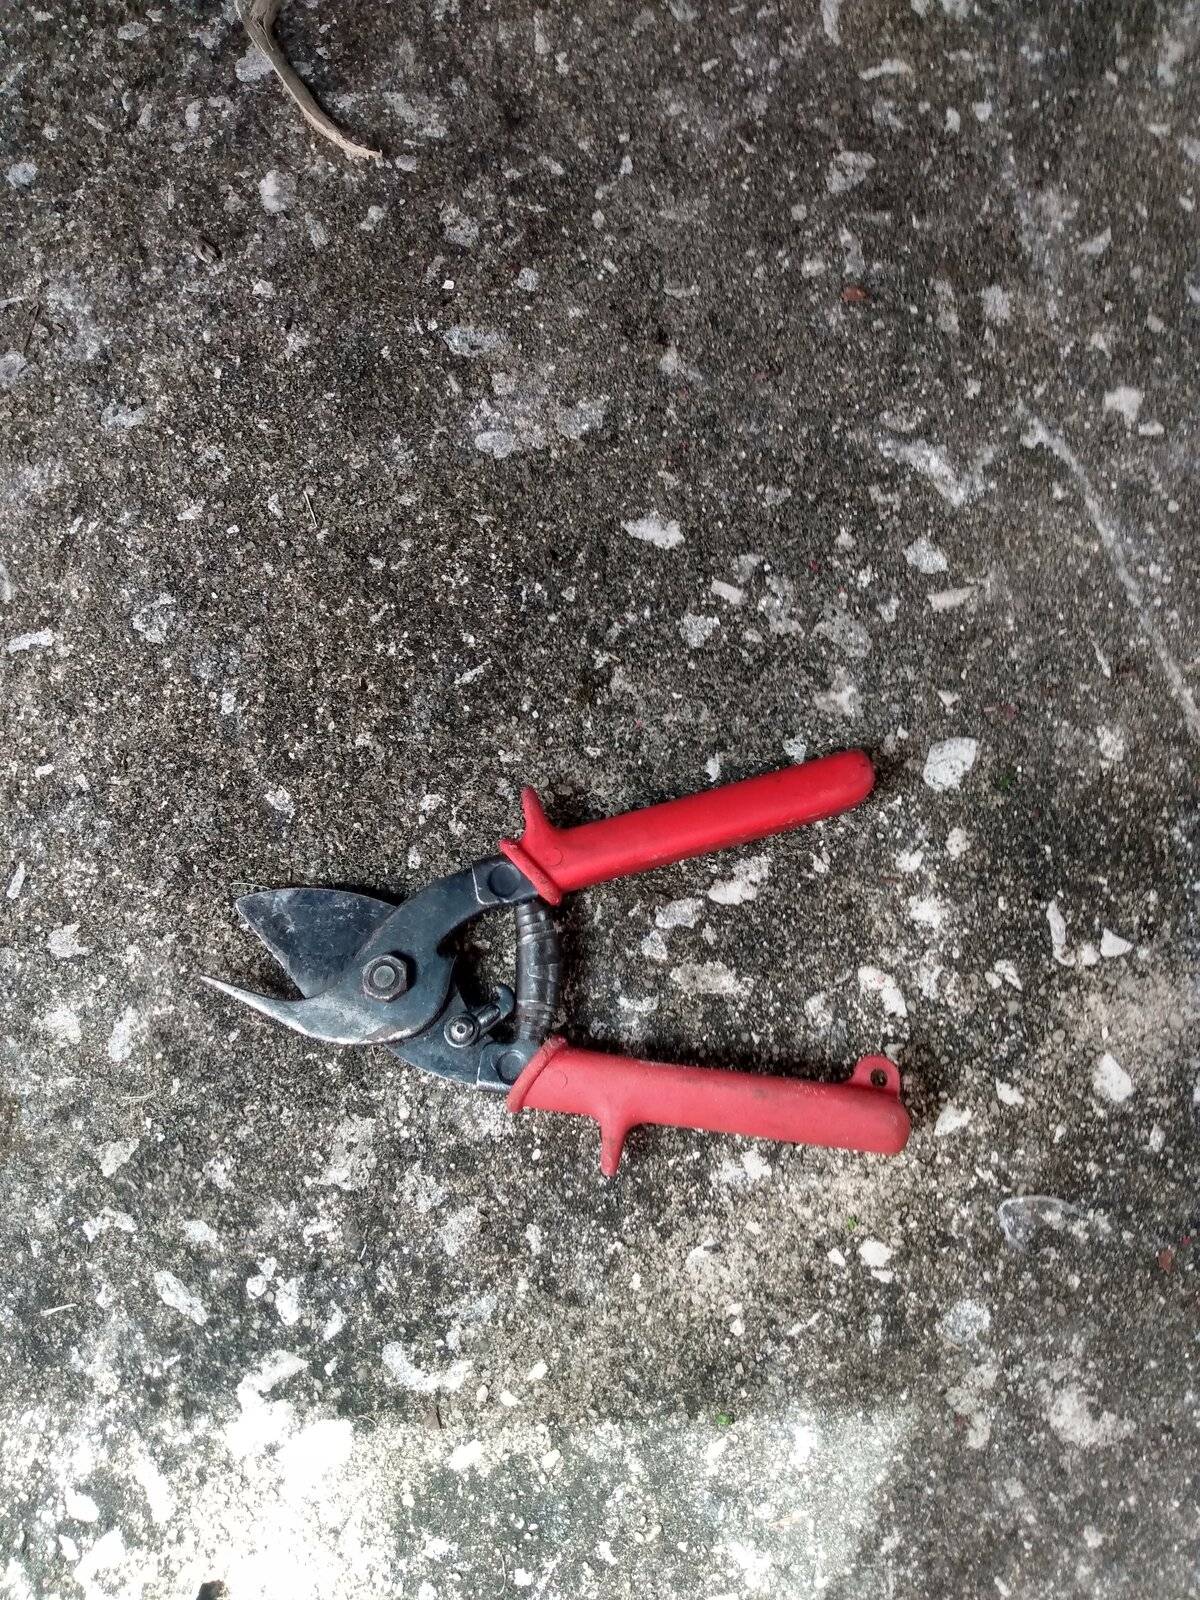
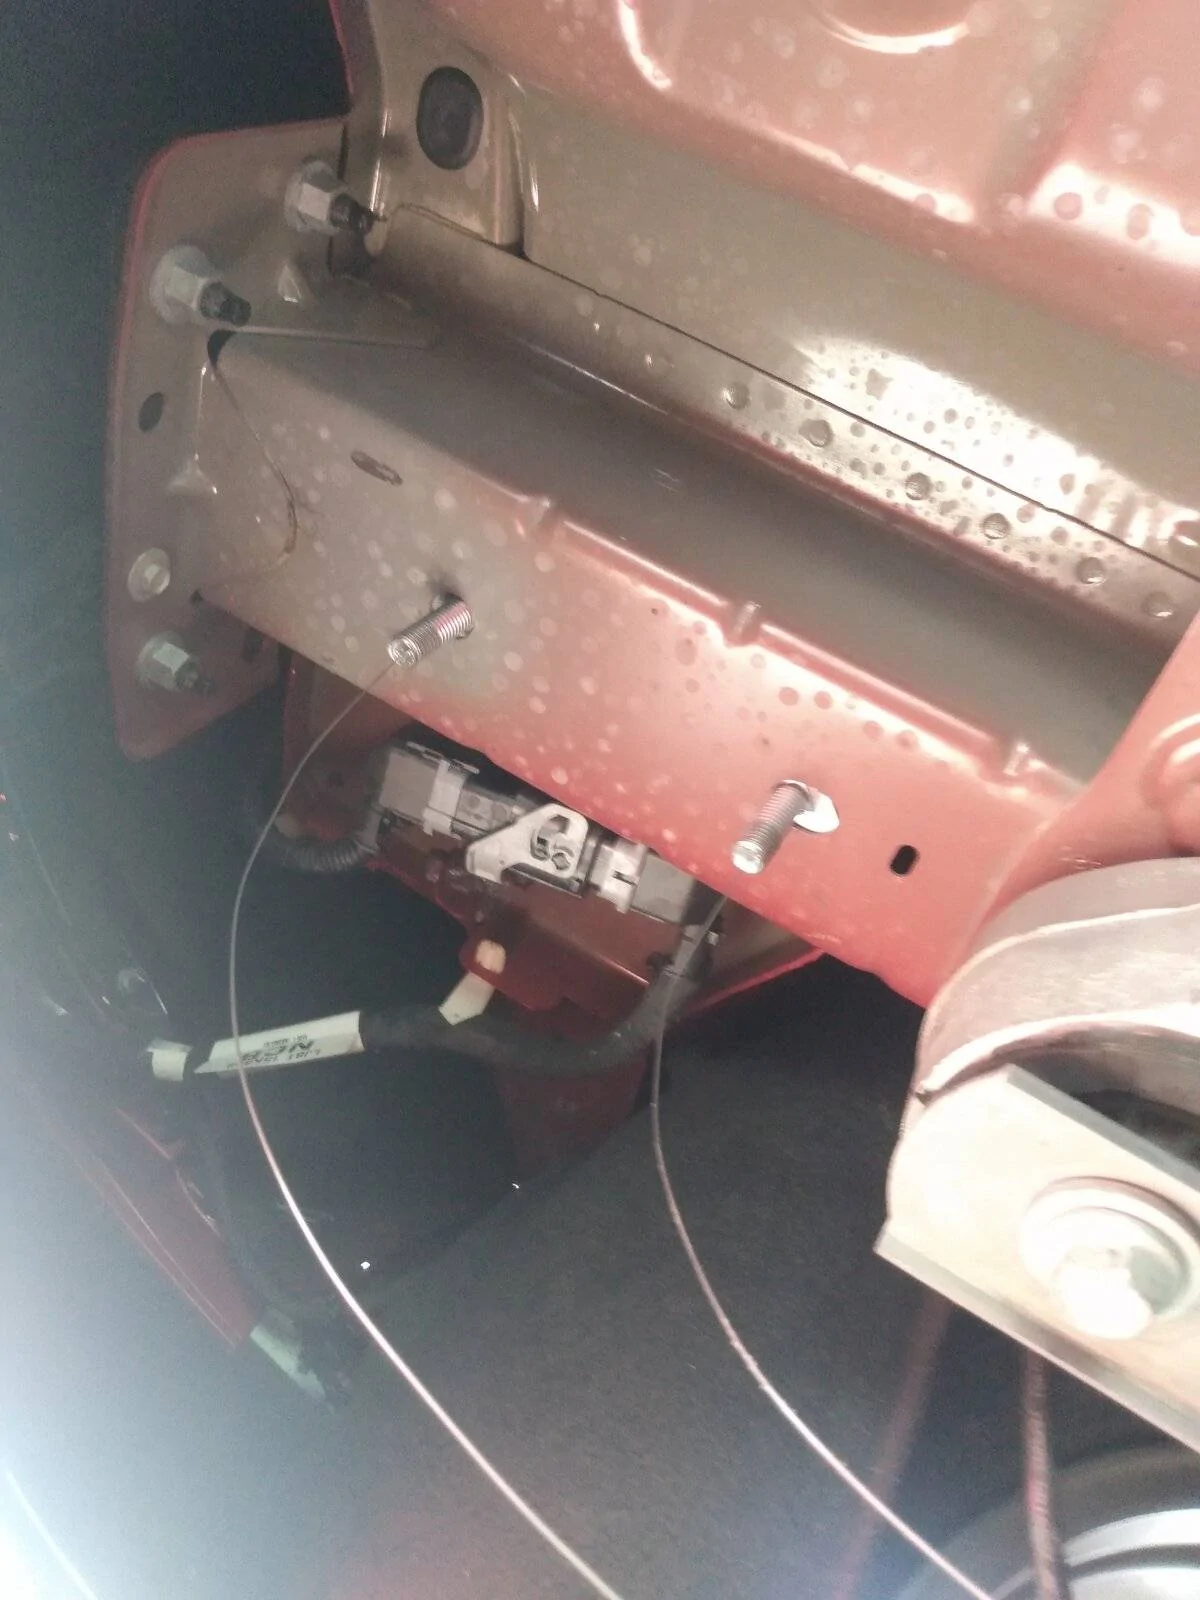
Once the covers were off I measured the spacing on the hitch and frame rail holes, just to be sure. Everything lined up. I then found the center of the rear valance and marked out my cuts. I just did the side cuts 4.75 inches and did not cut the 8 inch rear cut. Electing to fold up the plastic instead. The plastic was fairly thick. I used electrician snips to start but ended up using tabbing shears. They made quick work of things.

The hitch came with all the fasteners and spring wires needed for install. Bolts and interior washers went in easily using the spring wires.
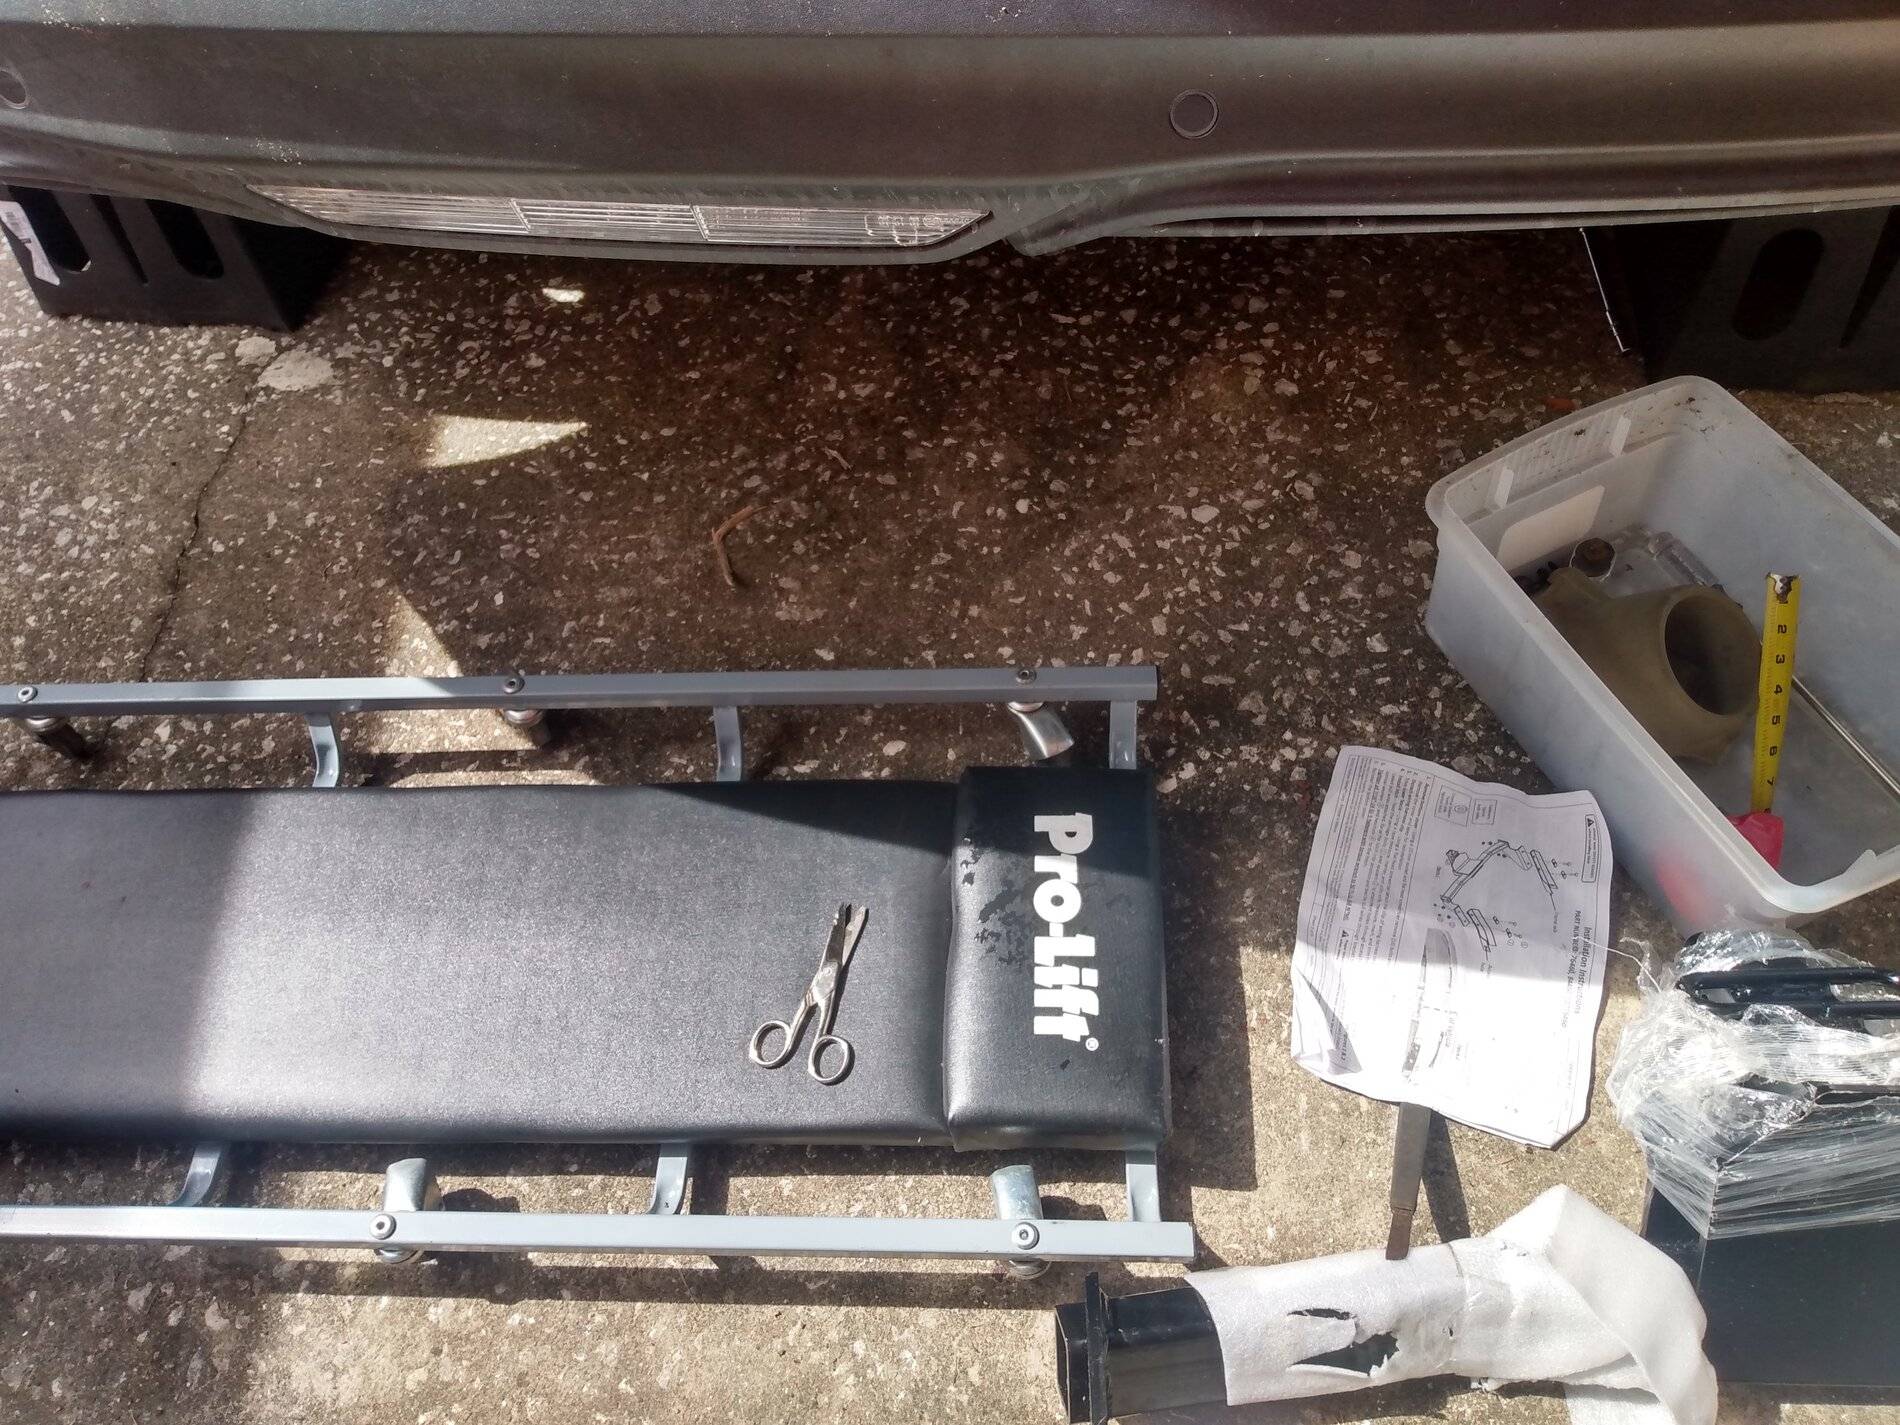
I used a floor jack to aid in lifting up the hitch. Of note the full extension needed to lift this hitch into place with the car on the ramps was 19 inches. I had to use some cribbing to add to the height of the jack.
I put the nut on the first bolt on the driver side, leaving off the crush washer. Then placed nuts and washers on the passenger side followed my the last nut and washer on the driver. At this point I put the washer on the fist bolt and proceeded to torque everything down to spec.
After reinstalling the cover total elapse time for me with this install was about 2 hours and 10 minutes from start to finish of work. It would have been miserable without the creeper.
The instructions were pretty good. The list the number and type of fasteners to be removed and the dimensions of the cut needed.
I purchased a set of Rino-Ramps from Amazon for this. I own a crawler and all the other tools used.
If a person does not own a torque wrench I believe you can borrow them from the local automotive store much like a loan a tool. Installation to the correct spec on torque is really important here. I started at 25lbs and increased the setting on the wrench until 50lbs specified was reached. The crush washers supplied with the hitch require the torque to work. I think I got at about 1/8 to 1/4 turn of crush out of the supplied washers between 25lbs and 50lbs.
Backing the Mustang onto the ramp was actually pretty nice, I have done ICE cars on ramps and always have had stress about falling off. Be it an automatic or clutch you really do not get the feel of the ramp and I always worried. The nature of the electric motors in the MachE make it very easy to feel I actually stopped on the flat and did not hit the rear stop on the ramp having to back until it I did. With one peddle there is no movement and it is very sure footed. Put on the parking brake and chocked the front tires, just because.
The 16 10mm's holding on the cover are not in there tight. I just used the socket on the extension and no wrench handle when removing and installing. Just hand snug. The 4 plastic rivets are of two types and removed after the 10mm 's and it helps for the forward ones to reach above the cover, the rear plastic rivets you pull out a the center to remove them.
Once the covers were off I measured the spacing on the hitch and frame rail holes, just to be sure. Everything lined up. I then found the center of the rear valance and marked out my cuts. I just did the side cuts 4.75 inches and did not cut the 8 inch rear cut. Electing to fold up the plastic instead. The plastic was fairly thick. I used electrician snips to start but ended up using tabbing shears. They made quick work of things.
The hitch came with all the fasteners and spring wires needed for install. Bolts and interior washers went in easily using the spring wires.
I used a floor jack to aid in lifting up the hitch. Of note the full extension needed to lift this hitch into place with the car on the ramps was 19 inches. I had to use some cribbing to add to the height of the jack.
I put the nut on the first bolt on the driver side, leaving off the crush washer. Then placed nuts and washers on the passenger side followed my the last nut and washer on the driver. At this point I put the washer on the fist bolt and proceeded to torque everything down to spec.
After reinstalling the cover total elapse time for me with this install was about 2 hours and 10 minutes from start to finish of work. It would have been miserable without the creeper.
Sponsored
Last edited:
")