dtbaker61
Well-Known Member
- First Name
- Dan
- Joined
- May 11, 2020
- Threads
- 126
- Messages
- 4,822
- Reaction score
- 4,524
- Location
- santa fe,nm
- Website
- www.envirokarma.org
- Vehicles
- MME (delivered 2/26/21), DIY eMiata BEV
- Occupation
- Solar Sales/install
- Thread starter
- #1
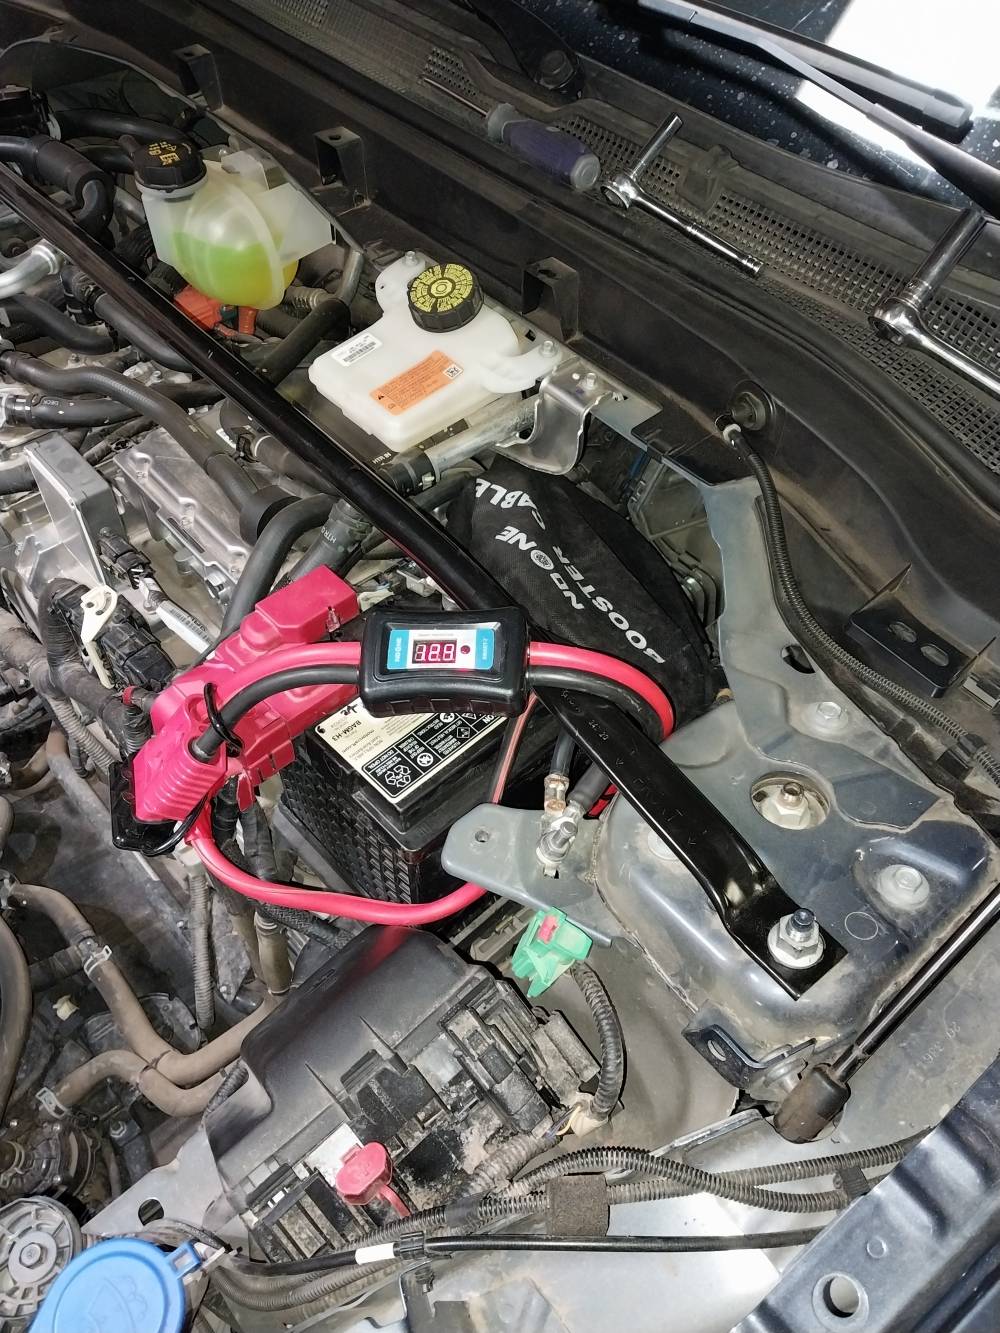
Making holes in the driver's side beauty cover to expose 12v+, 12v, and HV disconnect is a good DIY mod which takes 5 minutes with a 1-7/8 hole saw; and it works fine for emergency access to charge or jump. BUT, alligator clamps do not provide enough surface area to carry much current for extended periods of time for long FDRS session, or exporting to a little inverter.
So, this thread shows the DIY cables I came up with to provide solid connections to the 12v 'connection posts' capable of carrying 150amps for extended periods without overheating.... and the basics of installing them.

I started with a heavy duty jumper cable set (2awg wire), and then:
- cut stock clamps off one end, and crimped on lugs to match the MME connection points. 2awg x 5/16 lug for the 12v- connection stud, and 2awg x 1/4 for the 12v+ terminal stud on the 12v battery post.
- cut stock clamps off the other end, and crimped on a 175a 'Anderson' connector
- cut another 24" segment, and put an Anderson on one end, and a pair of 2awg x 5/16 lugs on the other end to install on Inverter of choice later.
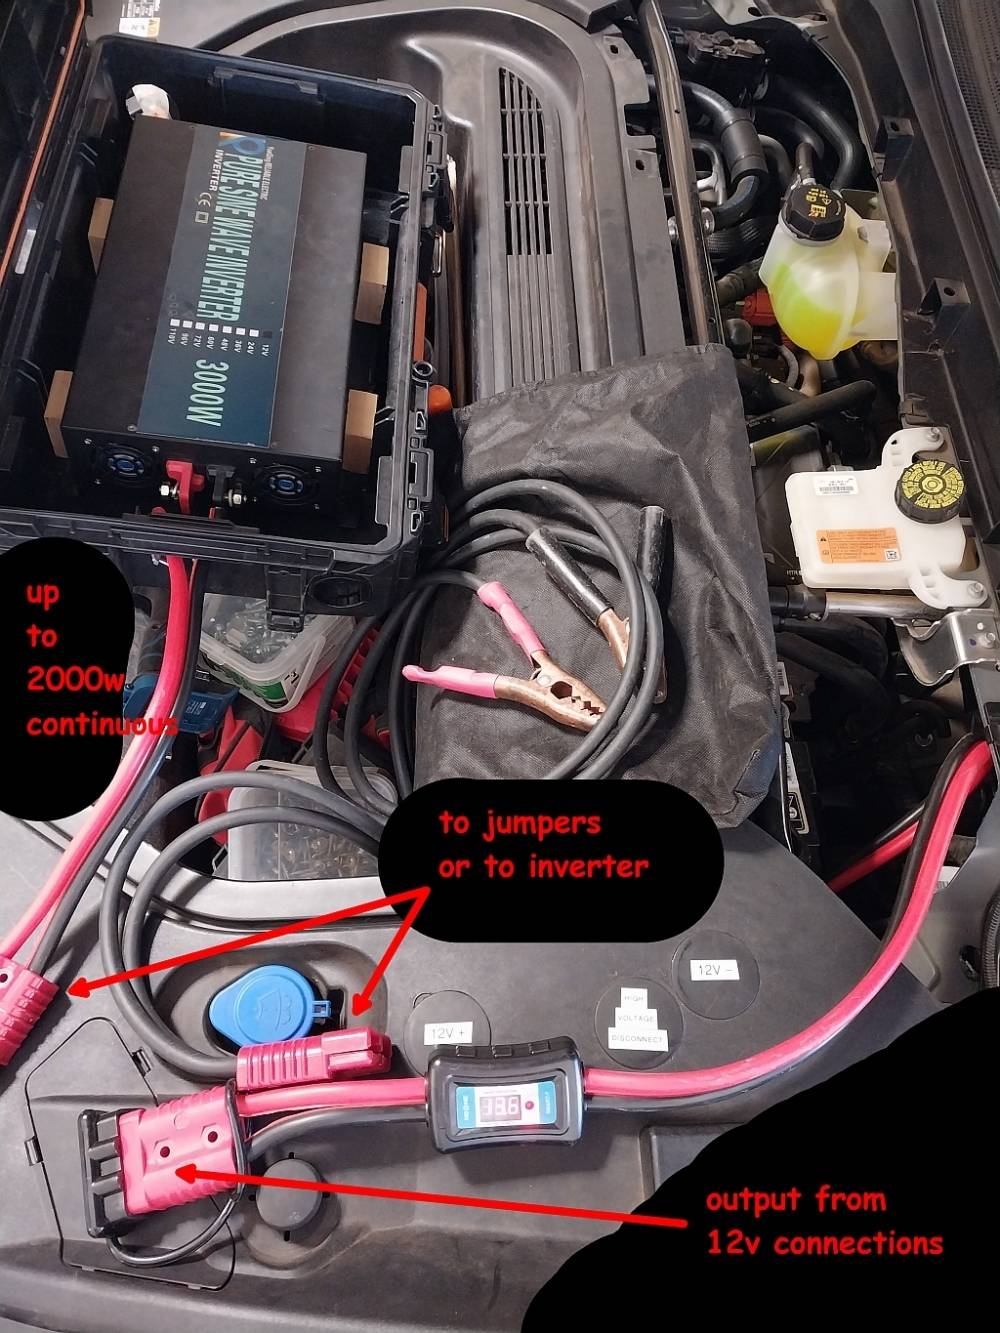
- installed a third Anderson on the remainder of the cable... essentially enabling me to have a 'permanent' 12v connection which could be stowed under the rear beauty cover area, and two 'pigtails' for choice of connection to standard alligator clamps, or lugs to install on an inverter or power supply/charger
Tools & materials needed to make these cables are:
- heavy duty (2AWG) wire or jumper cables
- wire cutter
- (1) 2awg x 1/4 lug, (3) 2awg x 5/16 lugs
- (3) 2awg - 175amp Anderson connectors w lugs
- crimper ... a BIG one for 2awg crimps!
- heat shrink and heat gun
Materials cost is about $75, but the big crimper needed to make cables may not be something many people have in their garage unless you know a solar installer or commercial electrician. I can fabricate and ship cable sets for $225 including shipping in the lower 48; contact me if you like a set.
Install is not too hard, and takes probably around an hour... The steps are:
1. remove beauty covers, and Frunk tub. You MIGHT be able to do the job without removing the Tub, but you will have to loosen and slide the battery back to reach the 12v+ terminal on the battery. It's easier and probably quicker overall to pull the Frunk Tub.
2. pop off the 12v+ terminal cover, and modify as shown below
3. remove the 12v+ conductor from battery
4. remove the 12v- 'connection post', install 12v- jumper lug, re-install connection post
5. install original 12v+ conductor on 12v+ battery stud, add 12v+ jumper lug and tighten nut on stud
6. replace (modified) 12v+ battery cover
7. replace Frunk tub and side beauty covers.... I leave the rear cover off for access to fluids, and easy storage of the new cable set in the space behind battery
here are the pictures to go along with it
I had mine out when replacing the battery anyway..... just (6) 10mm bolts, and two allans, and disconnect light/button to remove. then, pull the 12v-

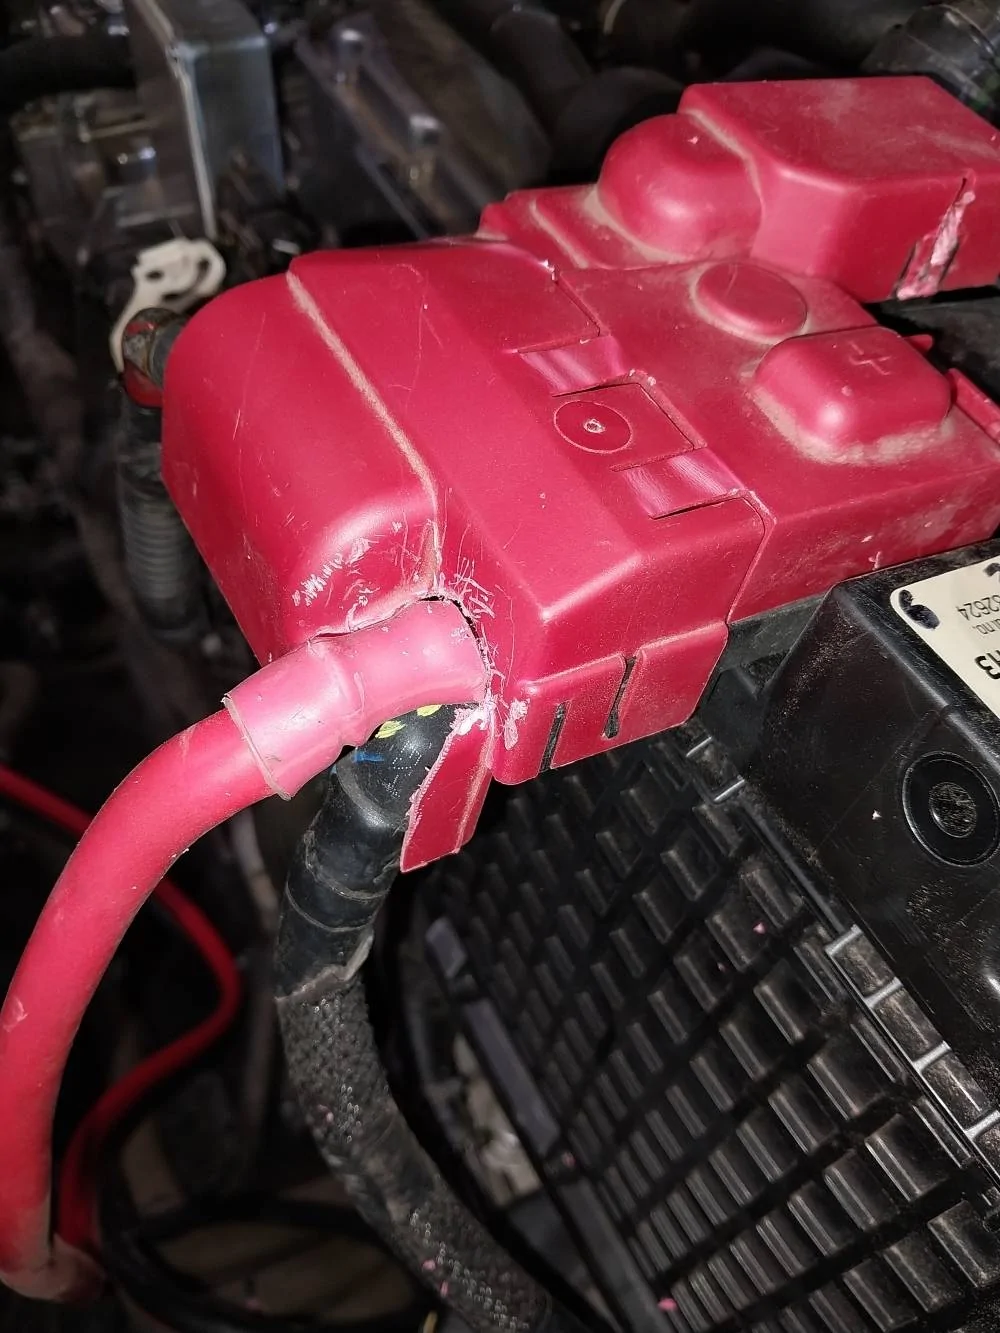
then pop off the 12v+ cover, modify, and install 12v+ jumper lug
note the trimming on the cover to enable new cable to poke thru.
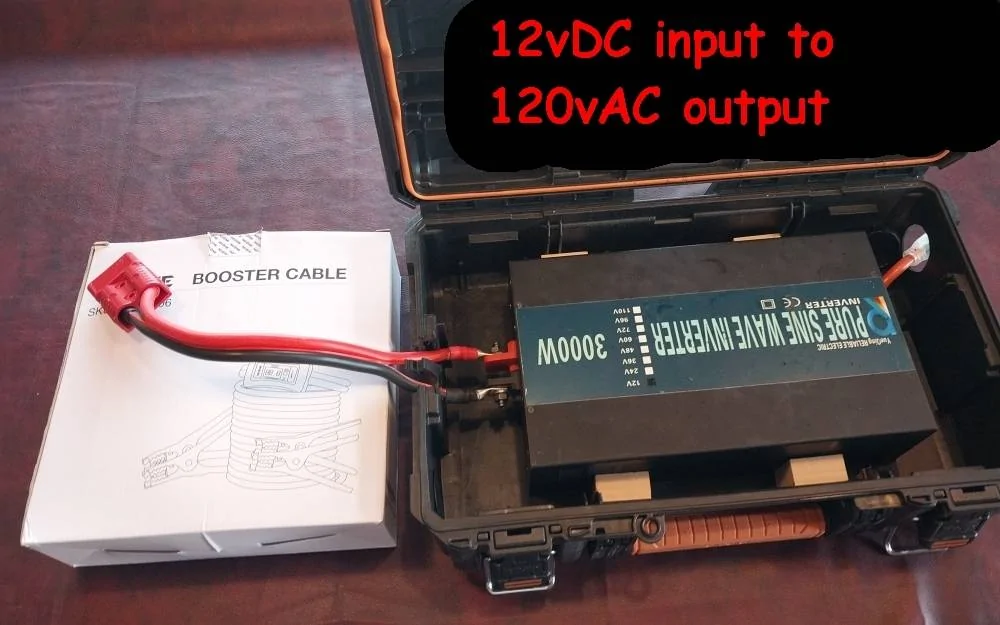
this is my favorite little inverter for 120v AC output

and this is one that I can put whatever plug/receptacle is needed to provide 240vAC power; RV shore power, or backfeed to a regular NEMA 14-50 outlet just like a Generator. I have used this setup to run 'critical loads' in my house!
House loads like refrigerator, lights, phone/modem, computer, etc take about 200-300 watts, with the occasional spike for microwave or teapot. This means you CAN run your house for days in case of emergency. You can also plug in your camper/RV and your MME becomes 'mobile shore power'.
You CANNOT run big loads (over 2000 watts) like wellpumps, hot tubs, electric water heaters, or air conditioners
So, this thread shows the DIY cables I came up with to provide solid connections to the 12v 'connection posts' capable of carrying 150amps for extended periods without overheating.... and the basics of installing them.

I started with a heavy duty jumper cable set (2awg wire), and then:
- cut stock clamps off one end, and crimped on lugs to match the MME connection points. 2awg x 5/16 lug for the 12v- connection stud, and 2awg x 1/4 for the 12v+ terminal stud on the 12v battery post.
- cut stock clamps off the other end, and crimped on a 175a 'Anderson' connector
- cut another 24" segment, and put an Anderson on one end, and a pair of 2awg x 5/16 lugs on the other end to install on Inverter of choice later.
- installed a third Anderson on the remainder of the cable... essentially enabling me to have a 'permanent' 12v connection which could be stowed under the rear beauty cover area, and two 'pigtails' for choice of connection to standard alligator clamps, or lugs to install on an inverter or power supply/charger
Tools & materials needed to make these cables are:
- heavy duty (2AWG) wire or jumper cables
- wire cutter
- (1) 2awg x 1/4 lug, (3) 2awg x 5/16 lugs
- (3) 2awg - 175amp Anderson connectors w lugs
- crimper ... a BIG one for 2awg crimps!
- heat shrink and heat gun
Materials cost is about $75, but the big crimper needed to make cables may not be something many people have in their garage unless you know a solar installer or commercial electrician. I can fabricate and ship cable sets for $225 including shipping in the lower 48; contact me if you like a set.
Install is not too hard, and takes probably around an hour... The steps are:
1. remove beauty covers, and Frunk tub. You MIGHT be able to do the job without removing the Tub, but you will have to loosen and slide the battery back to reach the 12v+ terminal on the battery. It's easier and probably quicker overall to pull the Frunk Tub.
2. pop off the 12v+ terminal cover, and modify as shown below
3. remove the 12v+ conductor from battery
4. remove the 12v- 'connection post', install 12v- jumper lug, re-install connection post
5. install original 12v+ conductor on 12v+ battery stud, add 12v+ jumper lug and tighten nut on stud
6. replace (modified) 12v+ battery cover
7. replace Frunk tub and side beauty covers.... I leave the rear cover off for access to fluids, and easy storage of the new cable set in the space behind battery
here are the pictures to go along with it

I had mine out when replacing the battery anyway..... just (6) 10mm bolts, and two allans, and disconnect light/button to remove. then, pull the 12v-

then pop off the 12v+ cover, modify, and install 12v+ jumper lug

note the trimming on the cover to enable new cable to poke thru.

this is my favorite little inverter for 120v AC output
and this is one that I can put whatever plug/receptacle is needed to provide 240vAC power; RV shore power, or backfeed to a regular NEMA 14-50 outlet just like a Generator. I have used this setup to run 'critical loads' in my house!
House loads like refrigerator, lights, phone/modem, computer, etc take about 200-300 watts, with the occasional spike for microwave or teapot. This means you CAN run your house for days in case of emergency. You can also plug in your camper/RV and your MME becomes 'mobile shore power'.
You CANNOT run big loads (over 2000 watts) like wellpumps, hot tubs, electric water heaters, or air conditioners

Sponsored
Last edited:
")

