Replacing the ACM without Removing the Dash

Mach-Lee

Well-Known Member
First Name
Lee
Joined
Jul 16, 2021
Threads
221
Messages
8,476
Reaction score
17,185
Location
Wisconsin
Vehicles
2022 Mach-E Premium AWD
Occupation
Sci/Eng
Country flag
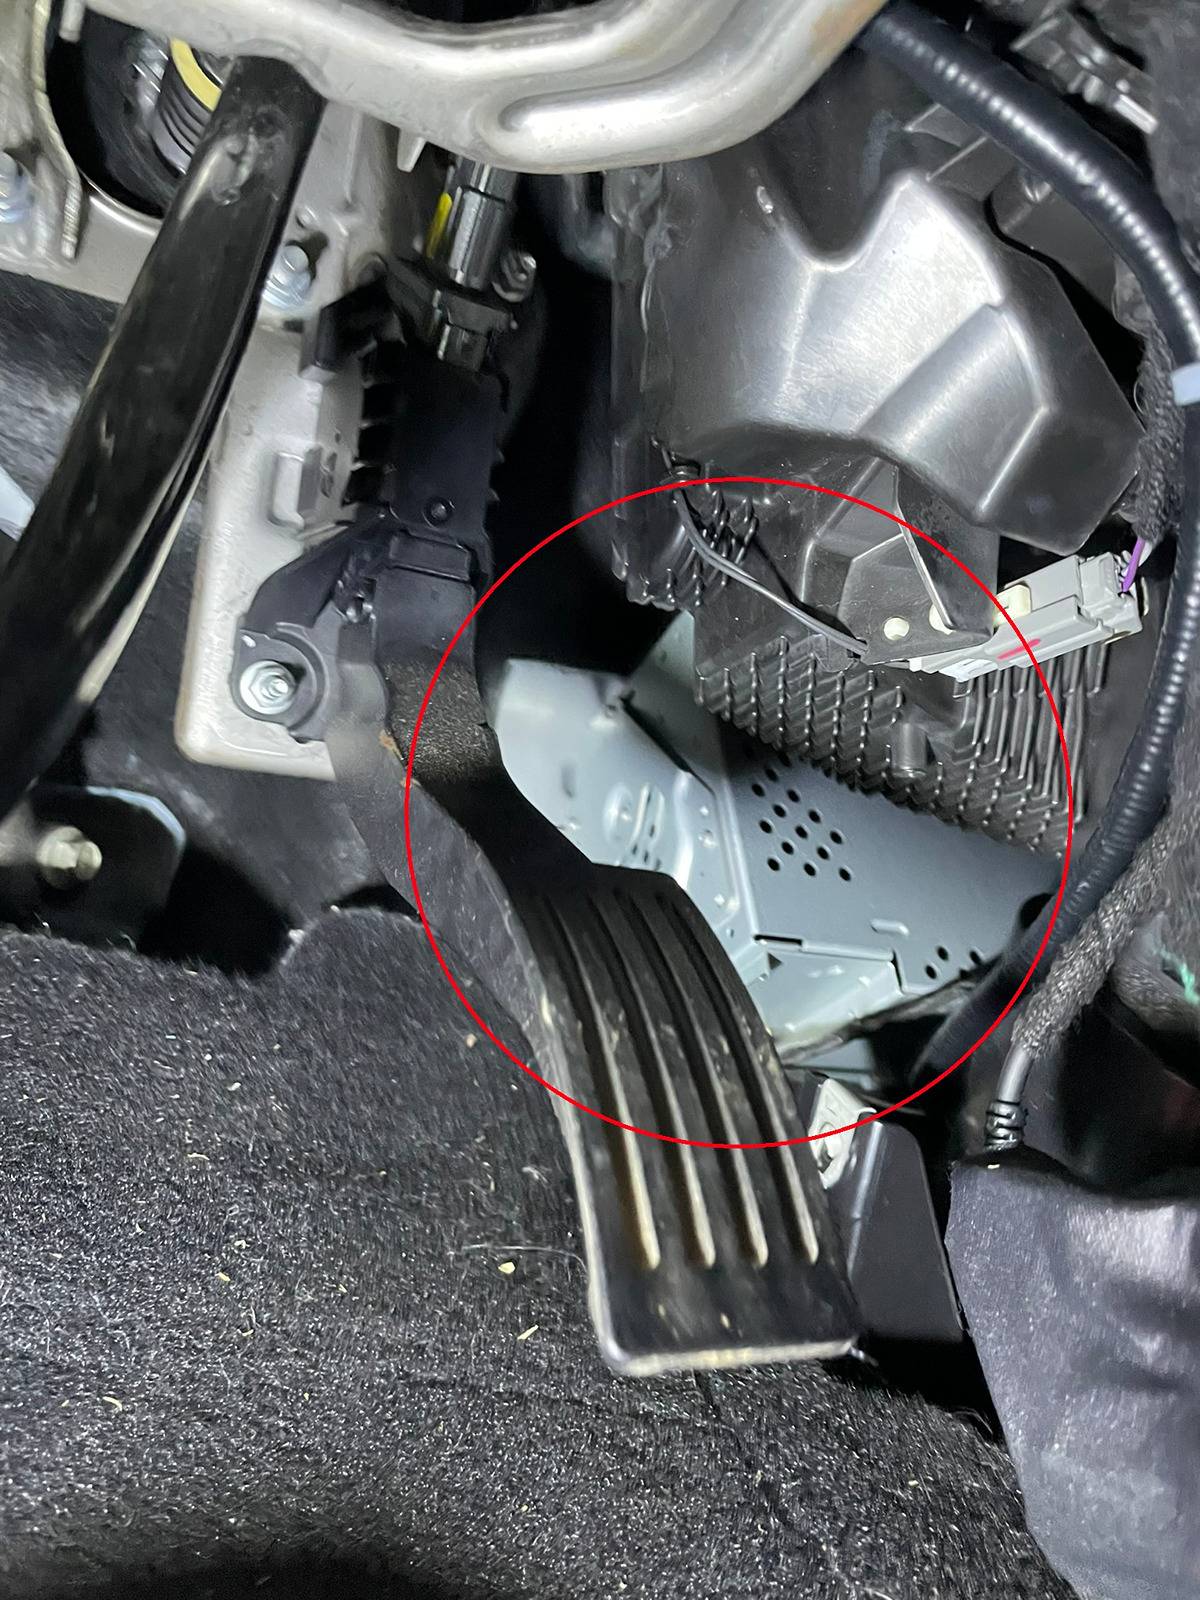
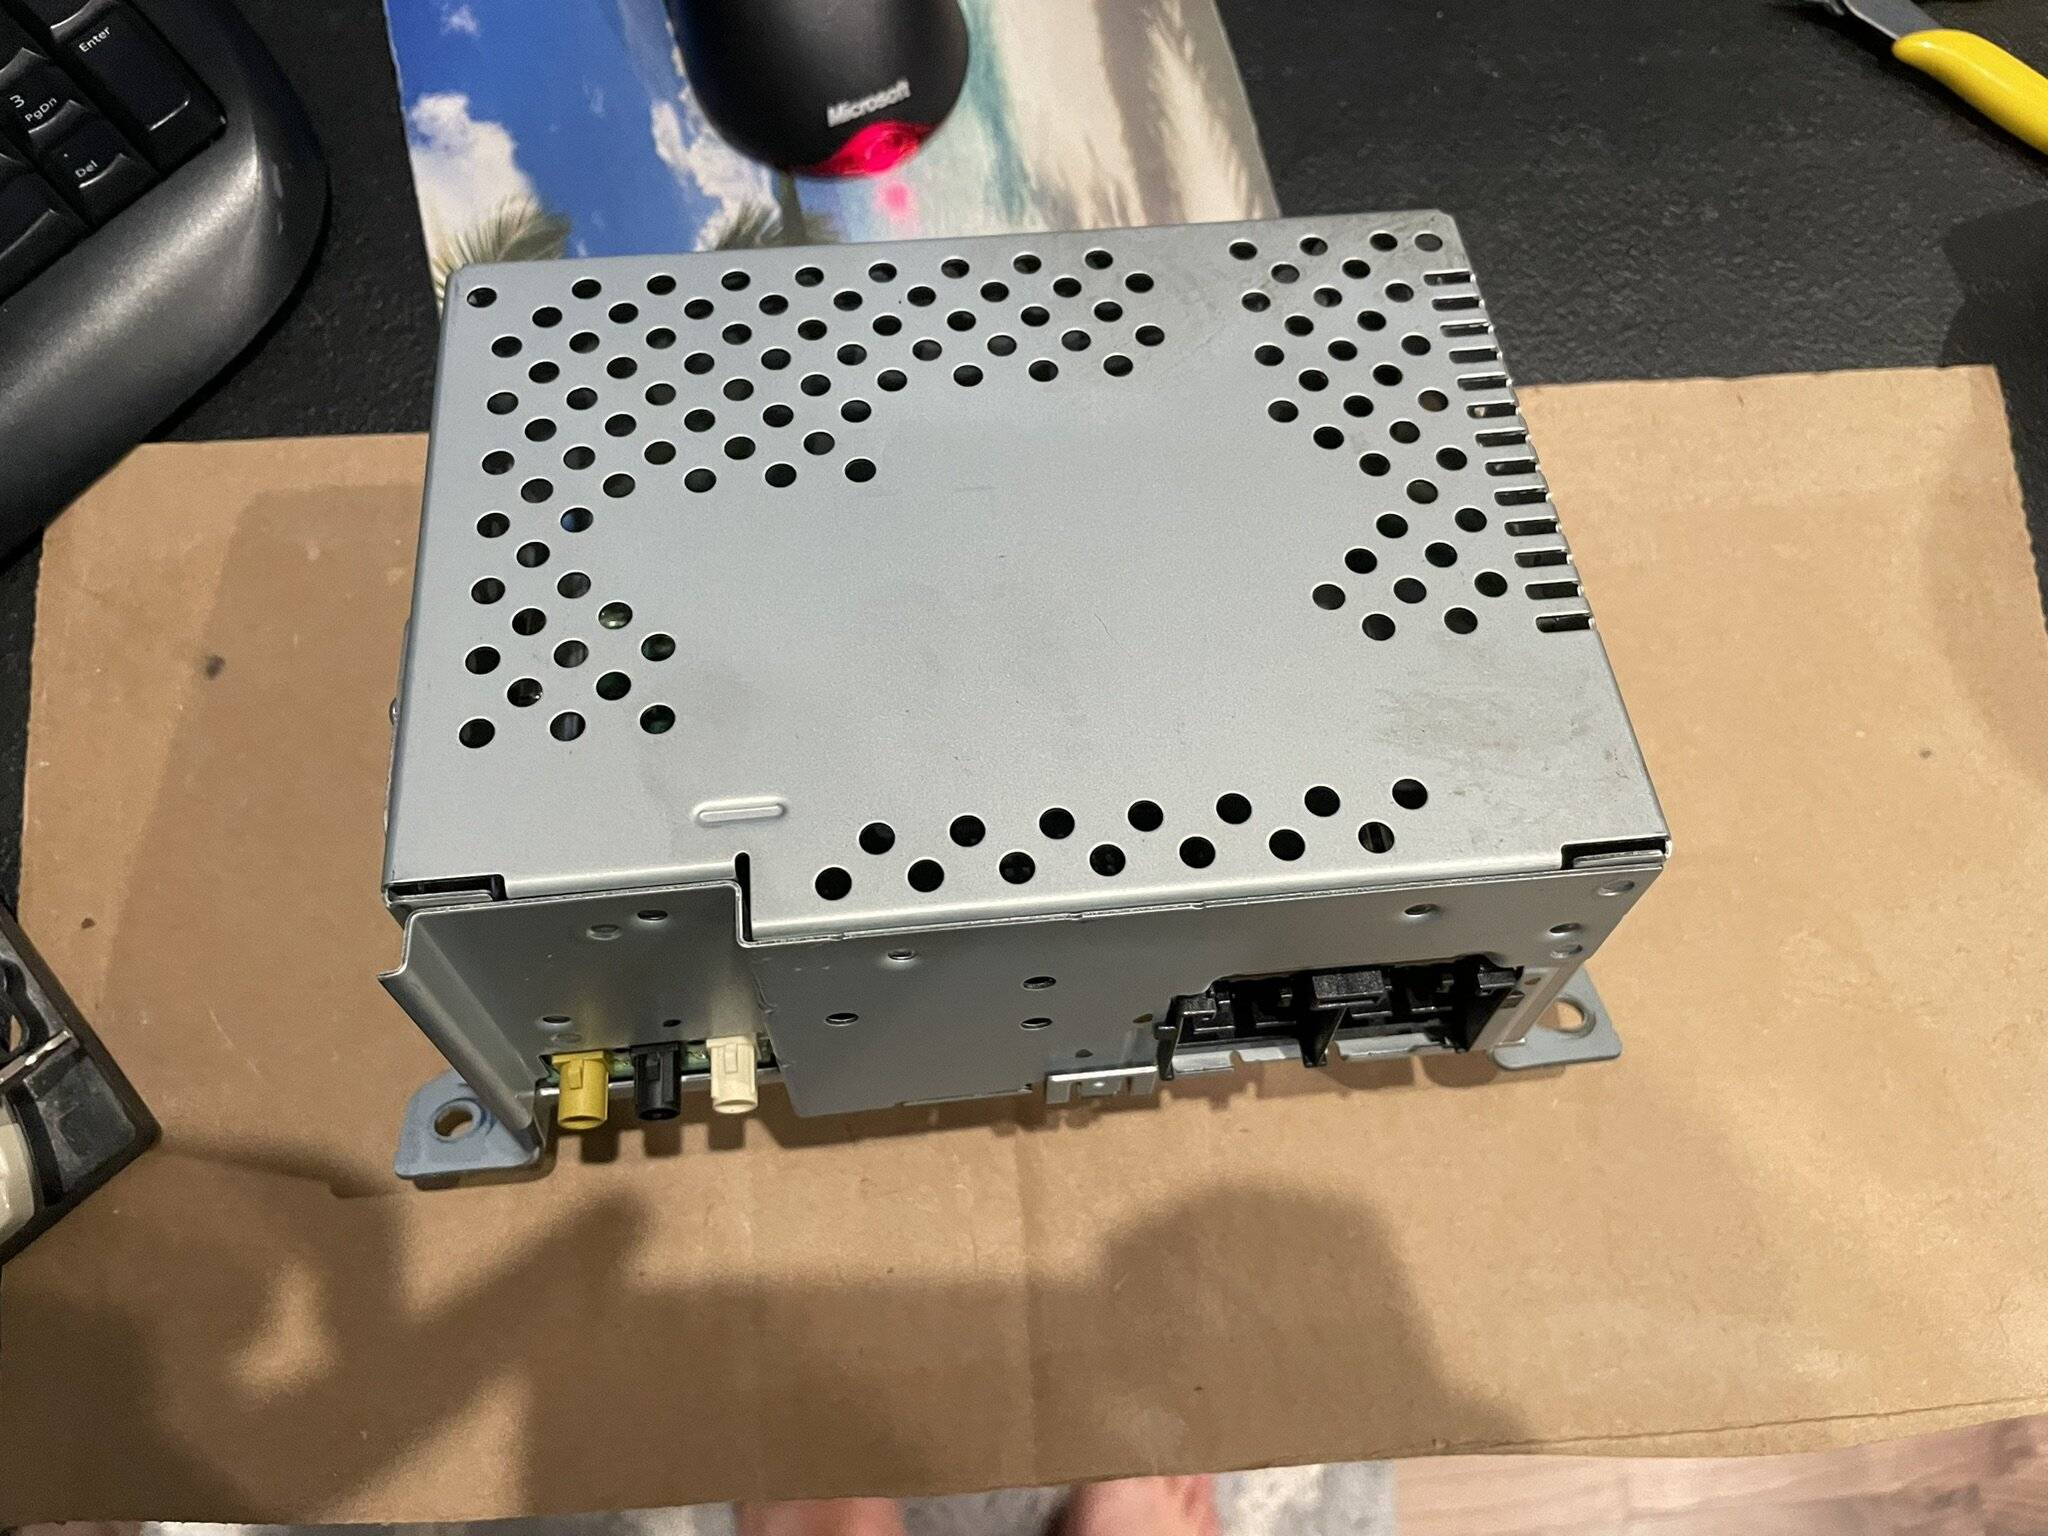
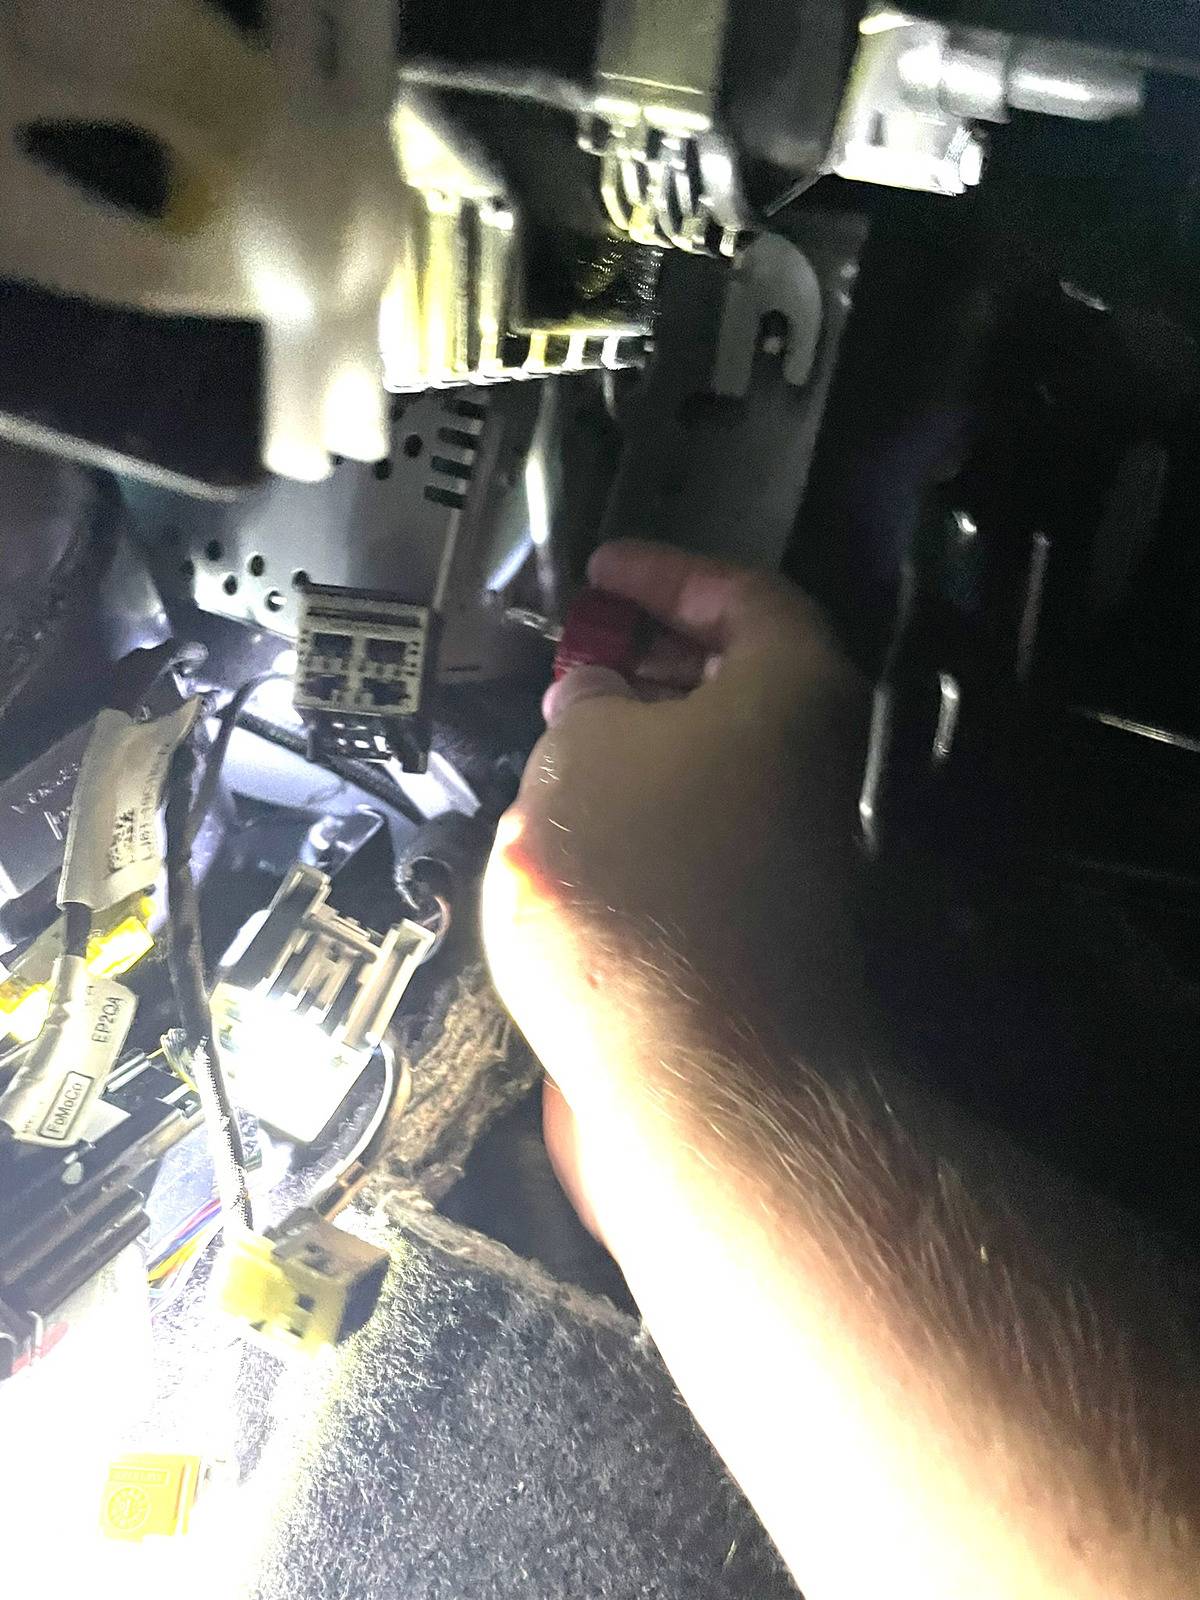
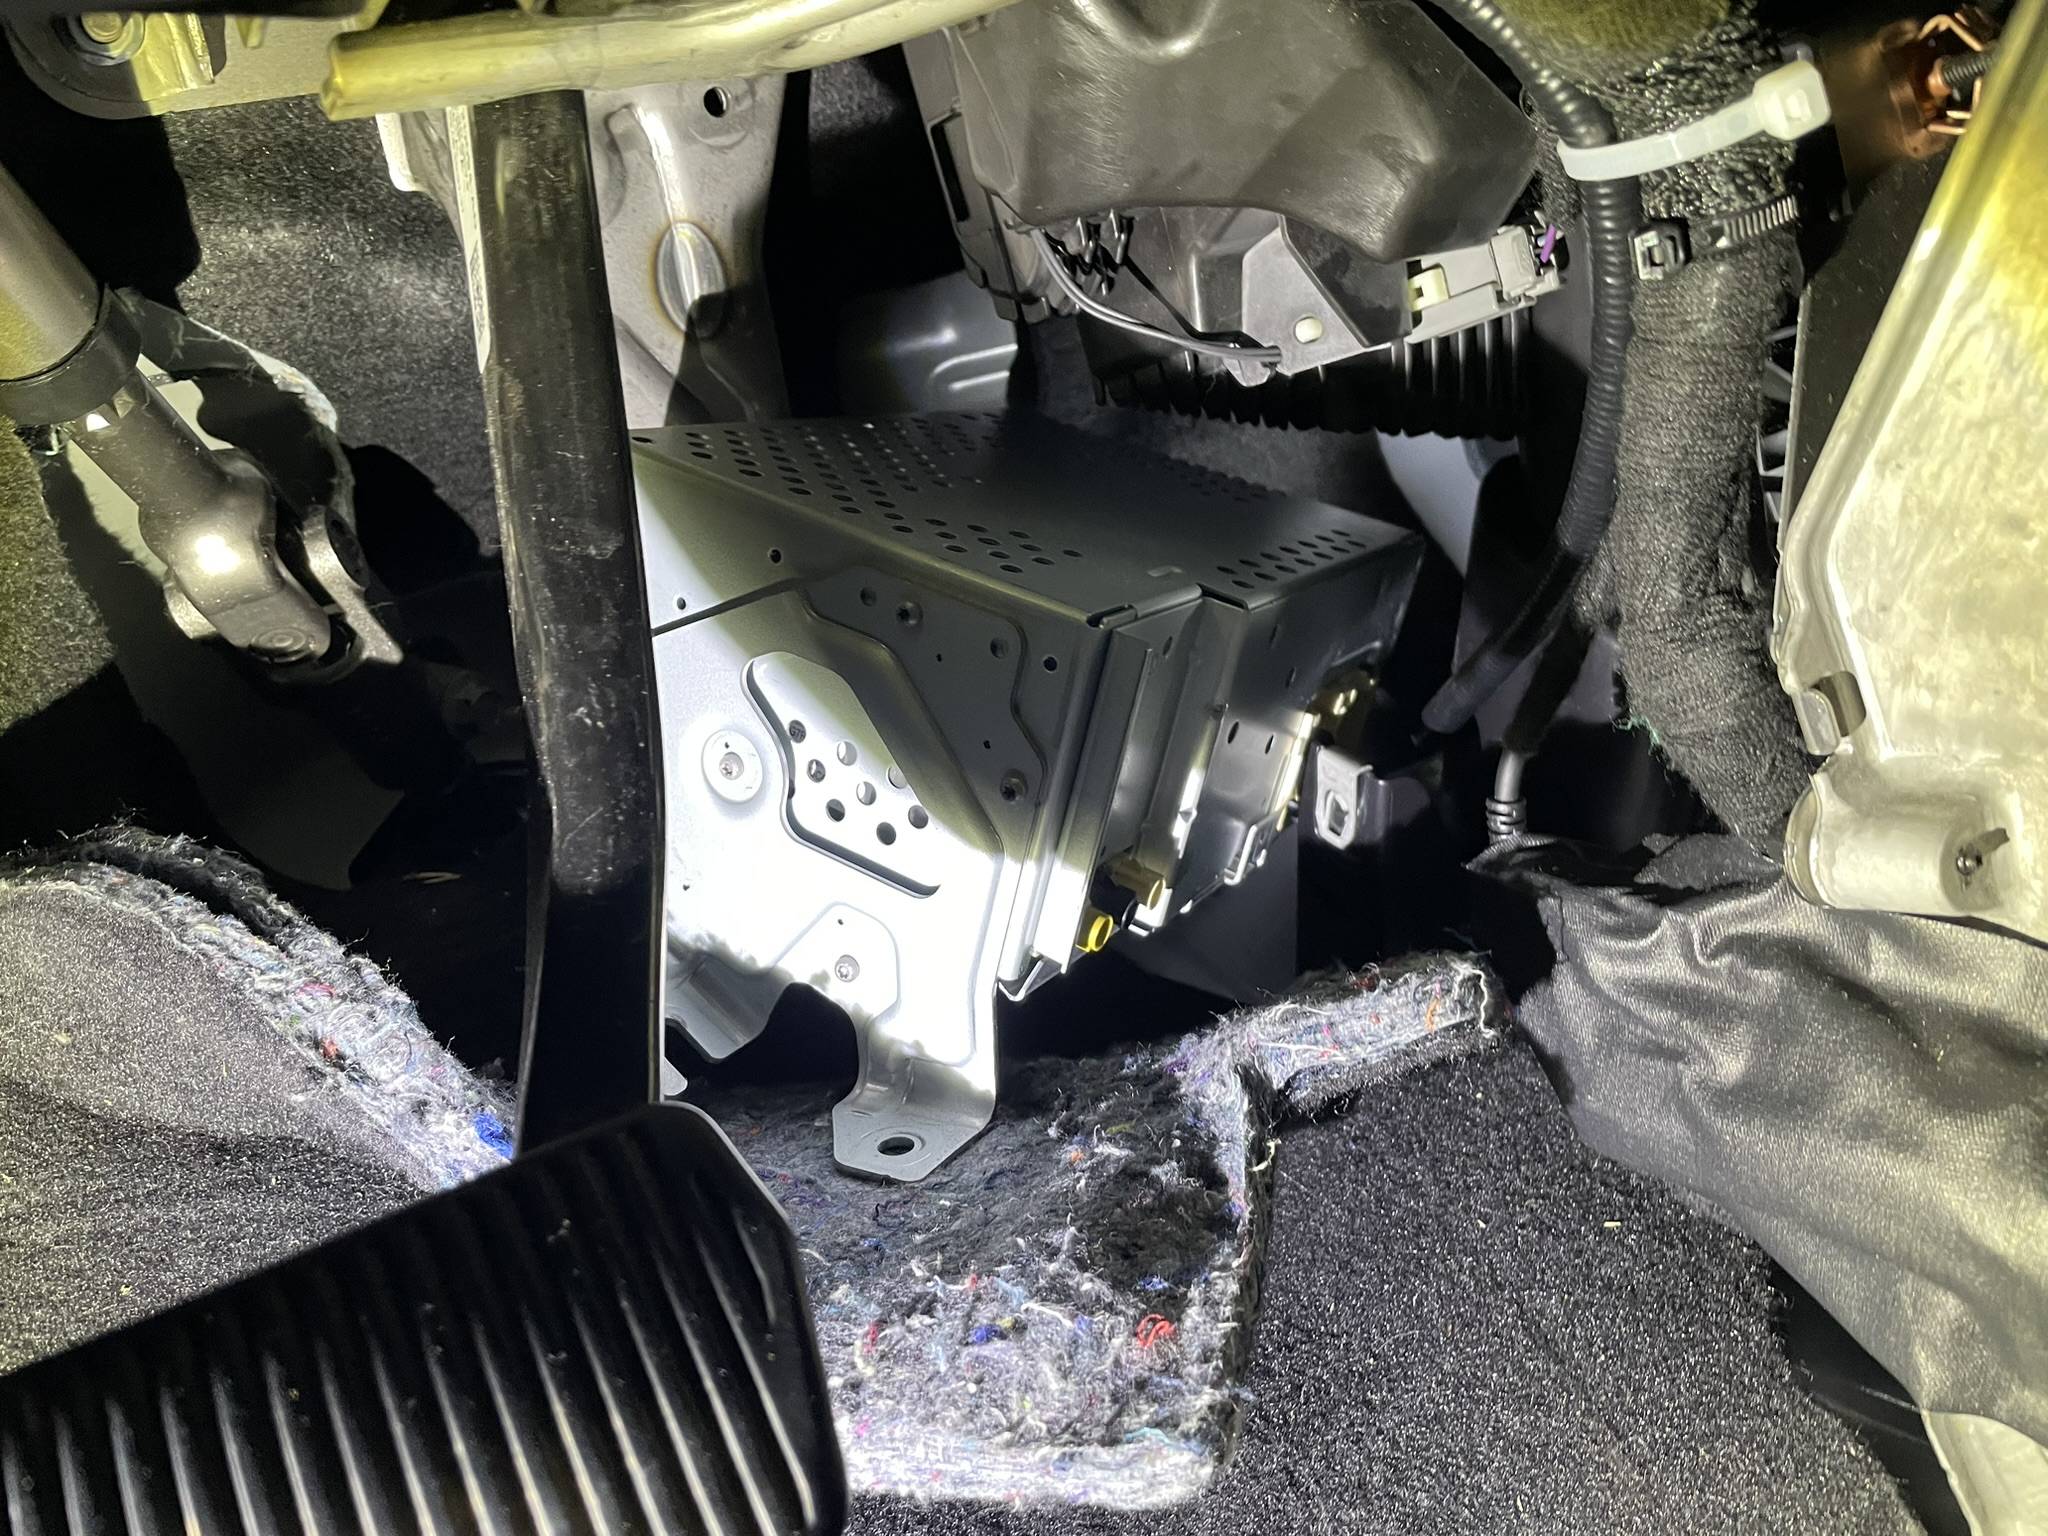
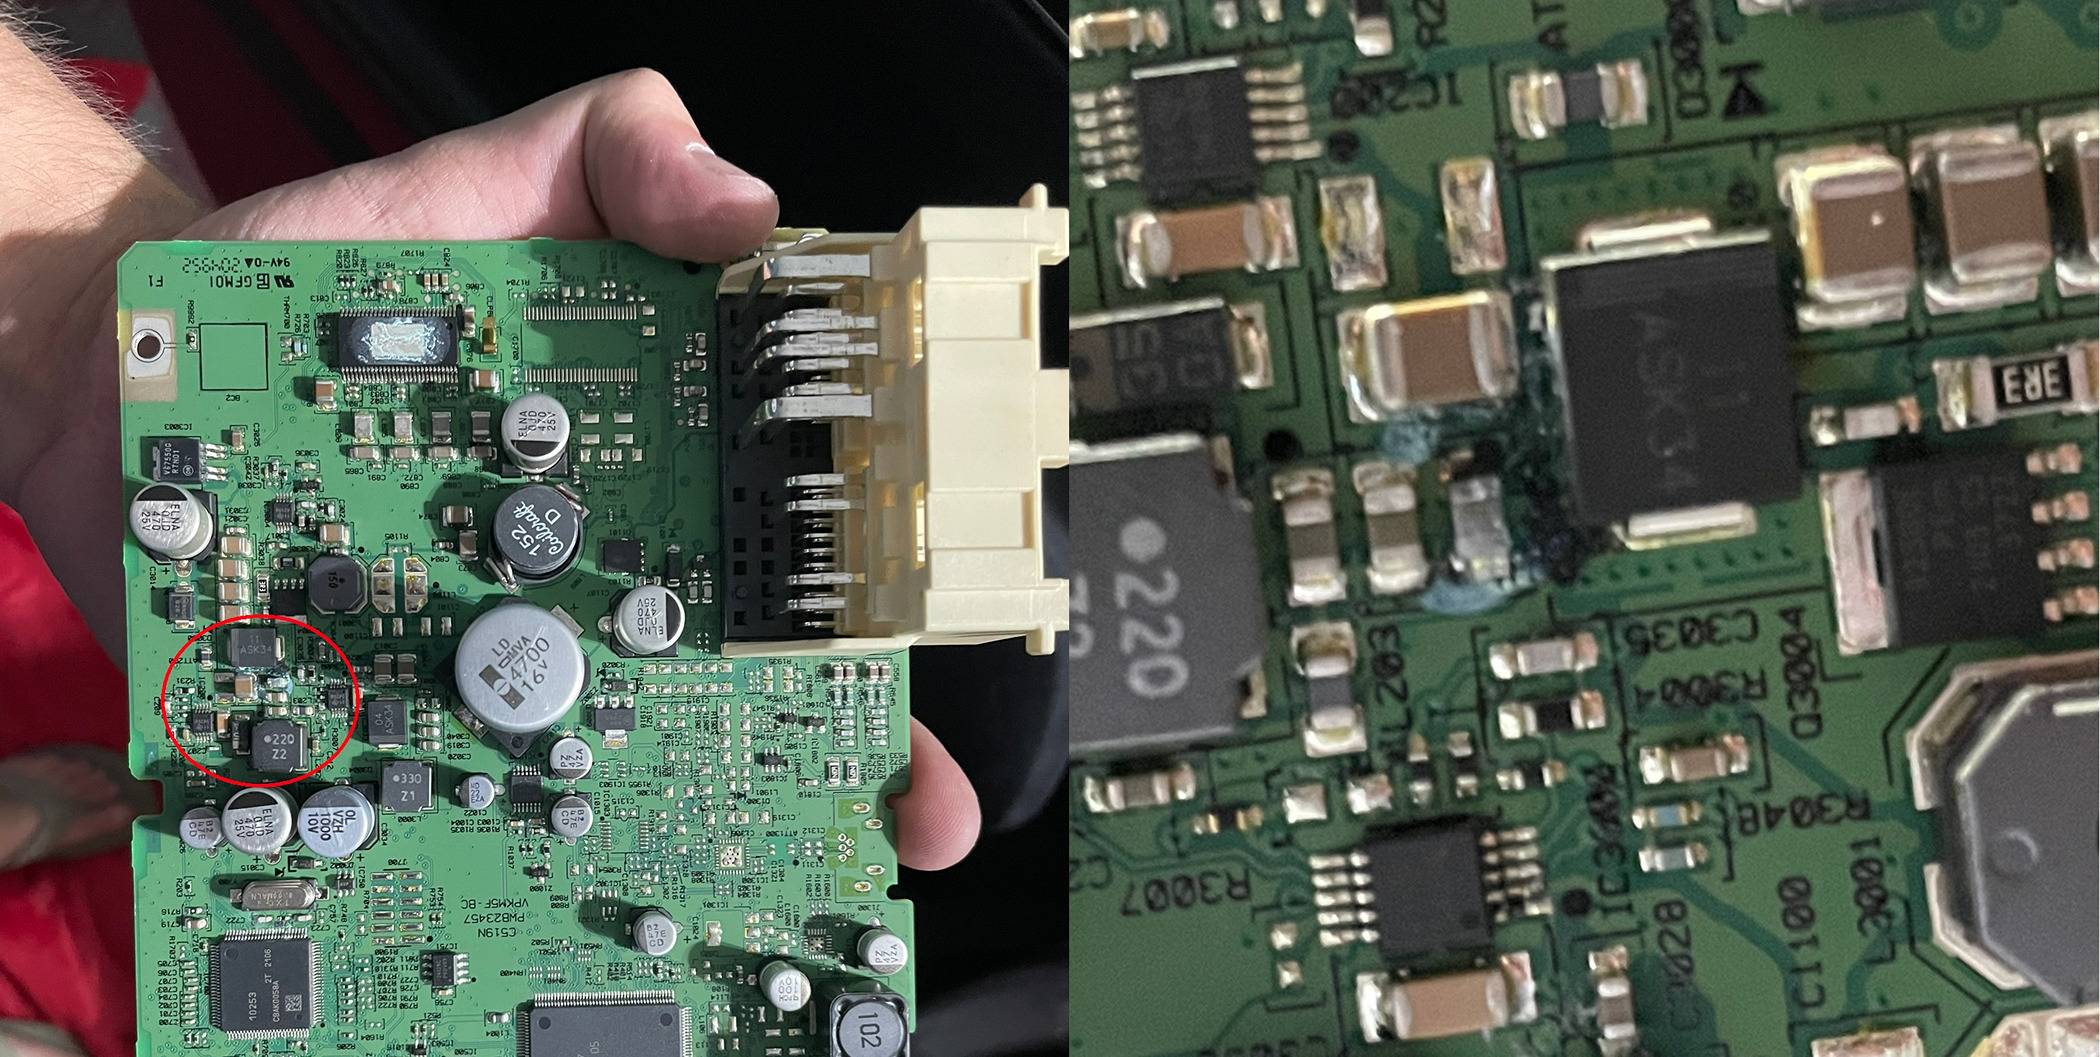
@360alaska You might want to check for water intrusion, I've heard of one other case where the windshield seal wasn't great so water ran down the firewall and shorted out either the ACM or a harness down there. That might be your root cause.
Sponsored

 
OP
OP
360alaska

360alaska

Active Member
First Name
Josh
Joined
Aug 21, 2023
Threads
2
Messages
43
Reaction score
45
Location
Northwest Louisiana
Vehicles
2021 MACH-E RWD, 2019 Model 3, 1997 Ranger 4.0
Country flag
Thanks, I saw no evidence of water intrusion, everything was bone dry. My best guess is that sometimes the car wash guys my wife takes it to spray the dashboard?
 

Jimrpa

Well-Known Member
First Name
Jim
Joined
Sep 10, 2020
Threads
241
Messages
7,286
Reaction score
9,650
Location
Wayne, PA
Vehicles
2021 Infinite Blue Premium Mustang Mach E ER AWD
Occupation
Retied (formerly tried to herd highly technical, independent cats)
Country flag
Introduction (TLDR at bottom)

On a family trip to Florida, our 2021 Mach-E suddenly lost its audio and GPS functions. After consulting a forum, I tried disconnecting the battery—a quick fix that temporarily restored the radio and GPS. Using a ¼” socket set from Harbor Freight, I performed this reset. Initially, this solution worked well, but the problem recurred several times. Frustrated, I purchased an FDRS subscription and planned to reload the ACM software. Unfortunately, the ACM stayed offline. Ford suggested that replacing the ACM would require removing the entire dashboard, including draining the coolant and recovering the refrigerant. Having previously removed a dashboard on a late-model Fusion but lacking the tools to bleed the HV battery, I was hesitant. With 45,000 miles on the car and no longer under bumper-to-bumper warranty, the repair cost was estimated at $2,000-$3,000. Despite being able to afford it, I lacked trust in my local dealership due to prior botched repairs.

IMG_7241.JPEG
Screenshot 2024-05-25 154620.png


Diagnosis


The diagnosis was straightforward. I used FDRS to check communication errors and found that each module sharing the HS3 bus with the ACM could not connect with the radio. After verifying power supply and wiring integrity with a voltmeter, I concluded that the ACM was indeed non-functional. This left me with two choices: drive to a reputable dealership in Dallas or Houston, or source the part myself and hope for a simpler fix. (Crazy 3rd choice: create an extension harness set and relocate the new unit to where the DSP would be since my car is 6 channel model.)

1.png


Sourcing a Part


Locating the part proved challenging. The specific ACM model (LJ8T-18K810-AHG / LJ8T-18K810-AHL) was not listed as available from Ford, so I turned to eBay, securing one from a slightly newer Job 2 2021 model. I considered a 2023 part (LJ8T-18D890-AHC), but uncertain if FDRS would program it, I opted for caution. The part arrived covered in oil, which led me to carefully clean it with plastic-safe electronics cleaner. Upon inspection, the board was noticeably smaller than its housing, suggesting the design was carried over from models previously equipped with a CD player.

IMG_7228.JPEG
IMG_7231.JPEG
IMG_7232.JPEG


Confirming the Diagnosis

Upon receiving the replacement ACM, I discovered there was sufficient slack in the connectors to temporarily install it for testing. Remarkably, as soon as it was connected, both audio and GPS functionalities were restored, even before performing the PMI (Programmable Module Installation). Encouraged by this immediate success, I proceeded with the PMI, which fully integrated the new module into the system. The final challenge was to securely mount the ACM in its designated spot without removing the dashboard.

IMG_7244.JPEG


Swapping the Part

Contrary to Ford's official stance that the dashboard must be removed to replace the ACM, I discovered a workaround that allowed for a less invasive approach. My initial step involved removing the side panels to better explore and assess the installation space. It appeared feasible to slide out the ACM if the brackets could be detached while the module remained in the car. I initially hoped that the BCM (Body Control Module) bracket could be easily removed. However, a structural "dog ear" mount from the EVAP casing presented an obstacle. Considering the option to cut and later repair this mount was preferable to the more daunting task of draining the coolant and refrigerant.

IMG_7249.JPEG
IMG_7250.JPEG


After further exploration, I devised a strategy that avoided altering the "dog ear" mount. By removing the accelerator pedal and cleverly manipulating the passenger-side bracket, I created enough clearance. I then loosened and temporarily bent part of the BCM mount using a chain of zip ties, which provided the necessary space. With this setup, I was able to contort my wrist enough to loosen the T10 screws with a thumb screwdriver. Ultimately, I only needed to remove the passenger bracket, and I managed to extract the entire unit through the driver’s side footwell, leaving the driver-side bracket installed.

IMG_7256.JPEG
IMG_7252.JPEG


The Old Unit


What could have caused the original ACM to fail? Often, electronic failures leave no visible clues, with issues typically arising from internal chip defects. However, upon inspection of the old unit, I discovered signs of corrosion and a burn mark, indicating more tangible damage. Reflecting on this experience, if I were to replace another ACM, I would apply a conformal coating to the replacement board to safeguard it against moisture. Ideally, such protective measures should be a standard practice straight from the factory.


IMG_7257.JPEG


TLDR


In summary, replacing the ACM can be done without removing the dashboard. Simply remove the footwell panels and the accelerator pedal, temporarily bend the BCM mount using zip ties, and unscrew the passenger-side ACM bracket. This approach allows for the removal and replacement of the ACM with minimal disruption. I hope this article helps you in your future endeavors.


IMG_7246.JPEG
I’m confused about one “little” detail - why would Ford advise disconnecting and draining the HV coolant just to replace the ACM (which appears to be little more than a fancy audio “head unit” without the “head” bits?
 
OP
OP
360alaska

360alaska

Active Member
First Name
Josh
Joined
Aug 21, 2023
Threads
2
Messages
43
Reaction score
45
Location
Northwest Louisiana
Vehicles
2021 MACH-E RWD, 2019 Model 3, 1997 Ranger 4.0
Country flag
I’m confused about one “little” detail - why would Ford advise disconnecting and draining the HV coolant just to replace the ACM (which appears to be little more than a fancy audio “head unit” without the “head” bits?
Because those things must be done to remove the Dashboard.
 

Jimrpa

Well-Known Member
First Name
Jim
Joined
Sep 10, 2020
Threads
241
Messages
7,286
Reaction score
9,650
Location
Wayne, PA
Vehicles
2021 Infinite Blue Premium Mustang Mach E ER AWD
Occupation
Retied (formerly tried to herd highly technical, independent cats)
Country flag
My Friend, it is easier to swap replaceble assemblies on fighter aircraft. These planes have specific requirements for maintainability. The aircraft also have validated maintenance procedures (typically called a Technical Order). An A+ on your effort. Also, how is your back after all of your contortions?
Actually, I know of specific instances on aircraft currently being manufactured and in USAF inventory, where it’s required to cut through the skin of the aircraft to get to certain avionics connectors.


Jimrpa

Well-Known Member
First Name
Jim
Joined
Sep 10, 2020
Threads
241
Messages
7,286
Reaction score
9,650
Location
Wayne, PA
Vehicles
2021 Infinite Blue Premium Mustang Mach E ER AWD
Occupation
Retied (formerly tried to herd highly technical, independent cats)
Country flag
Because those things must be done to remove the Dashboard.
Are you serious? The HV coolant lines are somehow involved with the dashboard? I can’t even begin to come up with a reason that might be the case!
 
OP
OP
360alaska

360alaska

Active Member
First Name
Josh
Joined
Aug 21, 2023
Threads
2
Messages
43
Reaction score
45
Location
Northwest Louisiana
Vehicles
2021 MACH-E RWD, 2019 Model 3, 1997 Ranger 4.0
Country flag
Are you serious? The HV coolant lines are somehow involved with the dashboard? I can’t even begin to come up with a reason that might be the case!

Sometimes the truth kinda sucks. See attachments.
 

Attachments

Wallie

Member
First Name
Walter
Joined
May 11, 2024
Threads
0
Messages
11
Reaction score
8
Location
Amsterdam, The Netherlands
Vehicles
Star white MME Premium AWD ER ‘21 Modified :-)
Actually, I know of specific instances on aircraft currently being manufactured and in USAF inventory, where it’s required to cut through the skin of the aircraft to get to certain avionics connectors.
That’s crazy 😱
 

Mach-Lee

Well-Known Member
First Name
Lee
Joined
Jul 16, 2021
Threads
221
Messages
8,476
Reaction score
17,185
Location
Wisconsin
Vehicles
2022 Mach-E Premium AWD
Occupation
Sci/Eng
Country flag
Are you serious? The HV coolant lines are somehow involved with the dashboard? I can’t even begin to come up with a reason that might be the case!
Coolant is used for the heater core. It’s all one coolant system, so it has to be drained to remove the heater hoses.

The service manual often has extra steps, if you’re smart you’ll learn you can often just partially dissemble things (rather than completely dissemble things) enough to get the part in and out, which is what he did. I do the same thing all the time when replacing parts on the cars I service.

For example, I had to replace my door presenter, the service manual wants you to completely remove the door glass and window mechanism. But I was able to just loosen the window mechanism enough to slide the part in without completely removing everything, which saved a lot of work.
 

Nikos

Well-Known Member
Joined
Dec 29, 2019
Threads
1
Messages
476
Reaction score
449
Location
Taylors SC
Vehicles
17 Must GT, 21MME AWD, 22 F-150 Lightning
Occupation
Aircraft Mechanic
Country flag
Introduction (TLDR at bottom)

On a family trip to Florida, our 2021 Mach-E suddenly lost its audio and GPS functions. After consulting a forum, I tried disconnecting the battery—a quick fix that temporarily restored the radio and GPS. Using a ¼” socket set from Harbor Freight, I performed this reset. Initially, this solution worked well, but the problem recurred several times. Frustrated, I purchased an FDRS subscription and planned to reload the ACM software. Unfortunately, the ACM stayed offline. Ford suggested that replacing the ACM would require removing the entire dashboard, including draining the coolant and recovering the refrigerant. Having previously removed a dashboard on a late-model Fusion but lacking the tools to bleed the HV battery, I was hesitant. With 45,000 miles on the car and no longer under bumper-to-bumper warranty, the repair cost was estimated at $2,000-$3,000. Despite being able to afford it, I lacked trust in my local dealership due to prior botched repairs.

IMG_7241.JPEG
Screenshot 2024-05-25 154620.png


Diagnosis


The diagnosis was straightforward. I used FDRS to check communication errors and found that each module sharing the HS3 bus with the ACM could not connect with the radio. After verifying power supply and wiring integrity with a voltmeter, I concluded that the ACM was indeed non-functional. This left me with two choices: drive to a reputable dealership in Dallas or Houston, or source the part myself and hope for a simpler fix. (Crazy 3rd choice: create an extension harness set and relocate the new unit to where the DSP would be since my car is 6 channel model.)

1.png


Sourcing a Part


Locating the part proved challenging. The specific ACM model (LJ8T-18K810-AHG / LJ8T-18K810-AHL) was not listed as available from Ford, so I turned to eBay, securing one from a slightly newer Job 2 2021 model. I considered a 2023 part (LJ8T-18D890-AHC), but uncertain if FDRS would program it, I opted for caution. The part arrived covered in oil, which led me to carefully clean it with plastic-safe electronics cleaner. Upon inspection, the board was noticeably smaller than its housing, suggesting the design was carried over from models previously equipped with a CD player.

IMG_7228.JPEG
IMG_7231.JPEG
IMG_7232.JPEG


Confirming the Diagnosis

Upon receiving the replacement ACM, I discovered there was sufficient slack in the connectors to temporarily install it for testing. Remarkably, as soon as it was connected, both audio and GPS functionalities were restored, even before performing the PMI (Programmable Module Installation). Encouraged by this immediate success, I proceeded with the PMI, which fully integrated the new module into the system. The final challenge was to securely mount the ACM in its designated spot without removing the dashboard.

IMG_7244.JPEG


Swapping the Part

Contrary to Ford's official stance that the dashboard must be removed to replace the ACM, I discovered a workaround that allowed for a less invasive approach. My initial step involved removing the side panels to better explore and assess the installation space. It appeared feasible to slide out the ACM if the brackets could be detached while the module remained in the car. I initially hoped that the BCM (Body Control Module) bracket could be easily removed. However, a structural "dog ear" mount from the EVAP casing presented an obstacle. Considering the option to cut and later repair this mount was preferable to the more daunting task of draining the coolant and refrigerant.

IMG_7249.JPEG
IMG_7250.JPEG


After further exploration, I devised a strategy that avoided altering the "dog ear" mount. By removing the accelerator pedal and cleverly manipulating the passenger-side bracket, I created enough clearance. I then loosened and temporarily bent part of the BCM mount using a chain of zip ties, which provided the necessary space. With this setup, I was able to contort my wrist enough to loosen the T10 screws with a thumb screwdriver. Ultimately, I only needed to remove the passenger bracket, and I managed to extract the entire unit through the driver’s side footwell, leaving the driver-side bracket installed.

IMG_7256.JPEG
IMG_7252.JPEG


The Old Unit


What could have caused the original ACM to fail? Often, electronic failures leave no visible clues, with issues typically arising from internal chip defects. However, upon inspection of the old unit, I discovered signs of corrosion and a burn mark, indicating more tangible damage. Reflecting on this experience, if I were to replace another ACM, I would apply a conformal coating to the replacement board to safeguard it against moisture. Ideally, such protective measures should be a standard practice straight from the factory.


IMG_7257.JPEG


TLDR


In summary, replacing the ACM can be done without removing the dashboard. Simply remove the footwell panels and the accelerator pedal, temporarily bend the BCM mount using zip ties, and unscrew the passenger-side ACM bracket. This approach allows for the removal and replacement of the ACM with minimal disruption. I hope this article helps you in your future endeavors.


IMG_7246.JPEG
I wished the large flat display was a smart display resembling modern Avionics displays on aircraft. Switched into diagnostic mode, you can see all comm busses from every module in the vehicle. Then proceed replacing the defective module such as you described. Avionics tech is a different animal and quite expensive.
 

Schmedlack

Well-Known Member
First Name
Joe
Joined
Oct 22, 2020
Threads
0
Messages
89
Reaction score
85
Location
Dundalk, MD
Vehicles
2014 Ford Escape S 1925 Ford Tudor (2-door)
Occupation
Trader
Actually, I know of specific instances on aircraft currently being manufactured and in USAF inventory, where it’s required to cut through the skin of the aircraft to get to certain avionics connectors.
Very surprising that the Government bought into this. Glad I retired from that stuff.
 

eStang

Well-Known Member
First Name
Larry
Joined
Apr 14, 2020
Threads
6
Messages
260
Reaction score
351
Location
Illinois
Vehicles
2021 Mustang Mach-E FE, 2021 Mustang Mach-E GT
Occupation
software salesperson
Country flag
Oh hey, this is the module I do work on! (Not this specific one, only been at the supplier for a couple years, I don't think the ones I've done work on have been released for Ford quite yet.) Pretty neat to see.
Thanks for your efforts! Love my vehicle and appreciate all who design, engineer and assemble them!
 

Sparty

Active Member
First Name
Dennis
Joined
May 17, 2024
Threads
5
Messages
30
Reaction score
15
Location
Eaton Rapids, MI
Vehicles
2023 Premium AWD, Rapid Red Metallic, Nite Pony
Occupation
Retired Repiratory Therapist married to Retired Home Hospice RN
Introduction (TLDR at bottom)

On a family trip to Florida, our 2021 Mach-E suddenly lost its audio and GPS functions. After consulting a forum, I tried disconnecting the battery—a quick fix that temporarily restored the radio and GPS. Using a ¼” socket set from Harbor Freight, I performed this reset. Initially, this solution worked well, but the problem recurred several times. Frustrated, I purchased an FDRS subscription and planned to reload the ACM software. Unfortunately, the ACM stayed offline. Ford suggested that replacing the ACM would require removing the entire dashboard, including draining the coolant and recovering the refrigerant. Having previously removed a dashboard on a late-model Fusion but lacking the tools to bleed the HV battery, I was hesitant. With 45,000 miles on the car and no longer under bumper-to-bumper warranty, the repair cost was estimated at $2,000-$3,000. Despite being able to afford it, I lacked trust in my local dealership due to prior botched repairs.

IMG_7241.JPEG
Screenshot 2024-05-25 154620.png


Diagnosis


The diagnosis was straightforward. I used FDRS to check communication errors and found that each module sharing the HS3 bus with the ACM could not connect with the radio. After verifying power supply and wiring integrity with a voltmeter, I concluded that the ACM was indeed non-functional. This left me with two choices: drive to a reputable dealership in Dallas or Houston, or source the part myself and hope for a simpler fix. (Crazy 3rd choice: create an extension harness set and relocate the new unit to where the DSP would be since my car is 6 channel model.)

1.png


Sourcing a Part


Locating the part proved challenging. The specific ACM model (LJ8T-18K810-AHG / LJ8T-18K810-AHL) was not listed as available from Ford, so I turned to eBay, securing one from a slightly newer Job 2 2021 model. I considered a 2023 part (LJ8T-18D890-AHC), but uncertain if FDRS would program it, I opted for caution. The part arrived covered in oil, which led me to carefully clean it with plastic-safe electronics cleaner. Upon inspection, the board was noticeably smaller than its housing, suggesting the design was carried over from models previously equipped with a CD player.

IMG_7228.JPEG
IMG_7231.JPEG
IMG_7232.JPEG


Confirming the Diagnosis

Upon receiving the replacement ACM, I discovered there was sufficient slack in the connectors to temporarily install it for testing. Remarkably, as soon as it was connected, both audio and GPS functionalities were restored, even before performing the PMI (Programmable Module Installation). Encouraged by this immediate success, I proceeded with the PMI, which fully integrated the new module into the system. The final challenge was to securely mount the ACM in its designated spot without removing the dashboard.

IMG_7244.JPEG


Swapping the Part

Contrary to Ford's official stance that the dashboard must be removed to replace the ACM, I discovered a workaround that allowed for a less invasive approach. My initial step involved removing the side panels to better explore and assess the installation space. It appeared feasible to slide out the ACM if the brackets could be detached while the module remained in the car. I initially hoped that the BCM (Body Control Module) bracket could be easily removed. However, a structural "dog ear" mount from the EVAP casing presented an obstacle. Considering the option to cut and later repair this mount was preferable to the more daunting task of draining the coolant and refrigerant.

IMG_7249.JPEG
IMG_7250.JPEG


After further exploration, I devised a strategy that avoided altering the "dog ear" mount. By removing the accelerator pedal and cleverly manipulating the passenger-side bracket, I created enough clearance. I then loosened and temporarily bent part of the BCM mount using a chain of zip ties, which provided the necessary space. With this setup, I was able to contort my wrist enough to loosen the T10 screws with a thumb screwdriver. Ultimately, I only needed to remove the passenger bracket, and I managed to extract the entire unit through the driver’s side footwell, leaving the driver-side bracket installed.

IMG_7256.JPEG
IMG_7252.JPEG


The Old Unit


What could have caused the original ACM to fail? Often, electronic failures leave no visible clues, with issues typically arising from internal chip defects. However, upon inspection of the old unit, I discovered signs of corrosion and a burn mark, indicating more tangible damage. Reflecting on this experience, if I were to replace another ACM, I would apply a conformal coating to the replacement board to safeguard it against moisture. Ideally, such protective measures should be a standard practice straight from the factory.


IMG_7257.JPEG


TLDR


In summary, replacing the ACM can be done without removing the dashboard. Simply remove the footwell panels and the accelerator pedal, temporarily bend the BCM mount using zip ties, and unscrew the passenger-side ACM bracket. This approach allows for the removal and replacement of the ACM with minimal disruption. I hope this article helps you in your future endeavors.


IMG_7246.JPEG
AWESOME!! You are the Dude, Dude! Good job and sweet post with pictures.


Top