Mach-Lee
Well-Known Member
- First Name
- Lee
- Joined
- Jul 16, 2021
- Threads
- 262
- Messages
- 11,421
- Reaction score
- 25,197
- Location
- Wisconsin
- Vehicles
- 2022 Mach-E Premium AWD
- Occupation
- Sci/Eng
- Thread starter
- #1
Excessive wind noise from the side mirrors has been identified on some vehicles. It can be especially noticeable above 60 MPH. This may be due to the poor sealing of the foam near the side mirror attachment. The mirror will be removed and new foam pieces installed to seal the area better. Various DIY fixes has been proposed in the past including caulking, my car had this issue and I fixed it with window screen retainer spline. If you suspect side mirror wind noise, I recommend taping over the areas shown in that link and seeing if the wind noise improves noticeably. If so, you may want to have this TSB performed.
Note: Even with proper sealing, there will still be a certain amount of wind noise around the side mirrors due to turbulent flow. This will be more noticeable on vehicles that do not have laminated side glass.
Note: Even with proper sealing, there will still be a certain amount of wind noise around the side mirrors due to turbulent flow. This will be more noticeable on vehicles that do not have laminated side glass.
| TECHNICAL SERVICE BULLETIN Wind Noise From Exterior Mirror/A-Pillar Area When Driving At Or Above 40 MPH (64 Km/H) - Built On Or Before 04-Dec-2023 | 24-2002 16 January 2024 | ||||||||||||||||||||||||||||||
Model:
Issue: Some 2021-2023 Mustang Mach-E vehicles built on or before 04-Dec-2023 may exhibit a wind noise from the exterior mirrors/A-pillar area when driving at or above 40 mph (64 km/h). This may be due to poor sealing of the lower mirror foam and the glass top run foam. To correct this condition, follow the Service Procedure to install new lower inner foam and the glass top run foam. Action: Follow the Service Procedure to correct the condition on vehicles that meet all of the following criteria:
Parts
Unit of Issue refers to the number of individual pieces included in a service part number package. Piece Quantity refers to the total number of individual pieces required to repair the vehicle. Warranty Status: Eligible under provisions of New Vehicle Limited Warranty (NVLW)/Service Part Warranty (SPW)/Special Service Part (SSP)/Extended Service Plan (ESP) coverage. Limits/policies/prior approvals are not altered by a TSB. NVLW/SPW/SSP/ESP coverage limits are determined by the identified causal part and verified using the OASIS part coverage tool. Labor Times
Service Procedure 1. Perform a road test to identify if the wind noise is coming from the exterior mirrors/A-pillar. Does the vehicle exhibit a wind noise coming from one or both exterior mirrors? (1). Yes - proceed to Step 2. (2). No - this article does not apply. Perform normal diagnostic. Refer Workshop Manual, Section 100-04. 2. Lower the front door window glass of the affected side to the fully down position. 3. Remove the exterior mirror. Refer to Workshop Manual (WSM), Section 501-09 Rear View Mirrors > Removal and Installation > Exterior Mirror Assembly. 4. If the exterior mirror foam gasket/seal remains on the door, remove and refit the mirror foam gasket/seal back onto the mirror before reassembly. (Figure 1) Figure 1 
5. Separate and fold back the front door glass top run from the door frame and the run channel in the areas highlighted in Figure 2. Figure 2 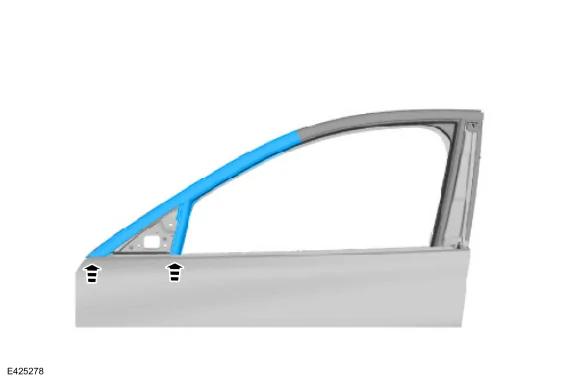
6. Remove the existing lower inner foam. 7. Install the new lower inner foam. (1). Insert the front of the foam first making sure is seated under the window run/sheet metal and the foam shape properly fits the curves of the door. (Figure 3) Figure 3 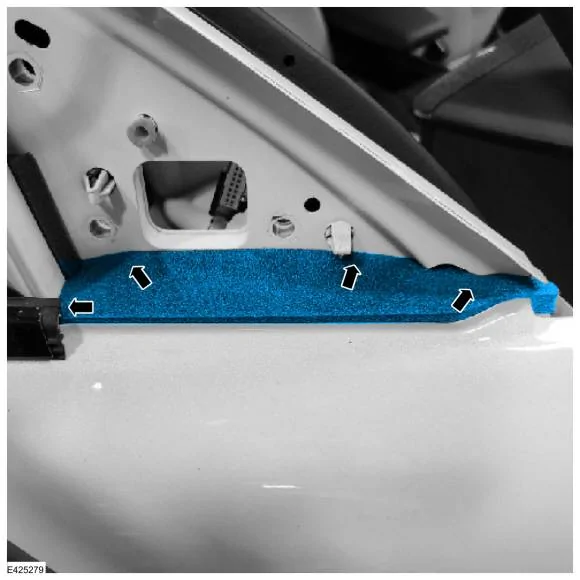
(2). Evenly tuck all edges of the foam into the door making sure that the rear sections sit flush against the window run frame with no gaps. (Figure 4) Figure 4 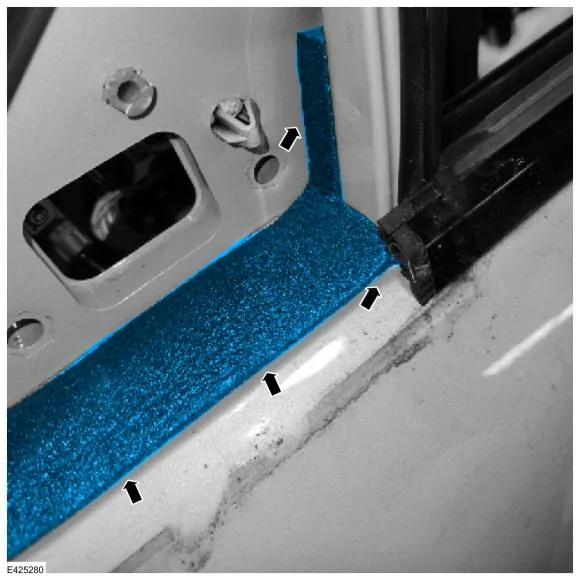
8. Print the foam template by clicking this link. Verify the horizontal and vertical scale of the image using a ruler against the scale on the template printout (Figure 5) to confirm the image scale is correct. Is the scaling of the template printout the same scale as the ruler? Figure 5 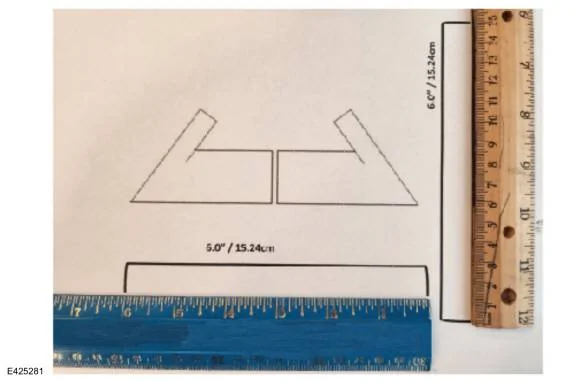
(1). Yes - proceed to Step 9. (2). No - adjust scale of the printing properties to actual size to resize the image. Repeat Step 8. 9. Layer together 3 pieces of the PVC Soft Foam Strips (Rotunda part) to obtain the desired thickness. 10. Cut the shapes from the template printed out and trace the shape of the back side of the foam. Cut the foam along the line traced on the back to create the shape indicated in Figure 6. Figure 6 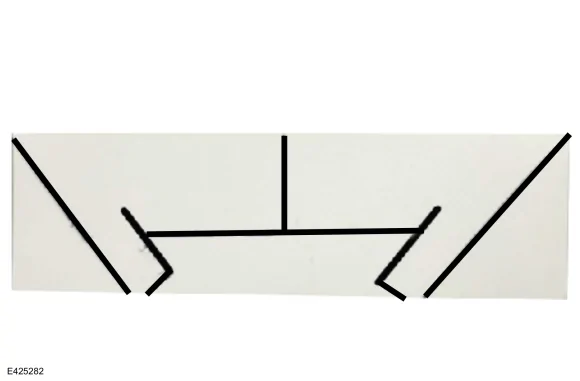
11. Cut an additional 10mm (0.39 in.) slice into the foam in the area indicated in Figure 7. 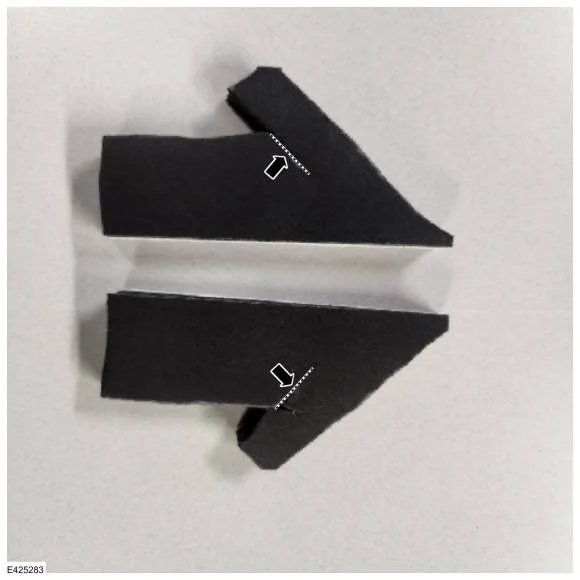
12. Remove the existing glass top run foam and clean the surface to remove any residual foam. (Figures 8-9) Figure 8 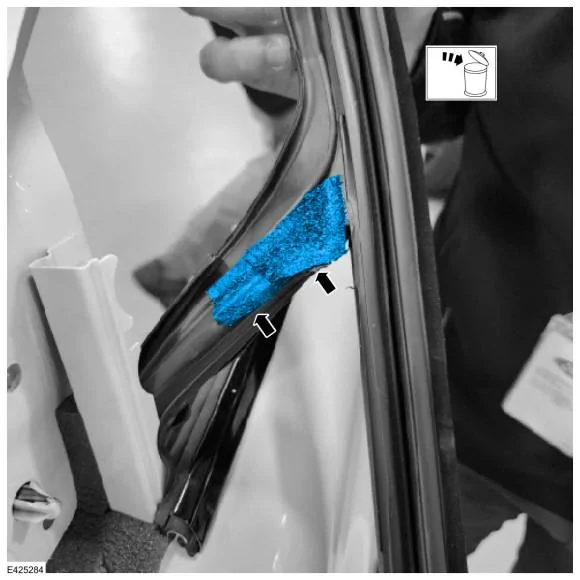
Figure 9 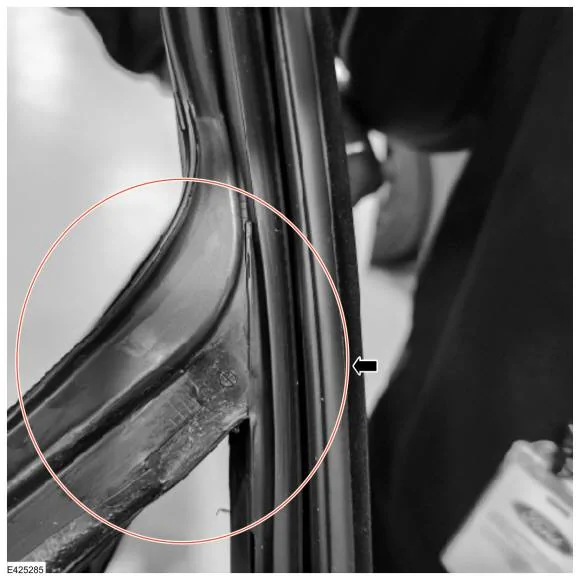

13. Install the cut pieces of foam onto the glass top run. (1). Align the foam with the ridge along A-pillar and the lip along the header. (Figure 10) Figure 10 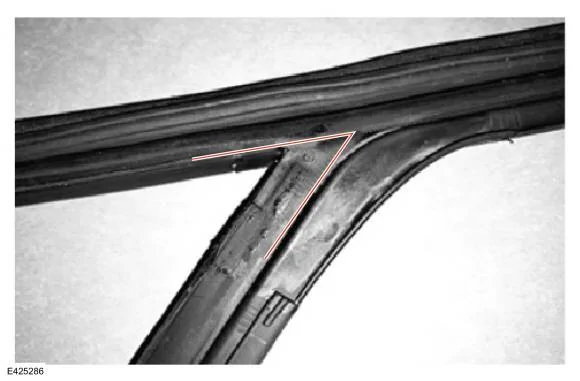
(2). Apply pressure to adhere the foam to the inner surface of the glass top run. (Figure 11) Figure 11 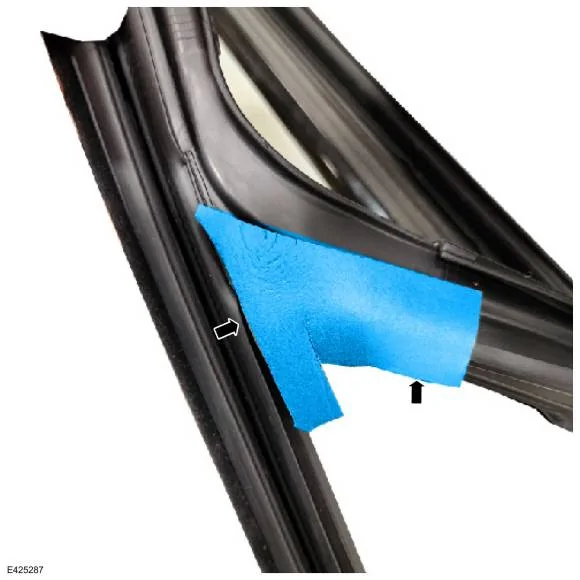
(3). Fold and pressurize the lower area of the foam over the back of the A-pillar channel, leaving the upper extension unadhered. (Figure 12) Figure 12 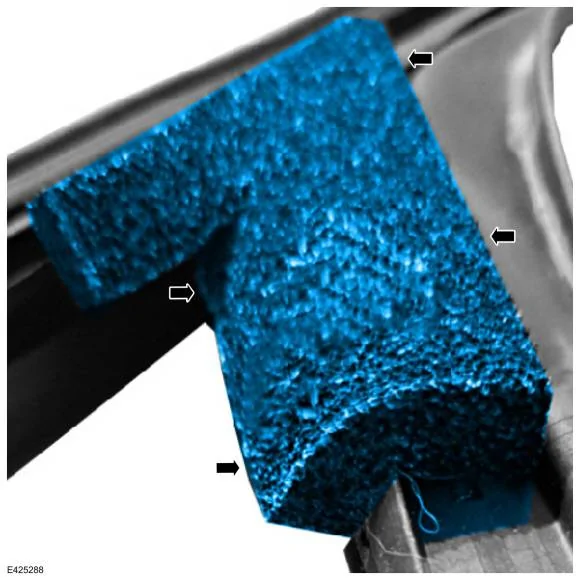
(4). Moving to the exterior of the glass top run, take the end of the foam extension and pull, seating the foam toward the header/A-pillar corner (Figure 13) Figure 13 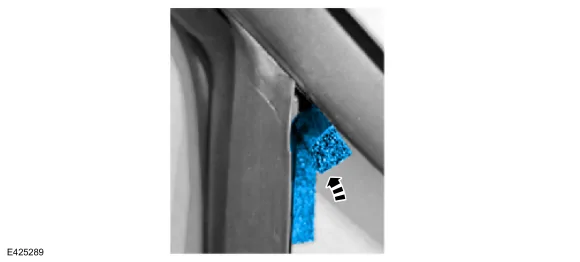
(5). Tuck the end of the foam extension high up under the lip of the glass top run following the upward angle of the run. (Figure 14) Figure 14 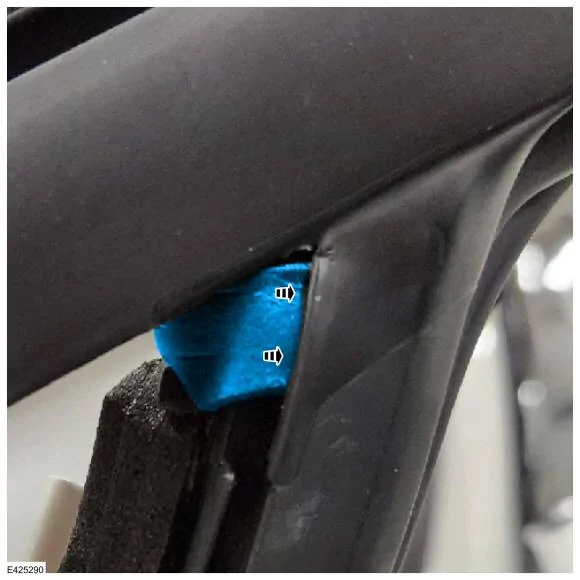
14. Reinstall the front door glass top run in the door frame and the run channel. (Figure 15) Figure 15 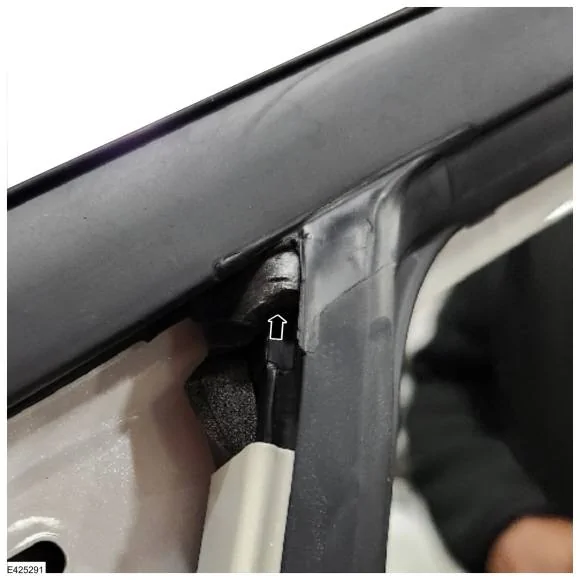
15. Reinstall the exterior mirror. Refer to WSM, Section 501-09 Rear View Mirrors > Removal and Installation > Exterior Mirror Assembly. NOTE: A small amount of wind noise from around the exterior mirrors is considered to be characteristic of vehicle design. |
Sponsored
Attachments
-
4.8 MB Views: 711