RallyQuest

Member
Joined
Mar 14, 2025
Threads
0
Messages
10
Reaction score
0
Location
USA
Vehicles
2024 Rally
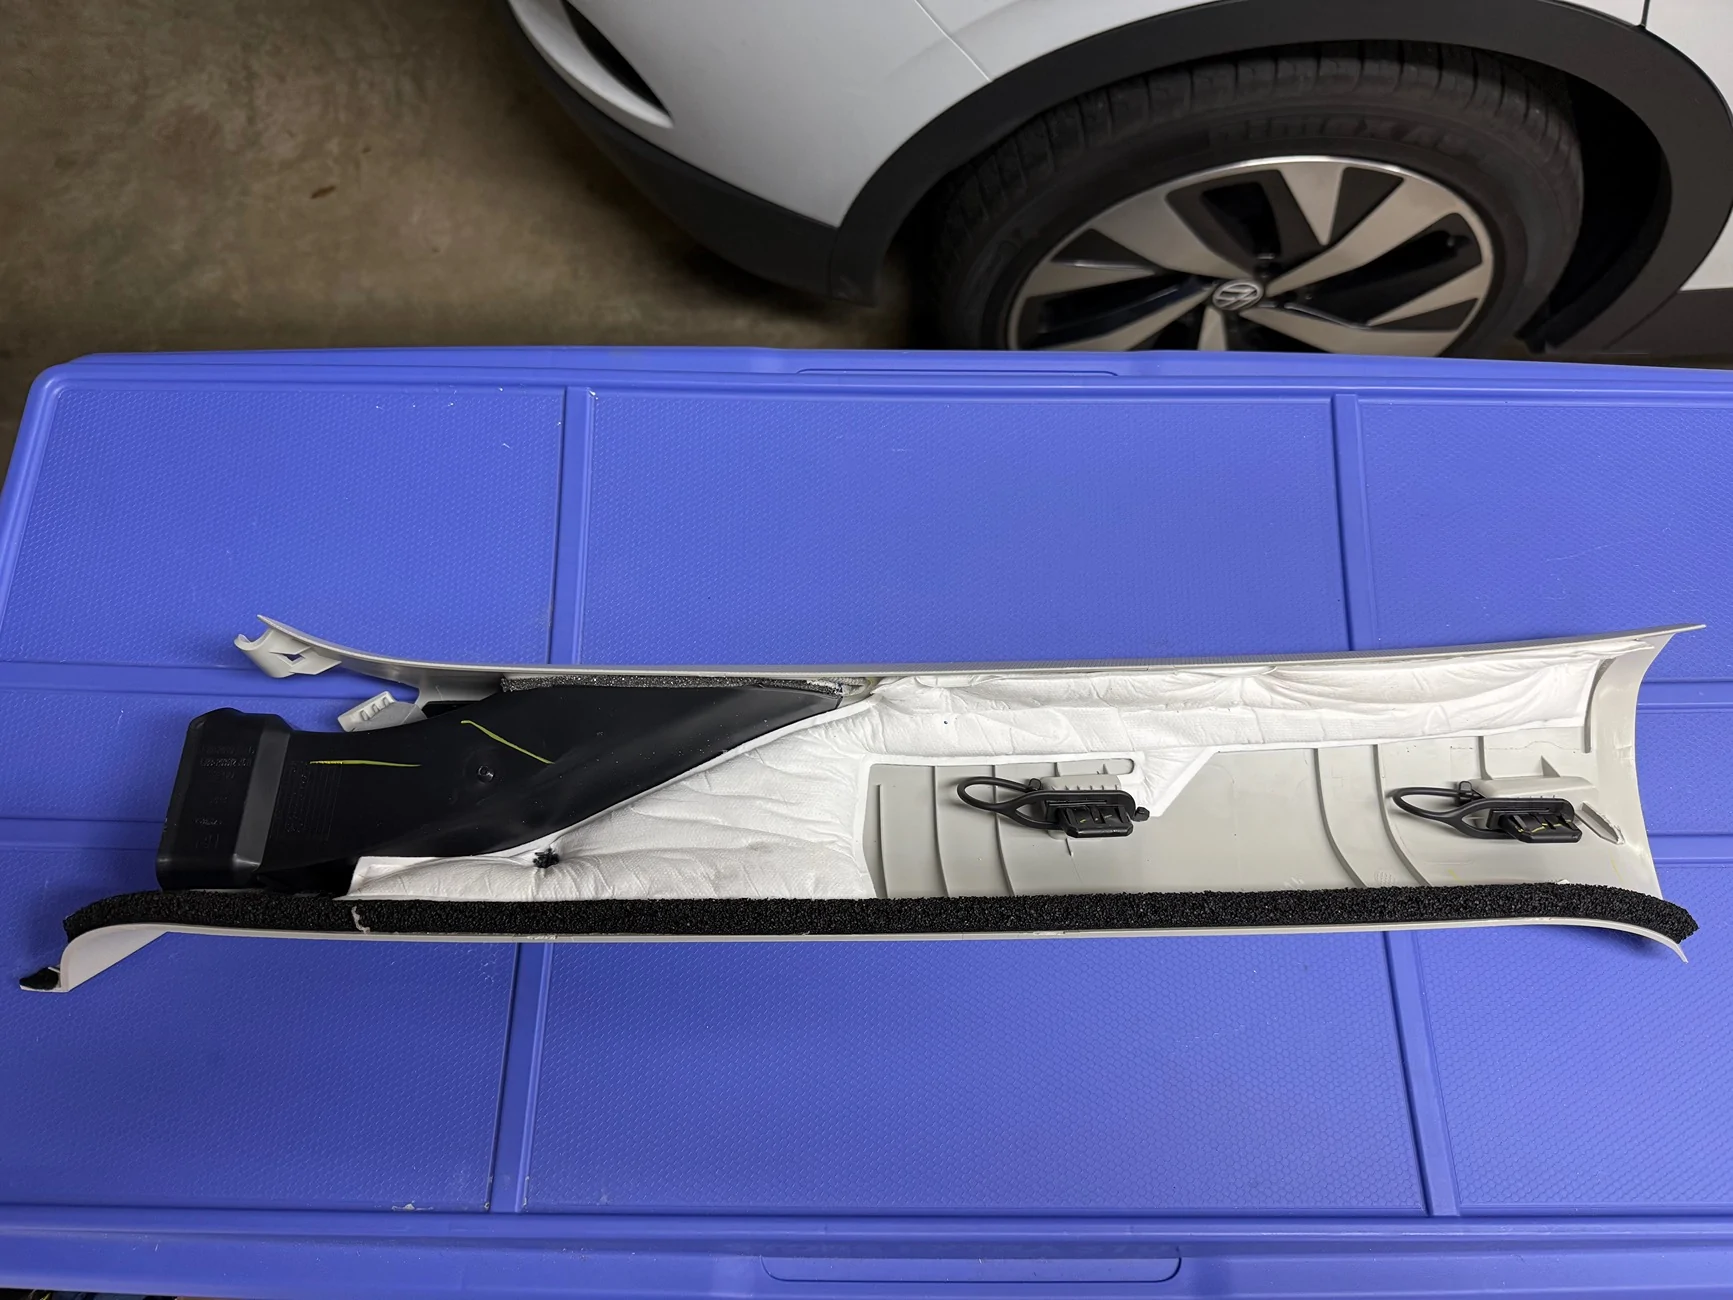
My BCM fuse area is missing the upper panel. It has the vertical panel near the passenger’s feet, but no horizontal interlocking panel on the top; it’s just open underneath the glove box. I’m wondering if this was a factory delete or if my car is missing the part. Anyone else see the same thing?
Any chance you know the part number for that white lined panel?
Did either of you figure more out about this? I, too, am missing that upper lined panel.
Sponsored


steve.panse

Well-Known Member
First Name
Steve
Joined
Aug 23, 2022
Threads
1
Messages
130
Reaction score
155
Location
South FL
Vehicles
2022 Mach E GT PE
Country flag
I took it to the dealer shortly after I posted that and they ordered and provided a new panel within a couple of weeks (under warranty).
 

kennelh

Well-Known Member
First Name
Louise and Ken
Joined
Nov 28, 2019
Threads
13
Messages
1,184
Reaction score
1,374
Location
Northern California
Vehicles
J1 '21 Premium Ex RWD (Rapid Red)
Country flag
This seems to be one of the dashcam threads which gets lot of references, so I thought I'd add one more post about my experience. I bought a dashcam based on a kickstarter campaign (big mistake, but we move on) and purchased a 70mui A810 to replace it. However, the UP03 hardwire kit had a cut-off at 11.8V, which is useless for our cars. I looked for some options to circumvent this and, since I have nothing better to do with my time now, thought I'd look into a solution using an Arduino.

Long story short: i build a small board which monitors the 12V battery voltage level and will cut off the dashcam once the voltage drops below a user-selectable voltage. Right now it's a hand-soldered Frankenstein perfboard, but it's worked great in testing and I'll be installing it soon. That got me wondering if there'd be anyone interested in using it in their vehicles. Since this a hobby/pasttime as opposed to a capitalist venture, I'd be asking for anyone who wanted to purchase one assembled to just cover my costs for materials and shipping (it looks like materials would be about $21 USD, including having a PCB manufactured for it).

If you'd be interested, send me a DM. If there's enough responses, and/or if this kind of post should really be put under some other forums since it's for "selling" something, I'll pursue that. Right now, I'm just curious whether there's any interest.

Ford Mustang Mach-E DIY Tutorial for Hardwiring a Dashcam and Radar Detector pc


Here is a KiCad screen capture of the PCB, which would be attached to a Chinese Arduino Nano clone board. It's mainly just to show it's not vaporware. I can also attach a copy of the prototype, but it's really not as attractive.
 

Mach-Lee

Well-Known Member
First Name
Lee
Joined
Jul 16, 2021
Threads
262
Messages
11,351
Reaction score
24,977
Location
Wisconsin
Vehicles
2022 Mach-E Premium AWD
Occupation
Sci/Eng
Country flag
This seems to be one of the dashcam threads which gets lot of references, so I thought I'd add one more post about my experience. I bought a dashcam based on a kickstarter campaign (big mistake, but we move on) and purchased a 70mui A810 to replace it. However, the UP03 hardwire kit had a cut-off at 11.8V, which is useless for our cars. I looked for some options to circumvent this and, since I have nothing better to do with my time now, thought I'd look into a solution using an Arduino.

Long story short: i build a small board which monitors the 12V battery voltage level and will cut off the dashcam once the voltage drops below a user-selectable voltage. Right now it's a hand-soldered Frankenstein perfboard, but it's worked great in testing and I'll be installing it soon. That got me wondering if there'd be anyone interested in using it in their vehicles. Since this a hobby/pasttime as opposed to a capitalist venture, I'd be asking for anyone who wanted to purchase one assembled to just cover my costs for materials and shipping (it looks like materials would be about $21 USD, including having a PCB manufactured for it).

If you'd be interested, send me a DM. If there's enough responses, and/or if this kind of post should really be put under some other forums since it's for "selling" something, I'll pursue that. Right now, I'm just curious whether there's any interest.

pcb.webp


Here is a KiCad screen capture of the PCB, which would be attached to a Chinese Arduino Nano clone board. It's mainly just to show it's not vaporware. I can also attach a copy of the prototype, but it's really not as attractive.
Interesting, curious why you just didn’t go with an analog circuit? You could probably whip up something with a MOSFET and a comparator as a cutoff, and use a potentiometer to adjust the voltage cutoff. I guess I’m old school.

I recommend setting the voltage cut off to 12.2 V or higher.
 
Last edited:


kennelh

Well-Known Member
First Name
Louise and Ken
Joined
Nov 28, 2019
Threads
13
Messages
1,184
Reaction score
1,374
Location
Northern California
Vehicles
J1 '21 Premium Ex RWD (Rapid Red)
Country flag
Interesting, curious why you just didn’t go with an analog circuit? You could probably whip up something with a MOSFET and a comparator as a cutoff, and use a potentiometer to adjust the voltage cutoff. I guess I’m old school.

I recommend sending the voltage cut off to 12.2 V or higher.
Good point, but I'm much more computer than electrical so that's my go-to. Plus, shiny Arduino! But I'll have to look at that more closely to see if it would work in my situation.
 

kennelh

Well-Known Member
First Name
Louise and Ken
Joined
Nov 28, 2019
Threads
13
Messages
1,184
Reaction score
1,374
Location
Northern California
Vehicles
J1 '21 Premium Ex RWD (Rapid Red)
Country flag
Good point, but I'm much more computer than electrical so that's my go-to. Plus, shiny Arduino! But I'll have to look at that more closely to see if it would work in my situation.
I searched around and found some parts (P-channel MOSFET and voltage reference/comparator) that simulations indicate would do the job, and so I just ordered from mouser.com. Assuming it really works, the total cost would be a little under over $9 a board in quantities of 10 (including the circuit board).

Ford Mustang Mach-E DIY Tutorial for Hardwiring a Dashcam and Radar Detector Screenshot_20250723_153859
Ford Mustang Mach-E DIY Tutorial for Hardwiring a Dashcam and Radar Detector Screenshot_20250723_155639


If anyone is interested in the KiCad files just send me a DM.

Edit: I forgot to mention that this design included a multi-turn trim pot and two test points to fine-tune the resistance so that the cut-off voltage can be adjusted, but you can also just install a resistor instead to have a fixed cut-off (and save about $1.50)

Edit again: updated images and price based on modifications suggested by @Mach-Lee. I proto-boarded it and installed in my car yesterday, so we'll see how it goes.
 
Last edited:

Mach-Lee

Well-Known Member
First Name
Lee
Joined
Jul 16, 2021
Threads
262
Messages
11,351
Reaction score
24,977
Location
Wisconsin
Vehicles
2022 Mach-E Premium AWD
Occupation
Sci/Eng
Country flag
I search around and found some parts (P-channel MOSFET and voltage reference/comparator) that would seem to do the job, so just ordered from mouser.com. If it works, it would cost a little under $9 a board. View attachment 152473
Cool!

Just a suggestion, make sure to include reverse polarity protection (such as a SS14 Schottky on the input) if you will be selling them.
 

kennelh

Well-Known Member
First Name
Louise and Ken
Joined
Nov 28, 2019
Threads
13
Messages
1,184
Reaction score
1,374
Location
Northern California
Vehicles
J1 '21 Premium Ex RWD (Rapid Red)
Country flag
I've taken the passenger side A-pillar off twice in the past and know it's tough to reinstall, but yesterday I spent at least forty-five minutes wrangling it. It refused to pop into place (and I did remove the black pieces and push onto the clips, so it wasn't that). I seem to remember the trick was getting the end by the windshield inserted correctly before trying to reattach, but nothing seemed to work. I did finally get it to snap in, but there's still an 1/8" to 1/4" gap between the top and the headliner. Any wisdom? I re-read this whole thread but didn't see an AHA post.

Follow-up: after ignoring the gap for two months, I decided to remove the A-pillar cover to see what was wrong. I was also motivated because a rattle had appeared in the same area. The problem was I somehow bent the guide pin at the top (the one that goes thru the alignment hole) and it was wedged between the cover and the bracket. Once I straightened it out and was a little more careful, I was able to get it installed flush.
 
Last edited:
OP
OP

MachDoc

Well-Known Member
Joined
Apr 4, 2021
Threads
3
Messages
61
Reaction score
103
Location
New Jersey
Vehicles
2021 Premium Grey, 2023 GT Vapor Blue
Country flag
I like the ideas of both the digital and analog solutions. I am just curious why you are doing this?

I have a hardwired battery monitor:

Battery Monitor

This thing monitors my 12V continuously recording the current state of charge. Every time the 12v drops near 12.2, the car charges it from the main battery pack.

I still get that stupid warning many mornings "Electrical System Drain - Service Required ....possibly caused by aftermarket devices...", but the car is taking care of maintaining the 12V.

Am I missing something?
 

rolltide

Well-Known Member
Joined
Jul 19, 2021
Threads
15
Messages
271
Reaction score
242
Location
Atlanta
Vehicles
2022 Premium RWD SR Grabber Blue
Country flag
Here's a great how-to guide:


For the A pillar, remove the two black clips from the A pillar, then insert them into the A pillar cover like so:

Ford Mustang Mach-E DIY Tutorial for Hardwiring a Dashcam and Radar Detector IMG_3035


Then put the A pillar cover back into the A pillar, and push the two clips back in.
Sponsored

 
Last edited:


Top