Bba
Member
- First Name
- Ben
- Joined
- Oct 4, 2023
- Threads
- 1
- Messages
- 13
- Reaction score
- 58
- Location
- tx
- Vehicles
- Mach E
- Thread starter
- #1
After months of planning and late night work in my garage, I’ve finally completed my project. This is an elaborate install, but nevertheless turned out to be pretty clean and rewarding. This is definitely not for the newbie, but you can see what the potential is on these new EVs. I believe it is the perfect platform for installing car audio; you can run the system for days as the whole car undercarriage is a battery(no need for extra batteries, capacitors, or high output alternator), voltage is constant (no more lights dimming when the bass hits), no carbon monoxide so you can keep your garage closed while you test or blast the audio.
I started with downloading the manual online from factorymanuals.com. It’s a large file, but you will need this in order to know how to remove panels and access the necessary wiring. My plan was to use the large 15 inch screen as the audio source/controller and upgrade everything else while keeping a factory/stealth look. Here’s a list of the major components:
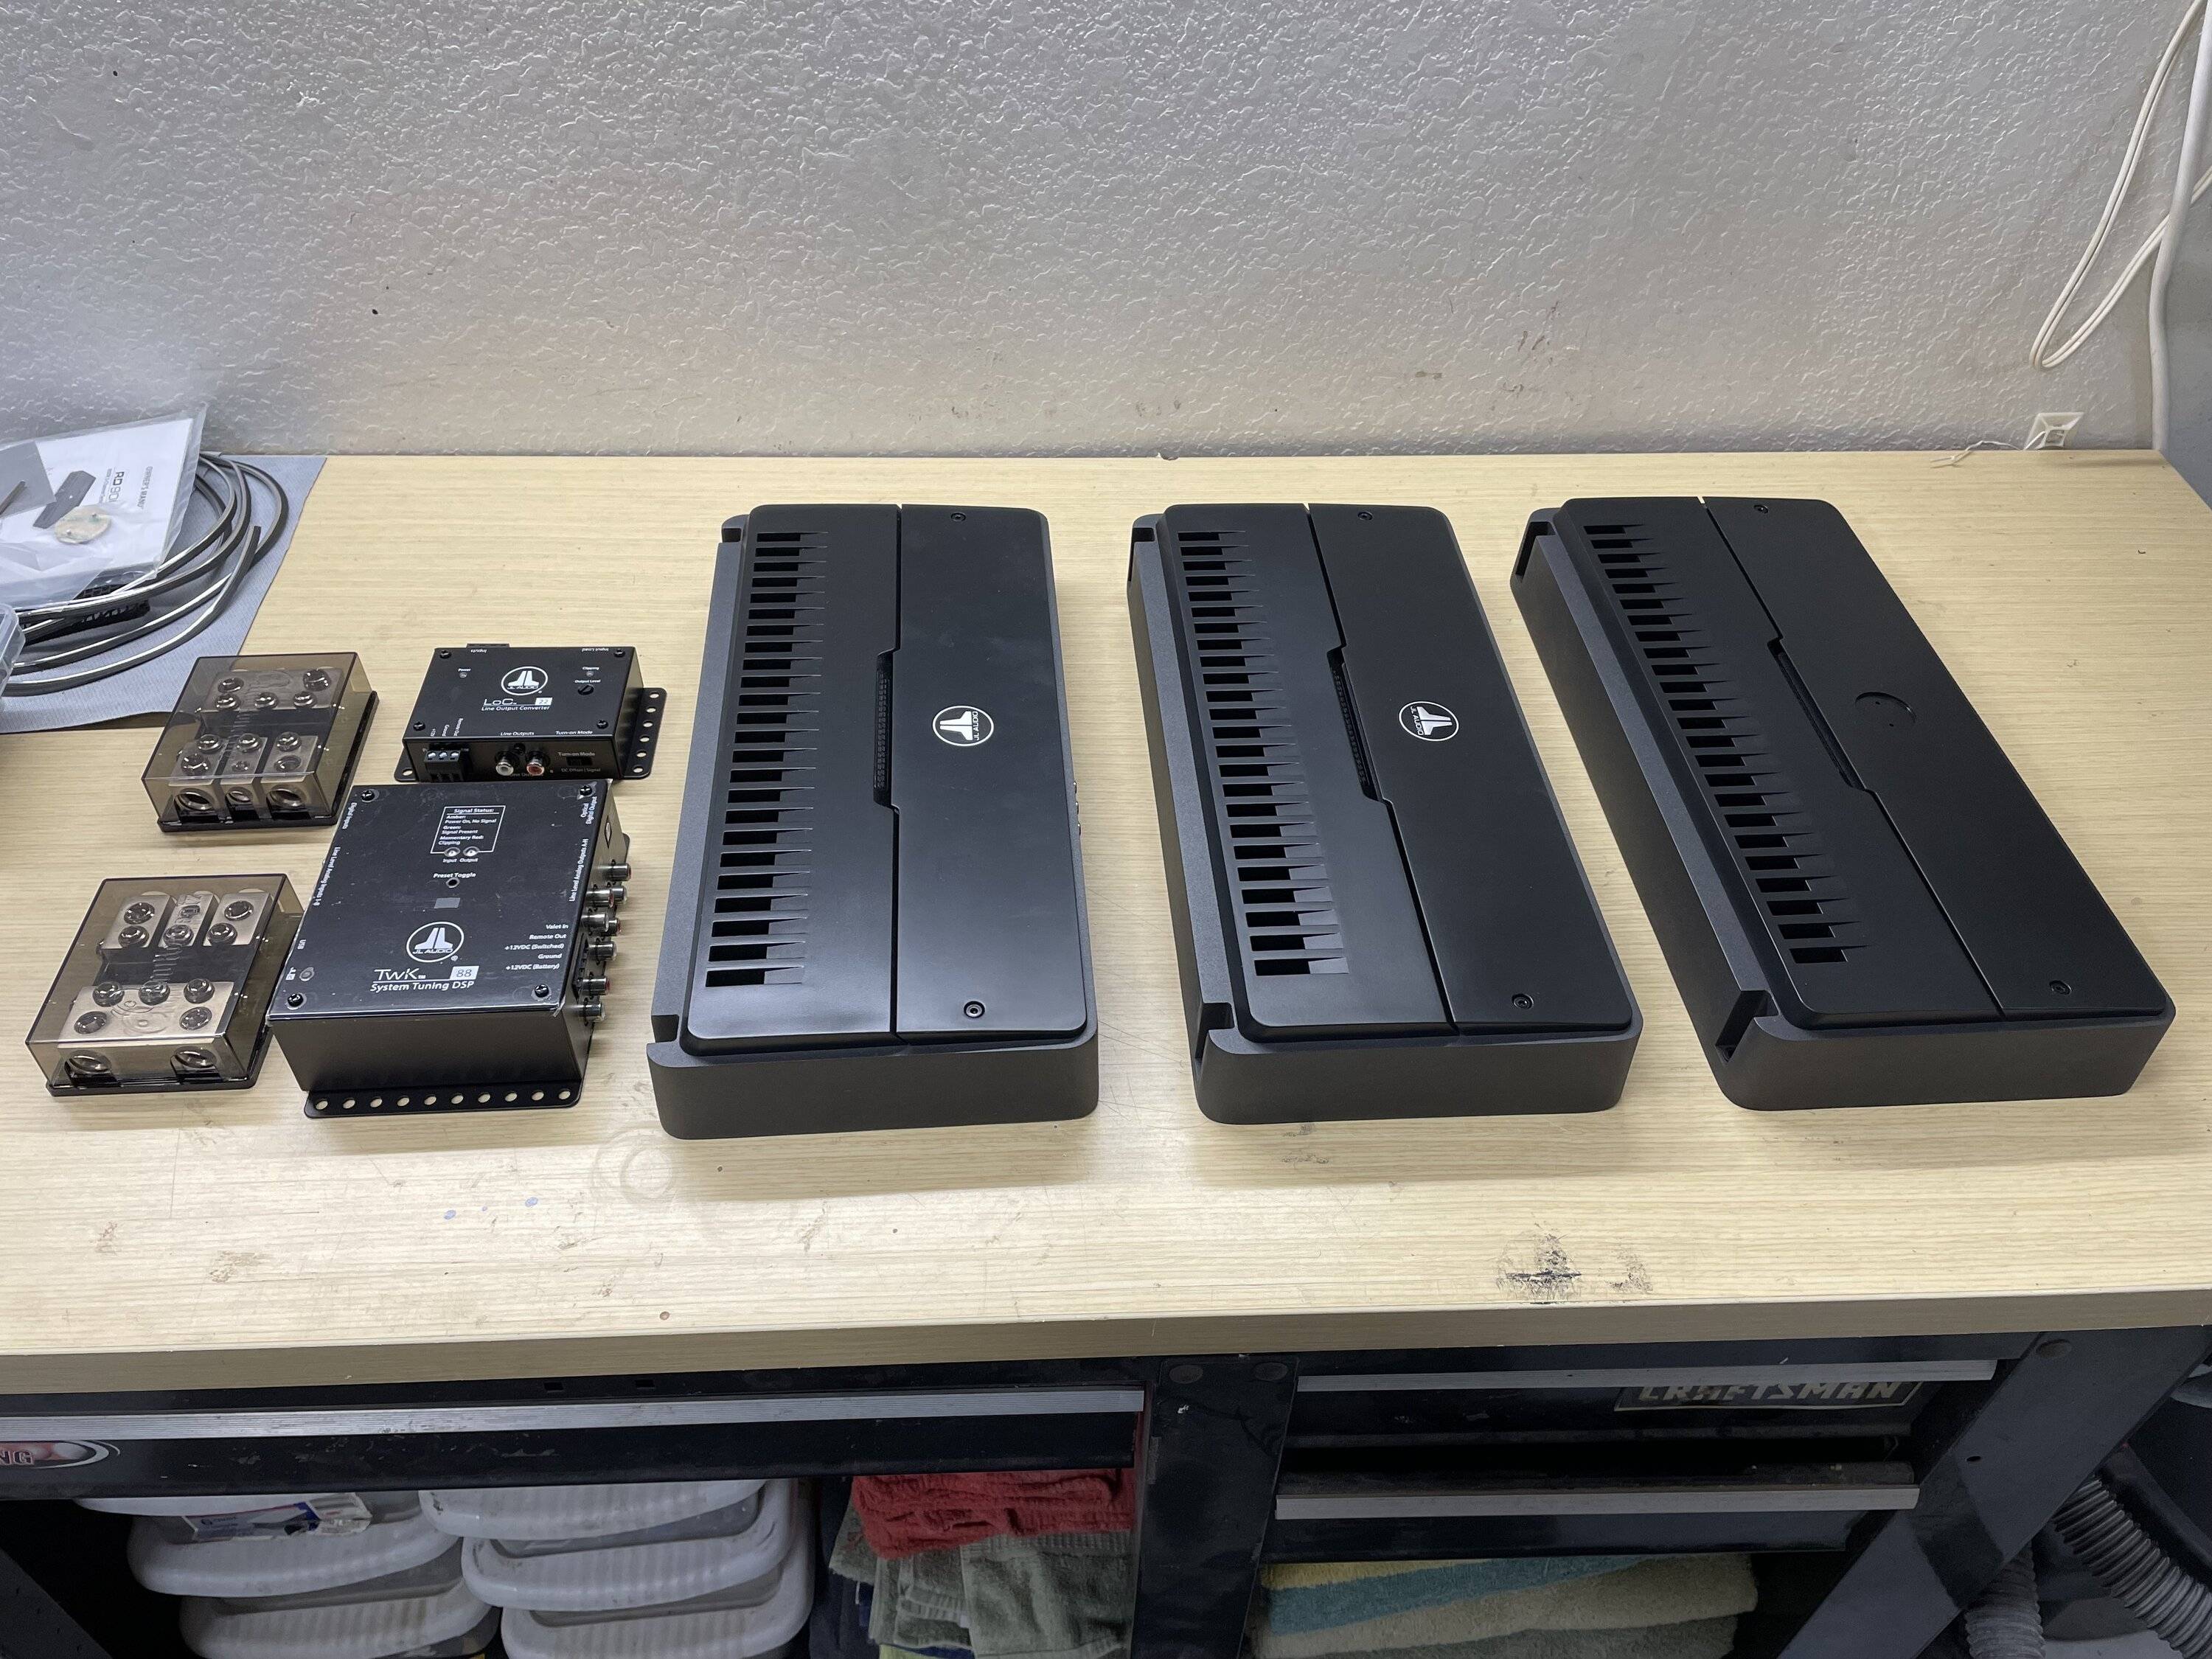
JL Audio LOC22 Line converter for factory signal
JL Audio TWK 88 - Front stage dsp
JL Audio D8 - Rear stage dsp
JL Audio RD900/5 - 3 total, sub channels; 1 for each sub, then hi pass for the mb/mr/tw front, mr/tw rear
JL Audio 13TW5 - 3 total
Morel MT300 - 1 pair tweeters (front)
Morel MM3 - 1 pair midrange (front)
Morel SCM634 - 1 pair mid bass (front)
Morel Integra 624 - 1 pair 6.5” coax (rear)
Total System Power 2700 Watts (500W to each sub)
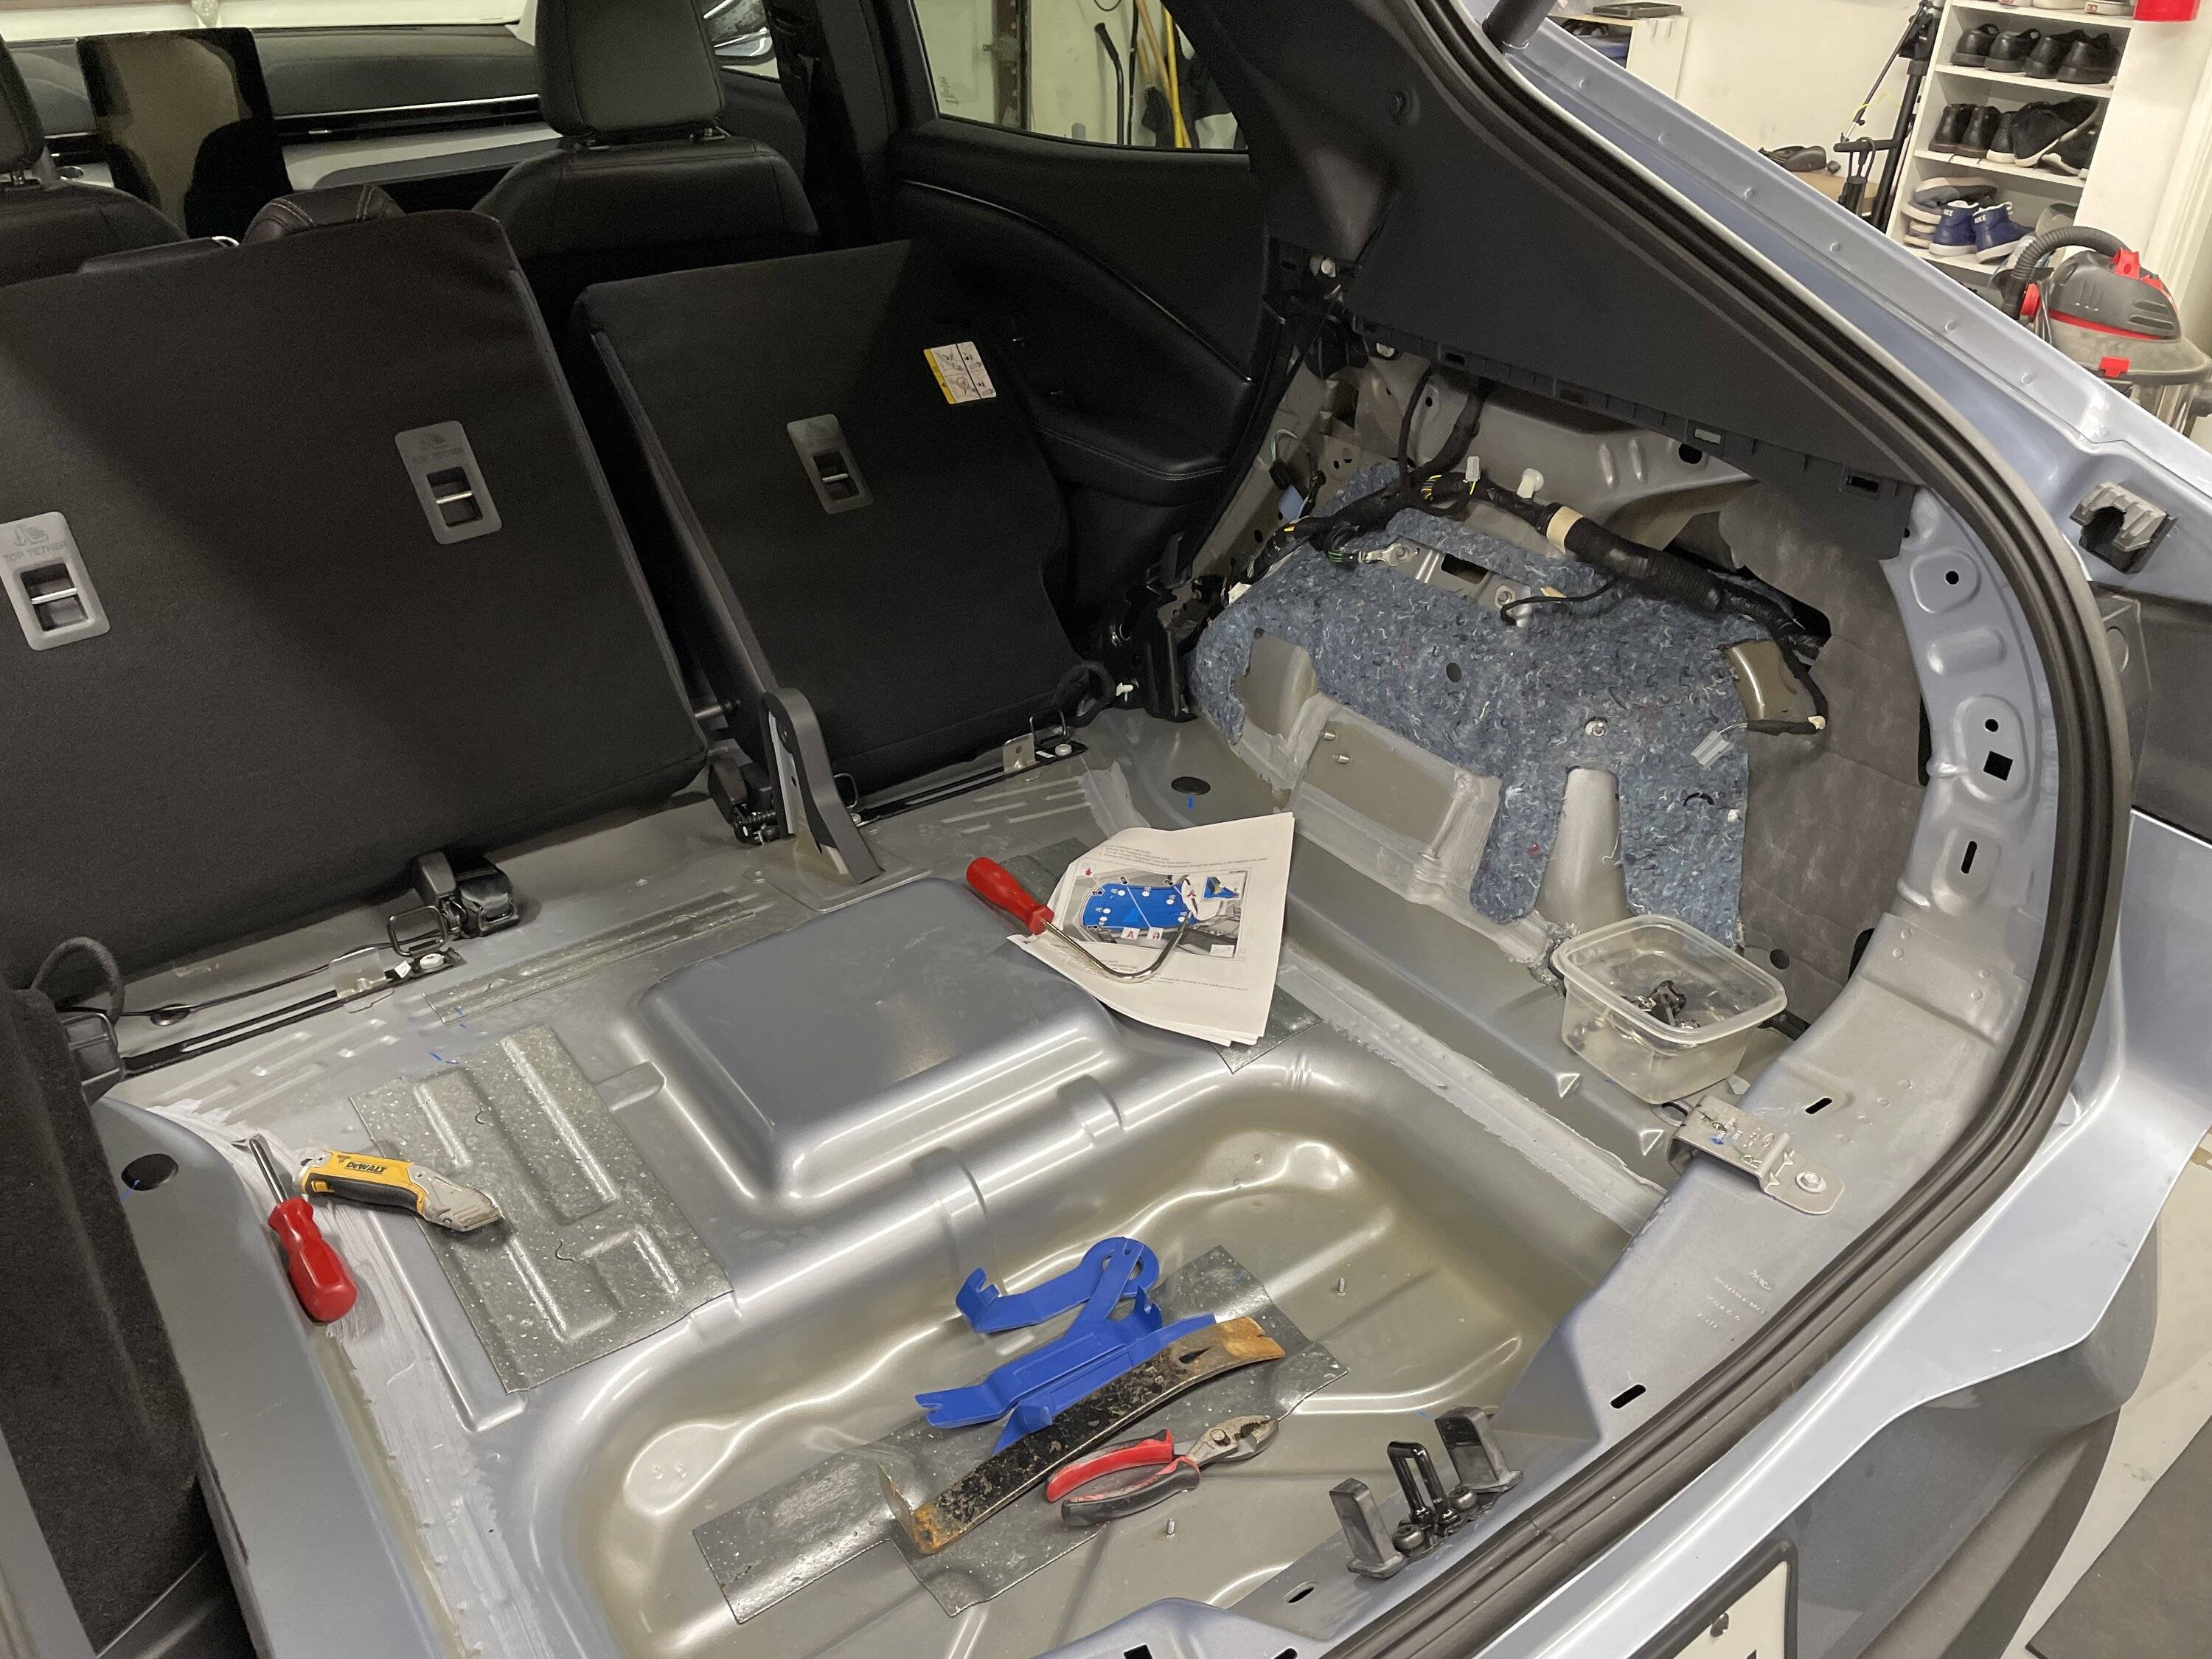
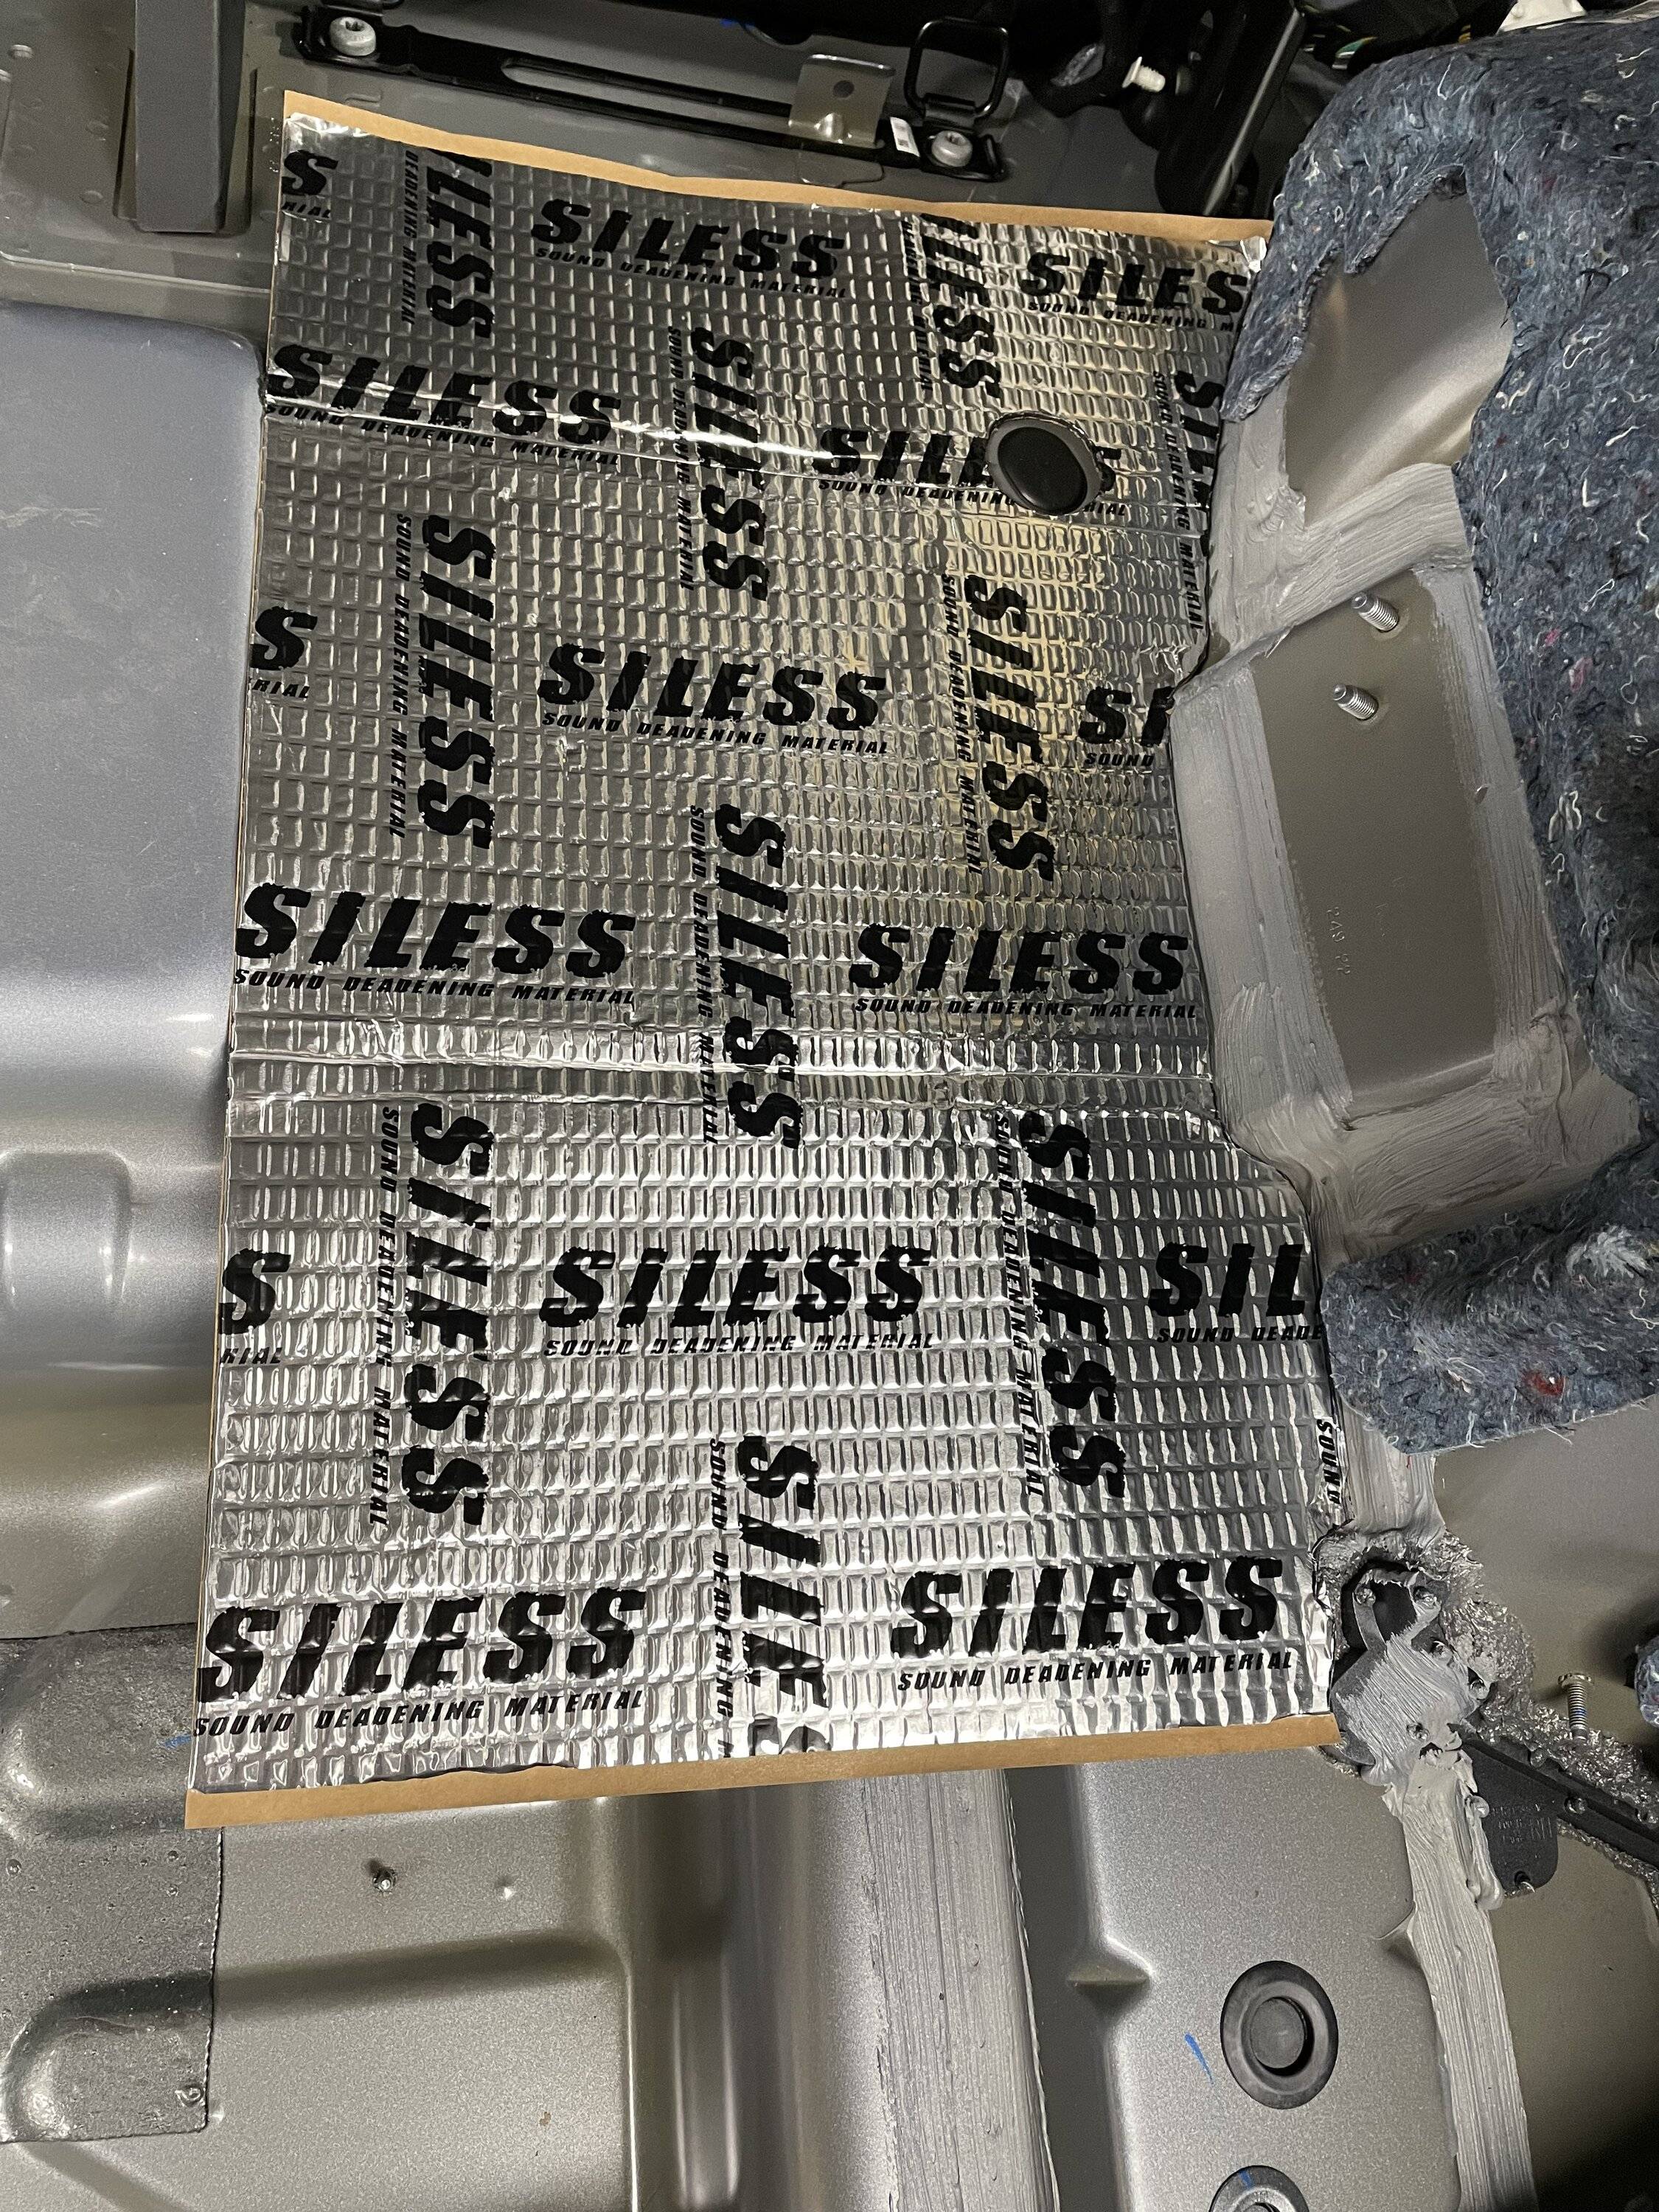
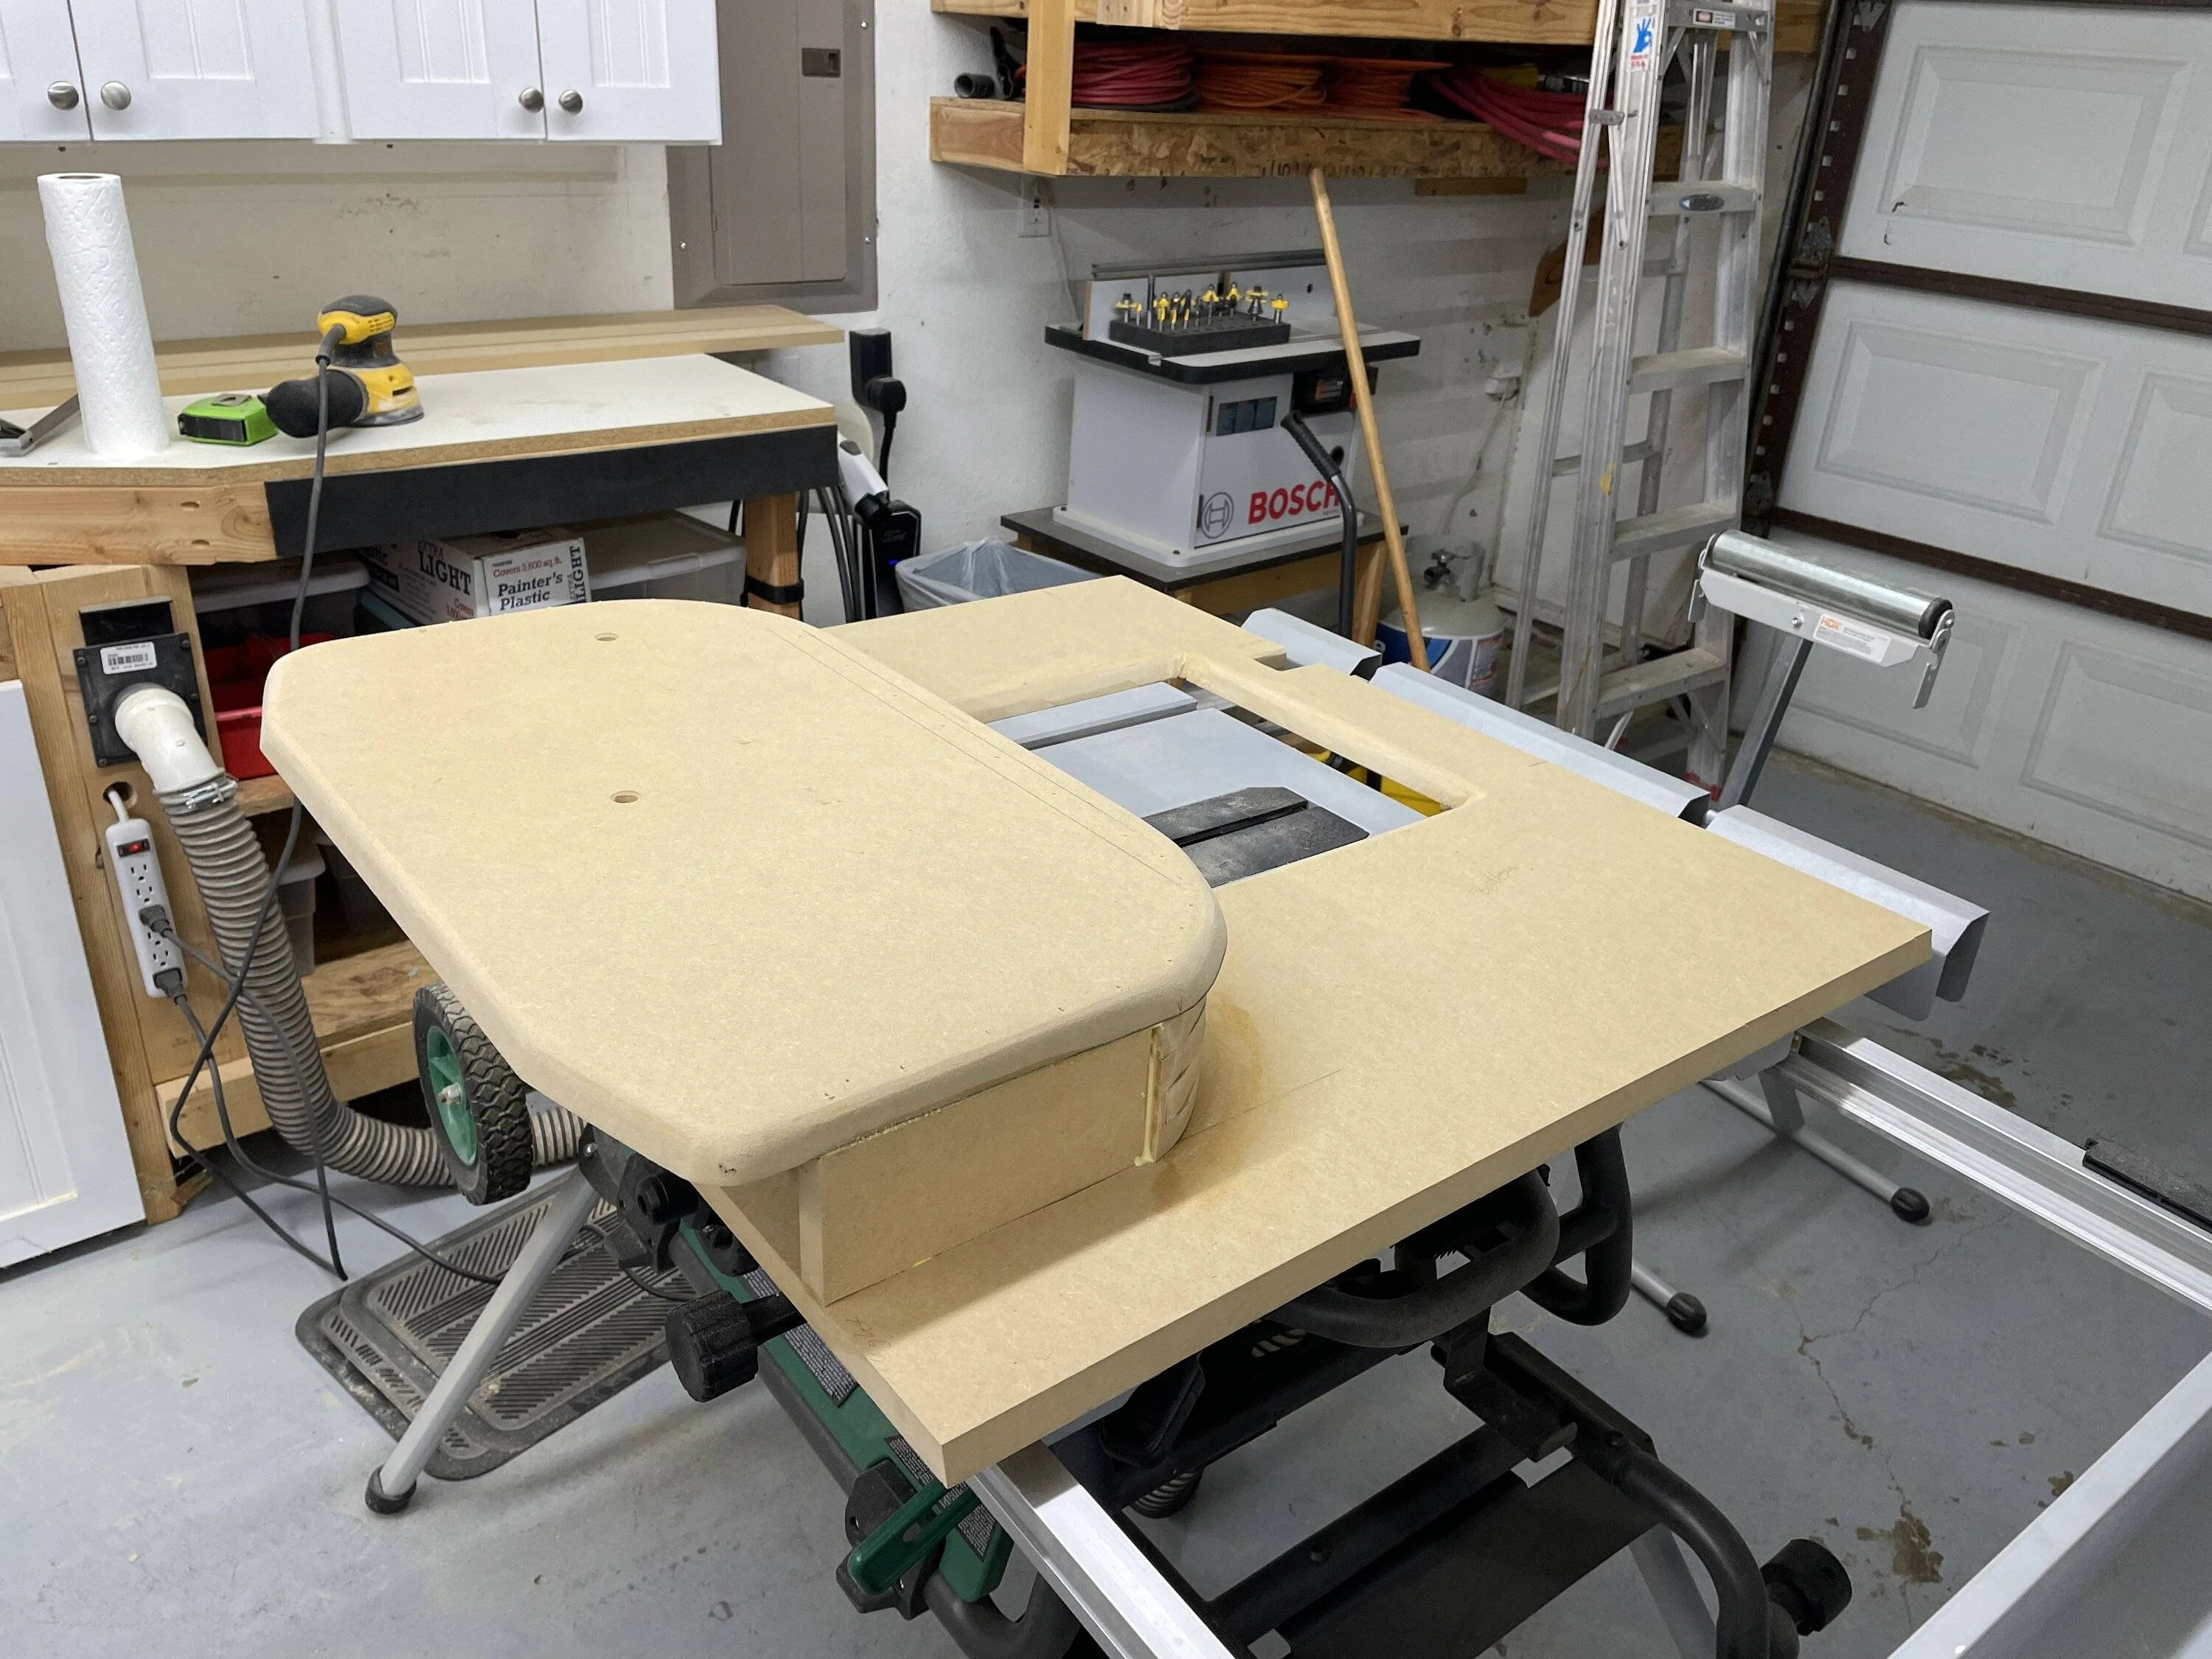
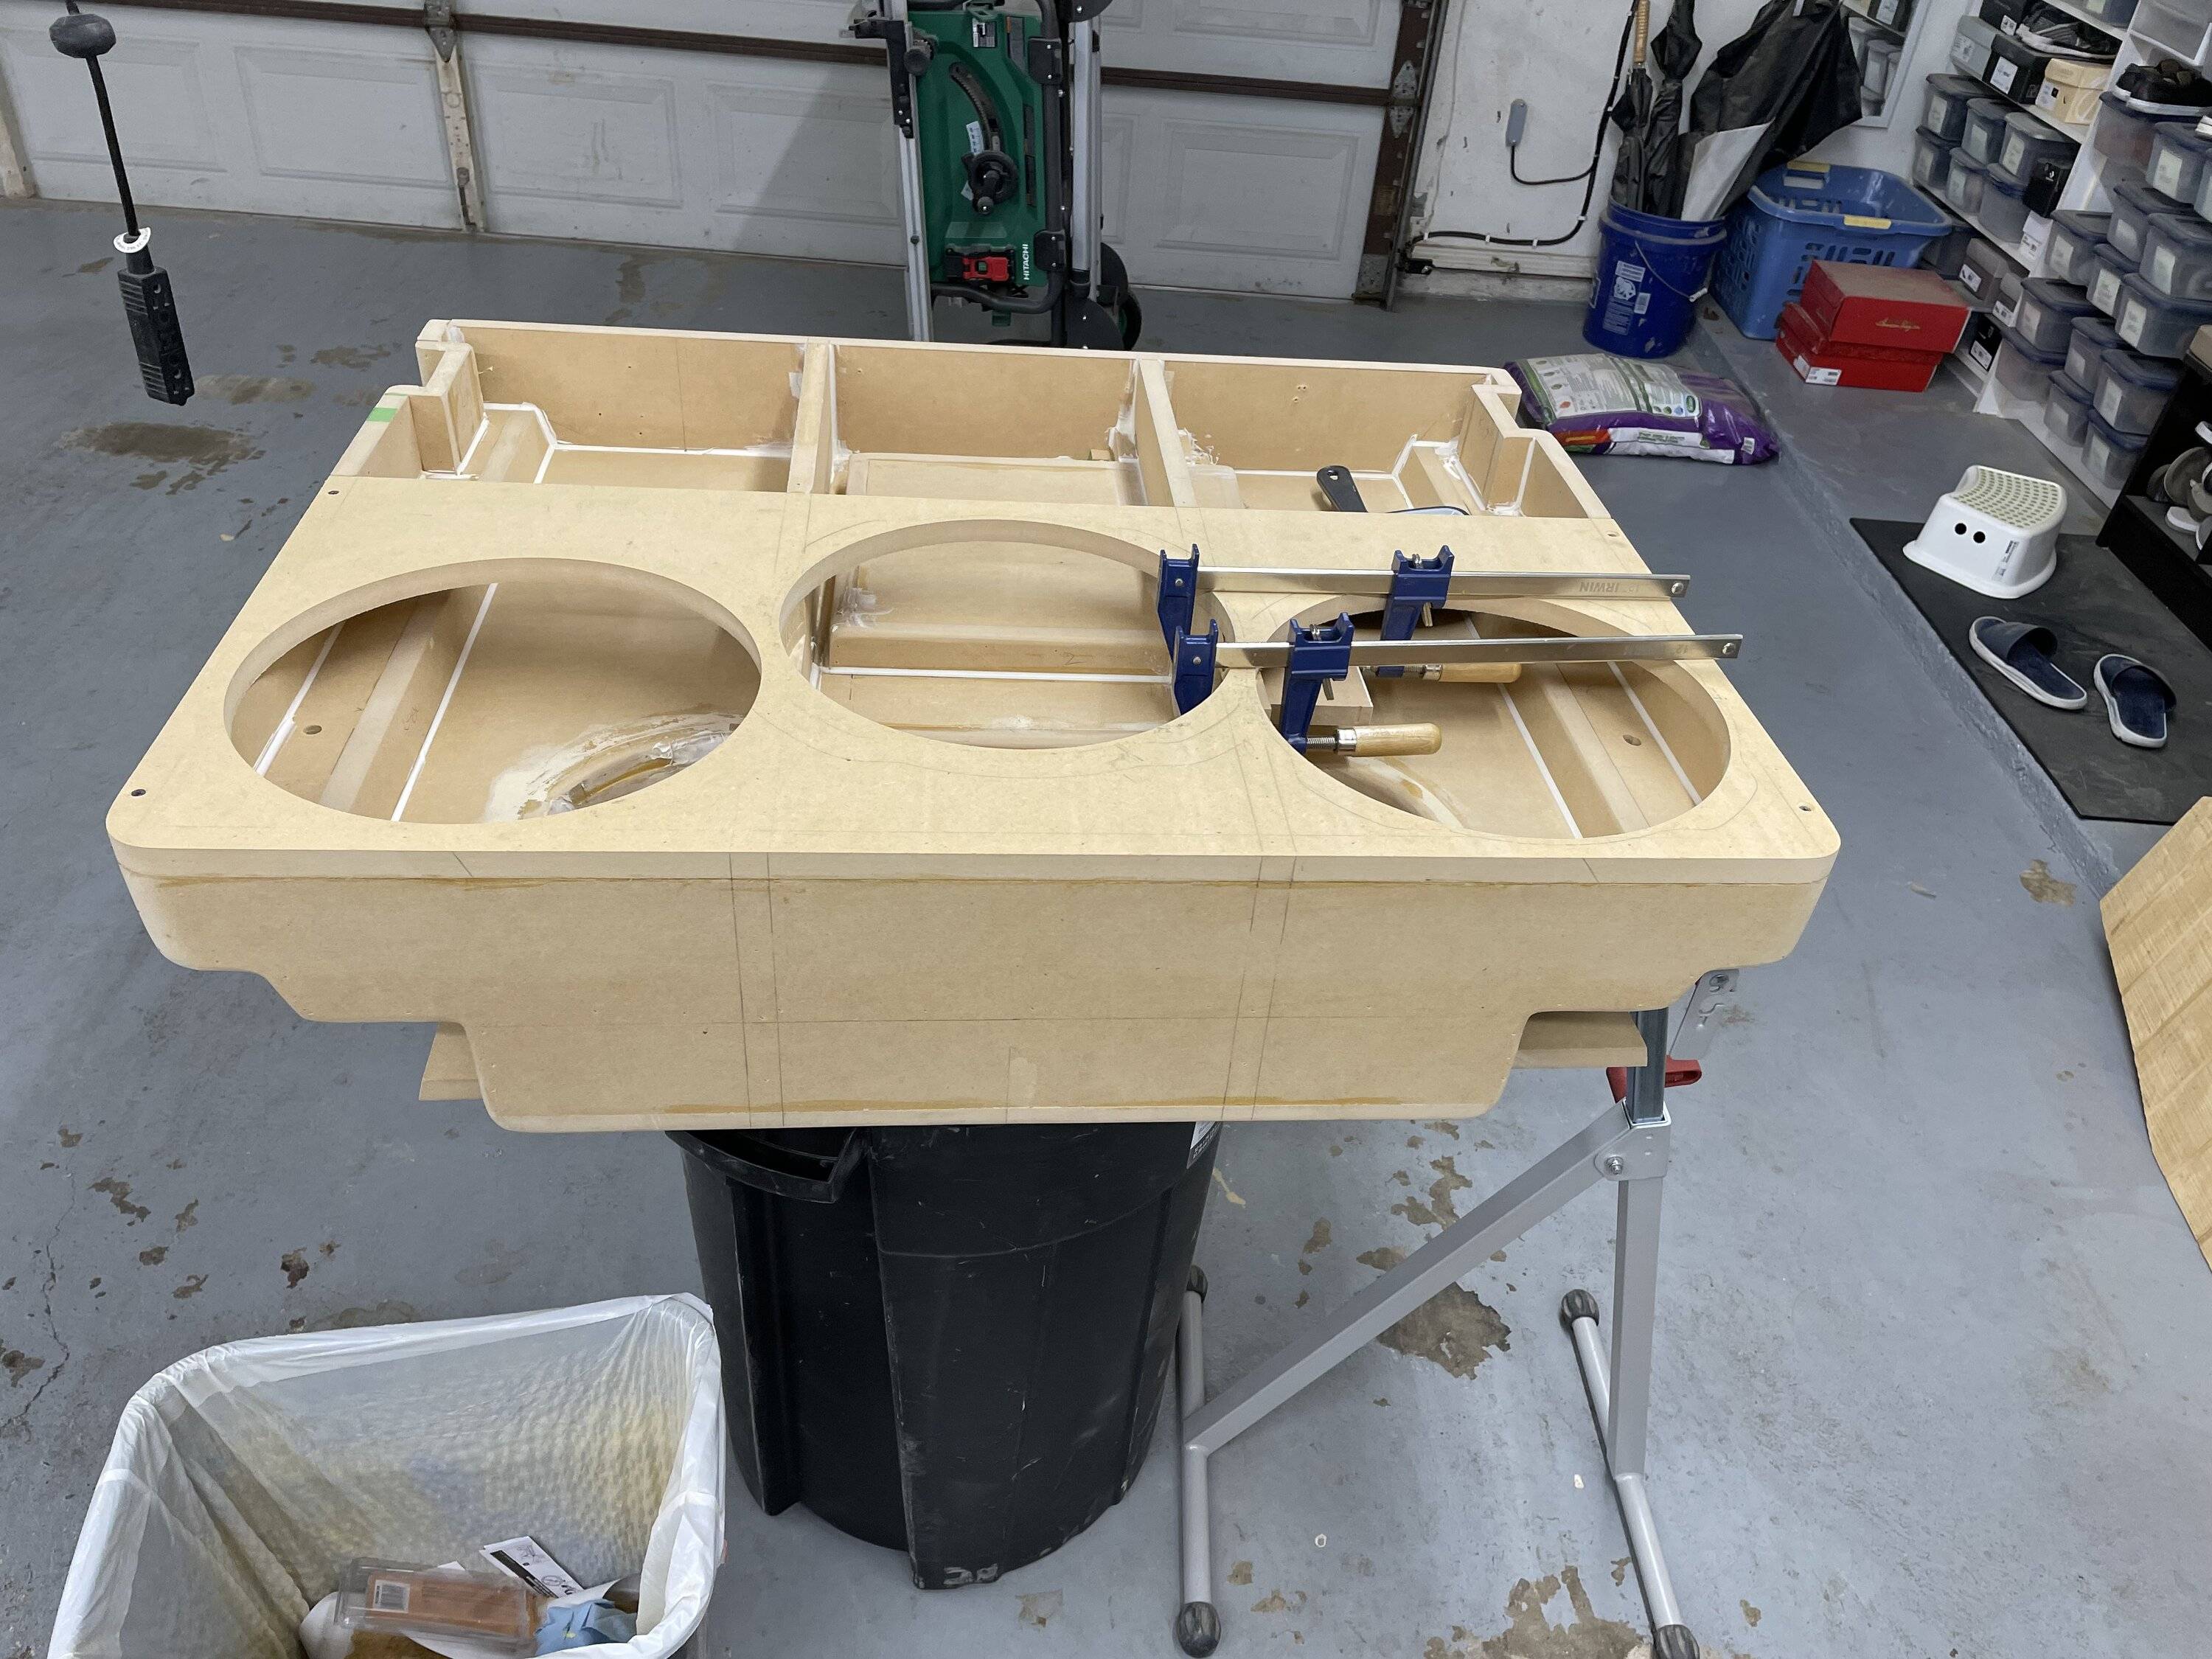
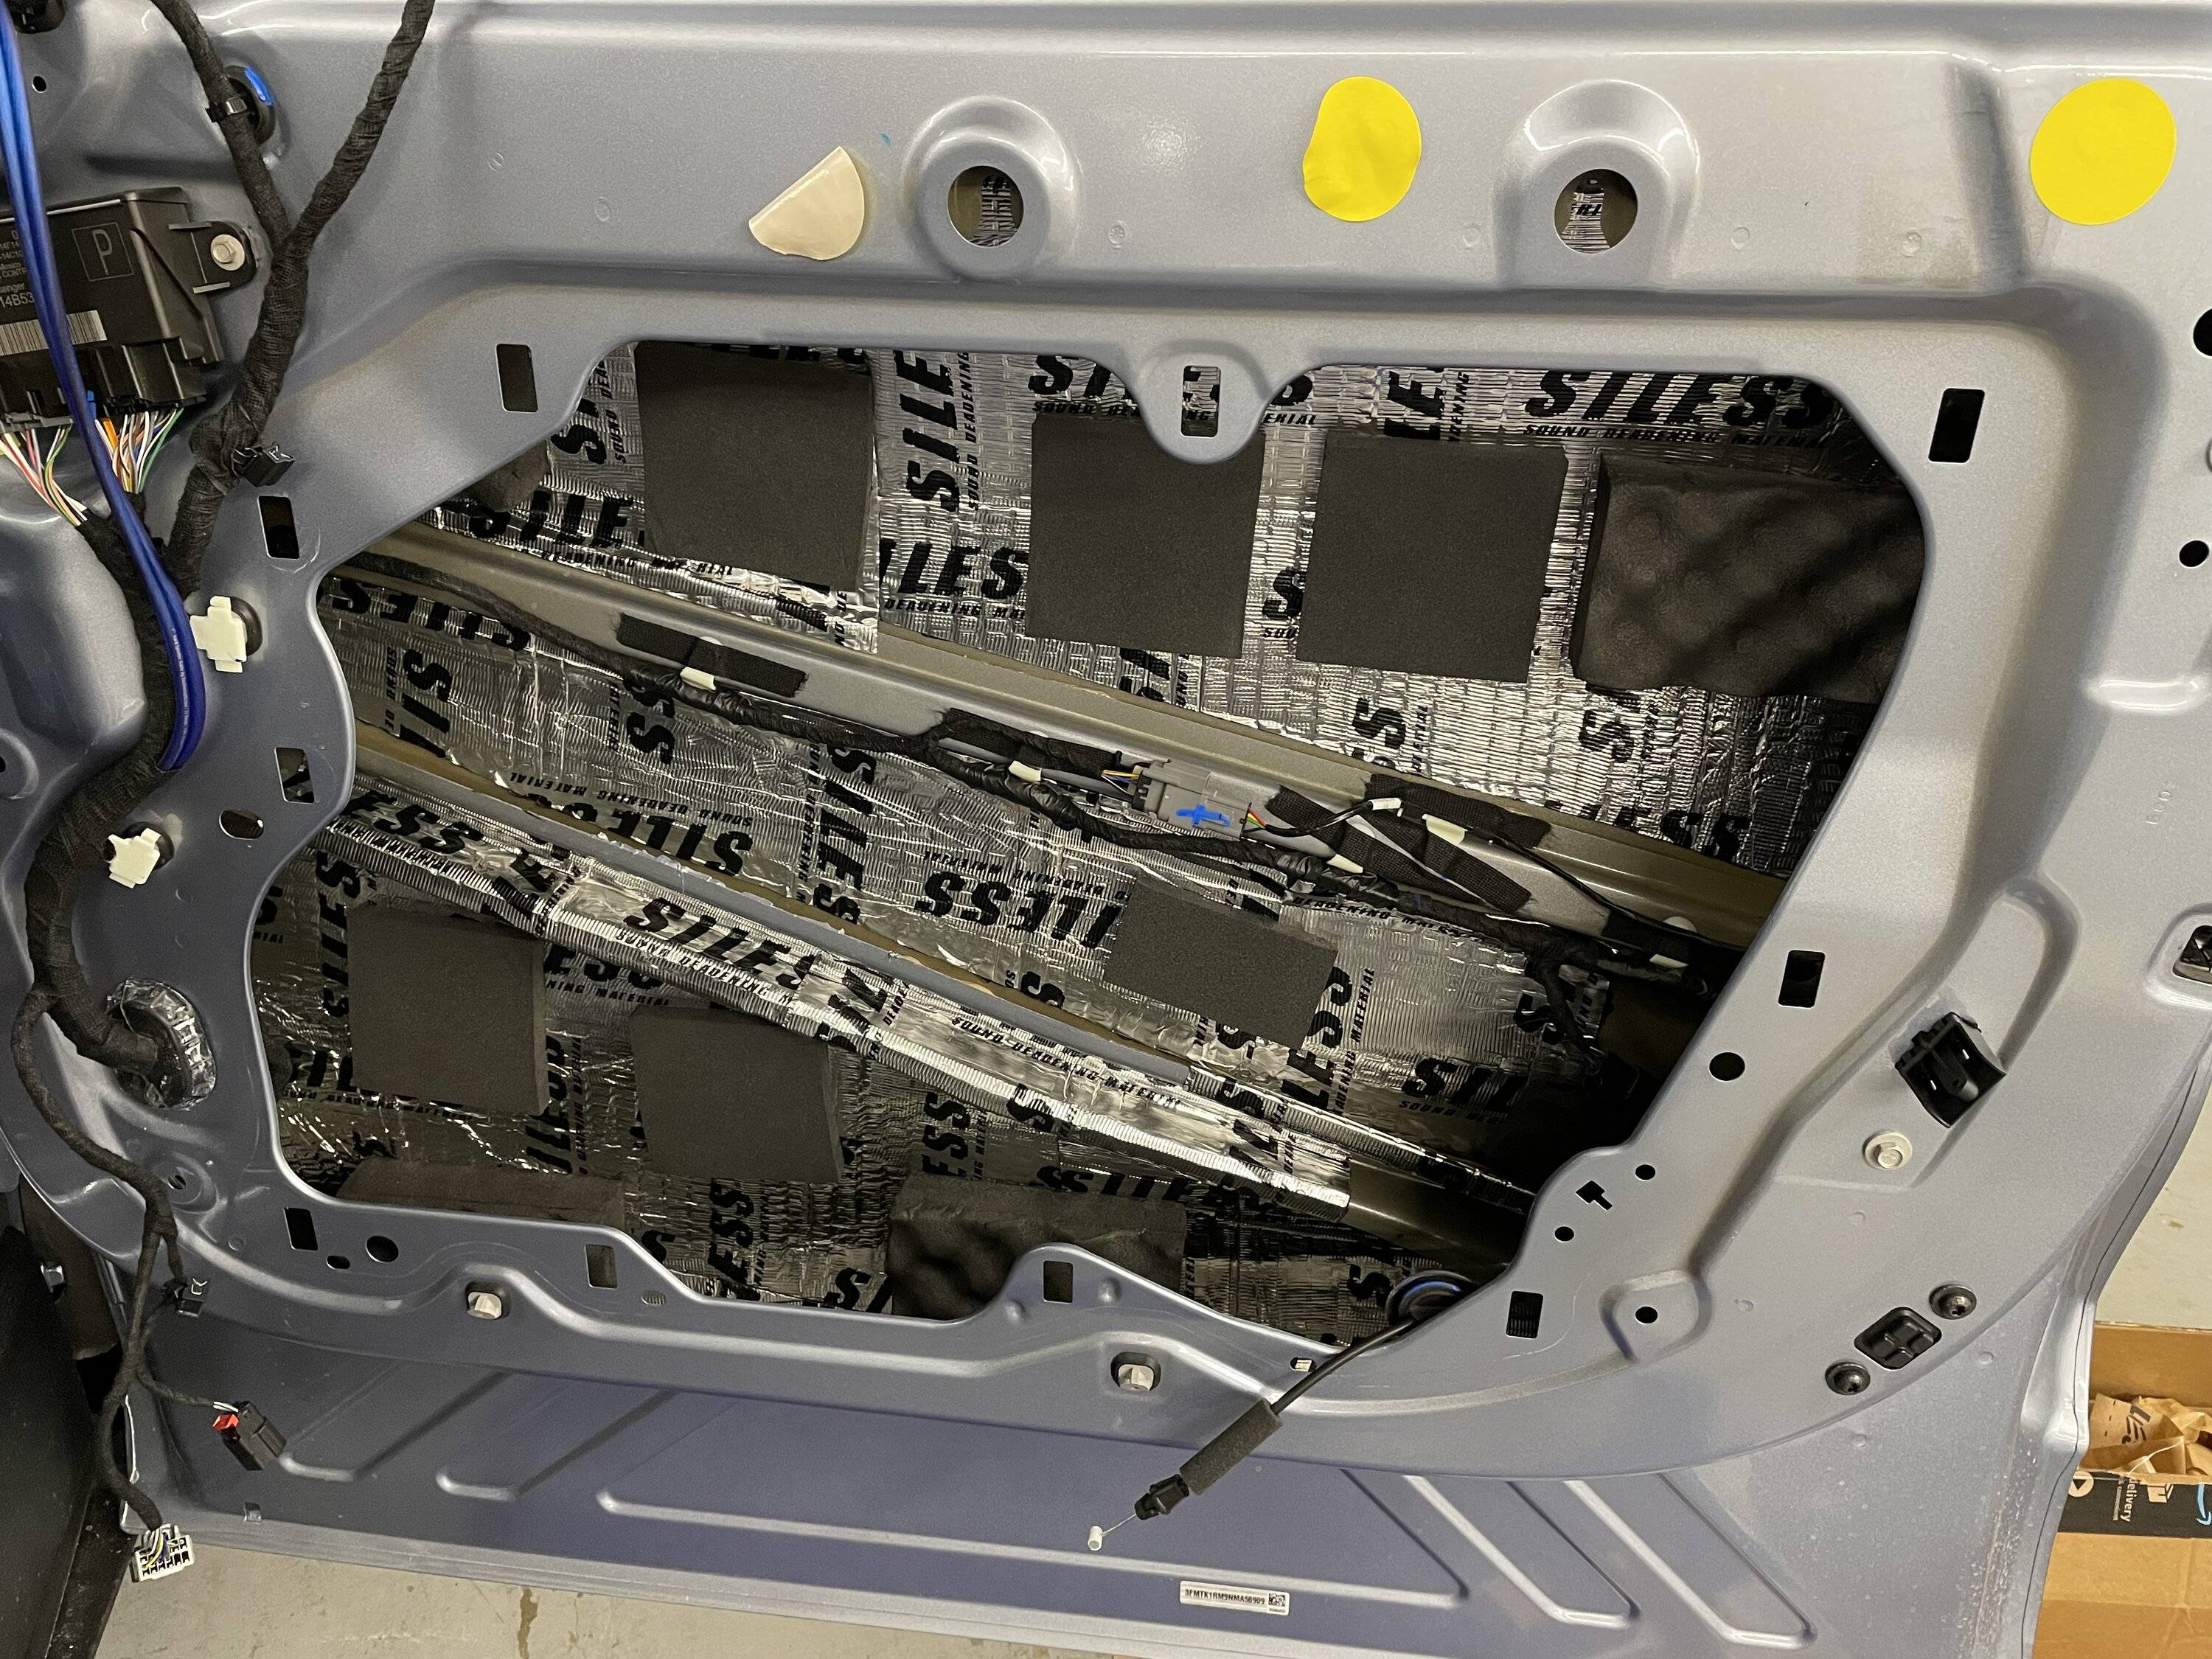
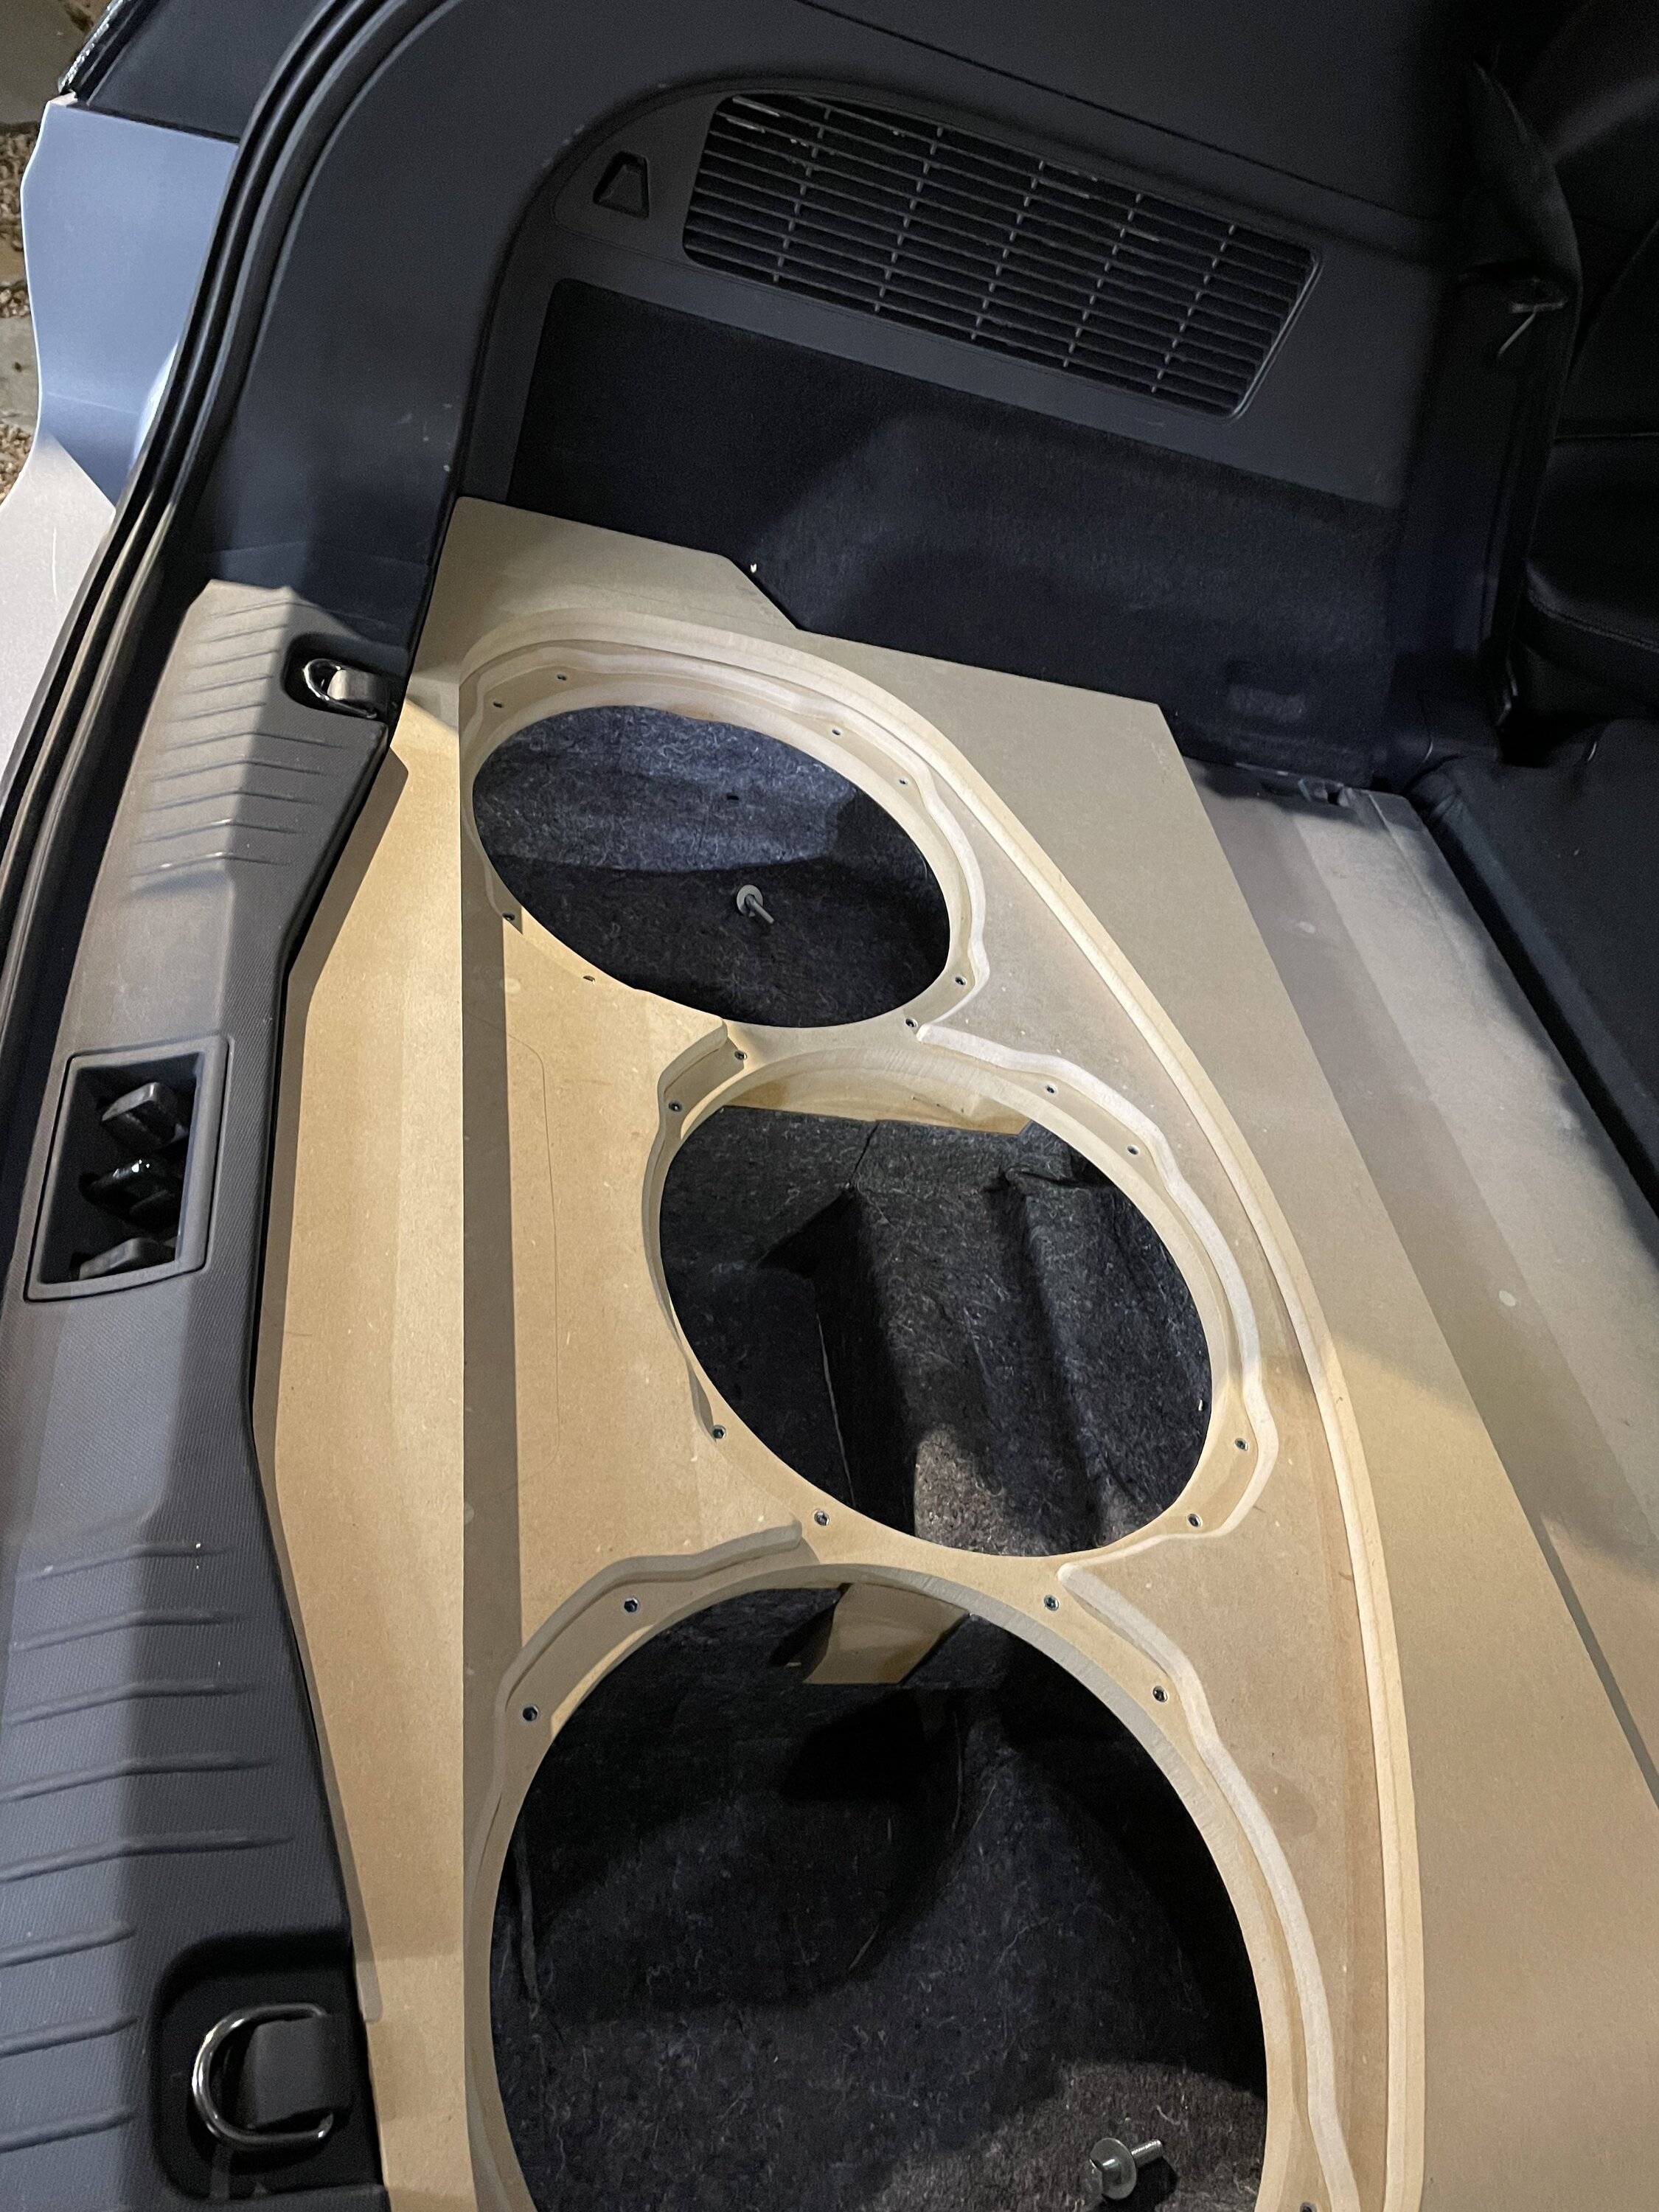
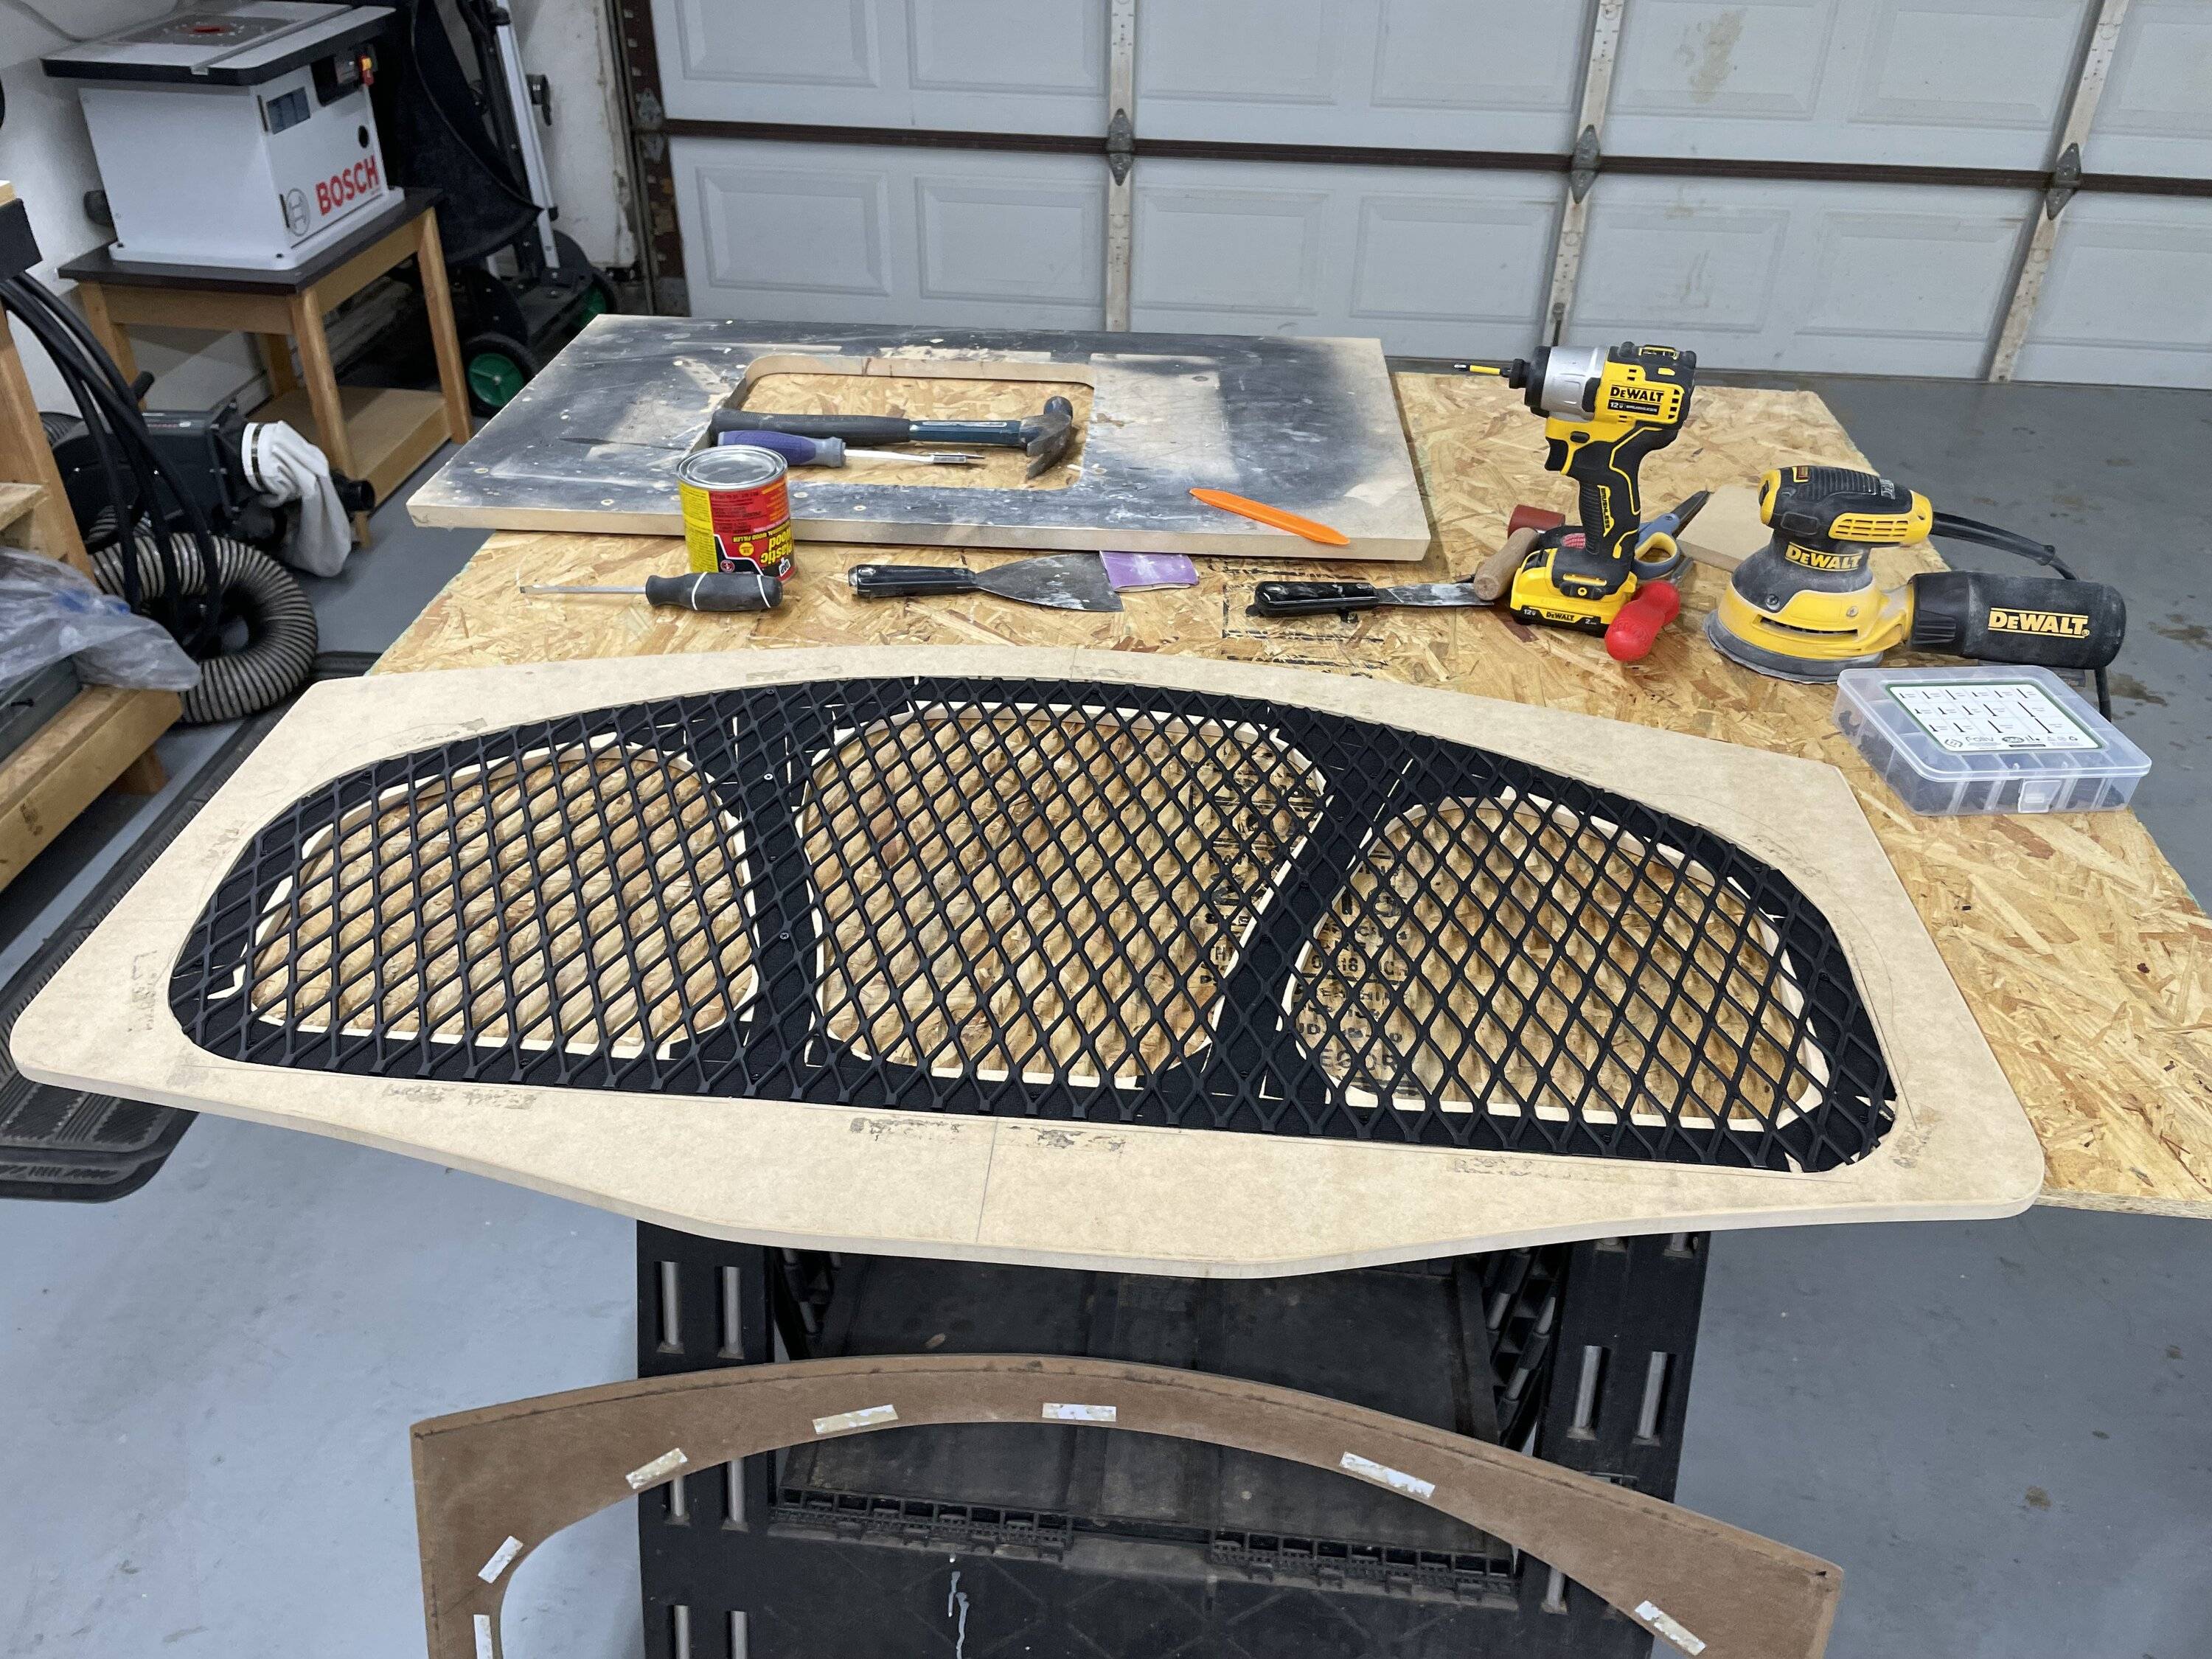
I disassembled all the doors and trunk area to apply sound deadening material to keep rattles to a minimum (the rear outside wing still rattles, will get to that later). After several measurements, calculations, and drawing revisions (on sketch up), I decided to go with three 13 inch JL Audio subs for their shallow mount and minimal air requirement. As you know, there is no spare tire since the trunk cavity is very shallow, the subwoofer options were limited. Fortunately, based on my design and calculations, 3 of them would work (2 would have done it but that would have been too easy). I built the subwoofer box with 3/4 inch mdf and used layers to build up around corners of the well. Each sub has its own chamber and equal in volume. There are multiple layers of panels to achieve a stock look but still give it a premium feel. Different layers of finish were incorporated to match the interior vinyl texture, carpet, and gloss black trim (vinyl wrap). The cover has a breathable grill covered in carpet so the trunk is still usable and factory looking.
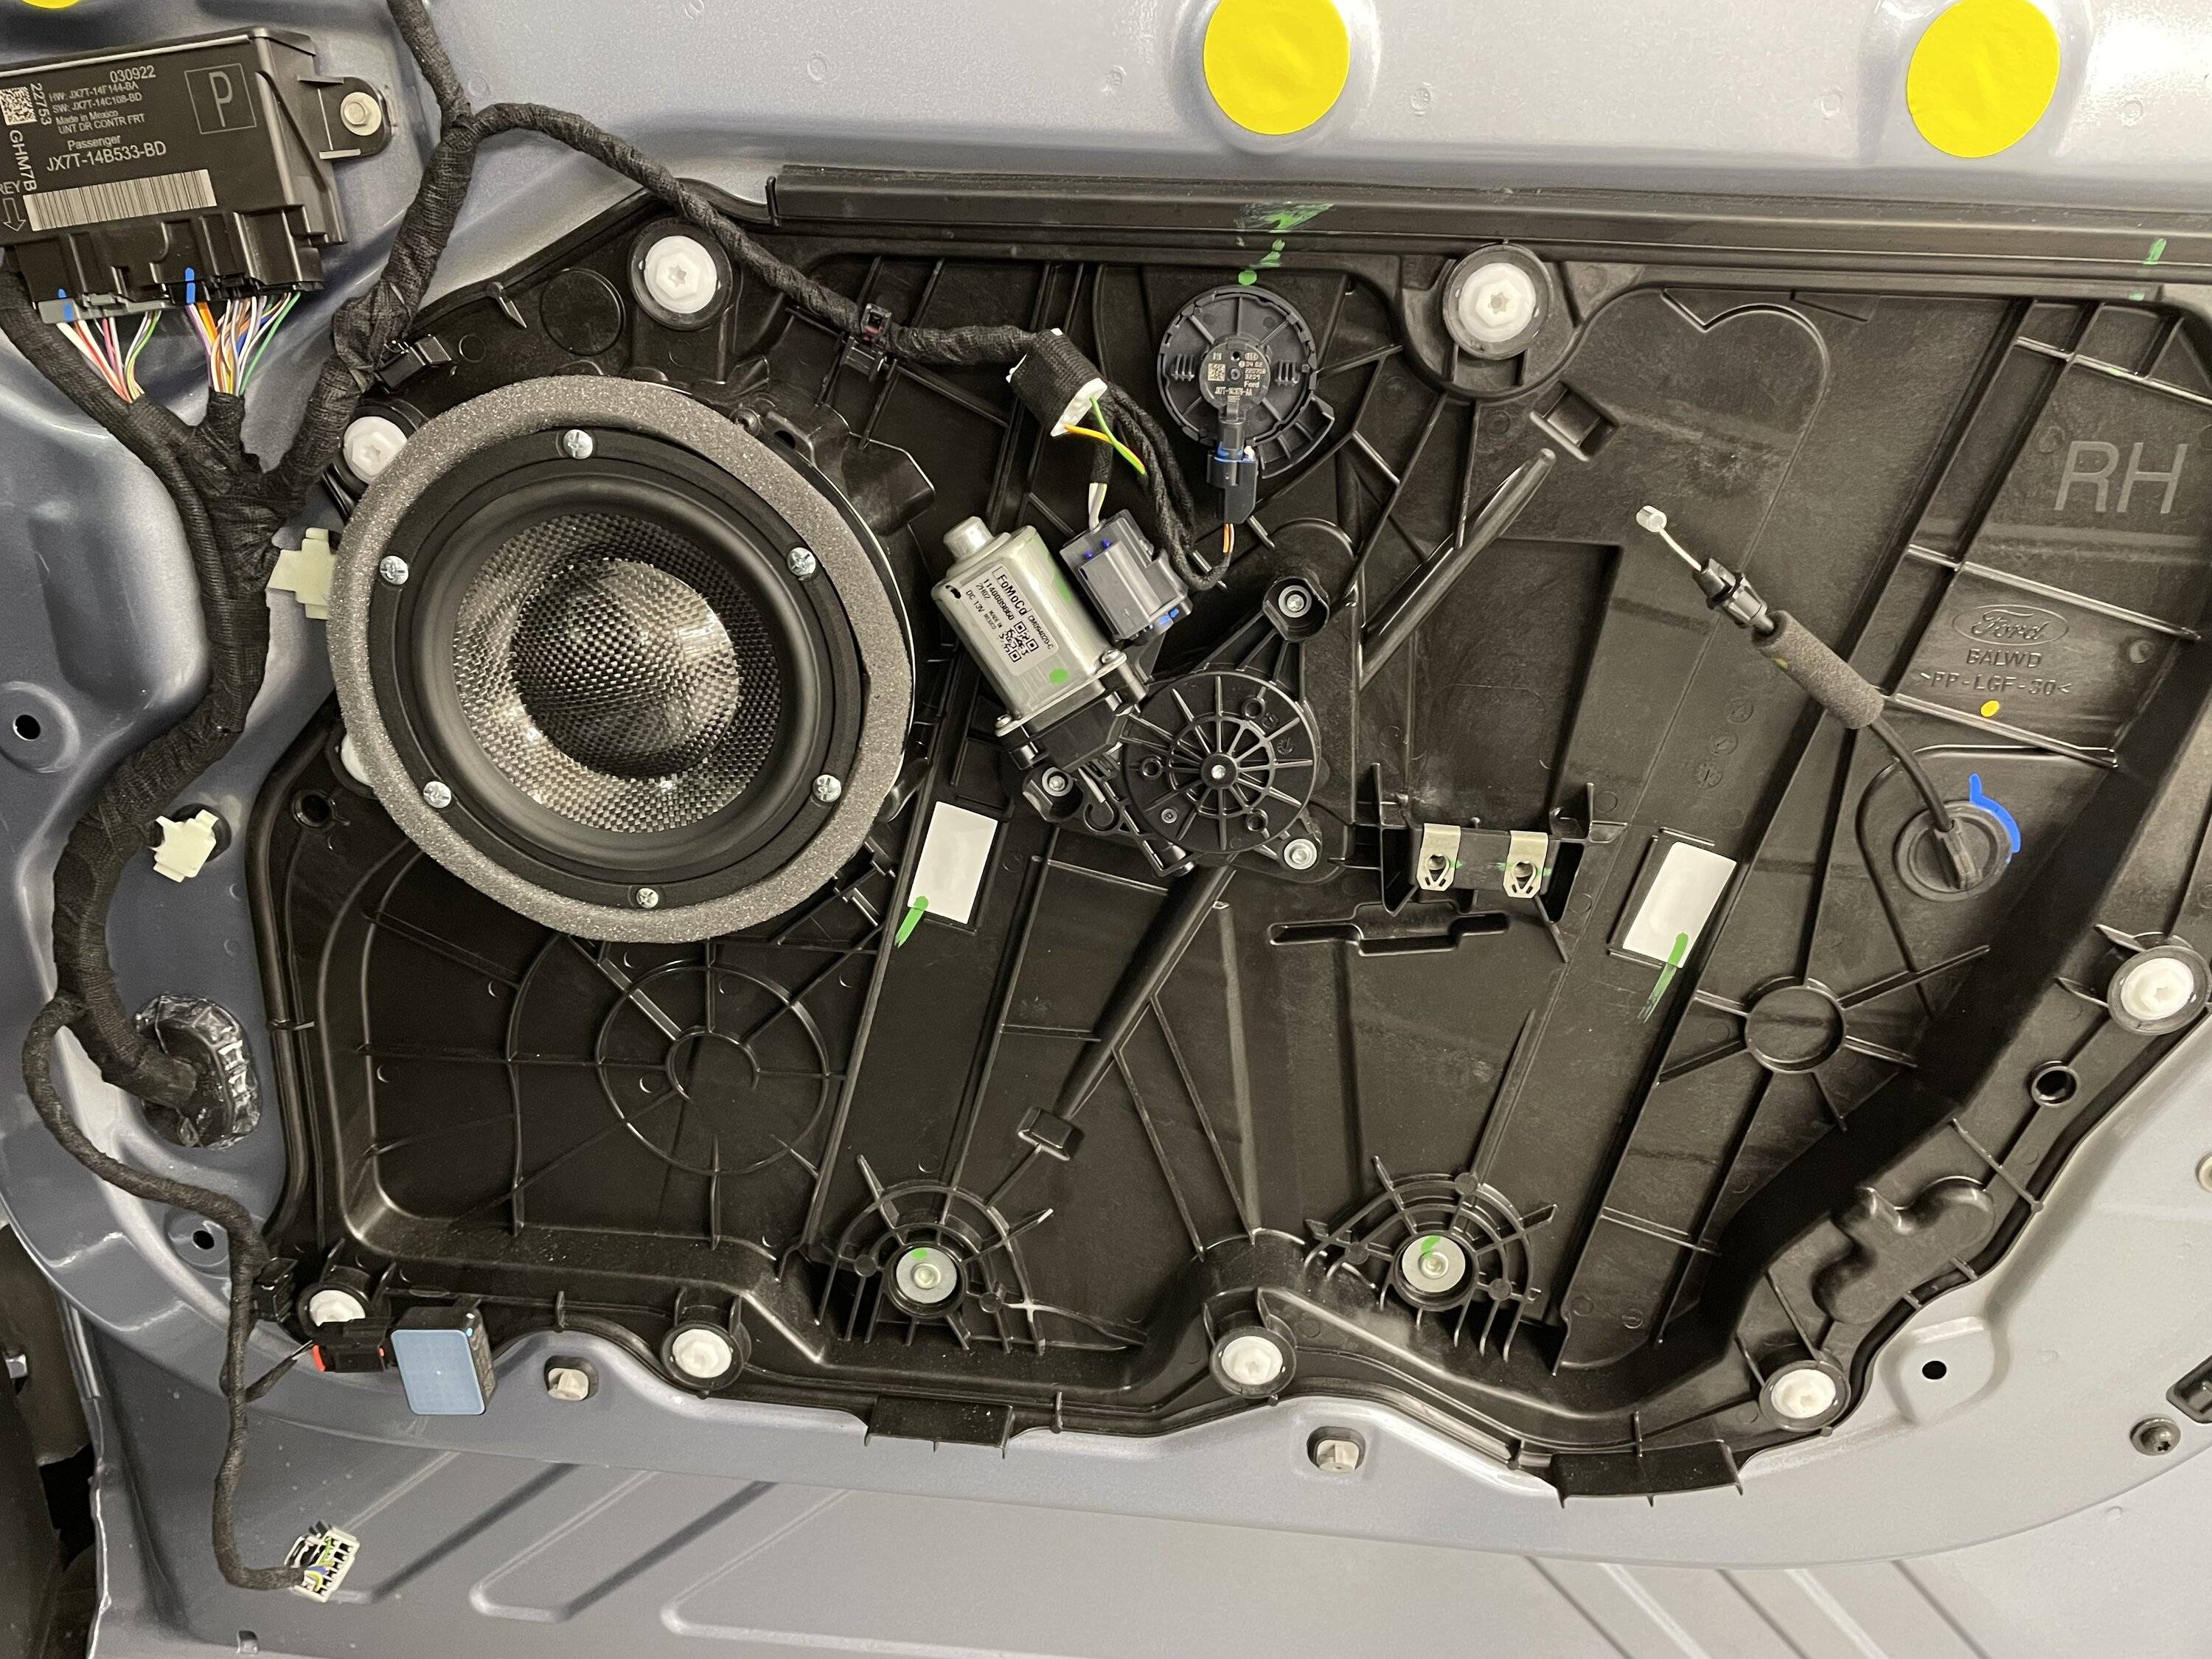
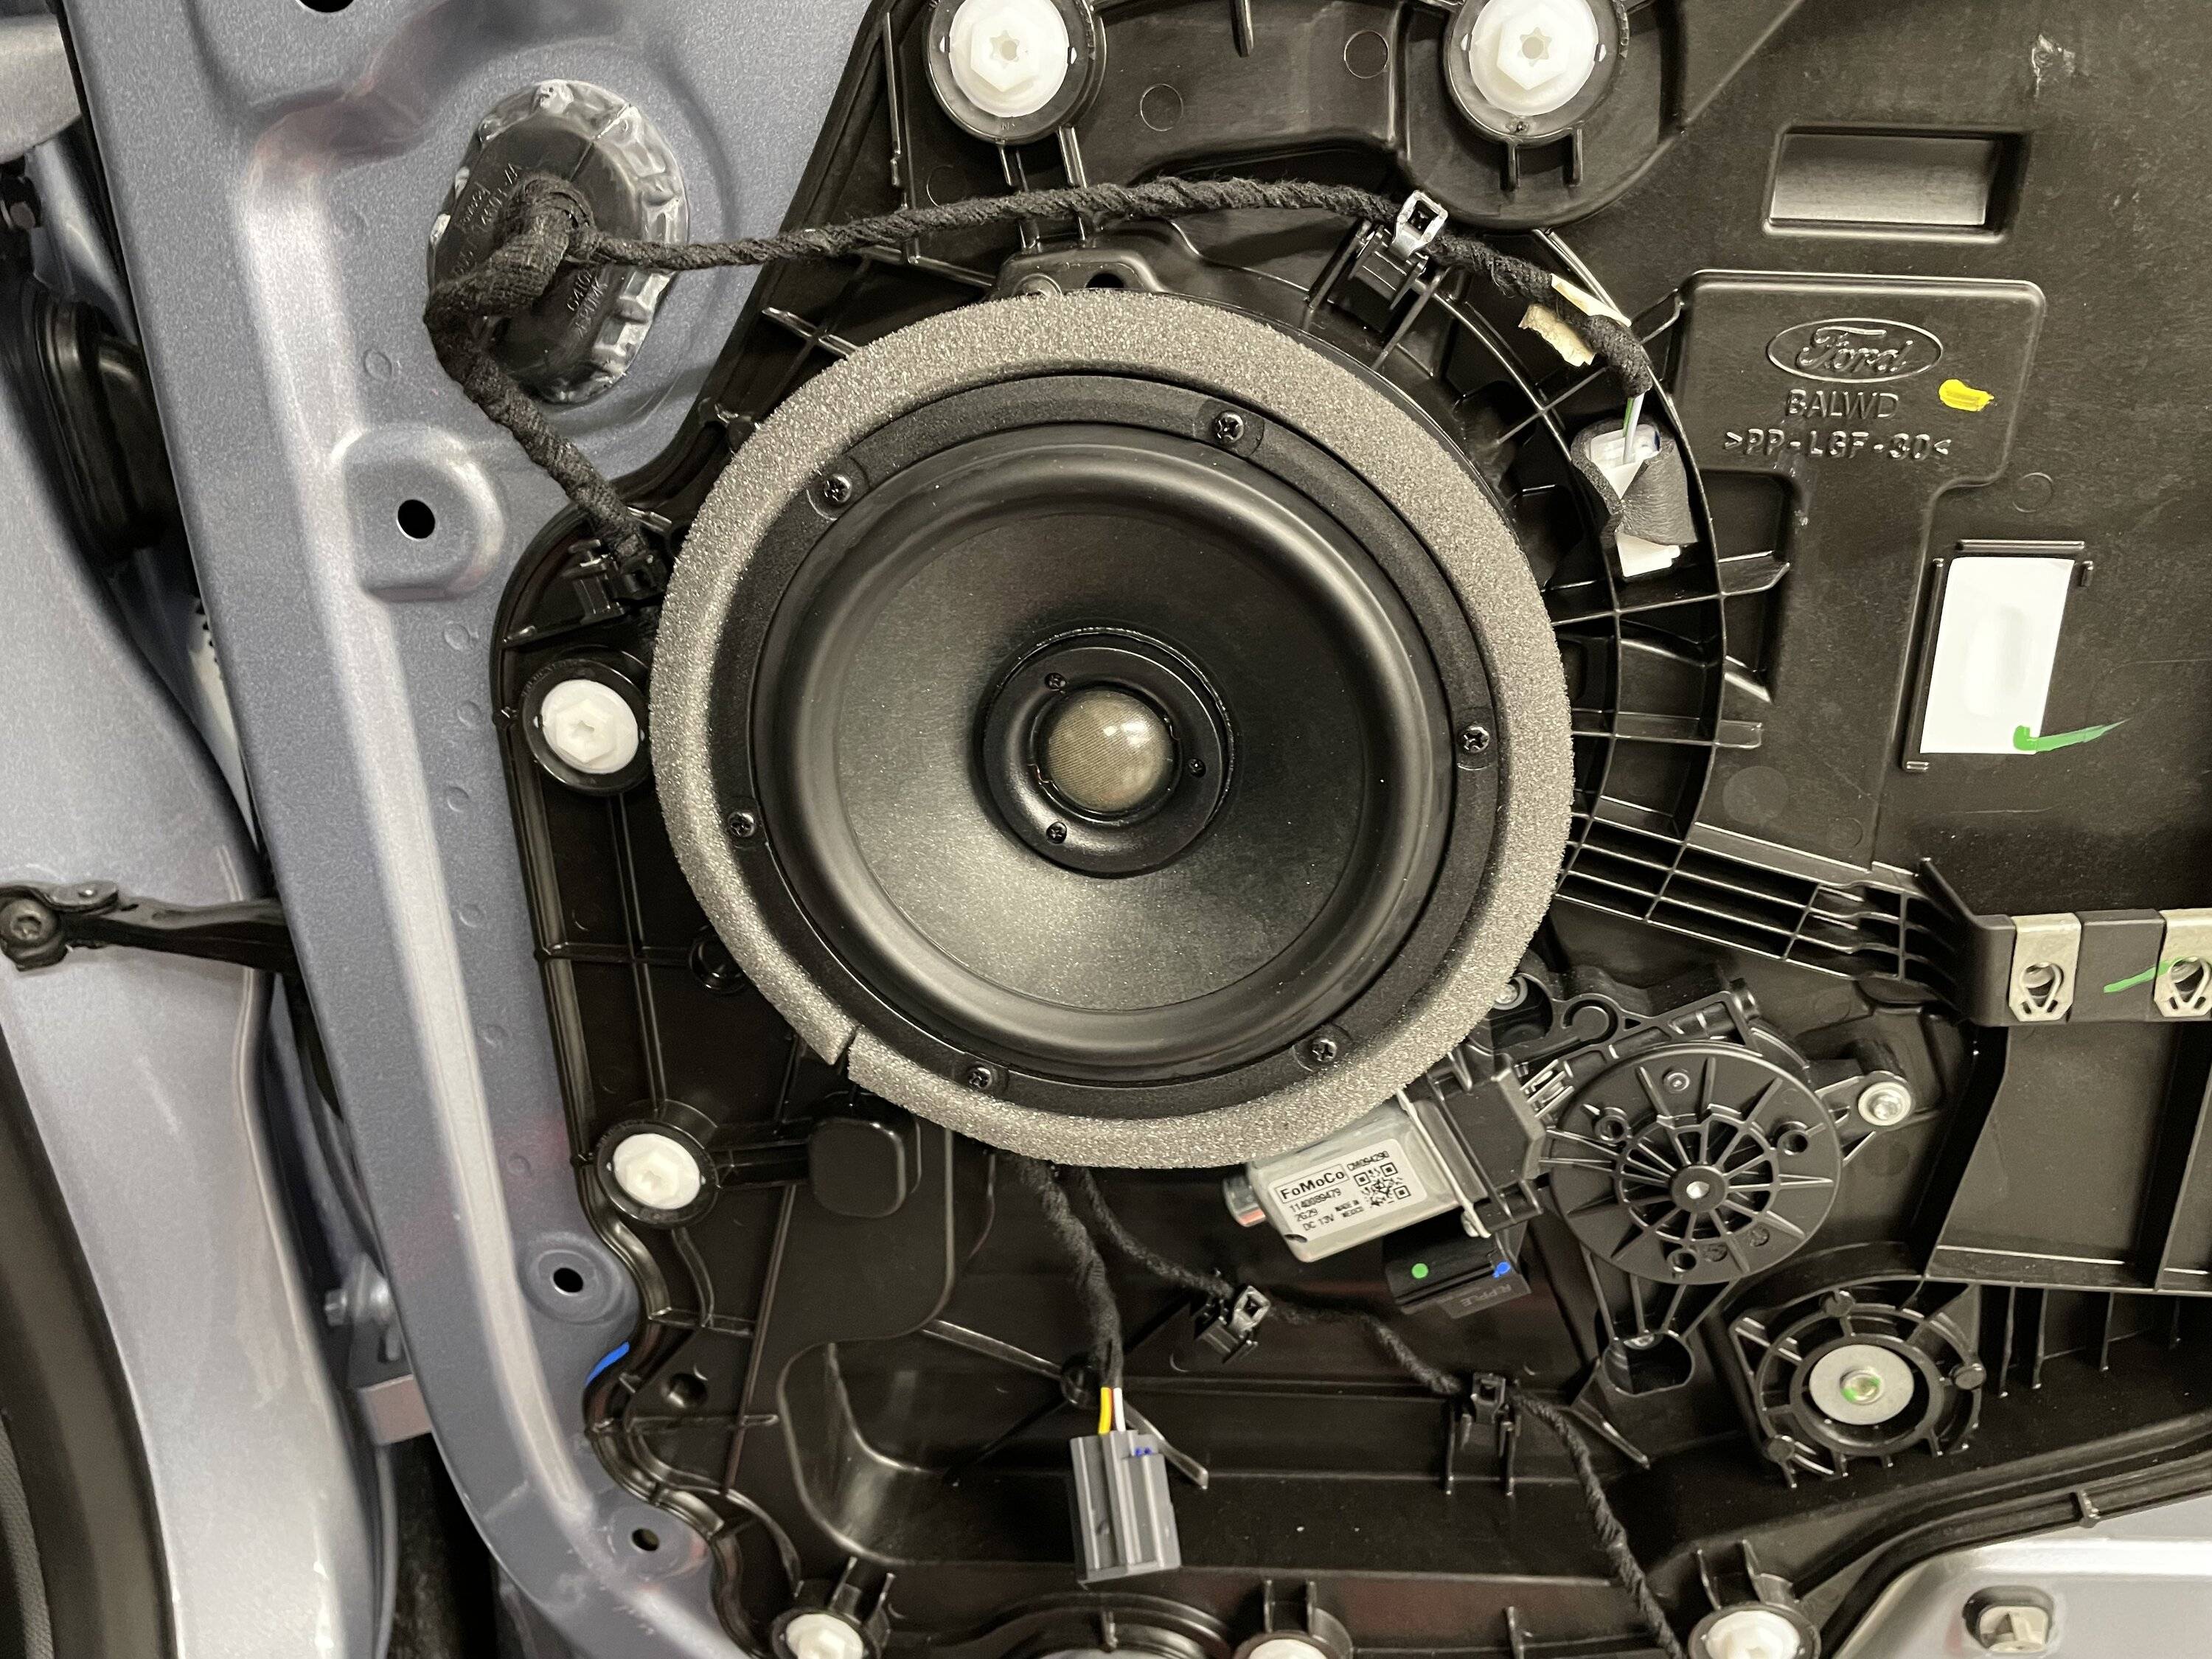
For the front doors, I dropped in 6.5 inch Morel carbon fiber midbass and then 6.5 Morel coaxial in the rear doors for fill.
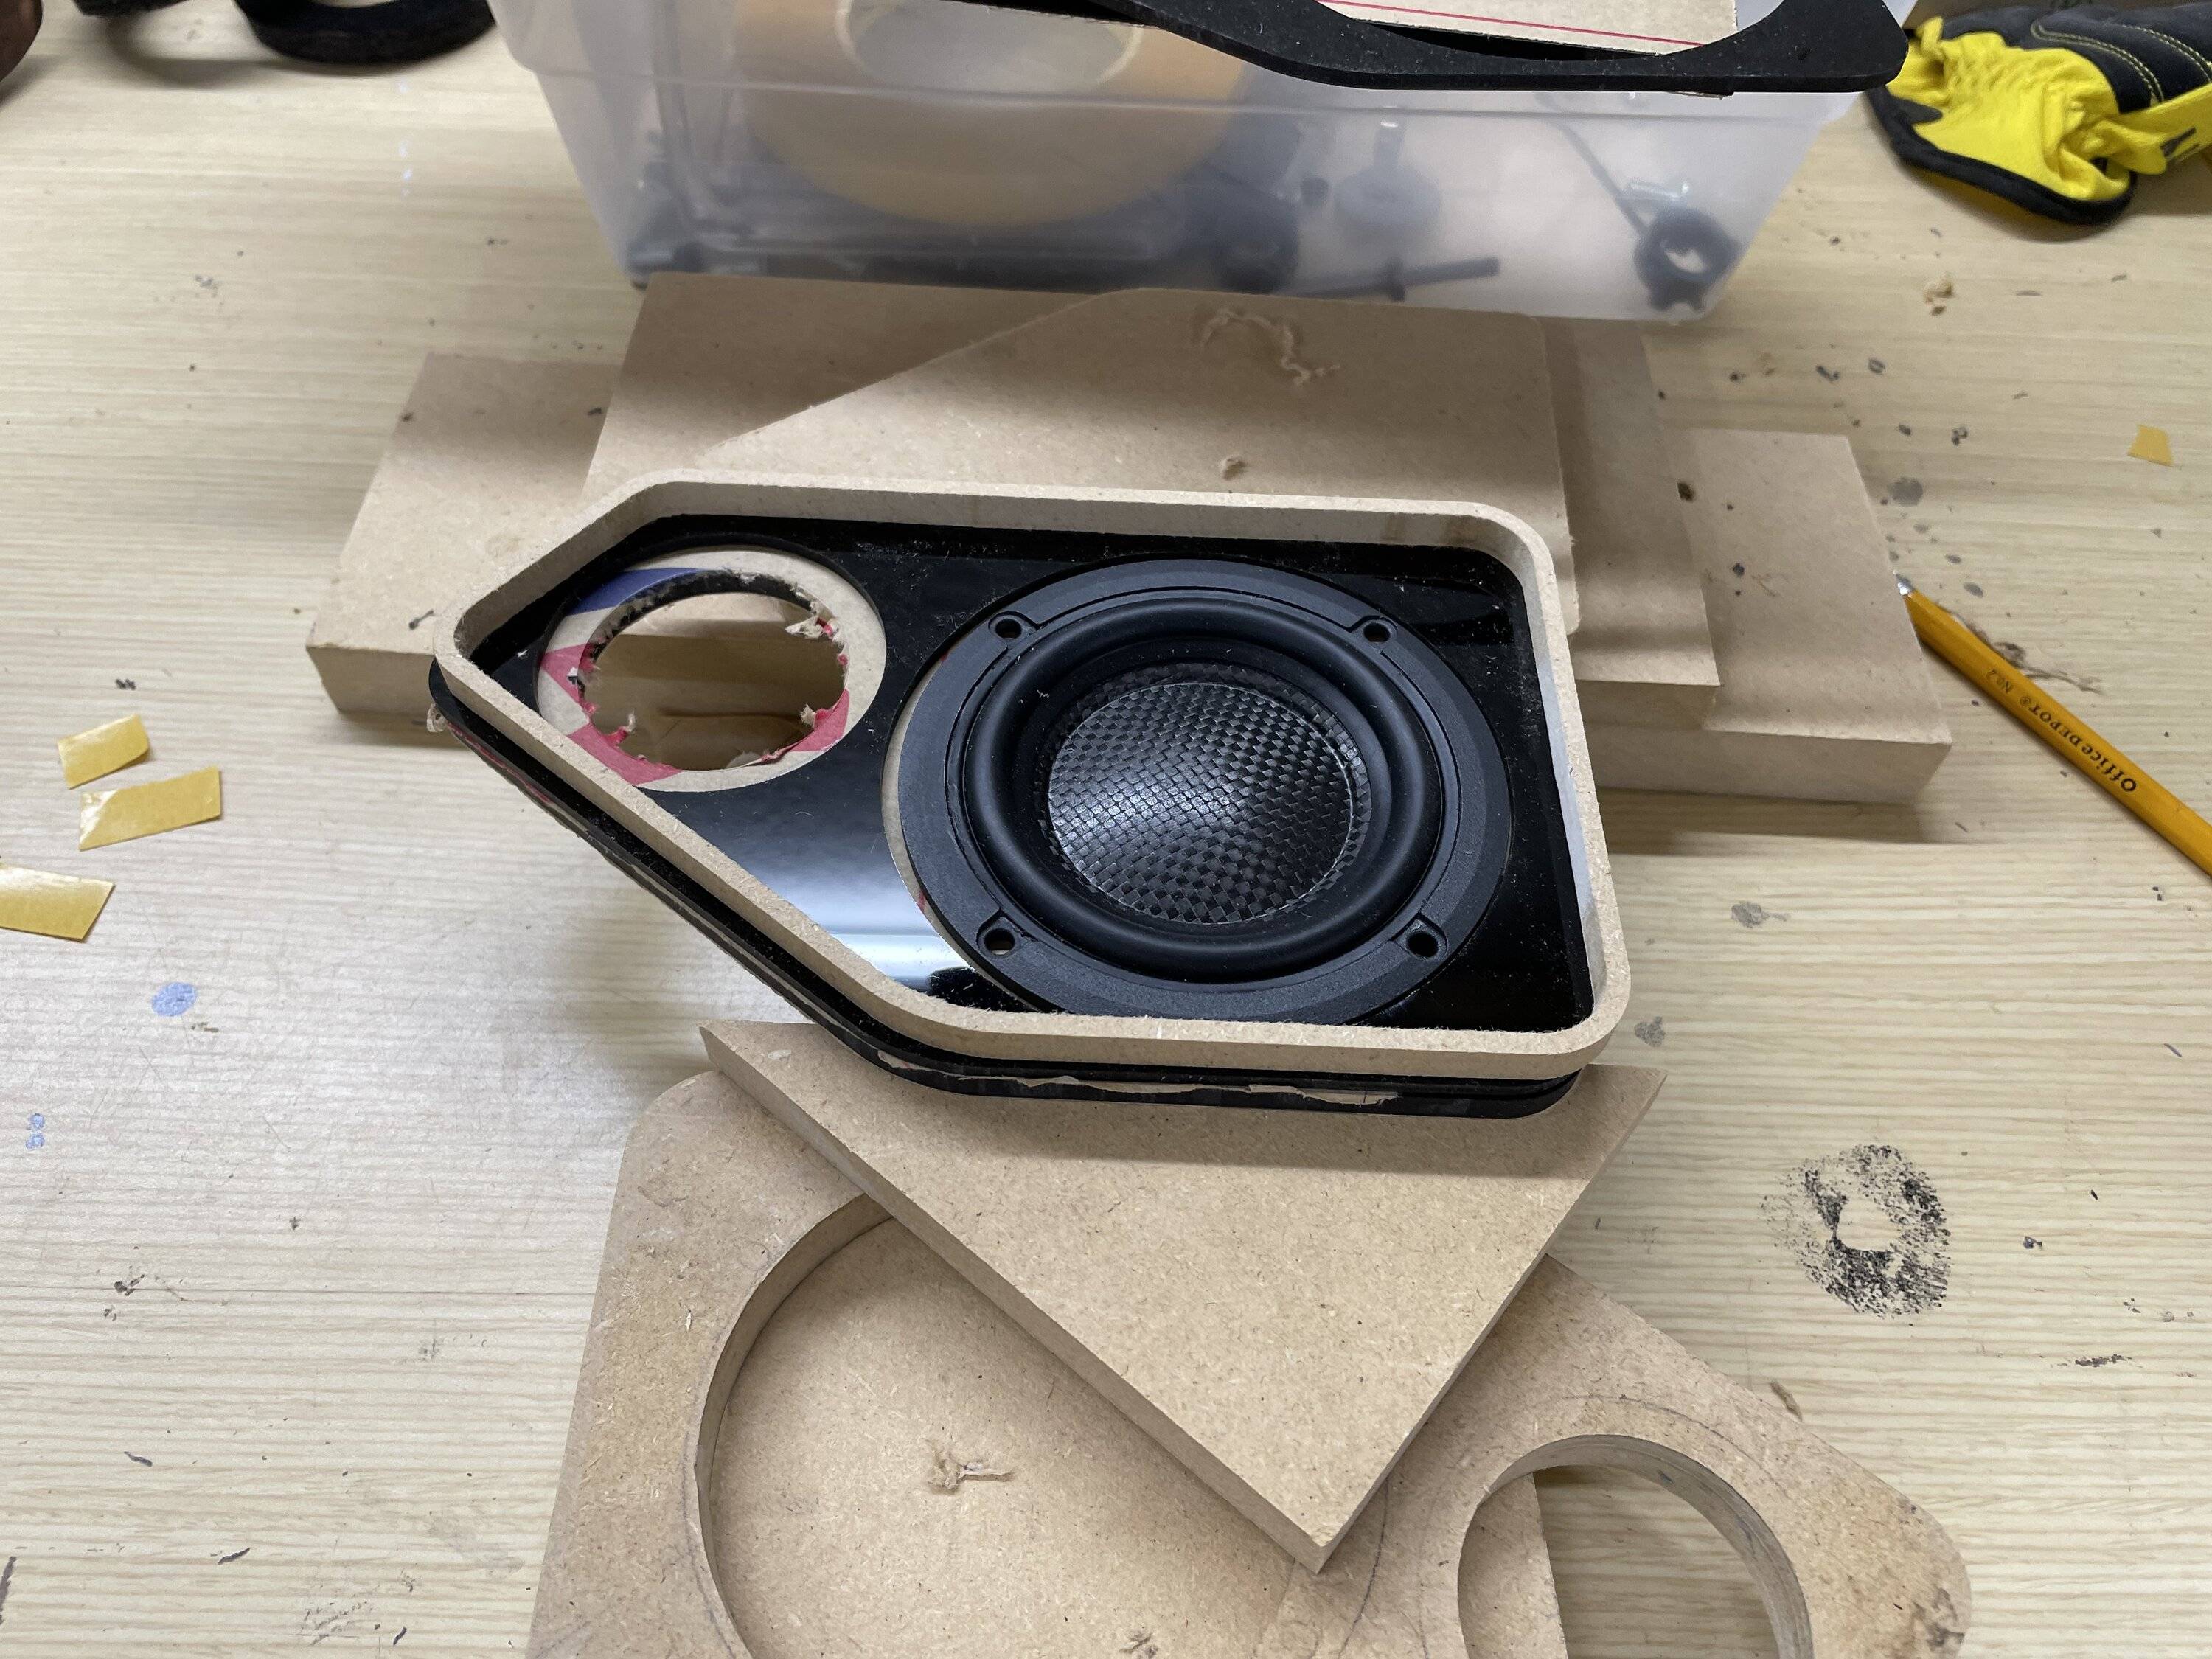
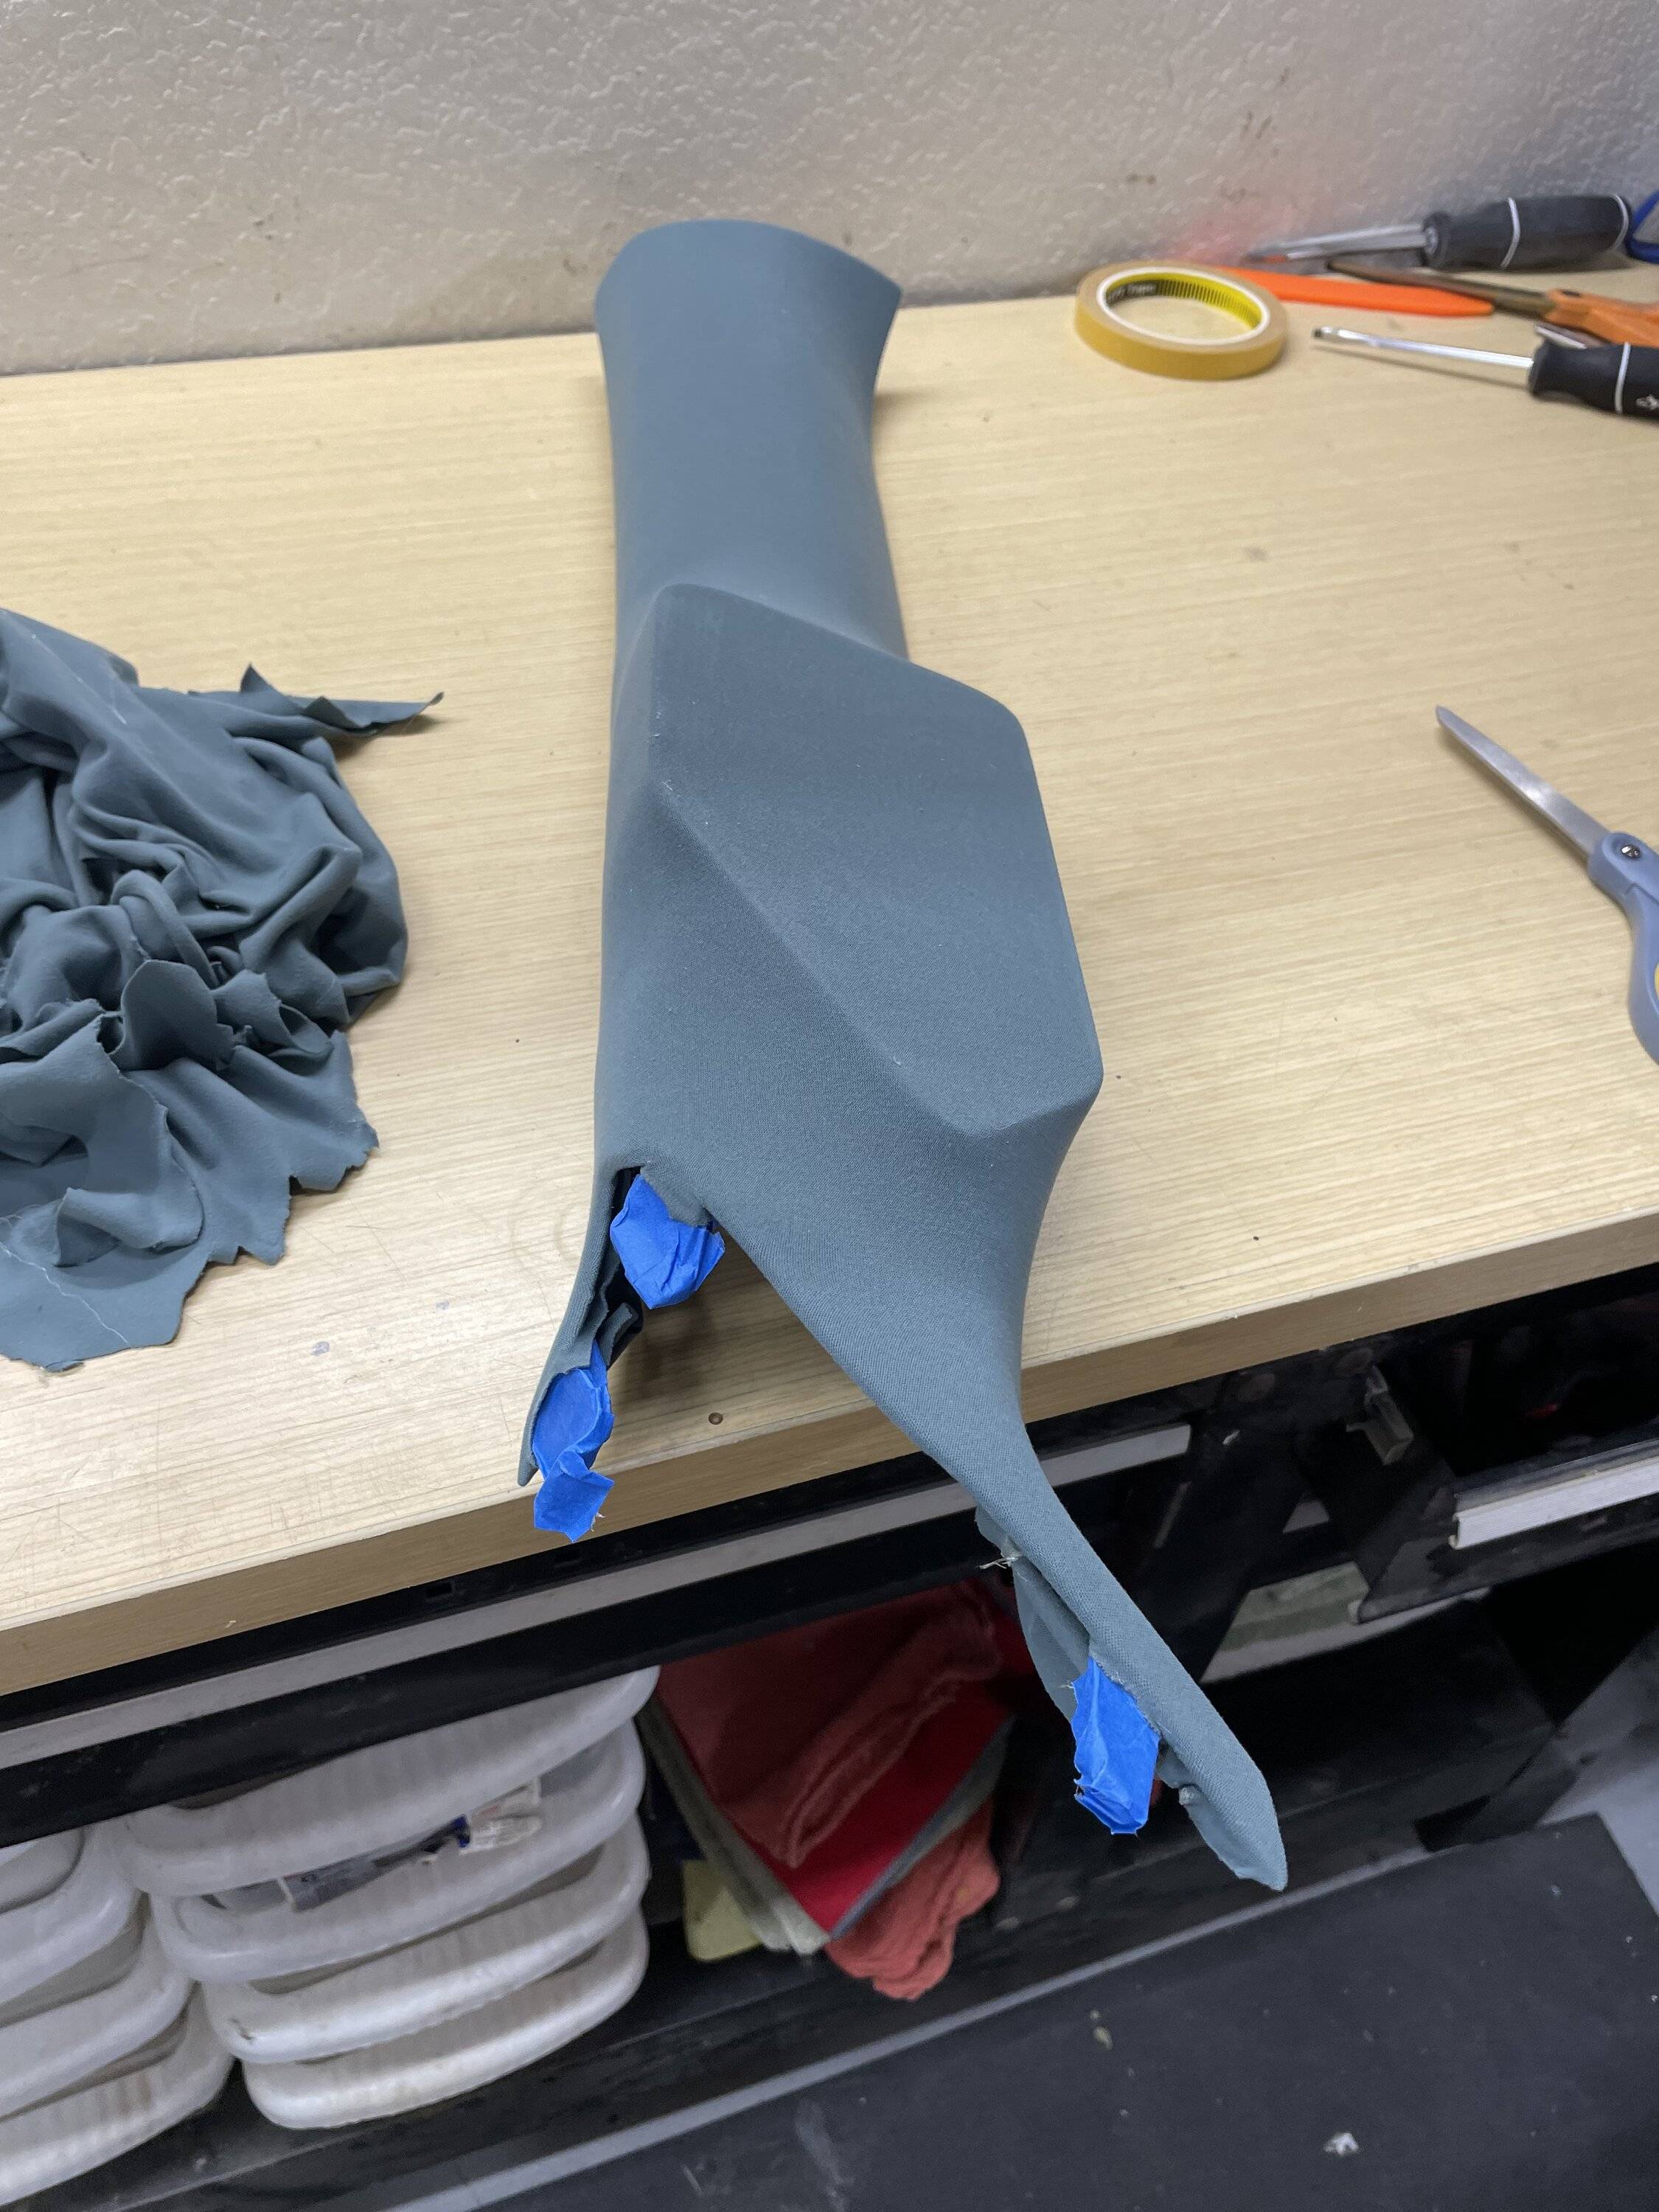
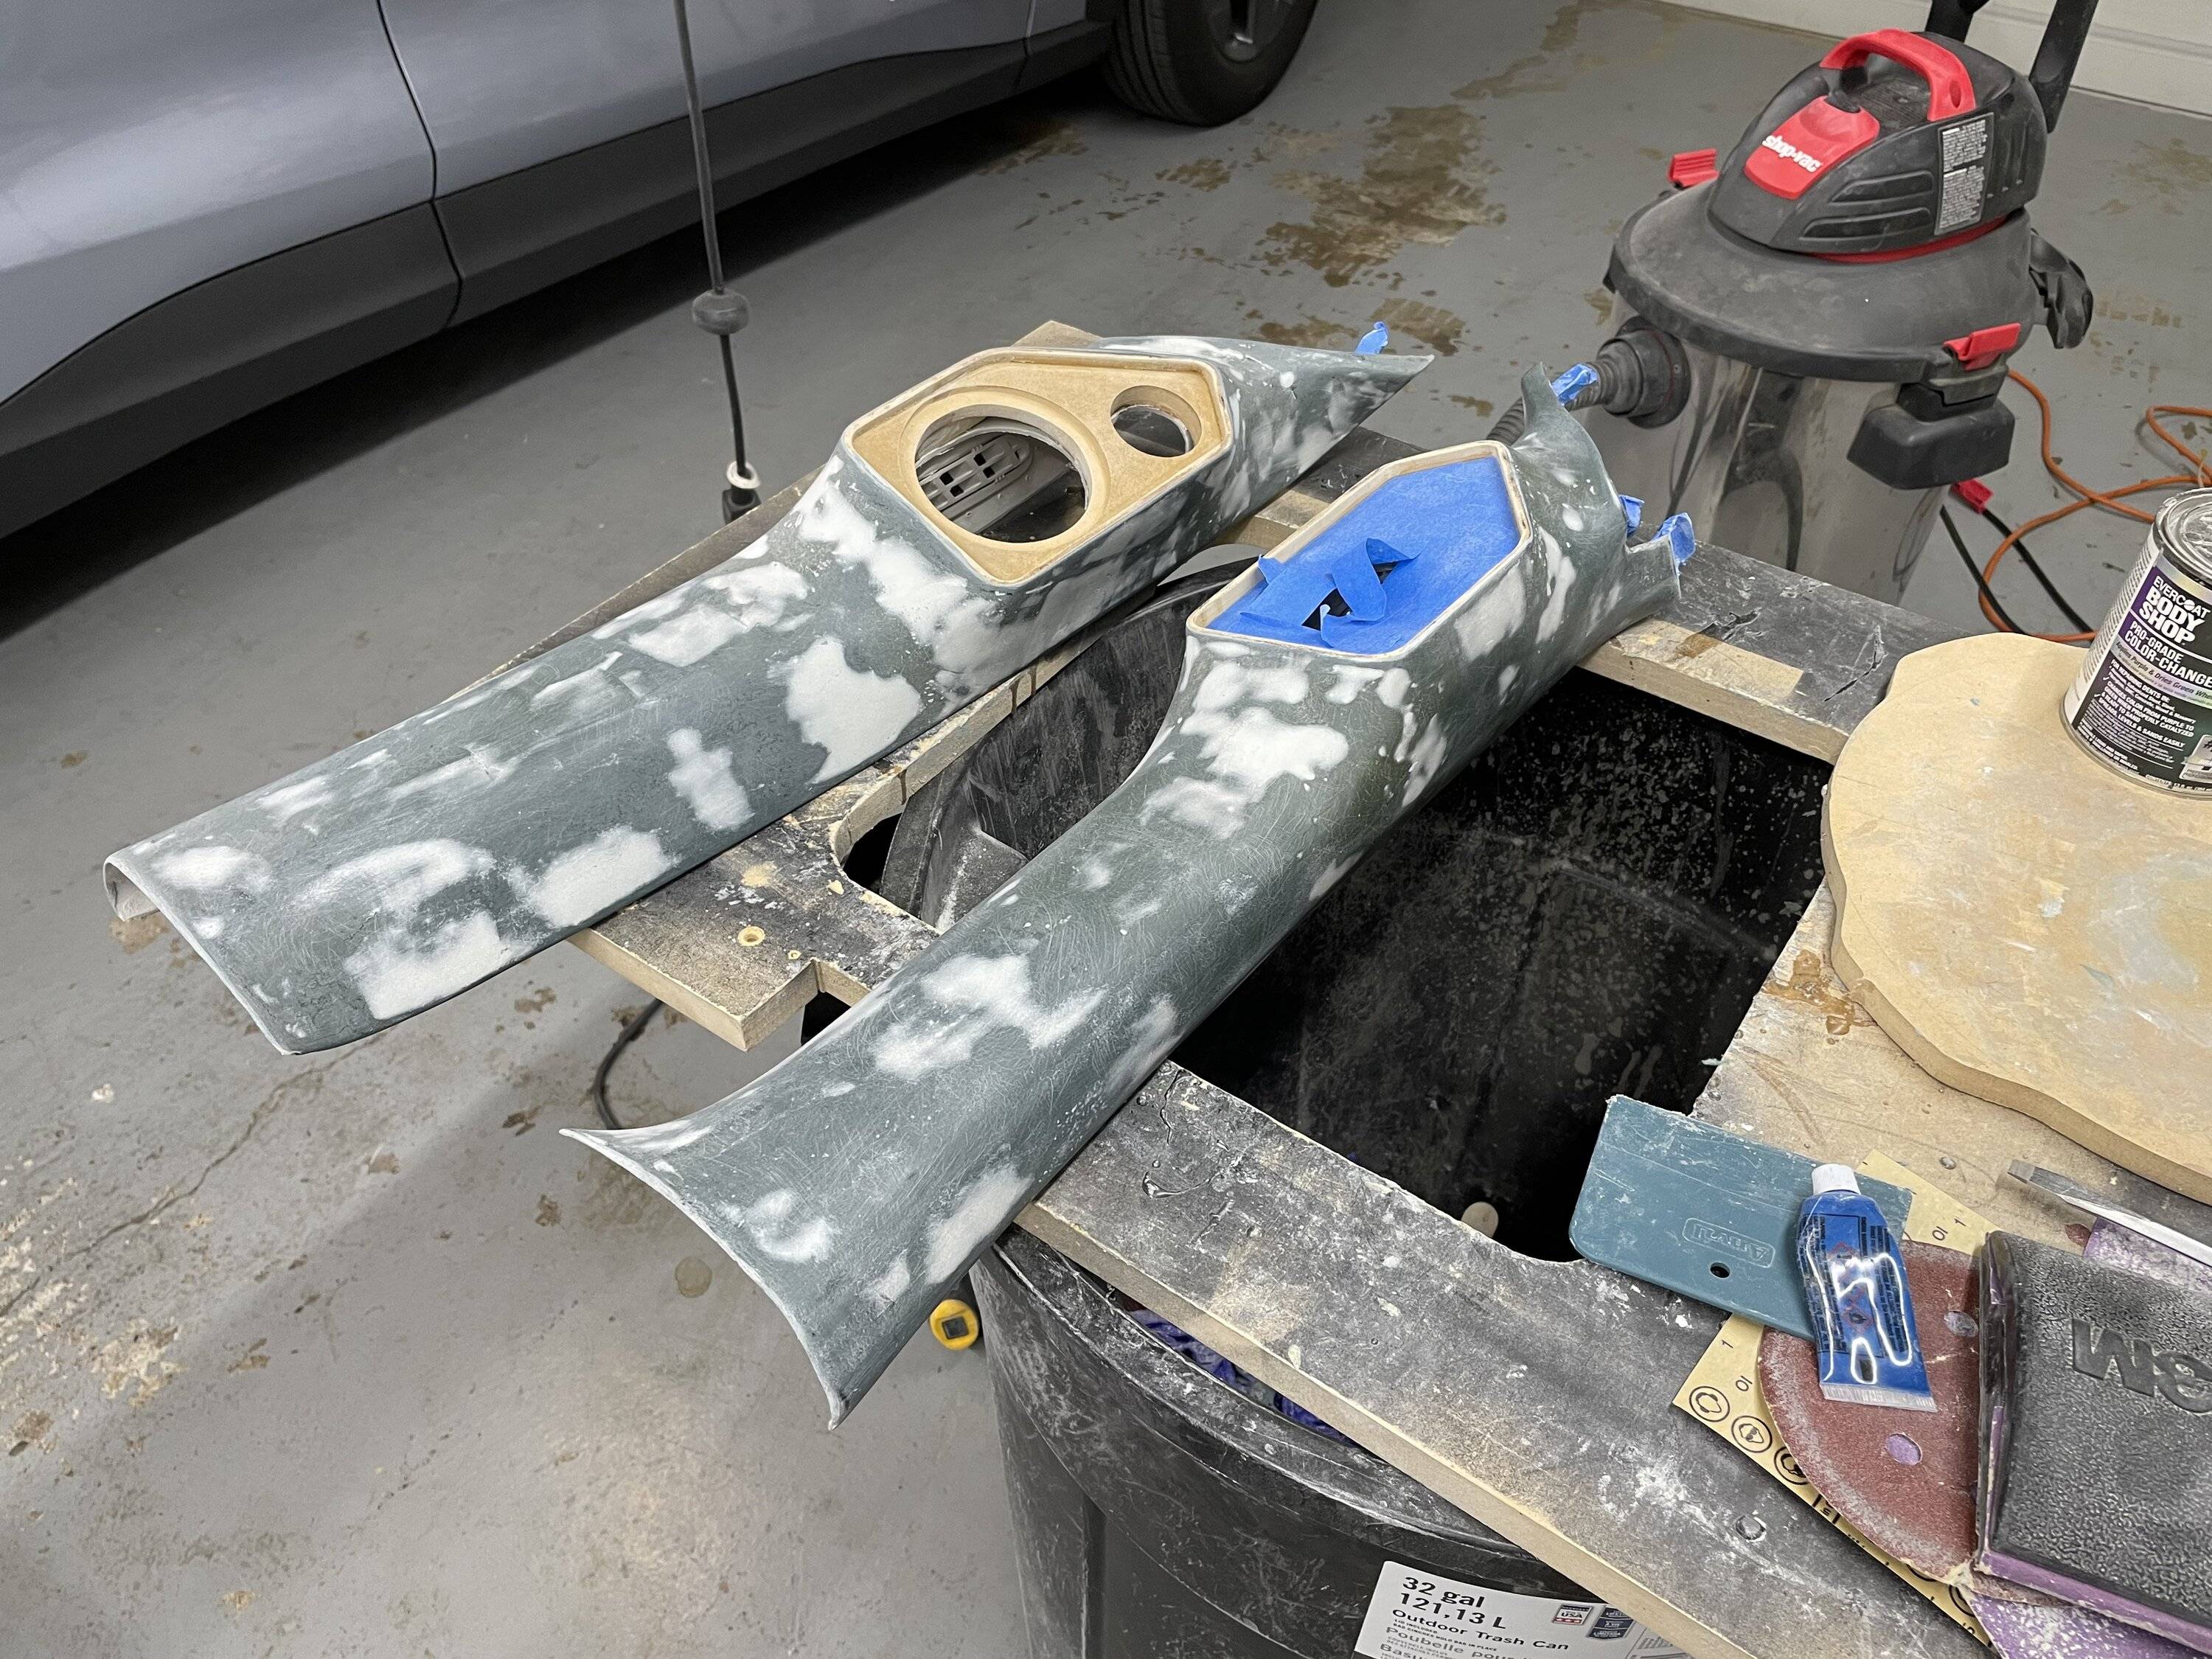
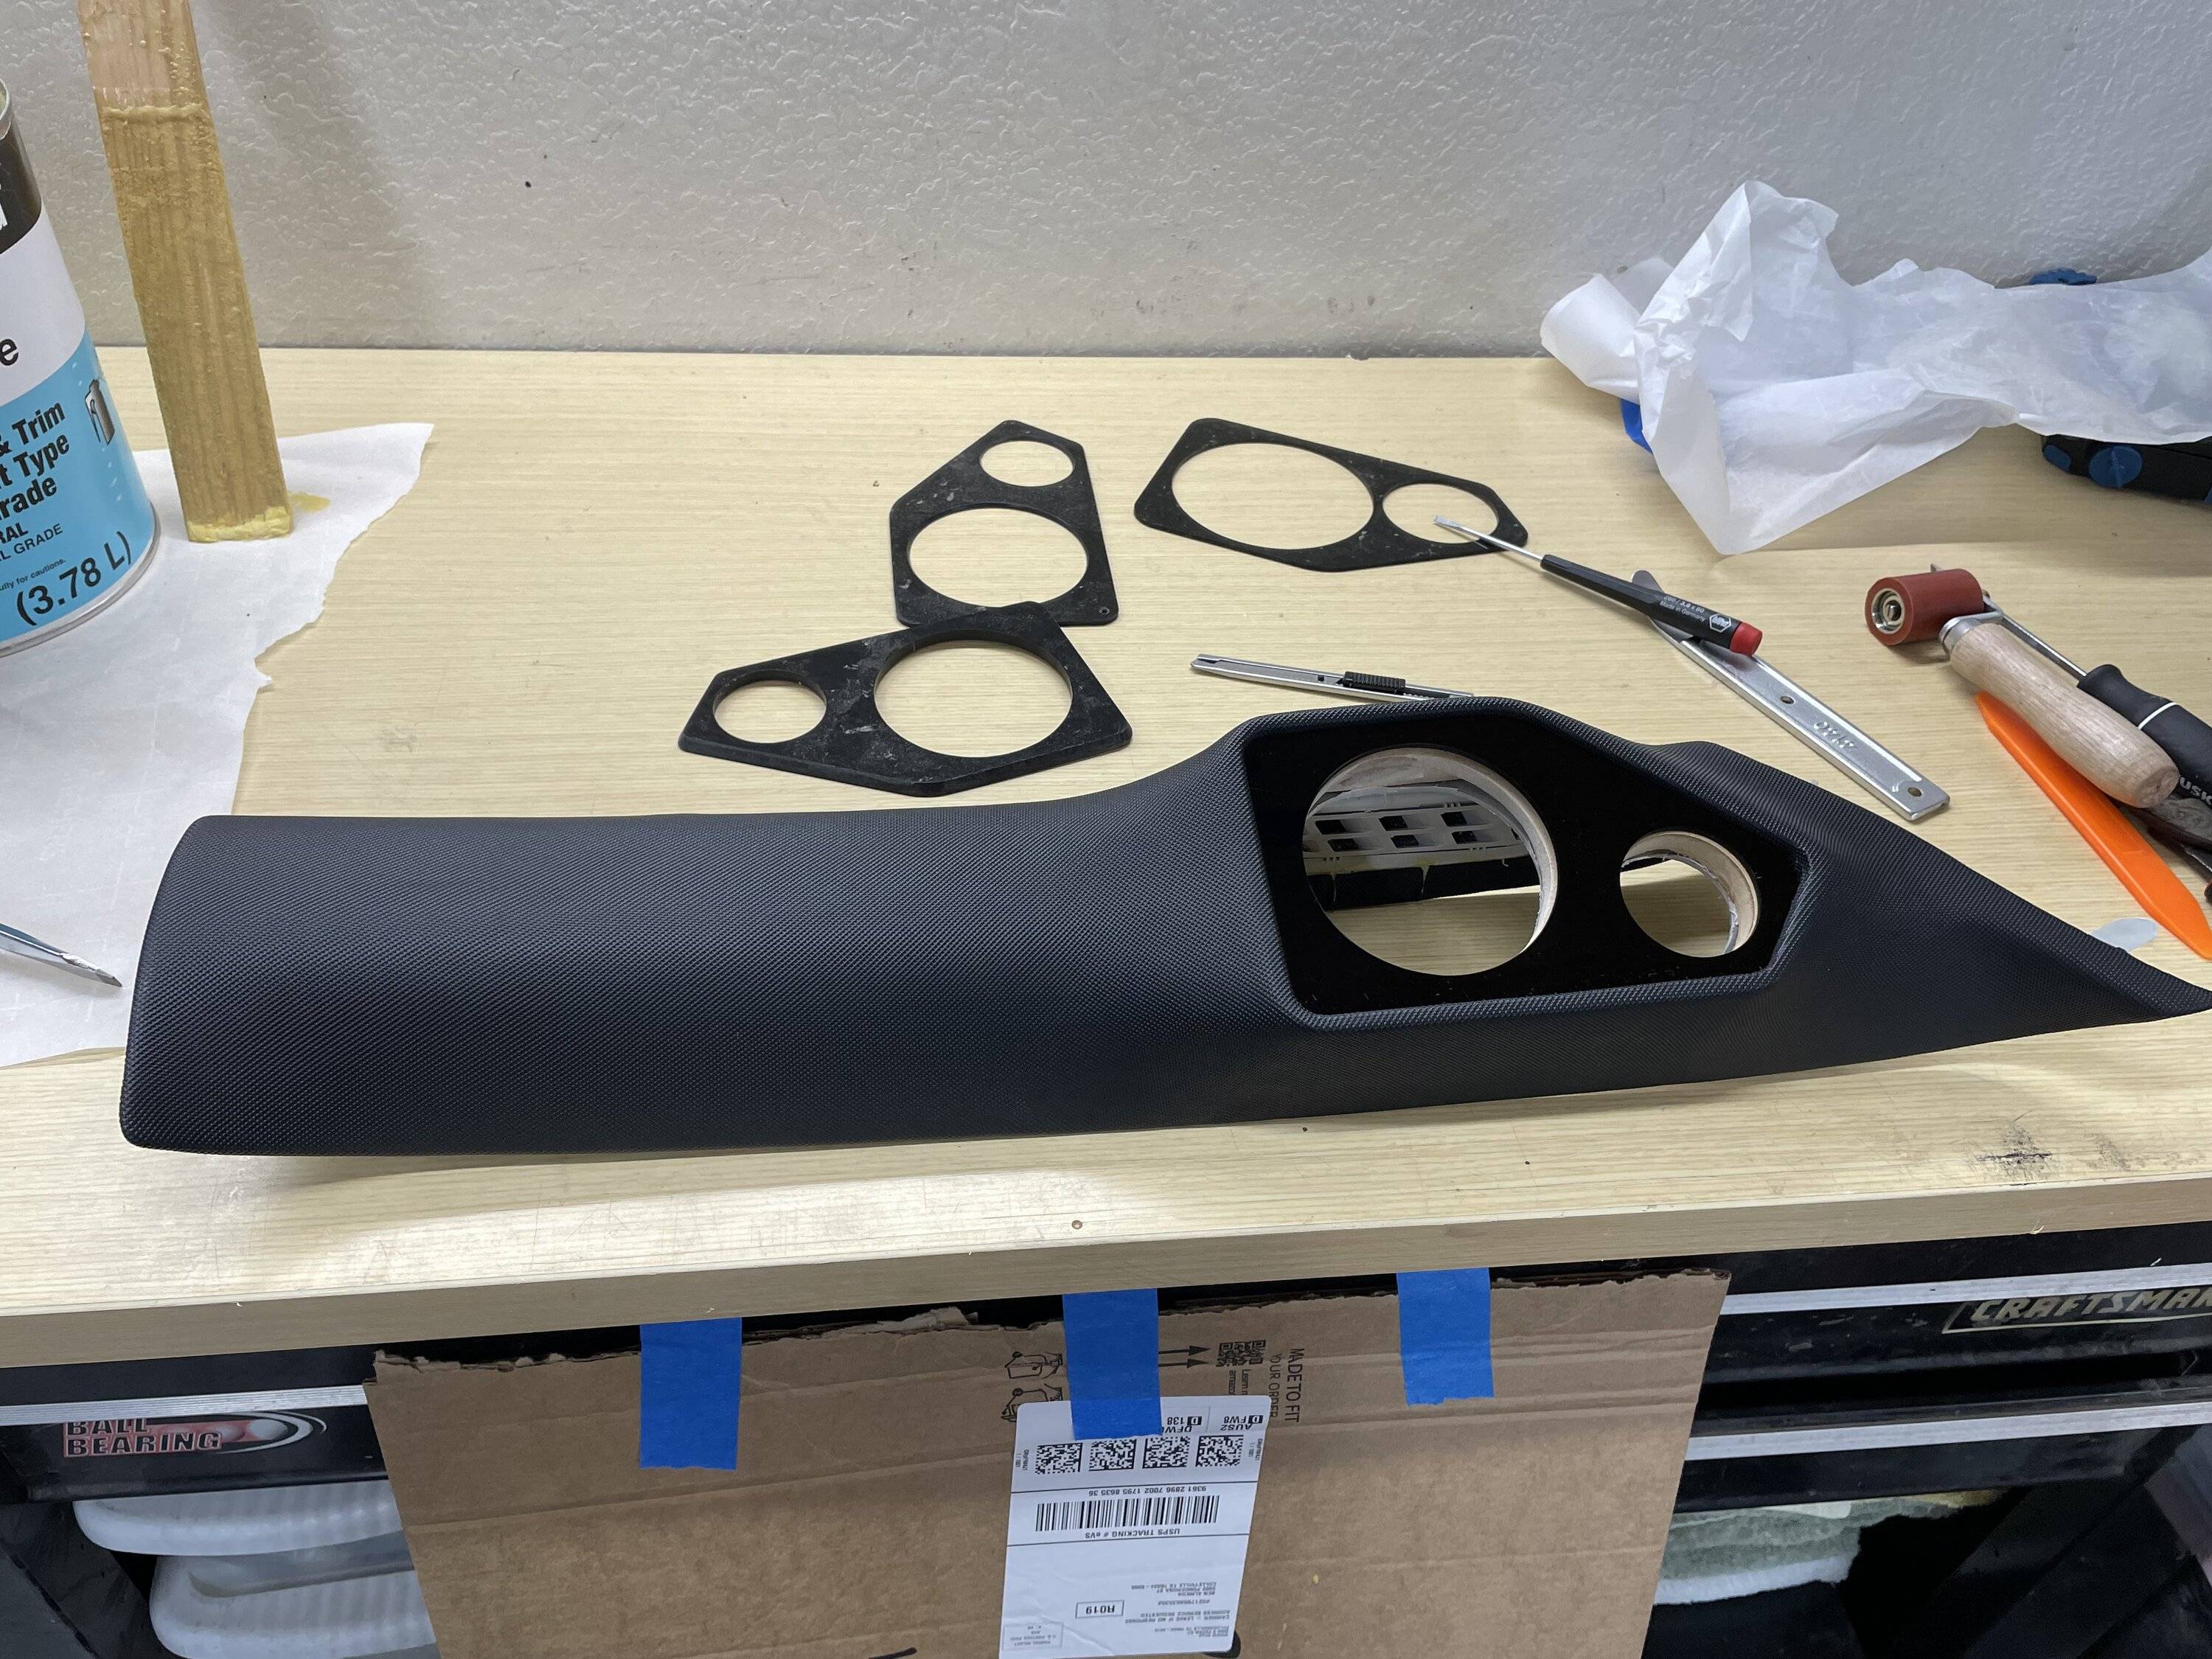
The front A-pillars were completely fabricated to accommodate a 3.5 inch midrange and 1 inch tweeter. The factory location for the tweeter on the dash was a decent location but I felt the midrange needed to be higher and forward. Since I was already building that, I might as well incorporate the tweeter with it. I made an mdf plate to hold the MR/TW combo then glued/screwed it to the plastic A-pillar. Then I wrapped it in a spandex type cloth to achieve a molded look. This gave me a base to apply resin and fiberglass. After multiple bondo fills and sanding, I wrapped it in diamond textured vinyl to match the dash (same as the sub panel). I made a pressed grill with a chrome edge finish to match the chrome around the dash and door panel. Not sure if I will wrap the grill with cloth to match the doors as I like the look of the grill but still looks factory.
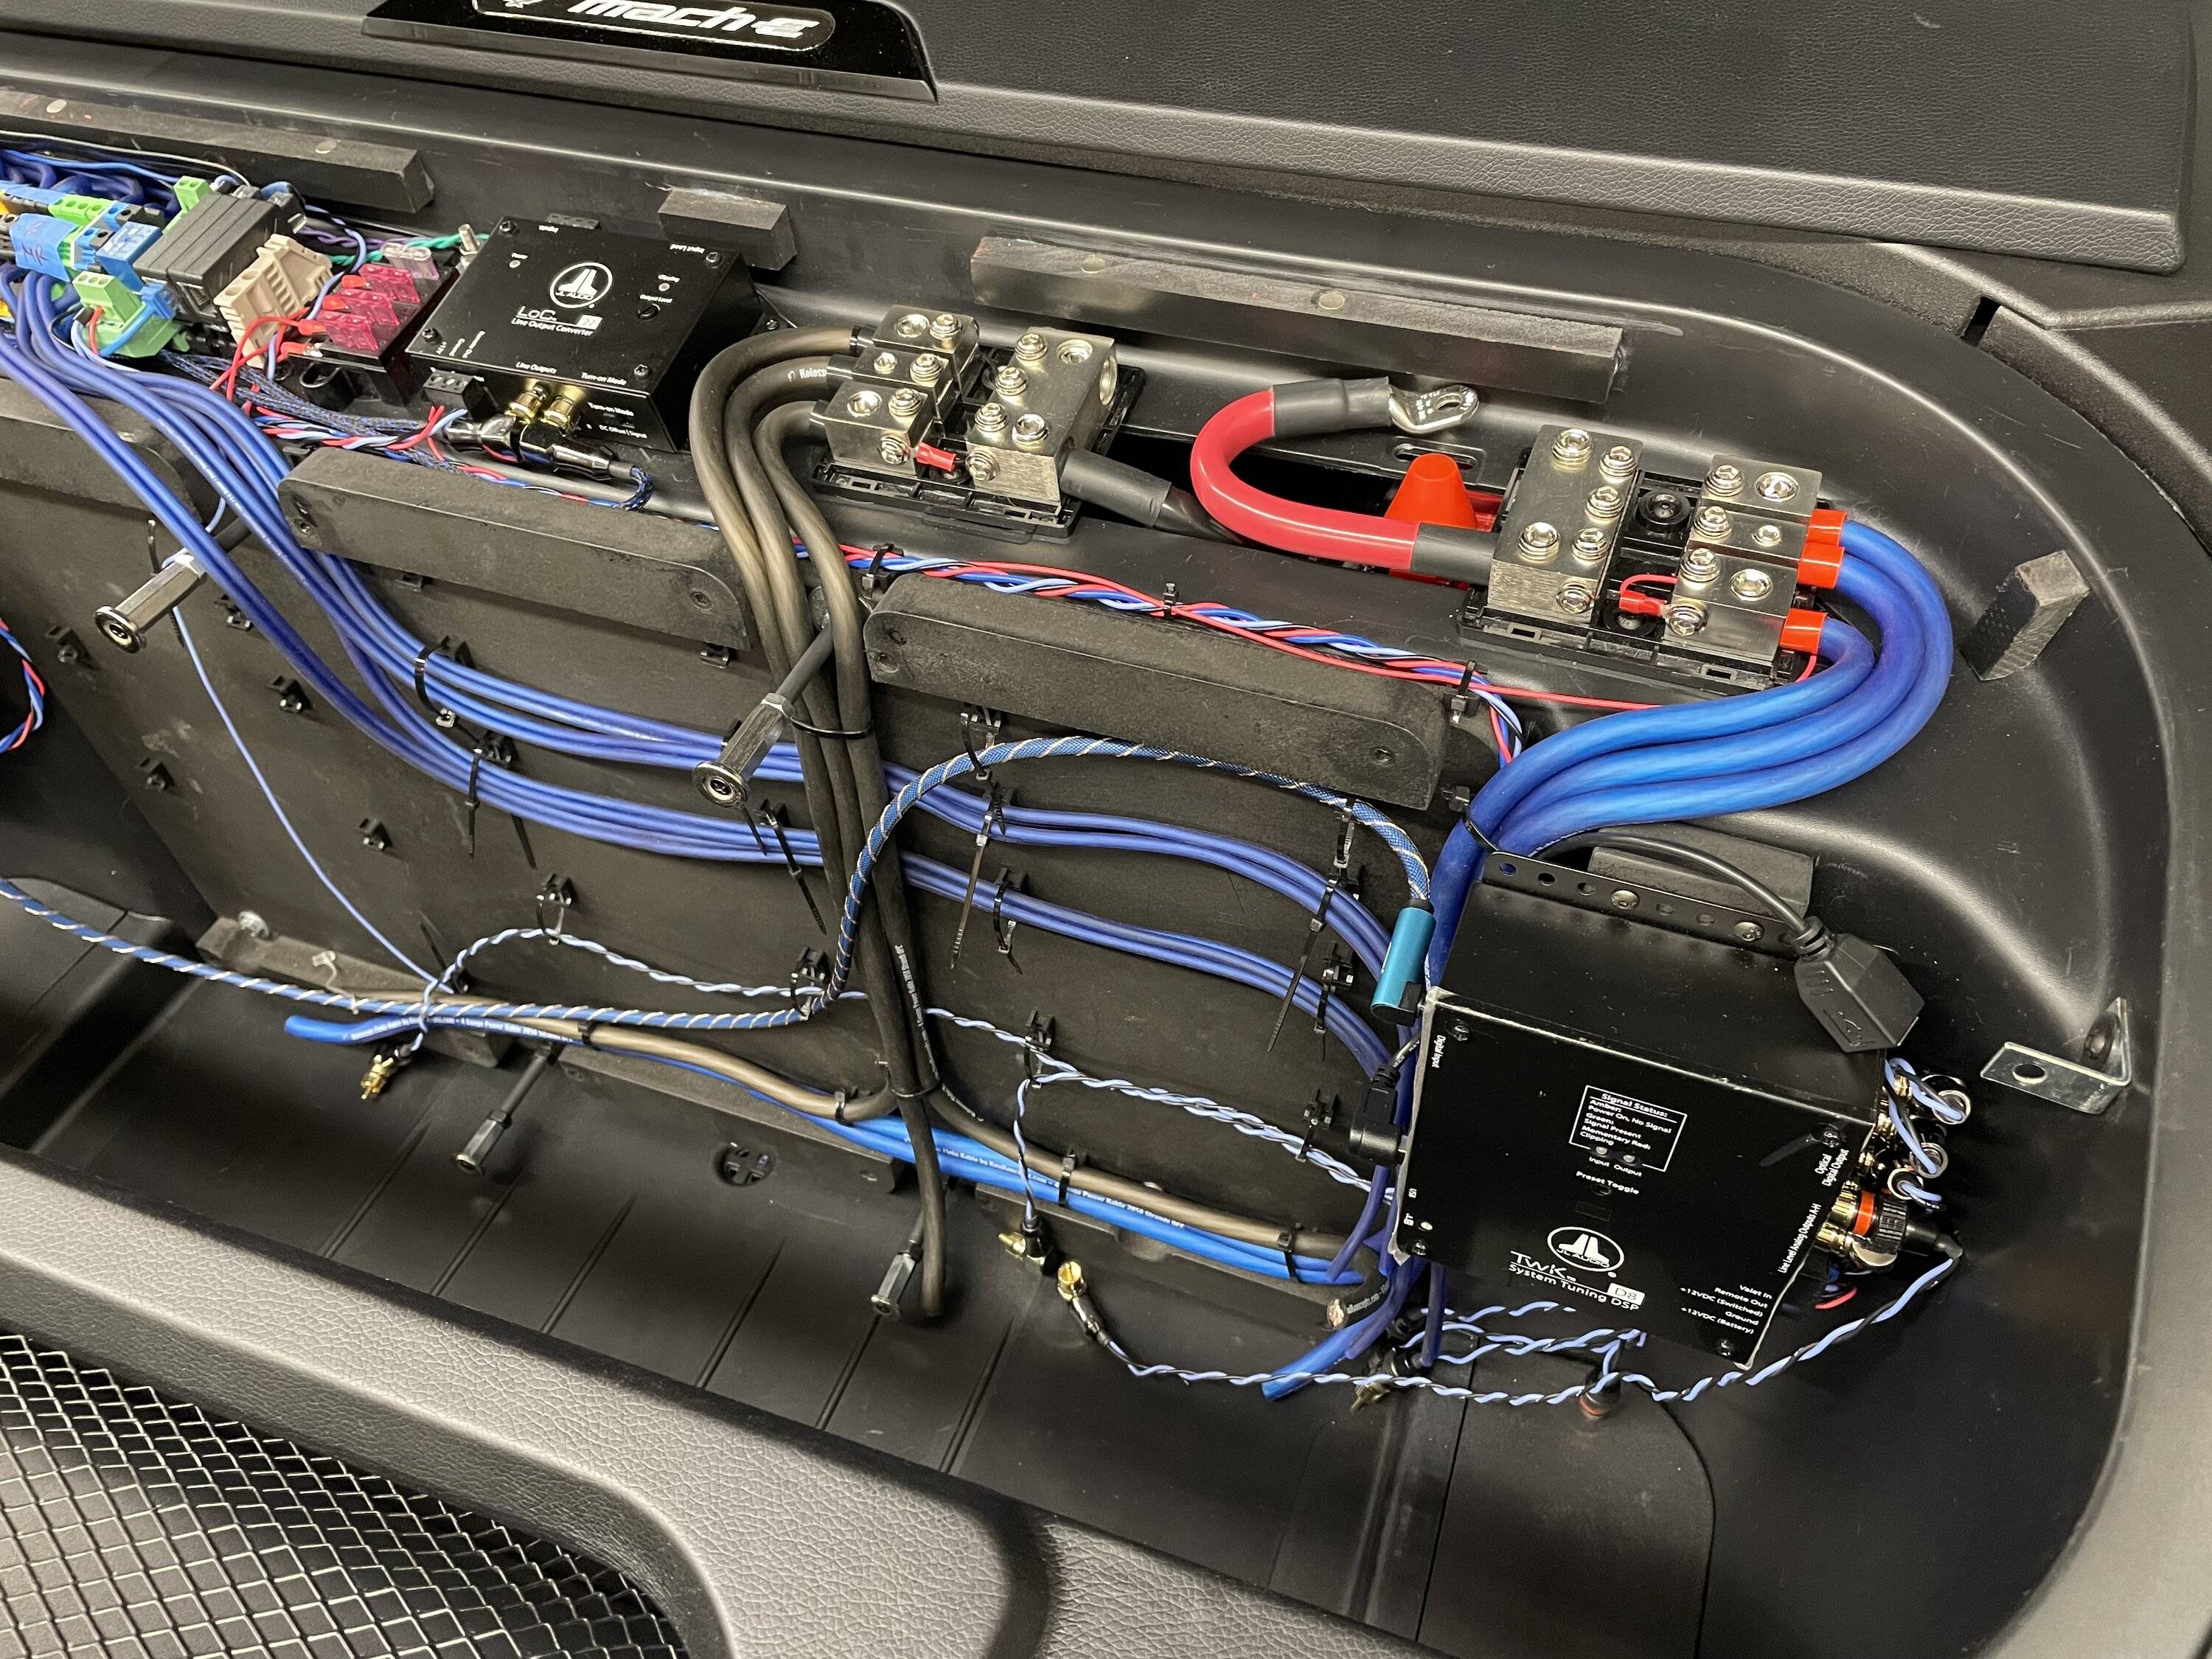
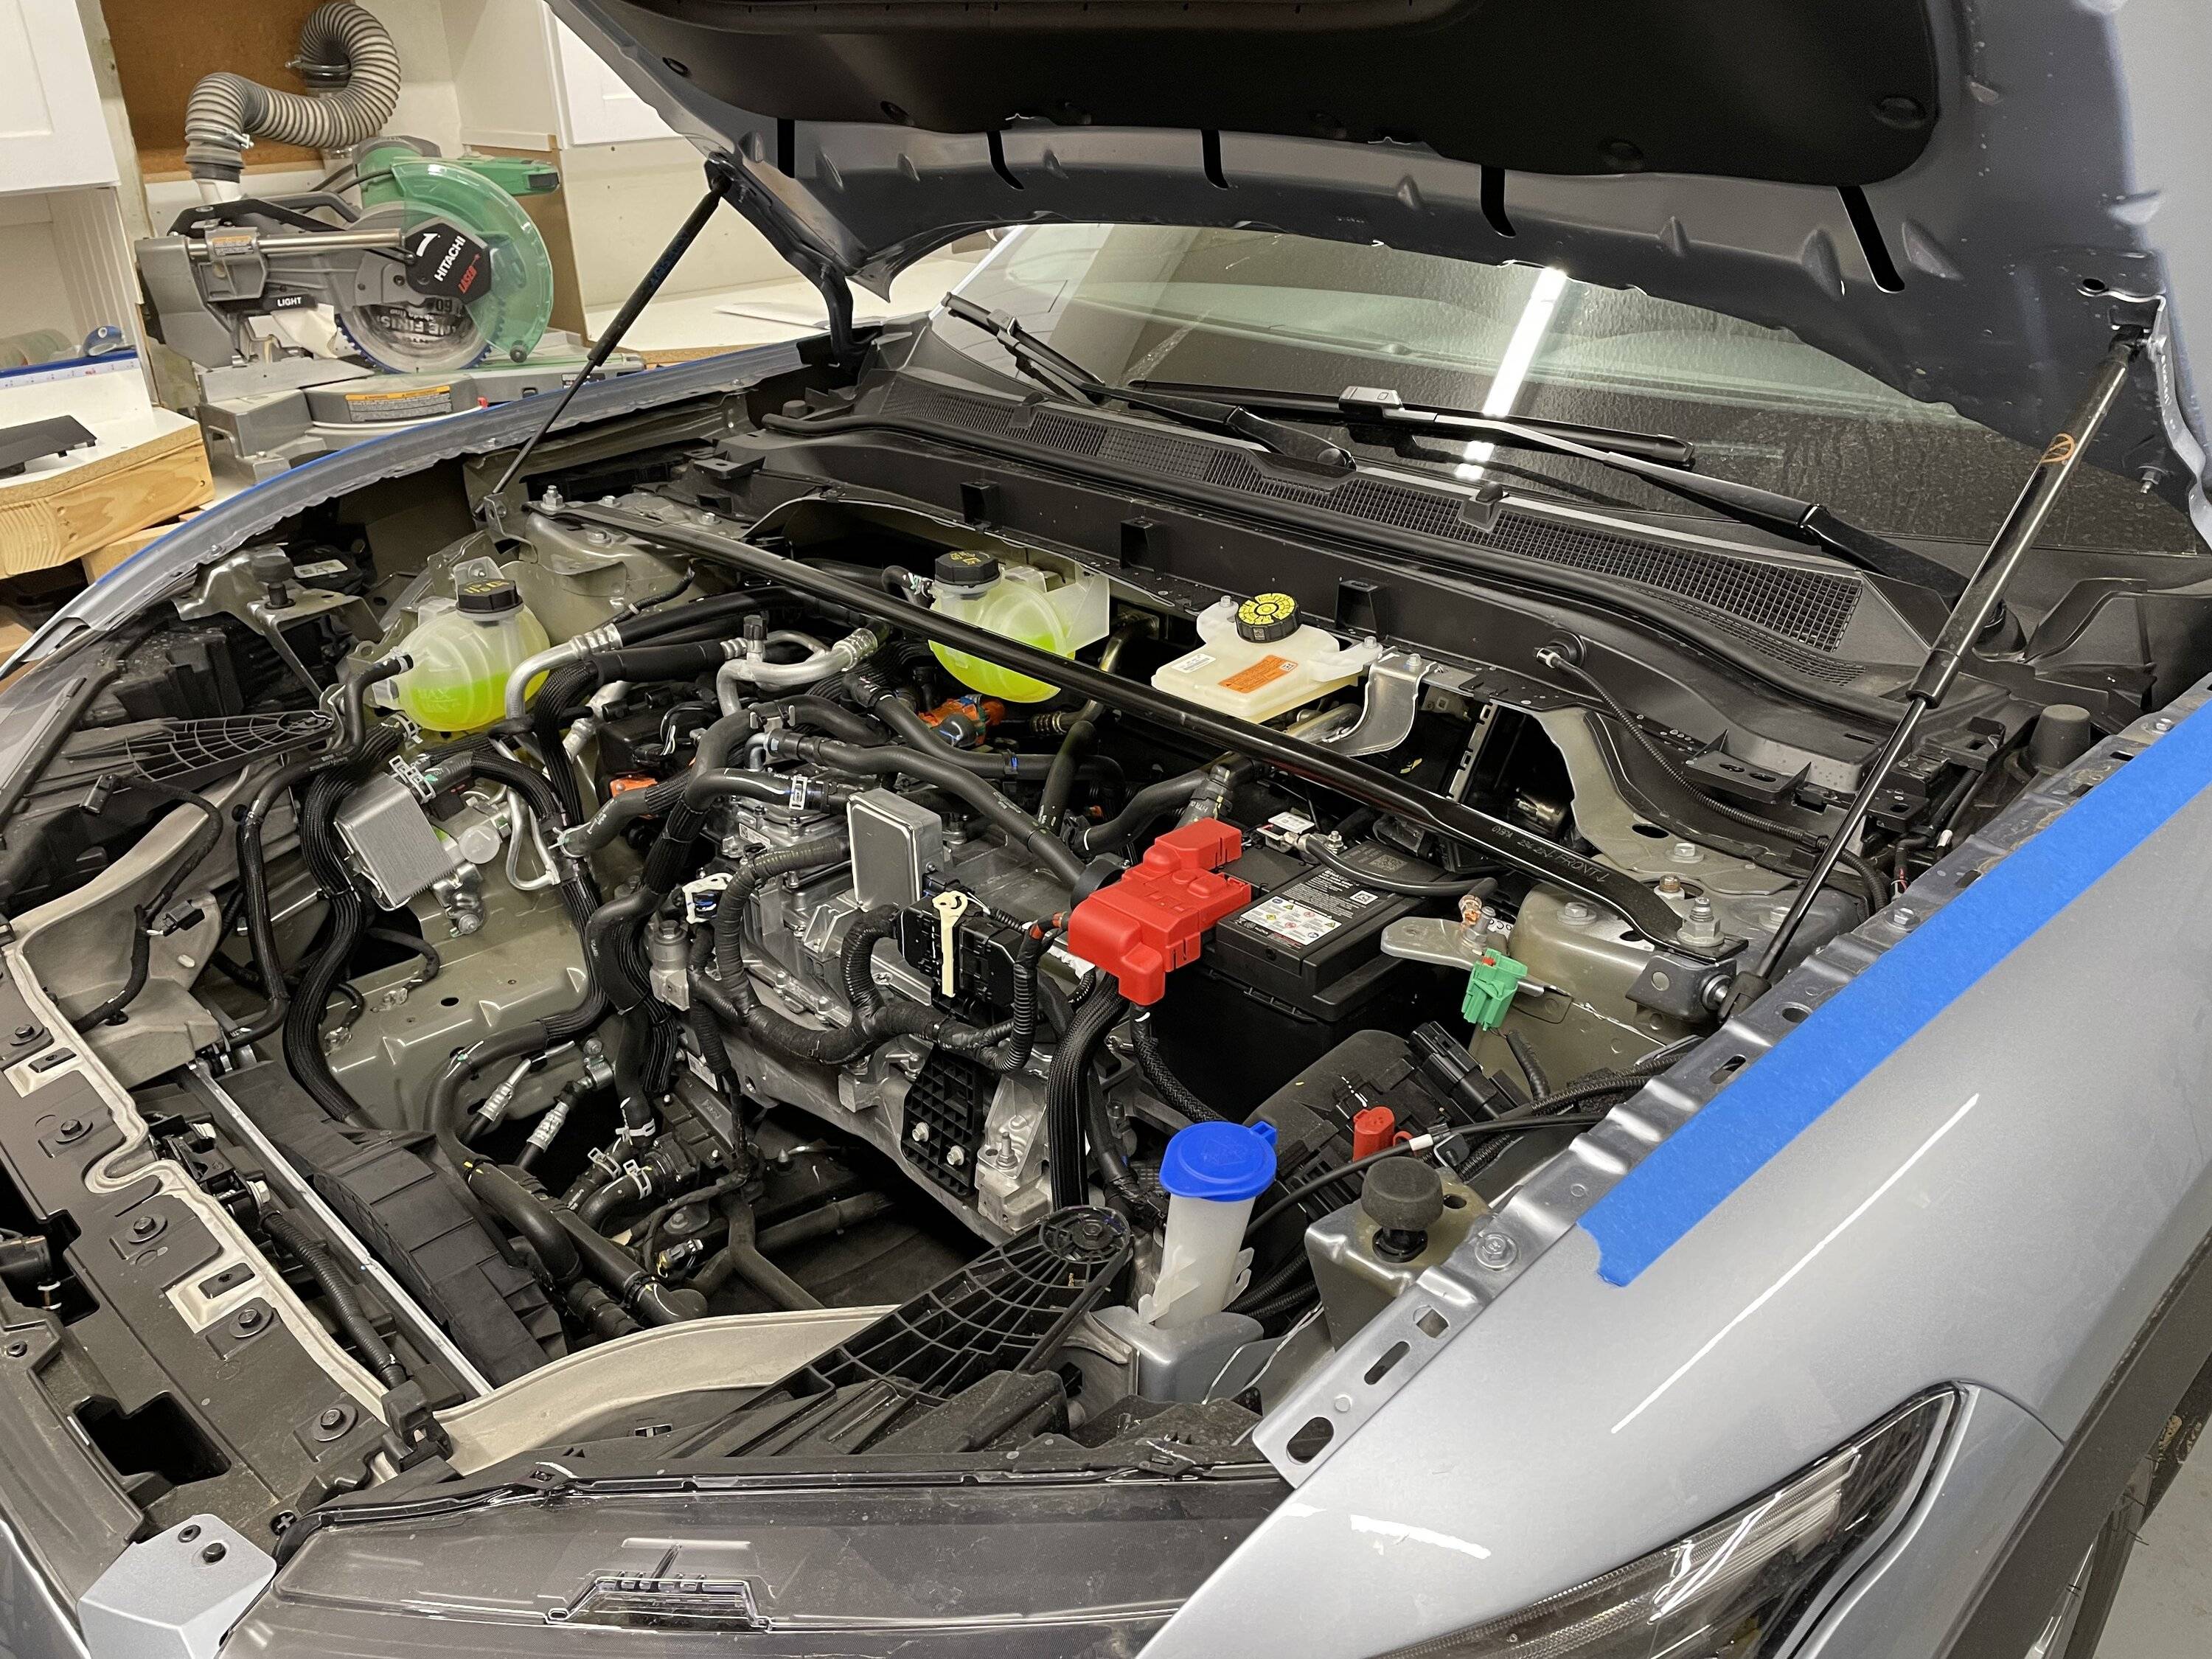
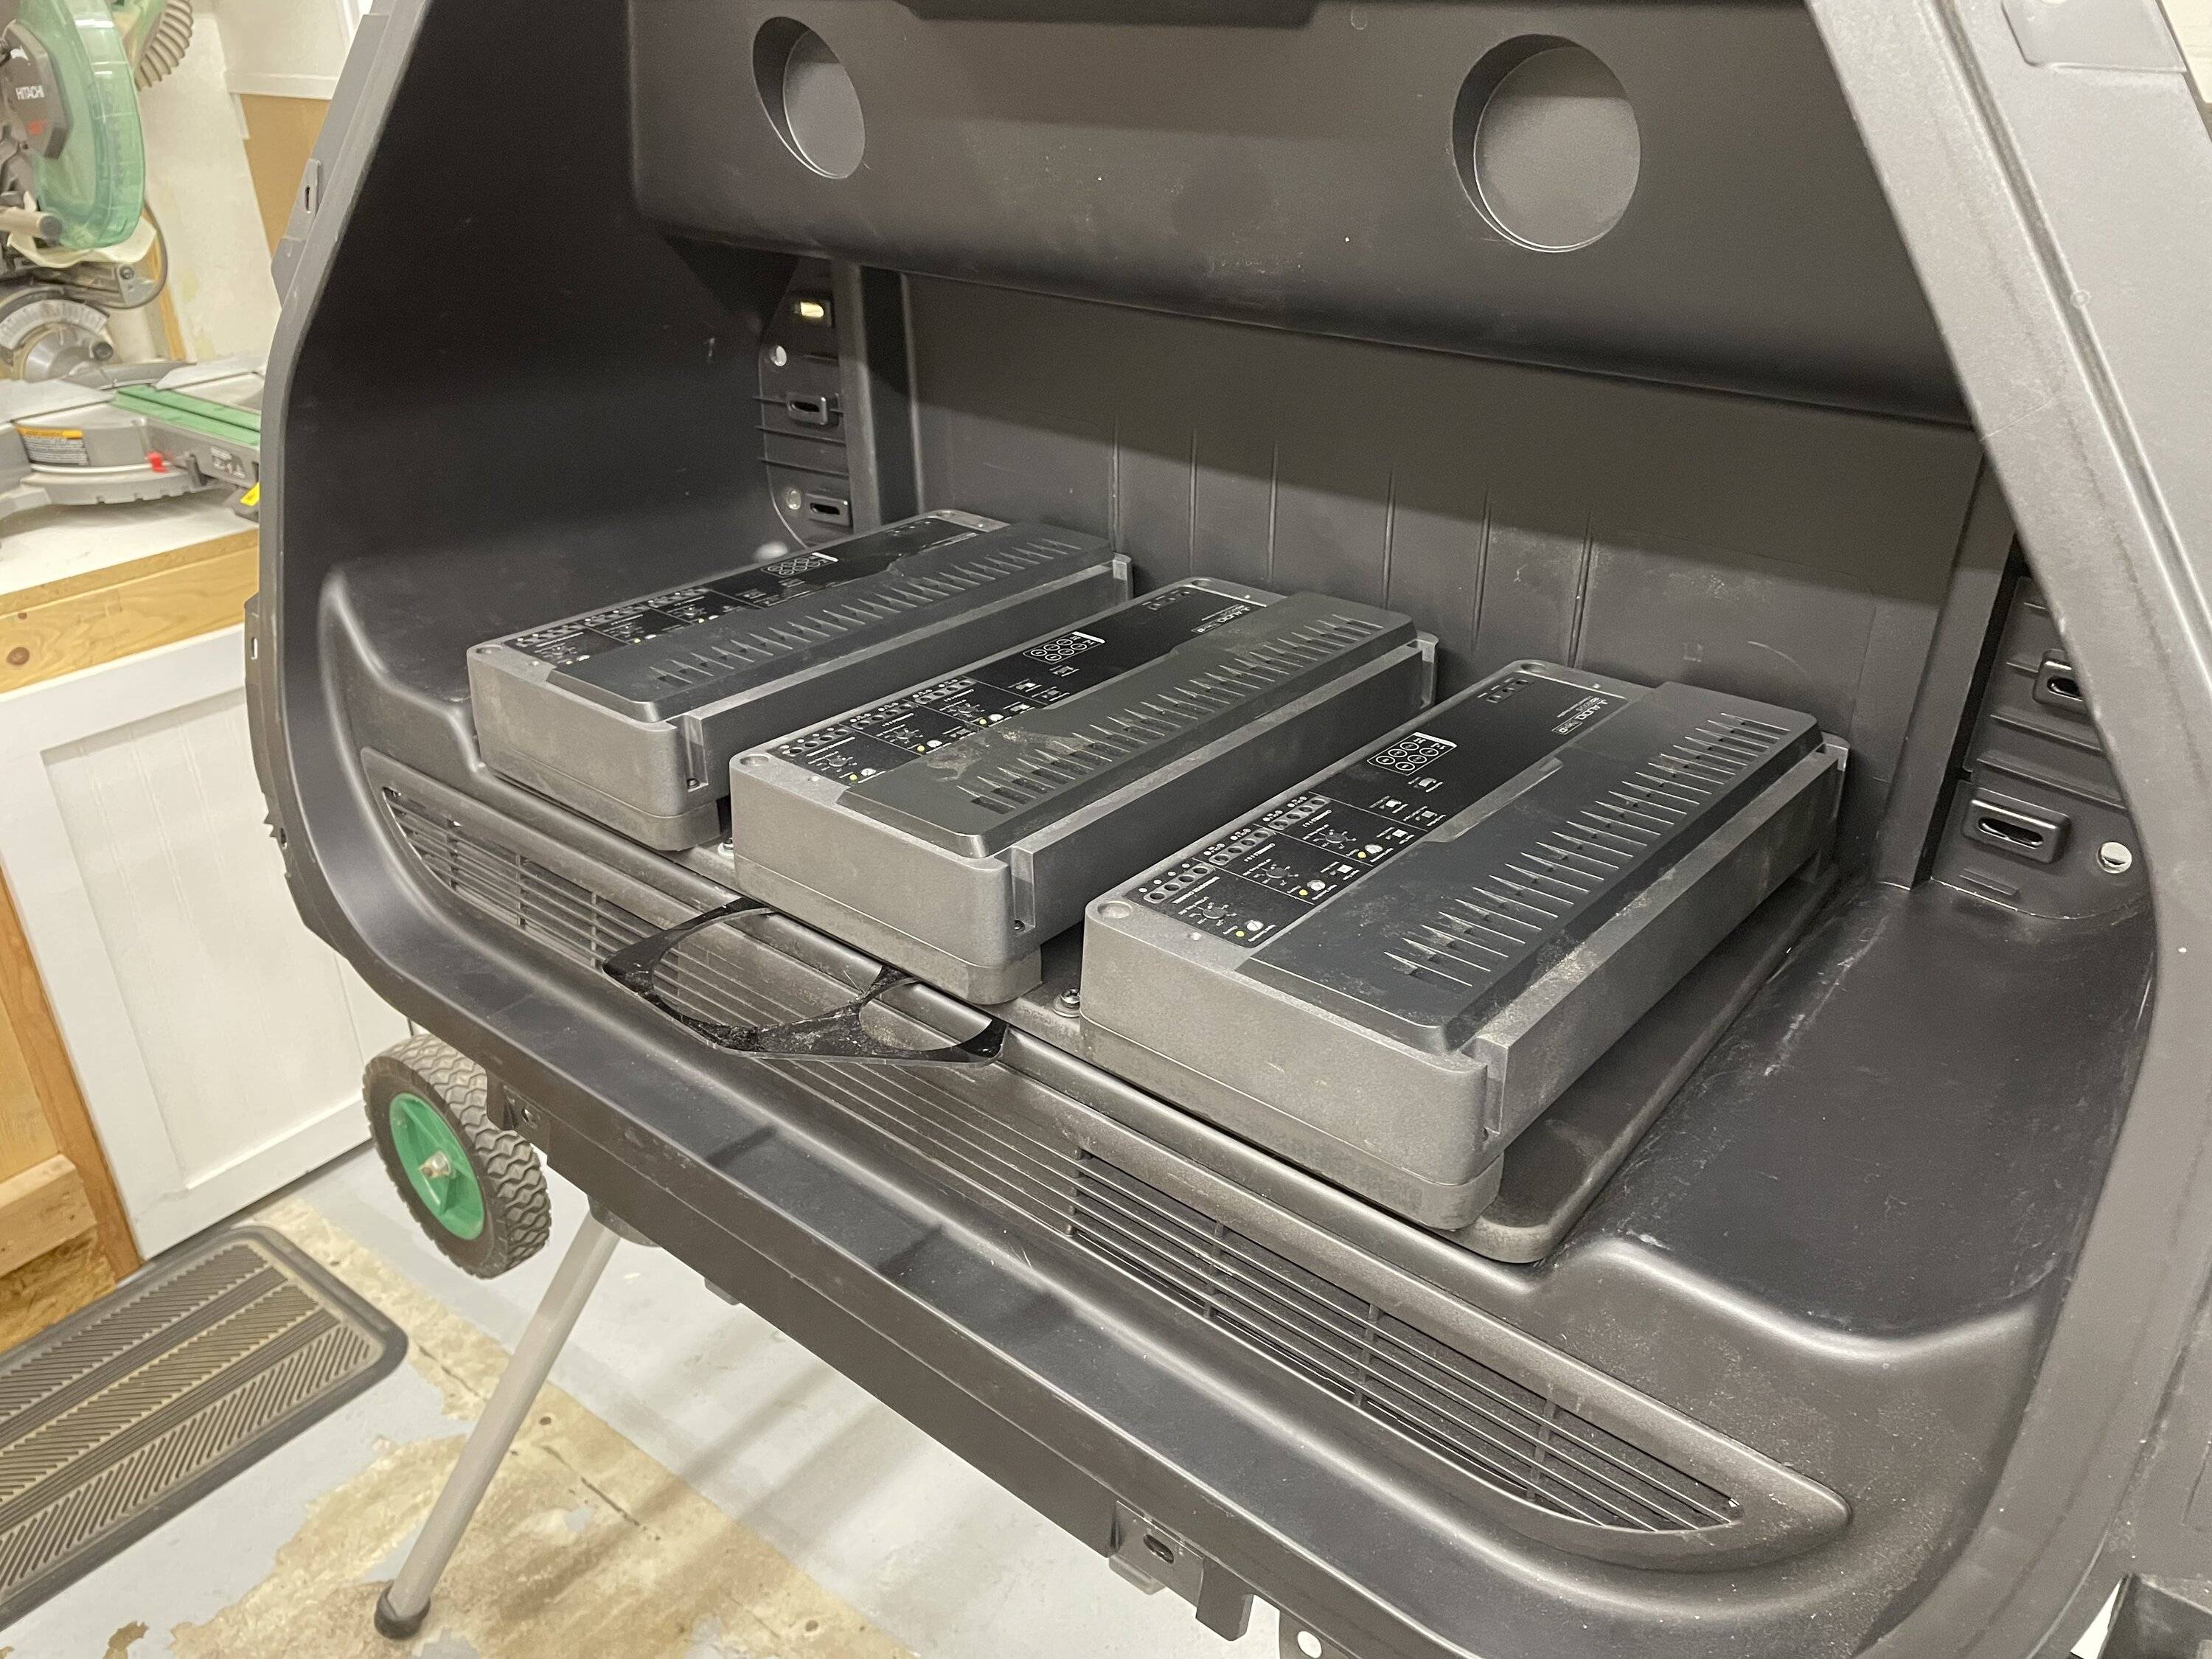
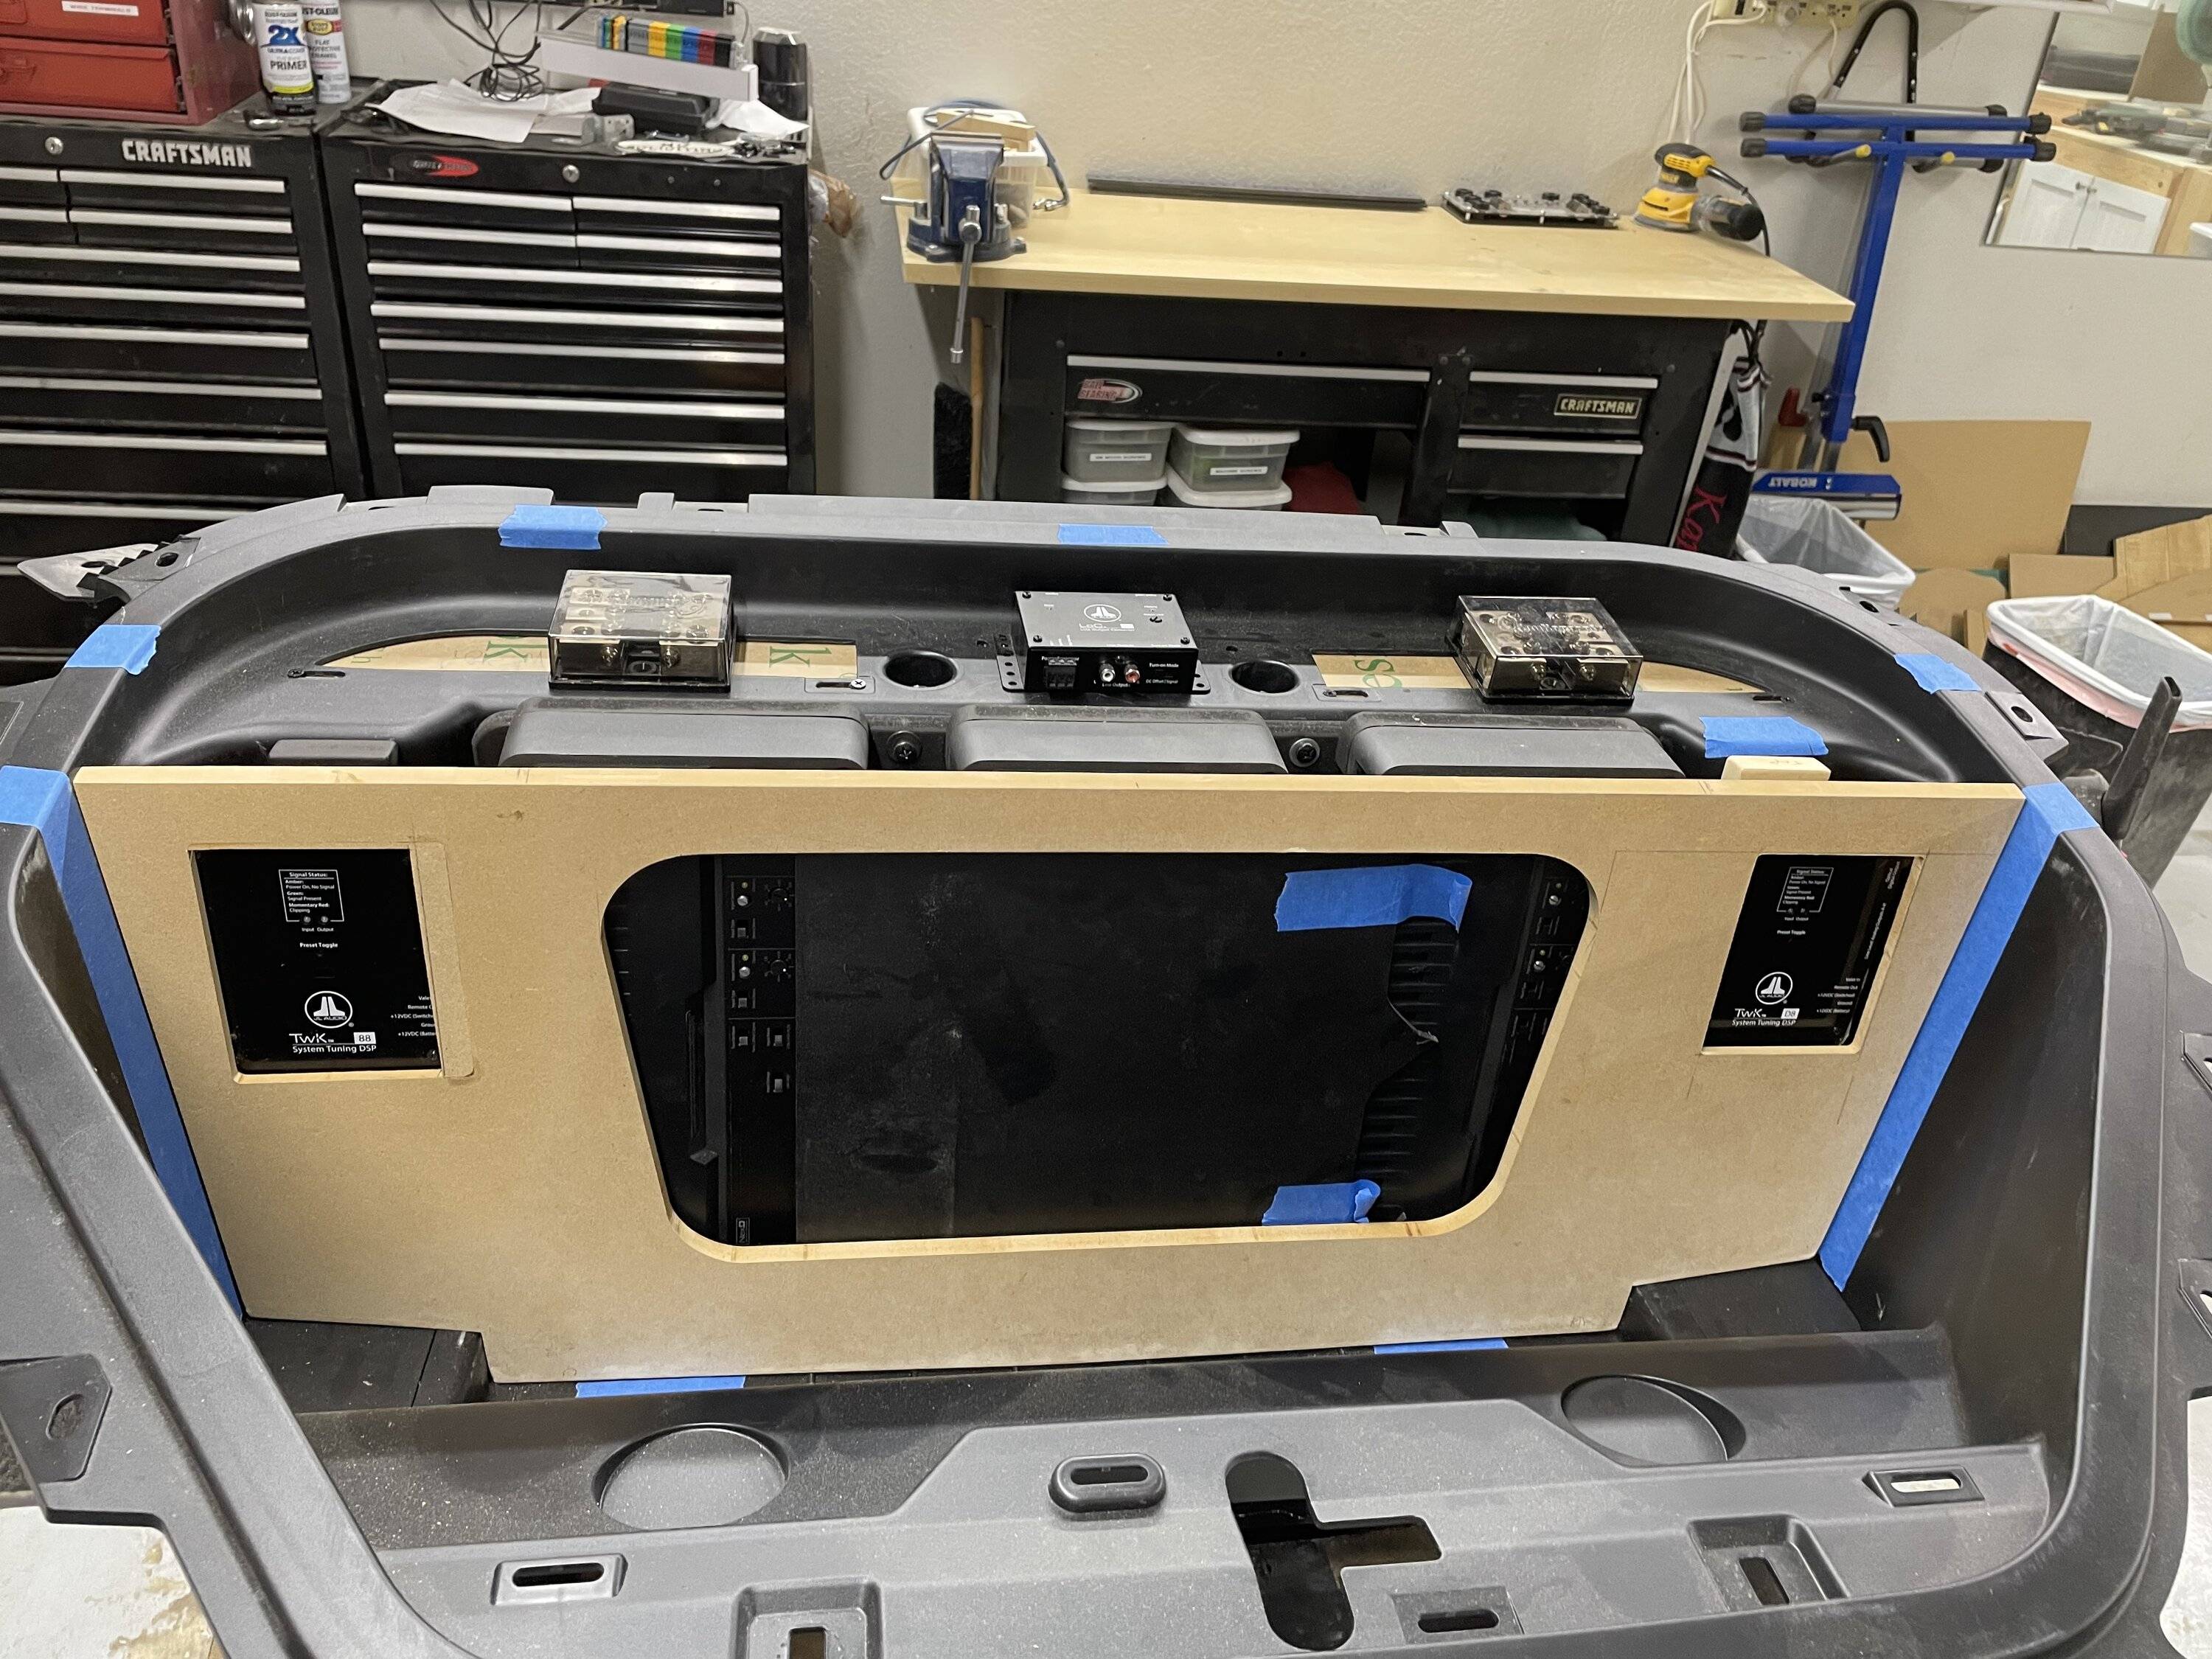
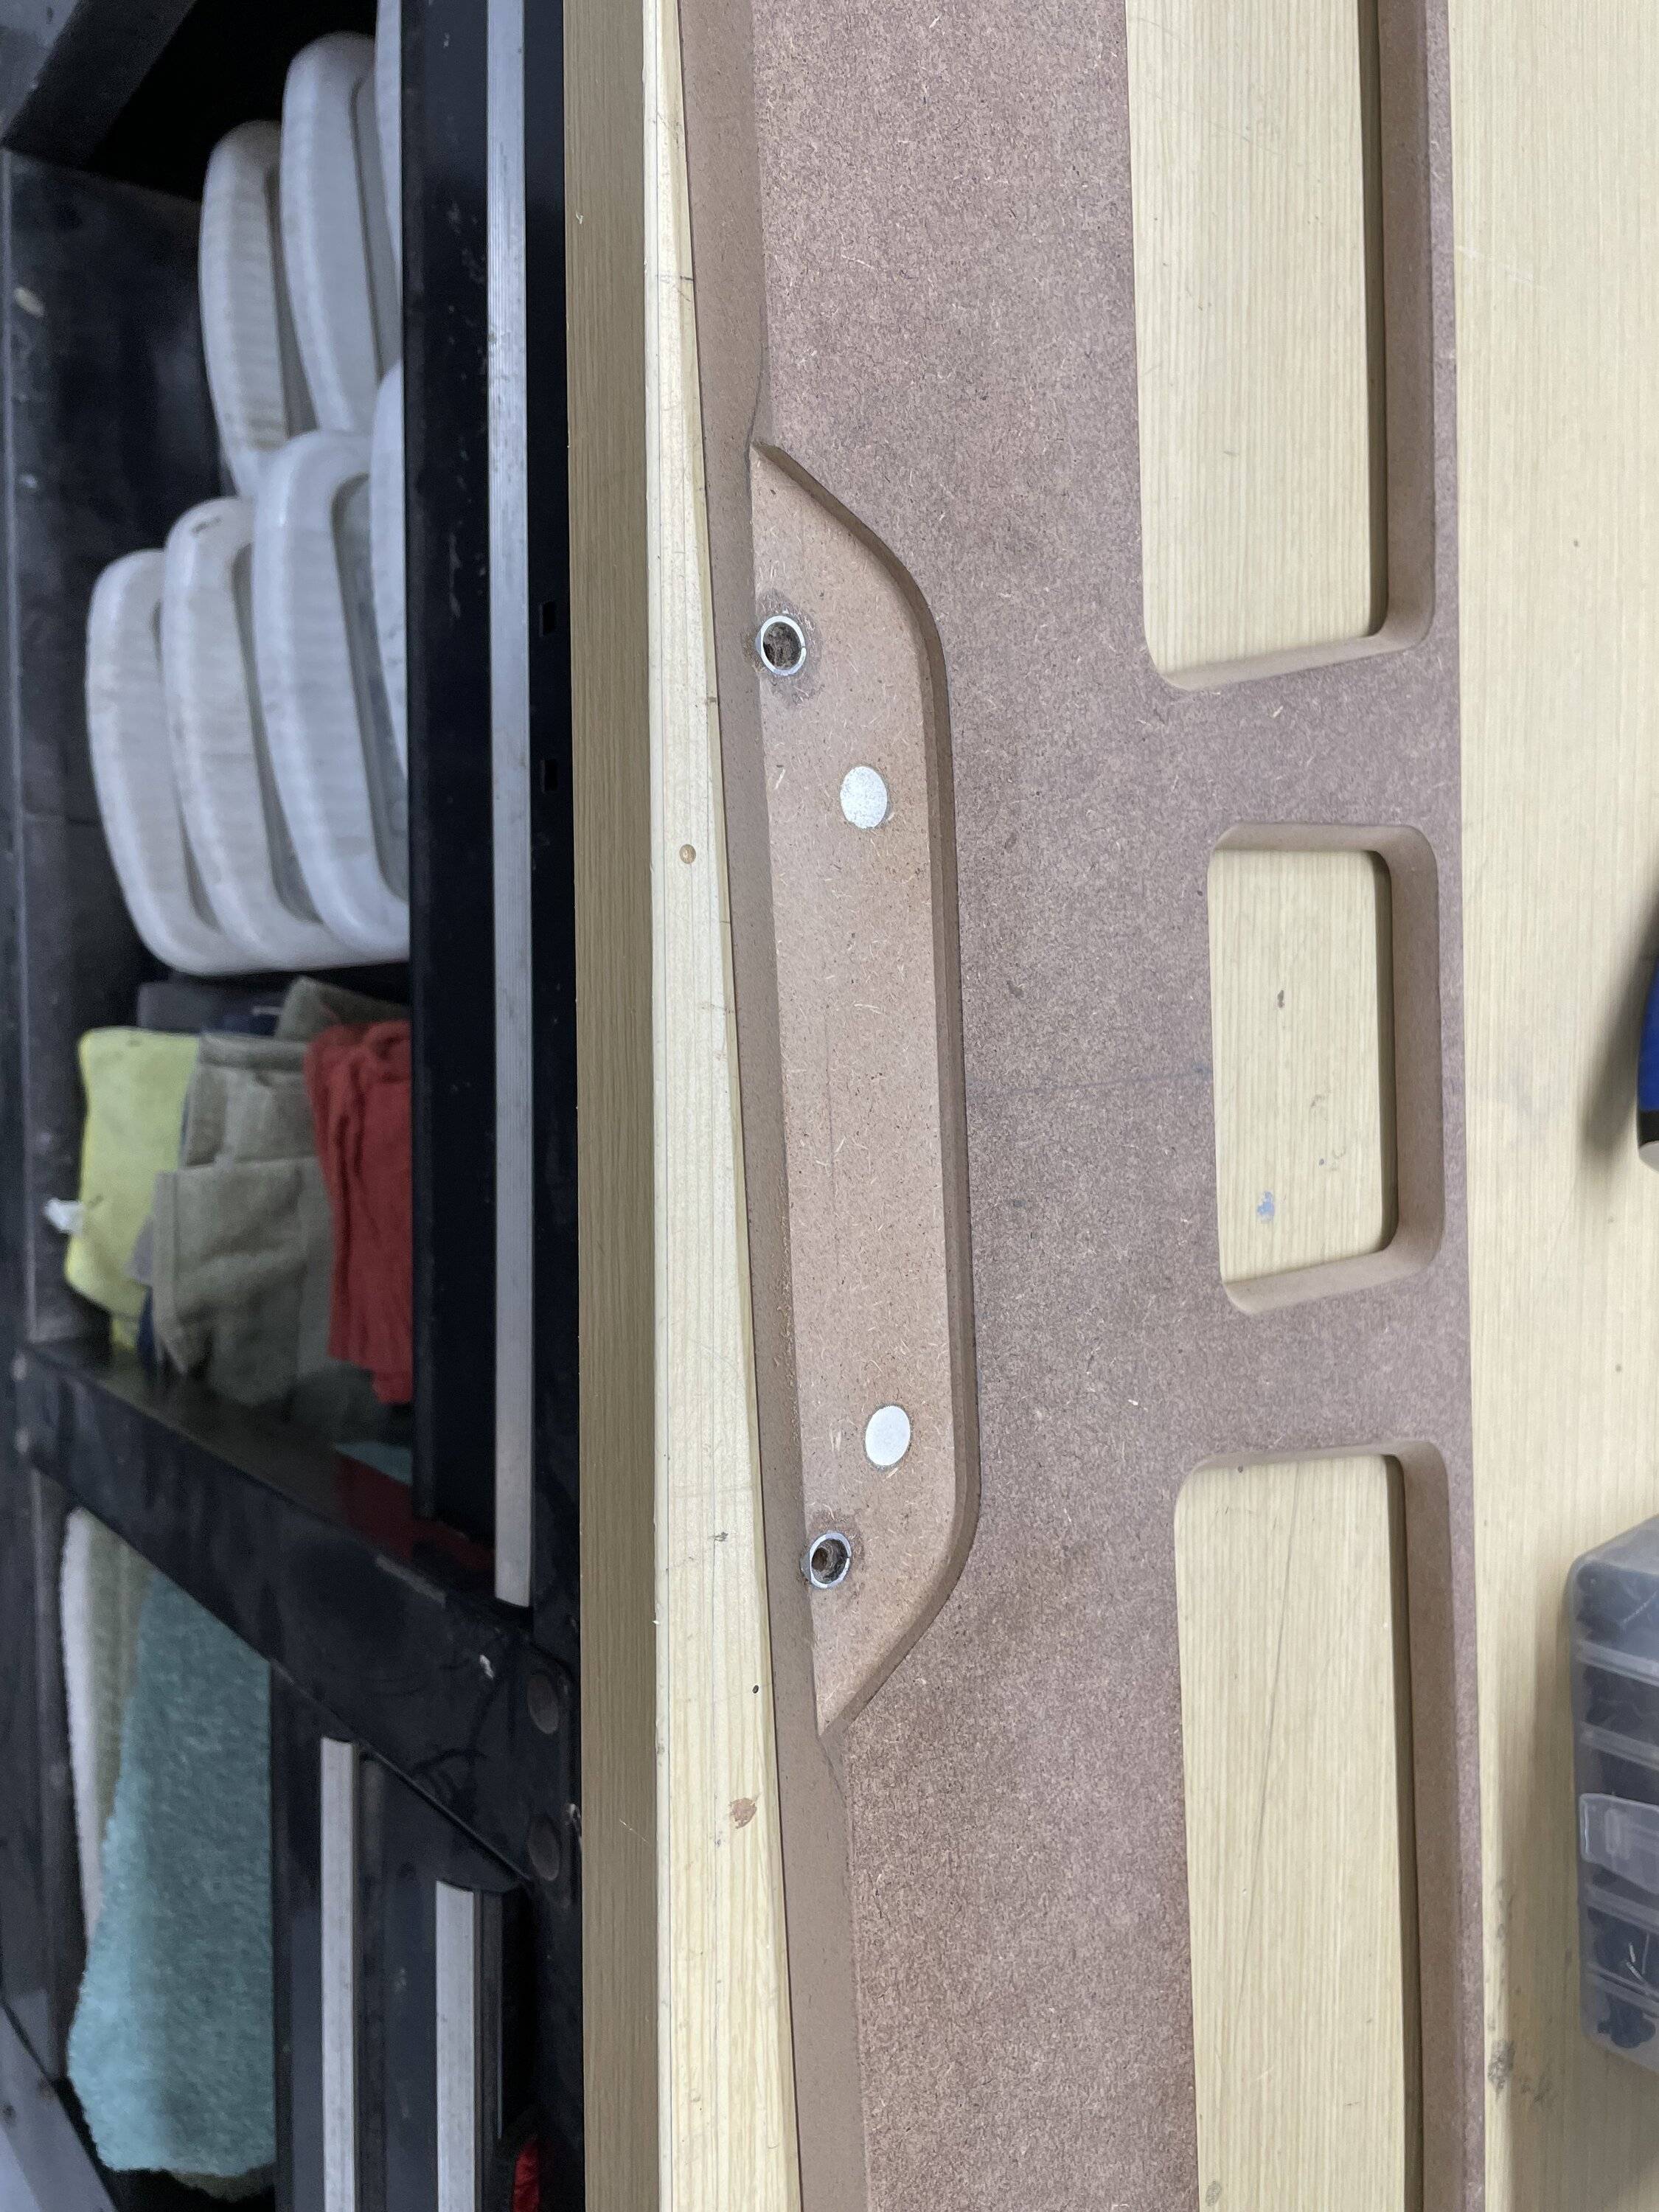
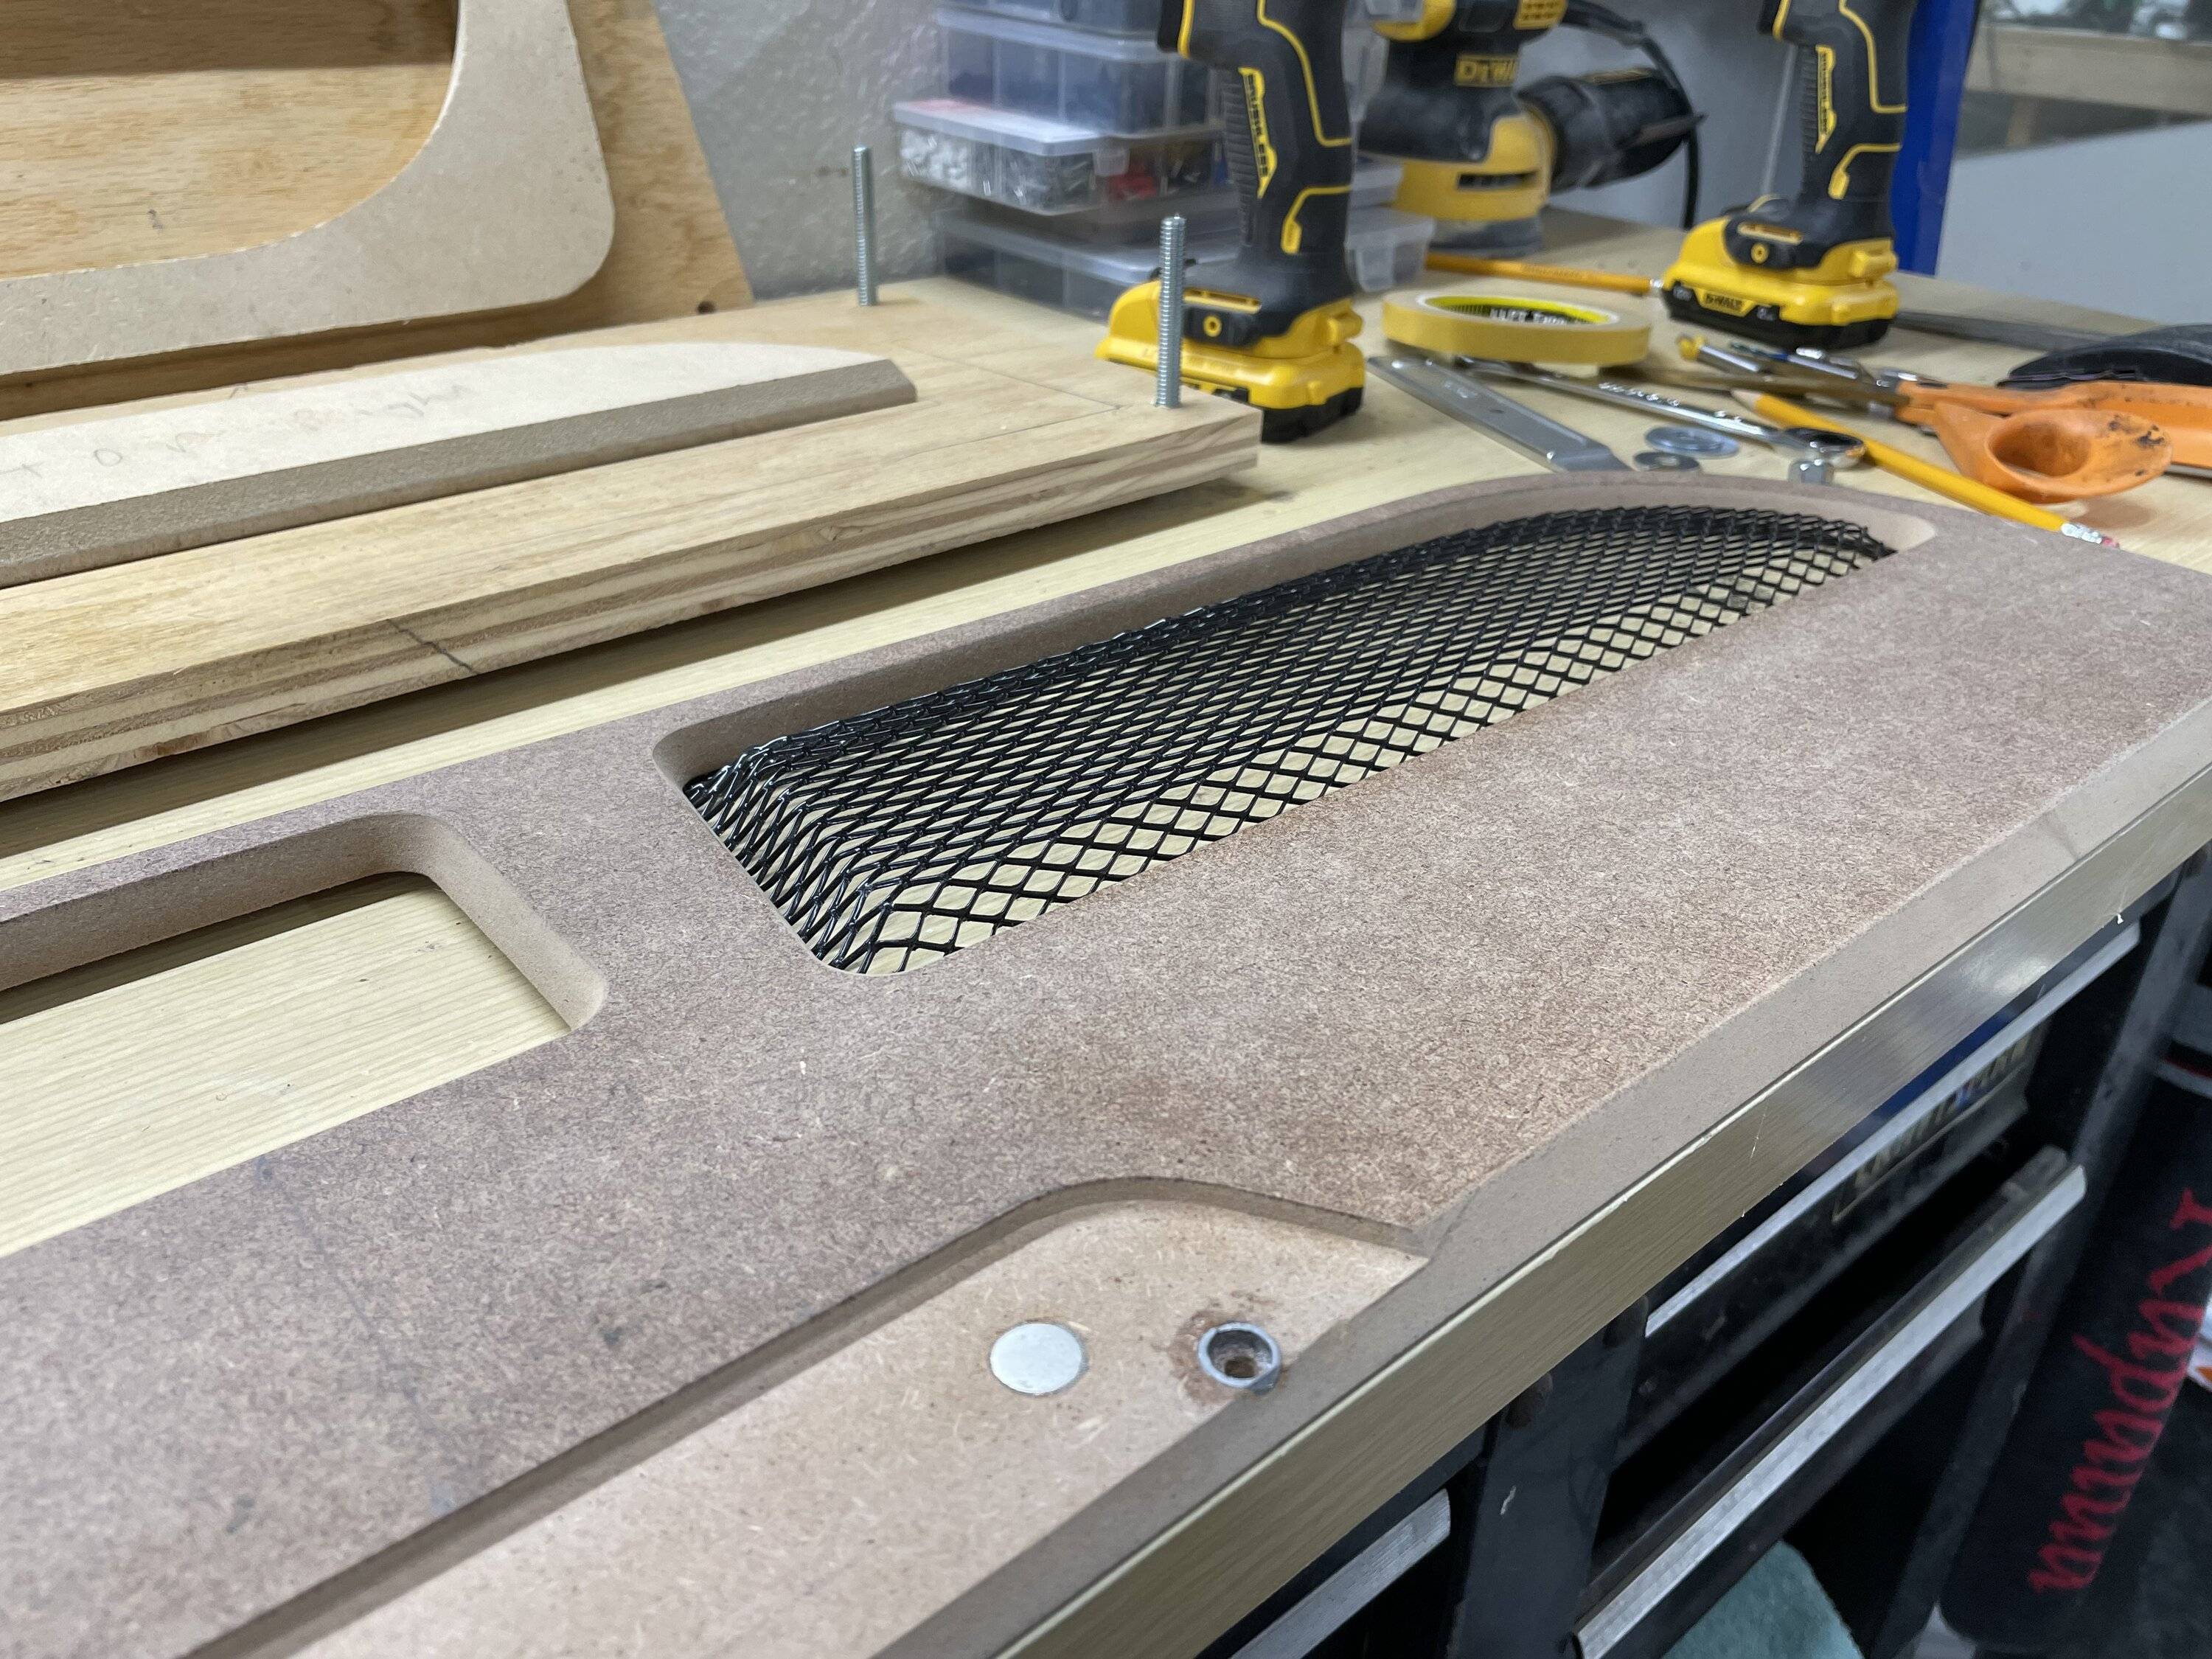
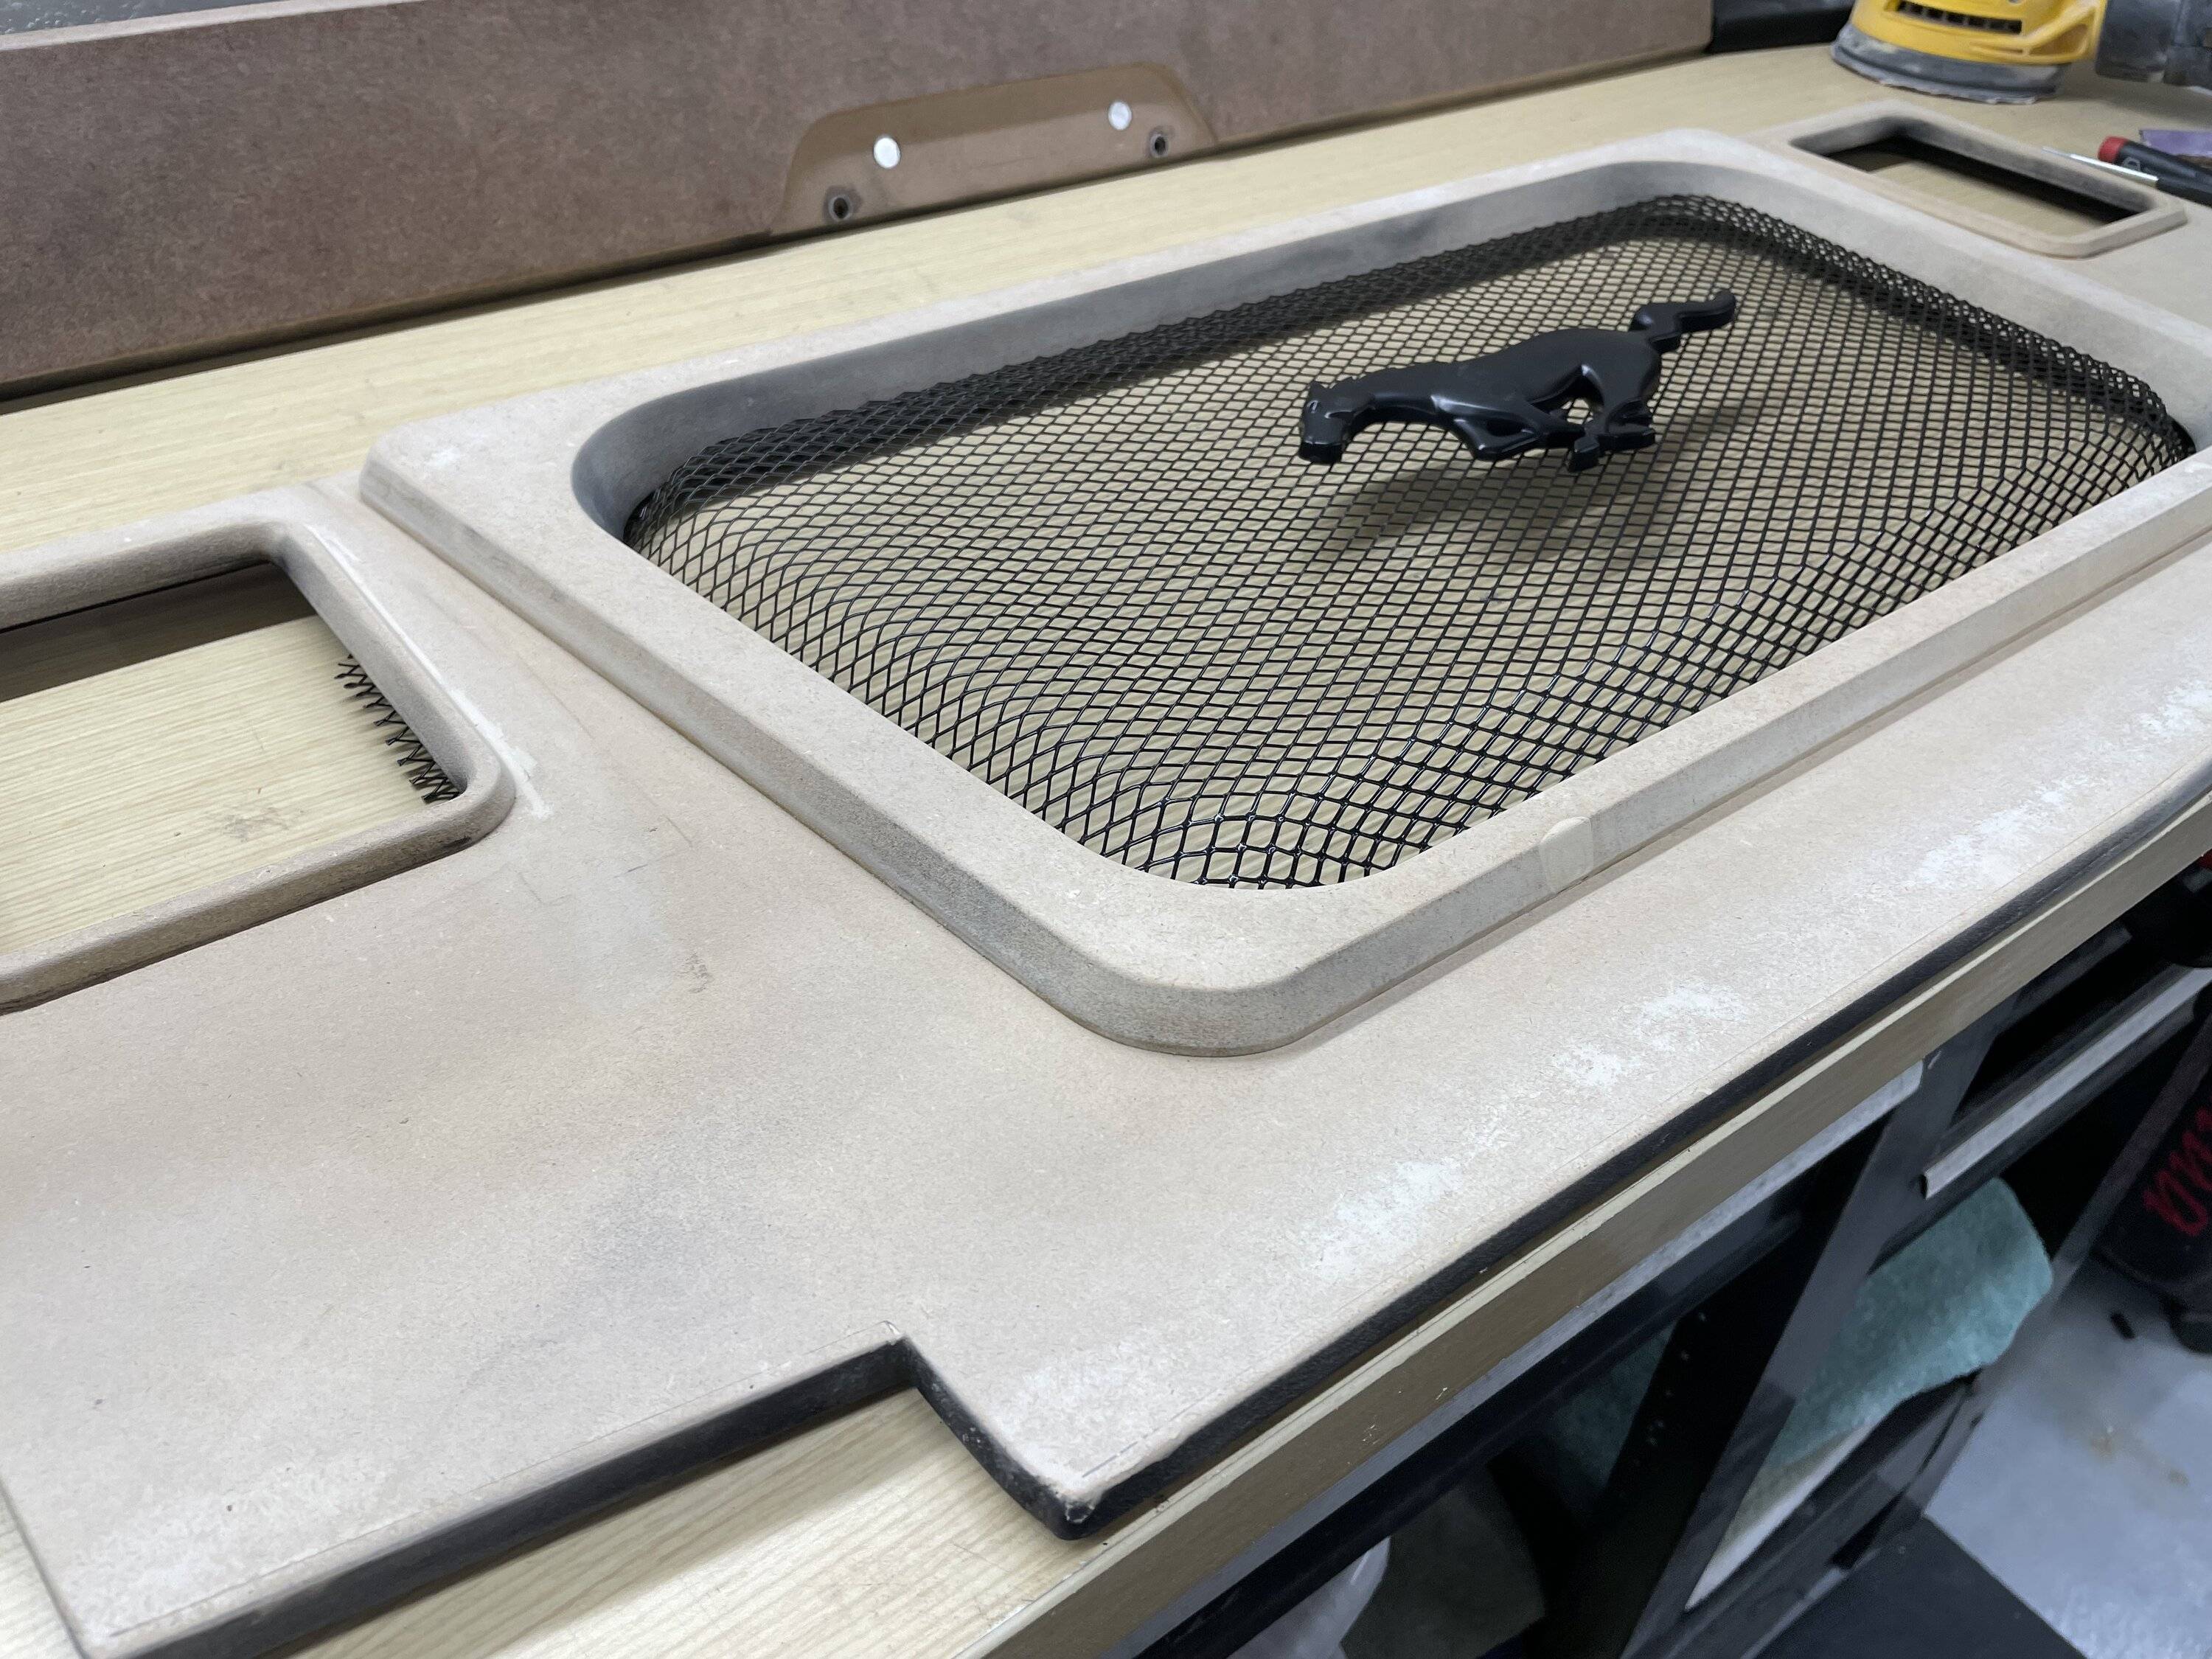
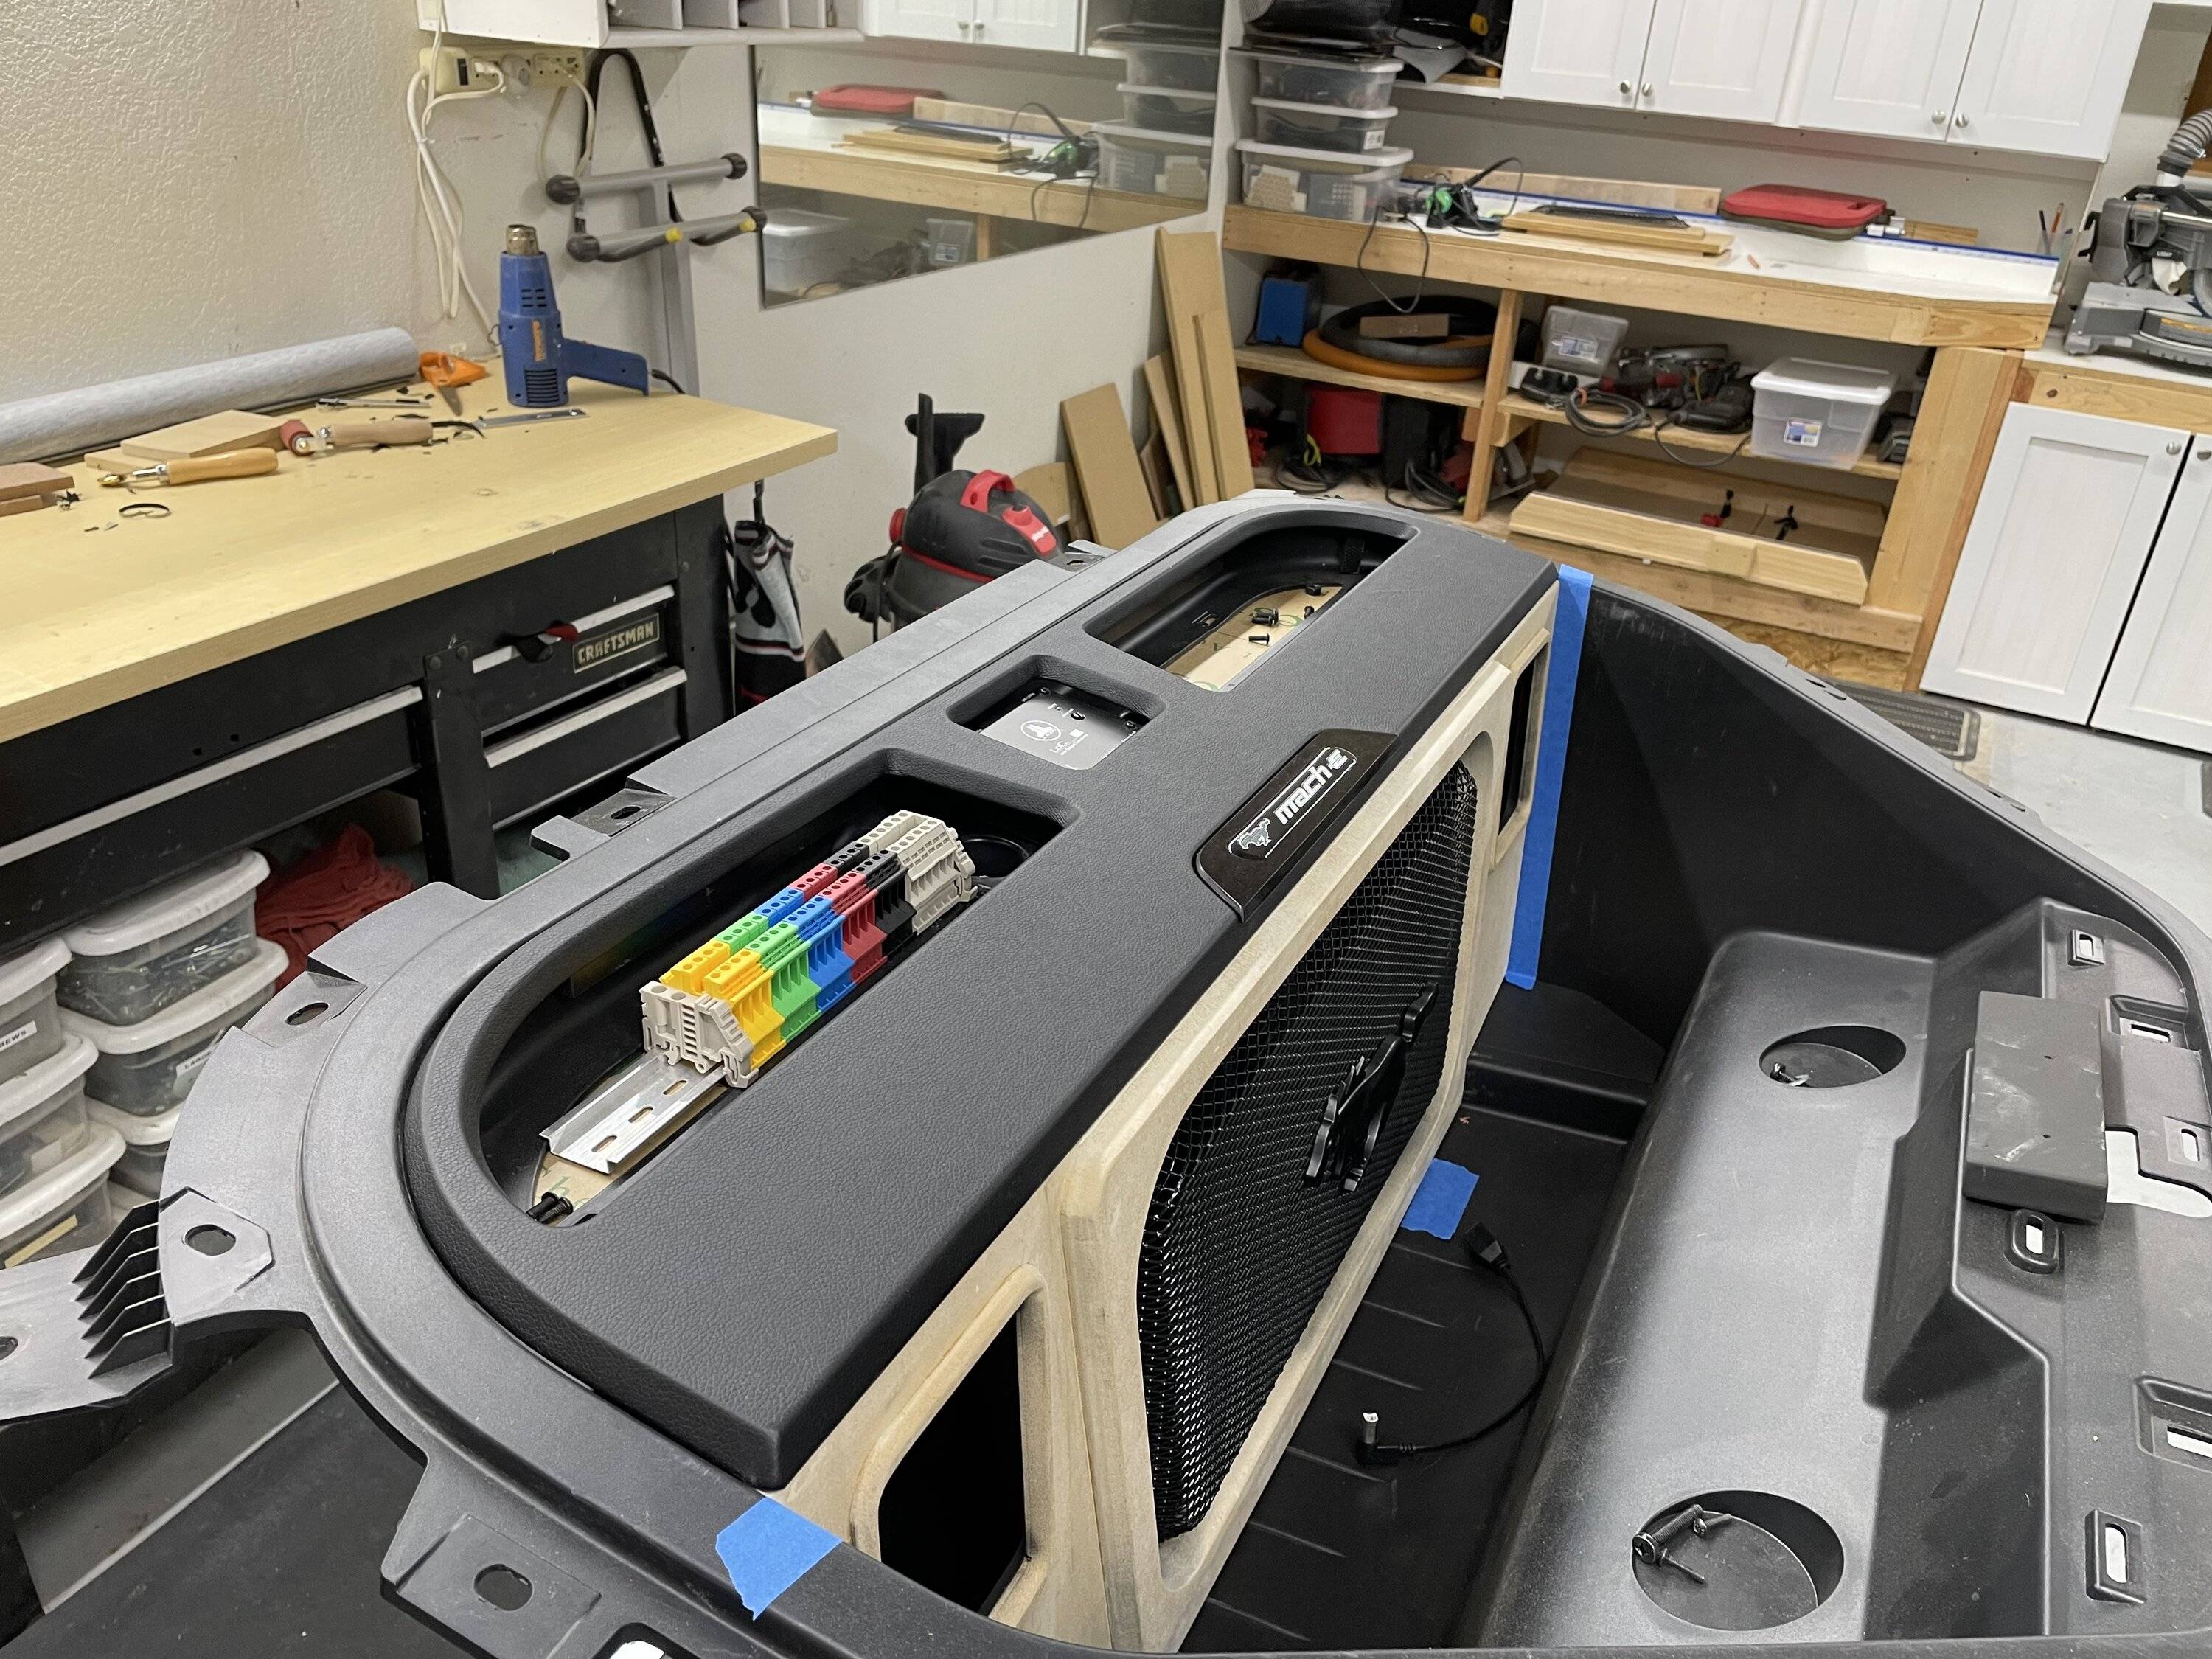
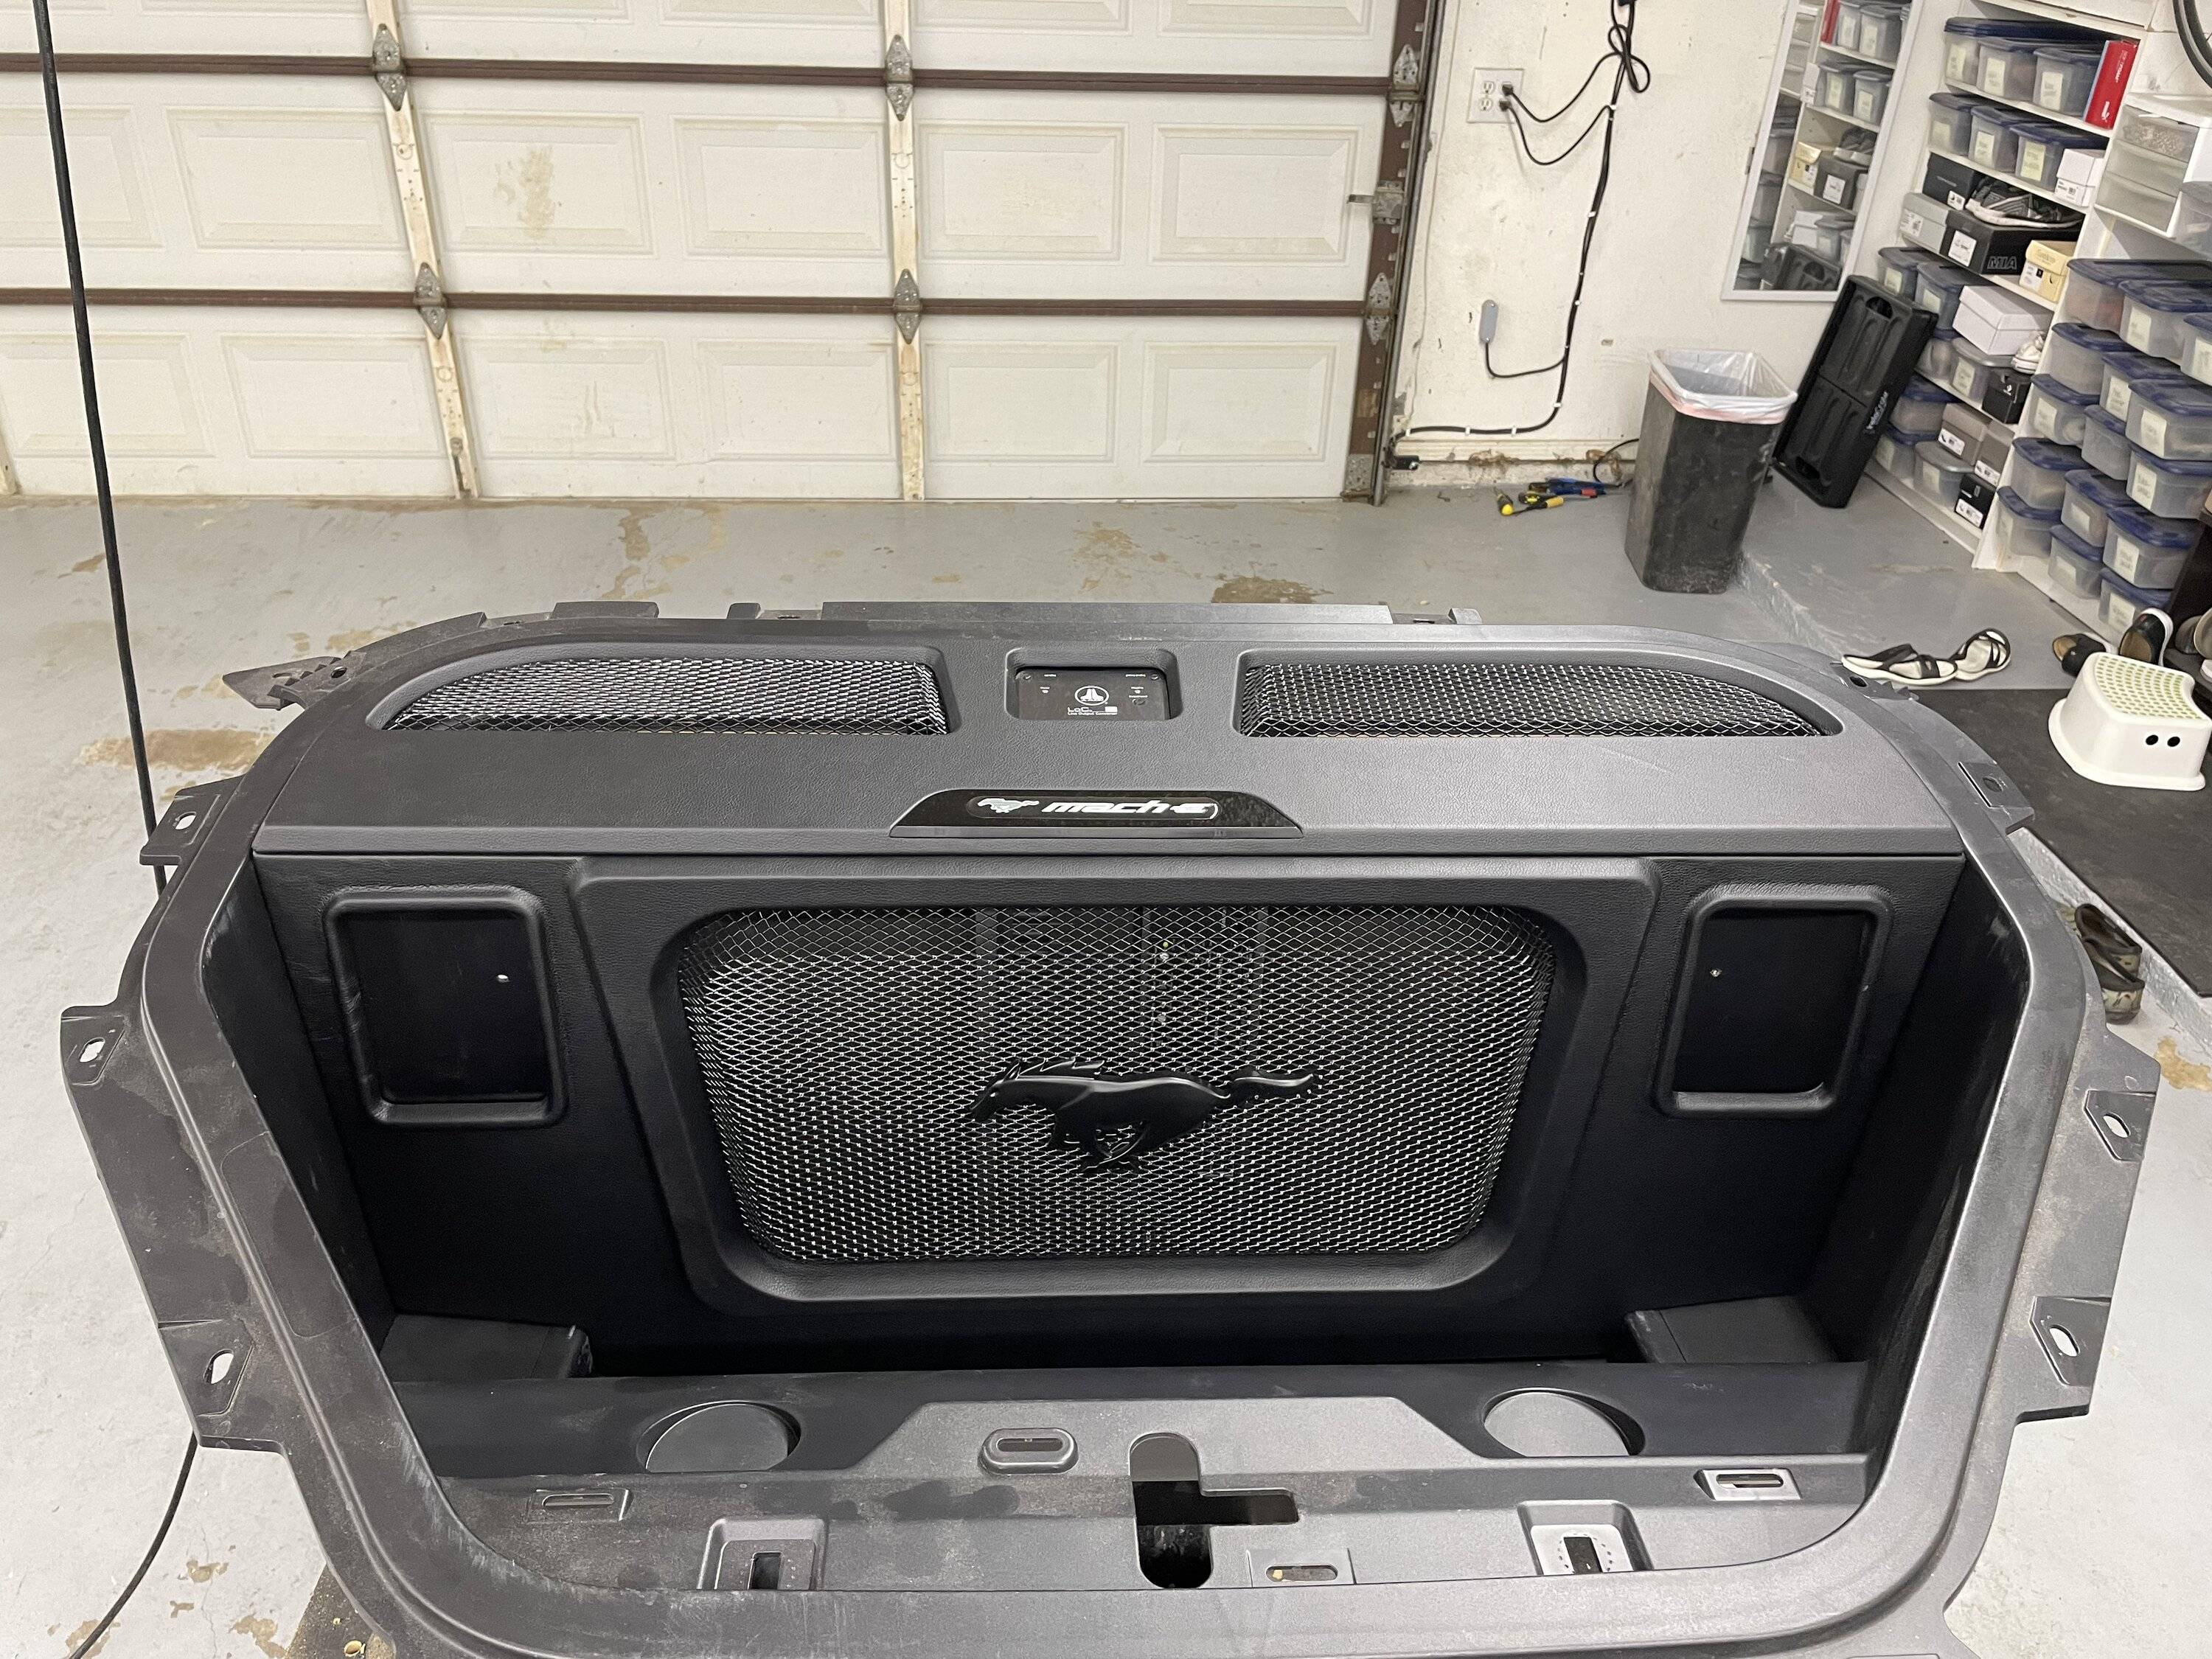
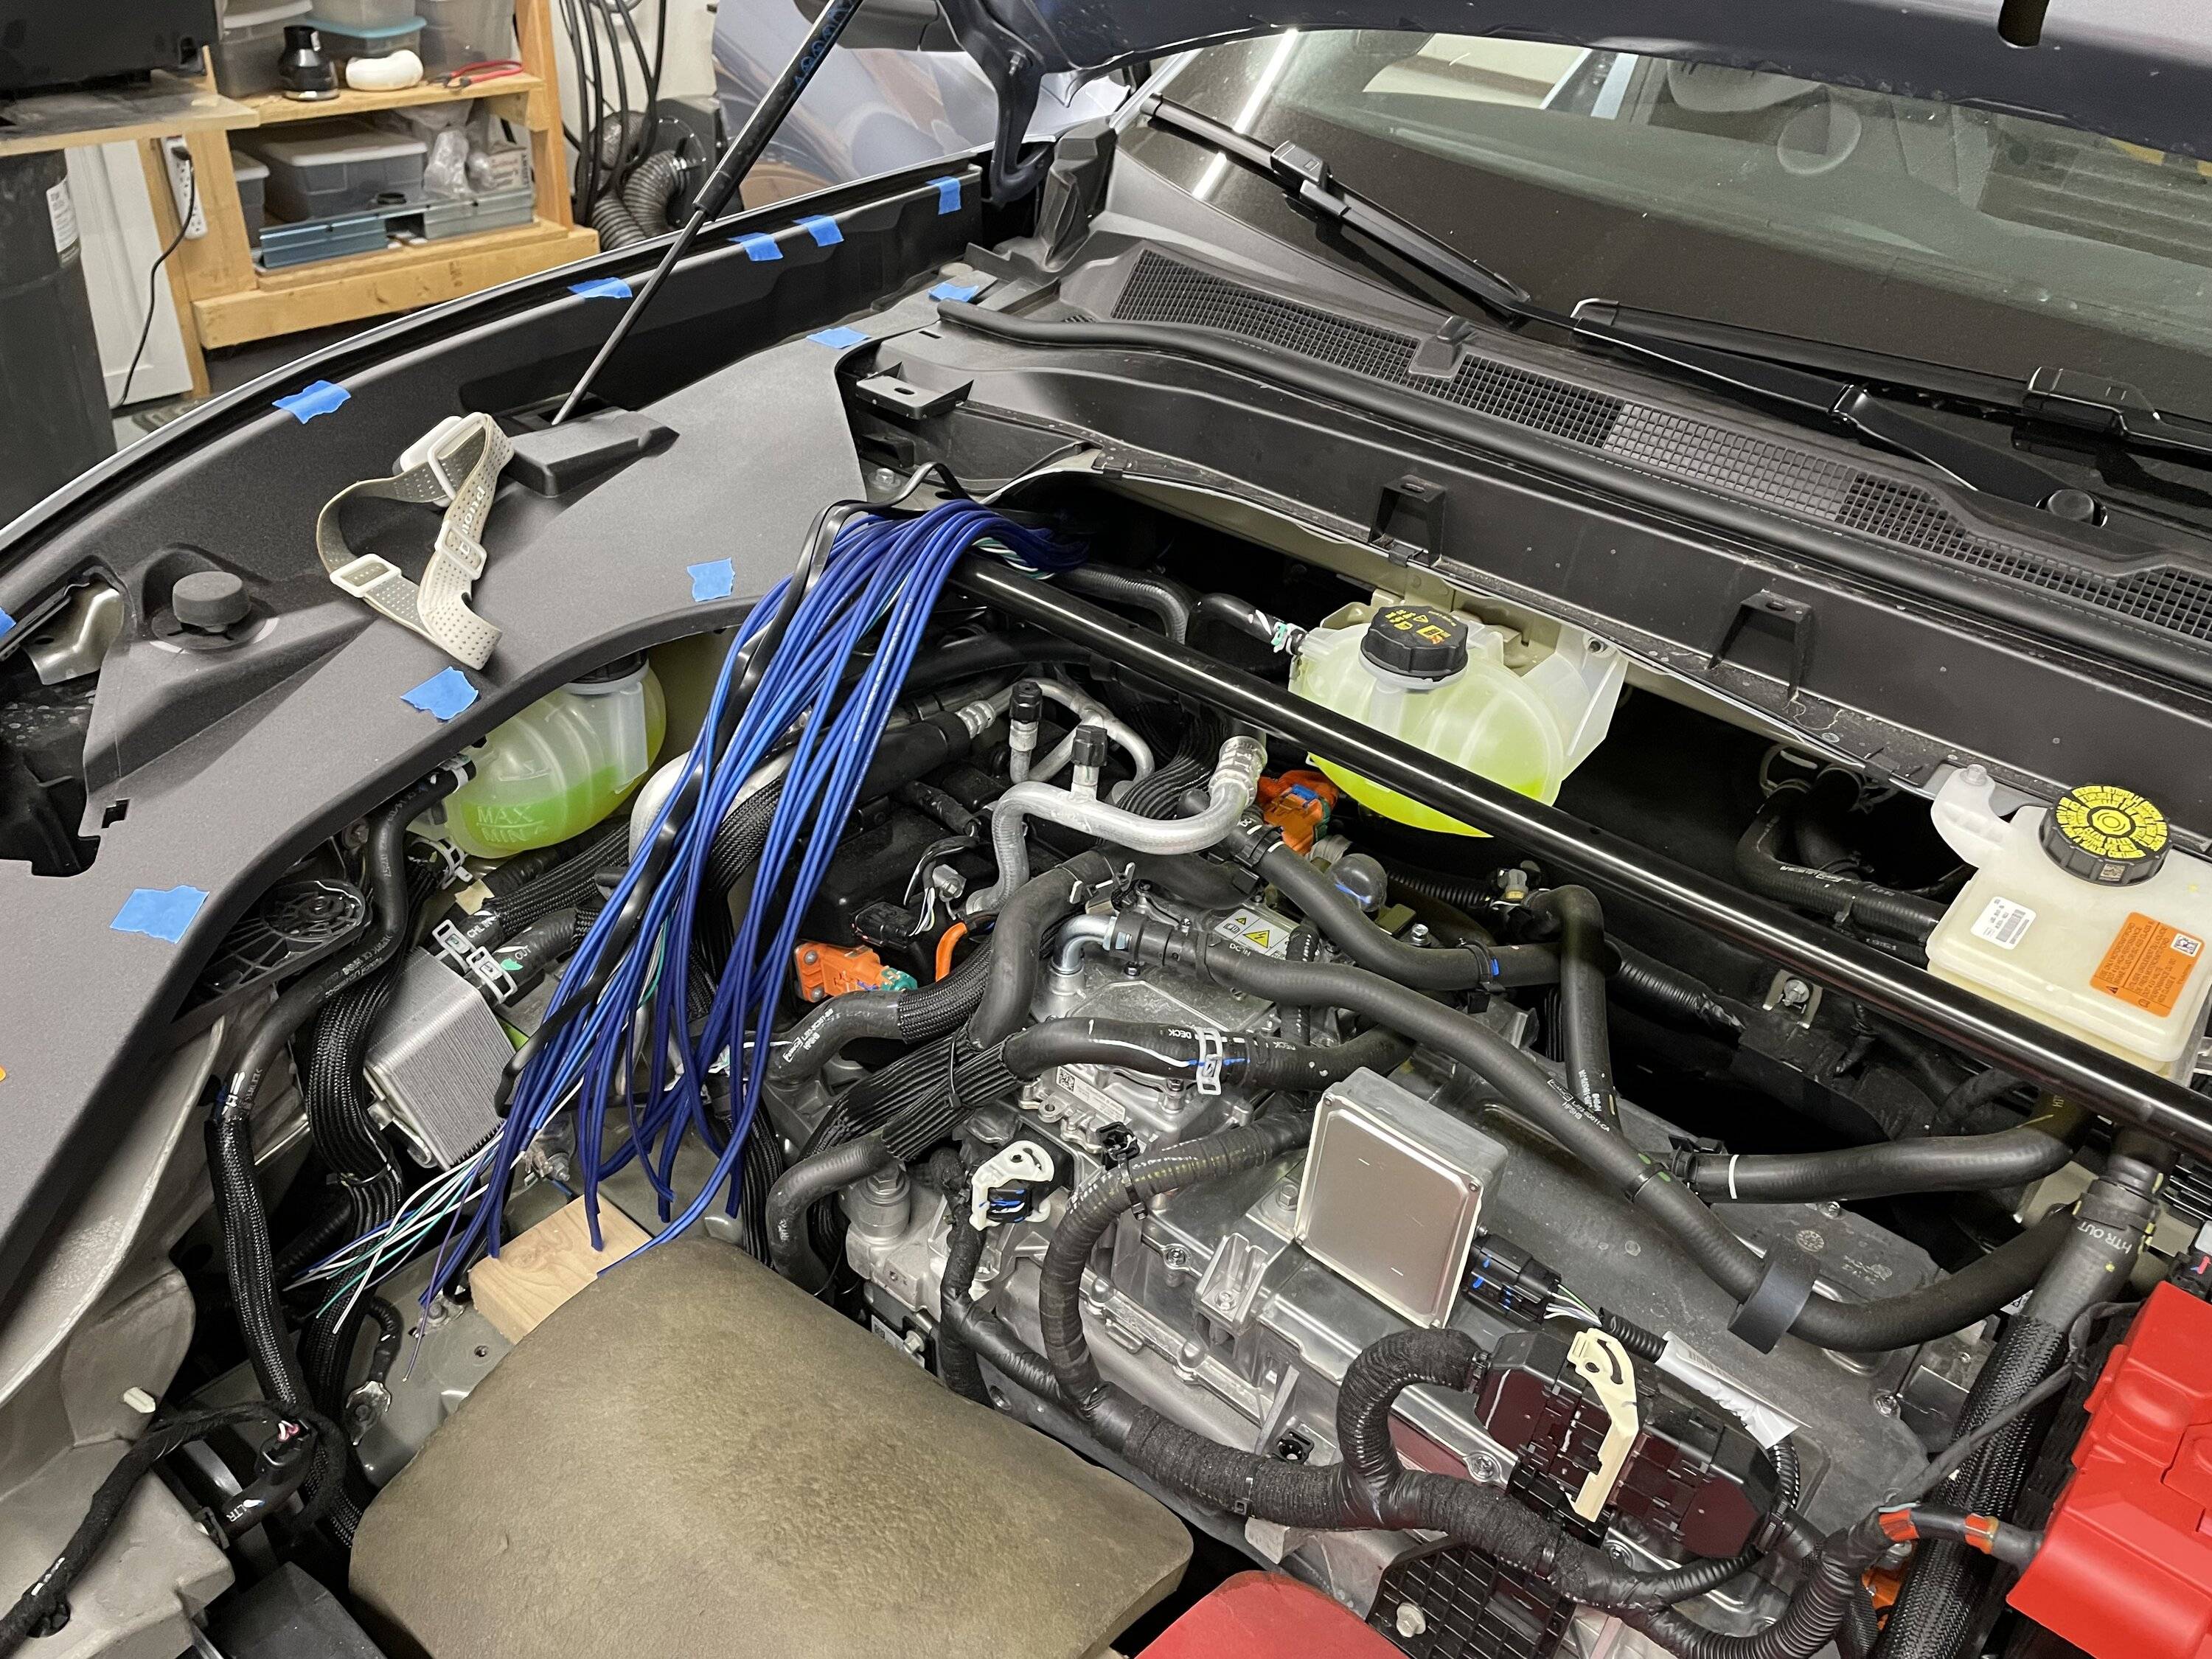
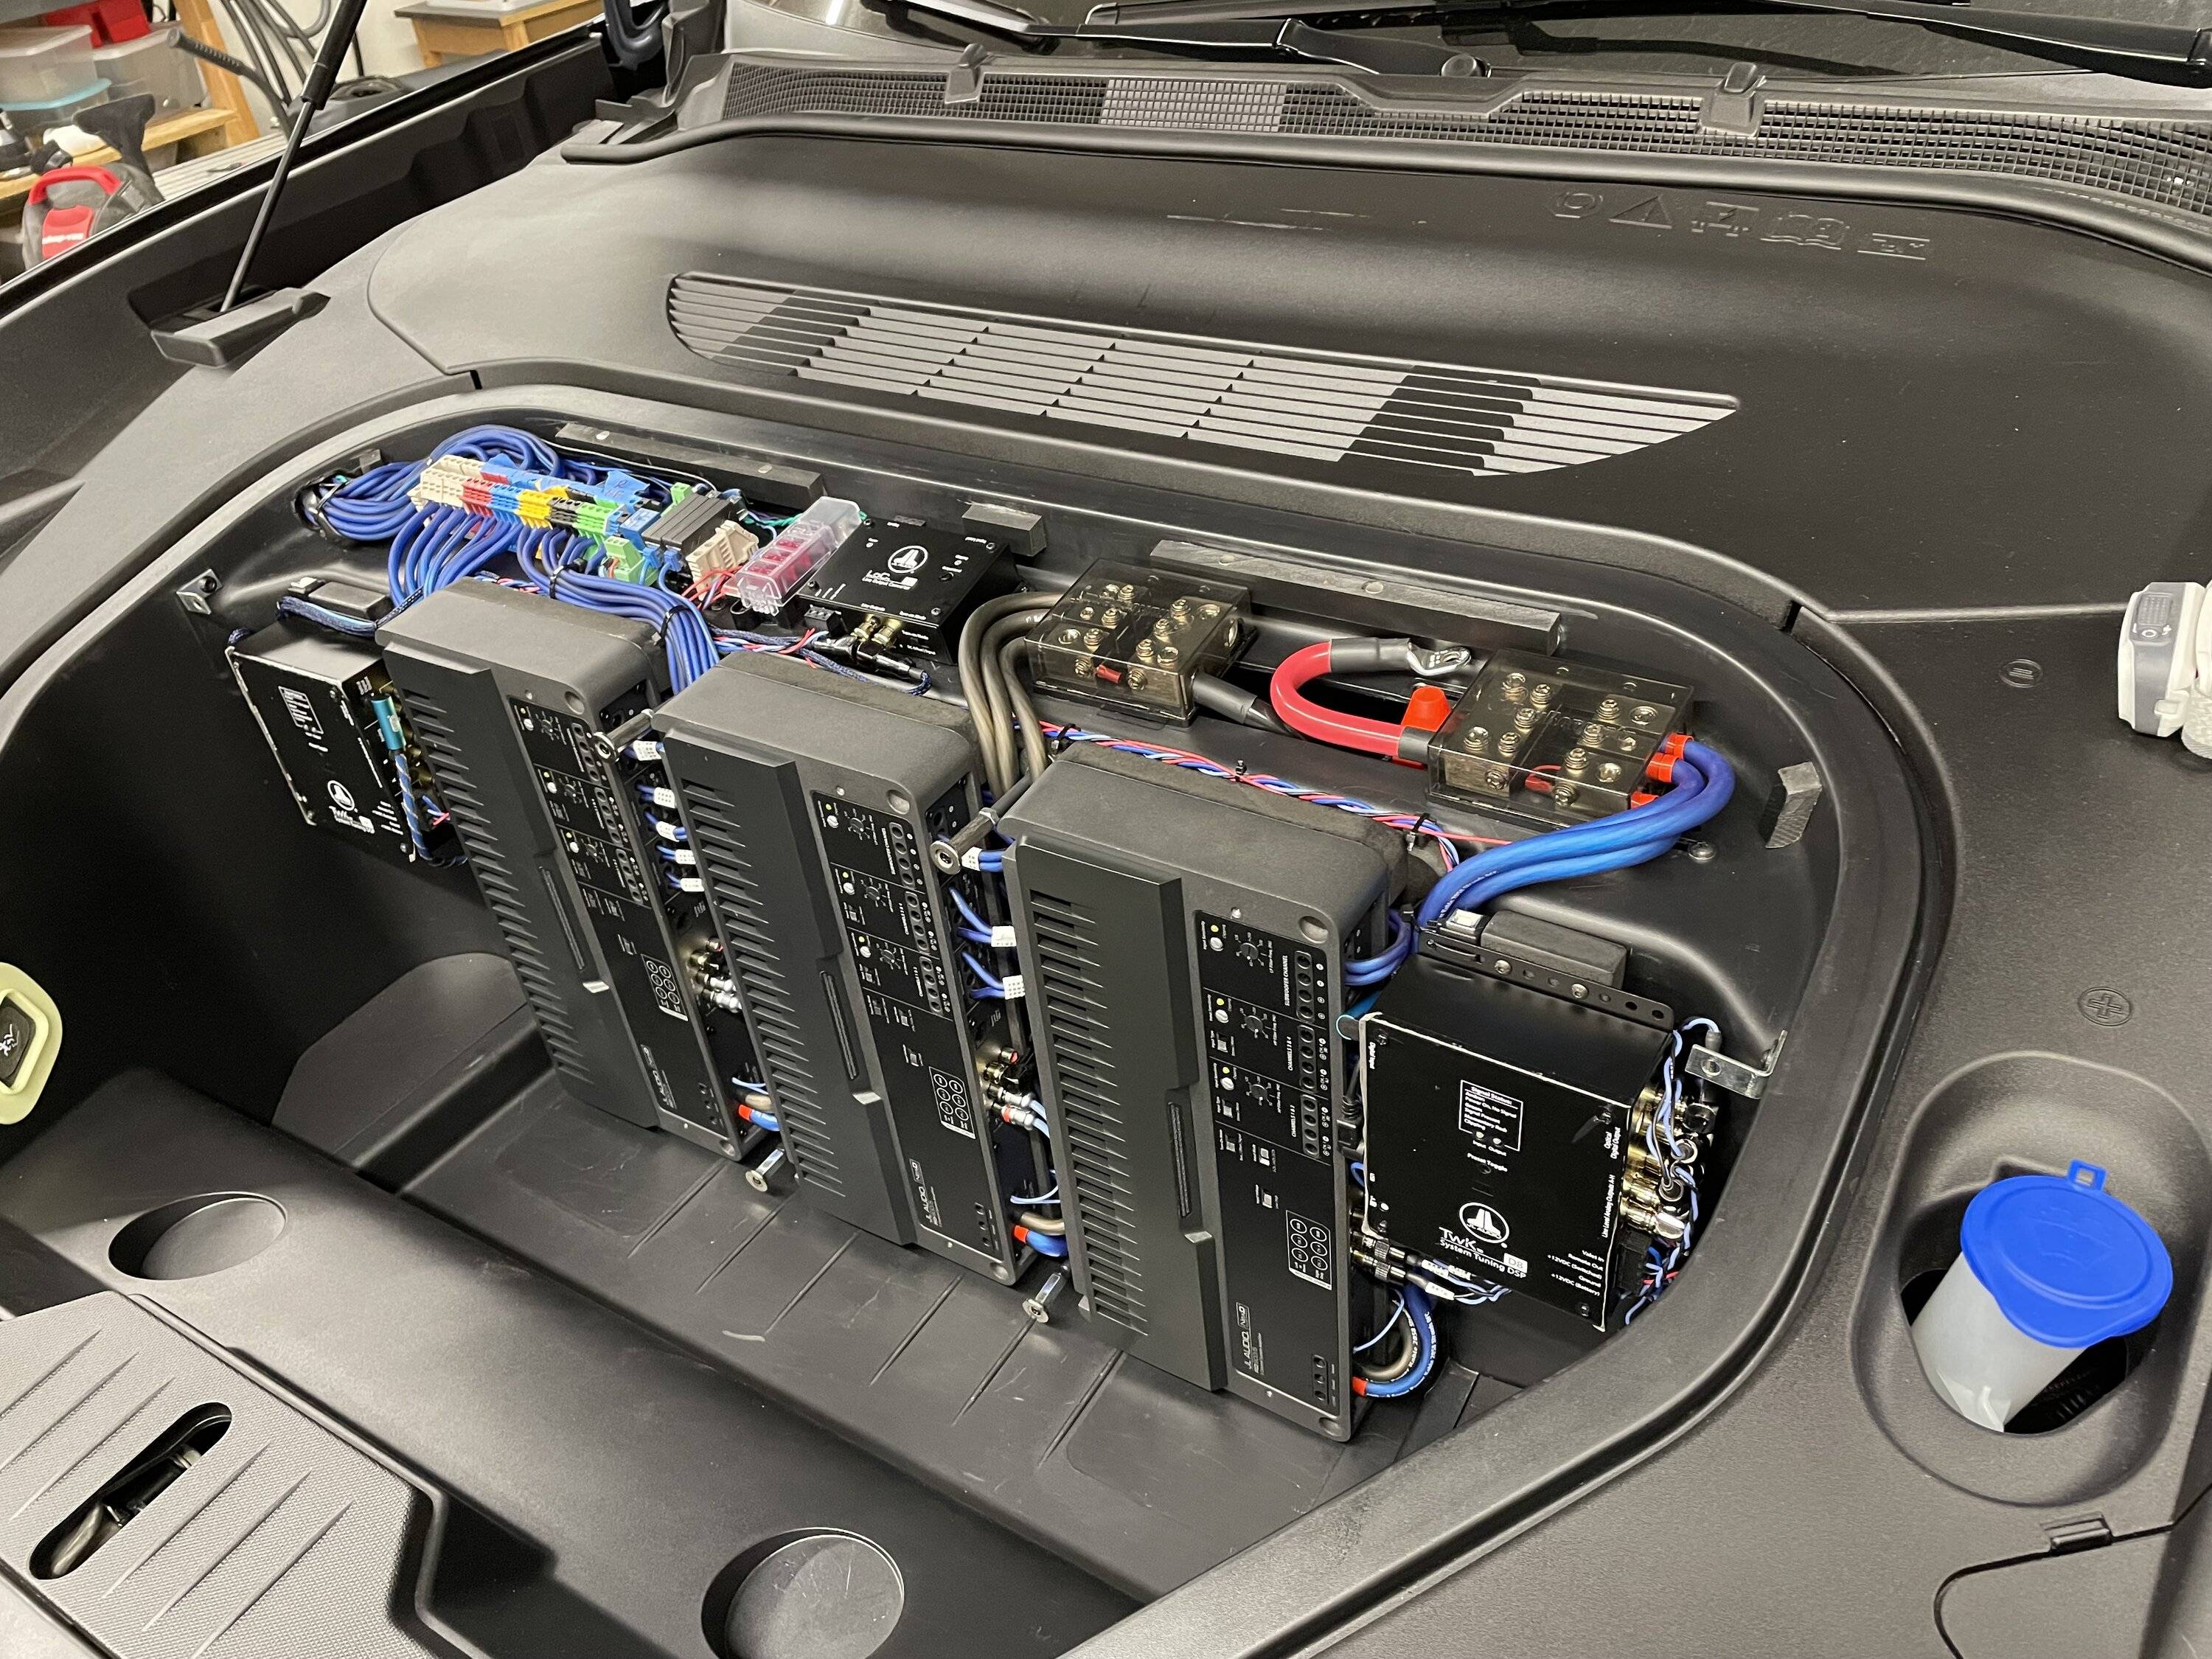
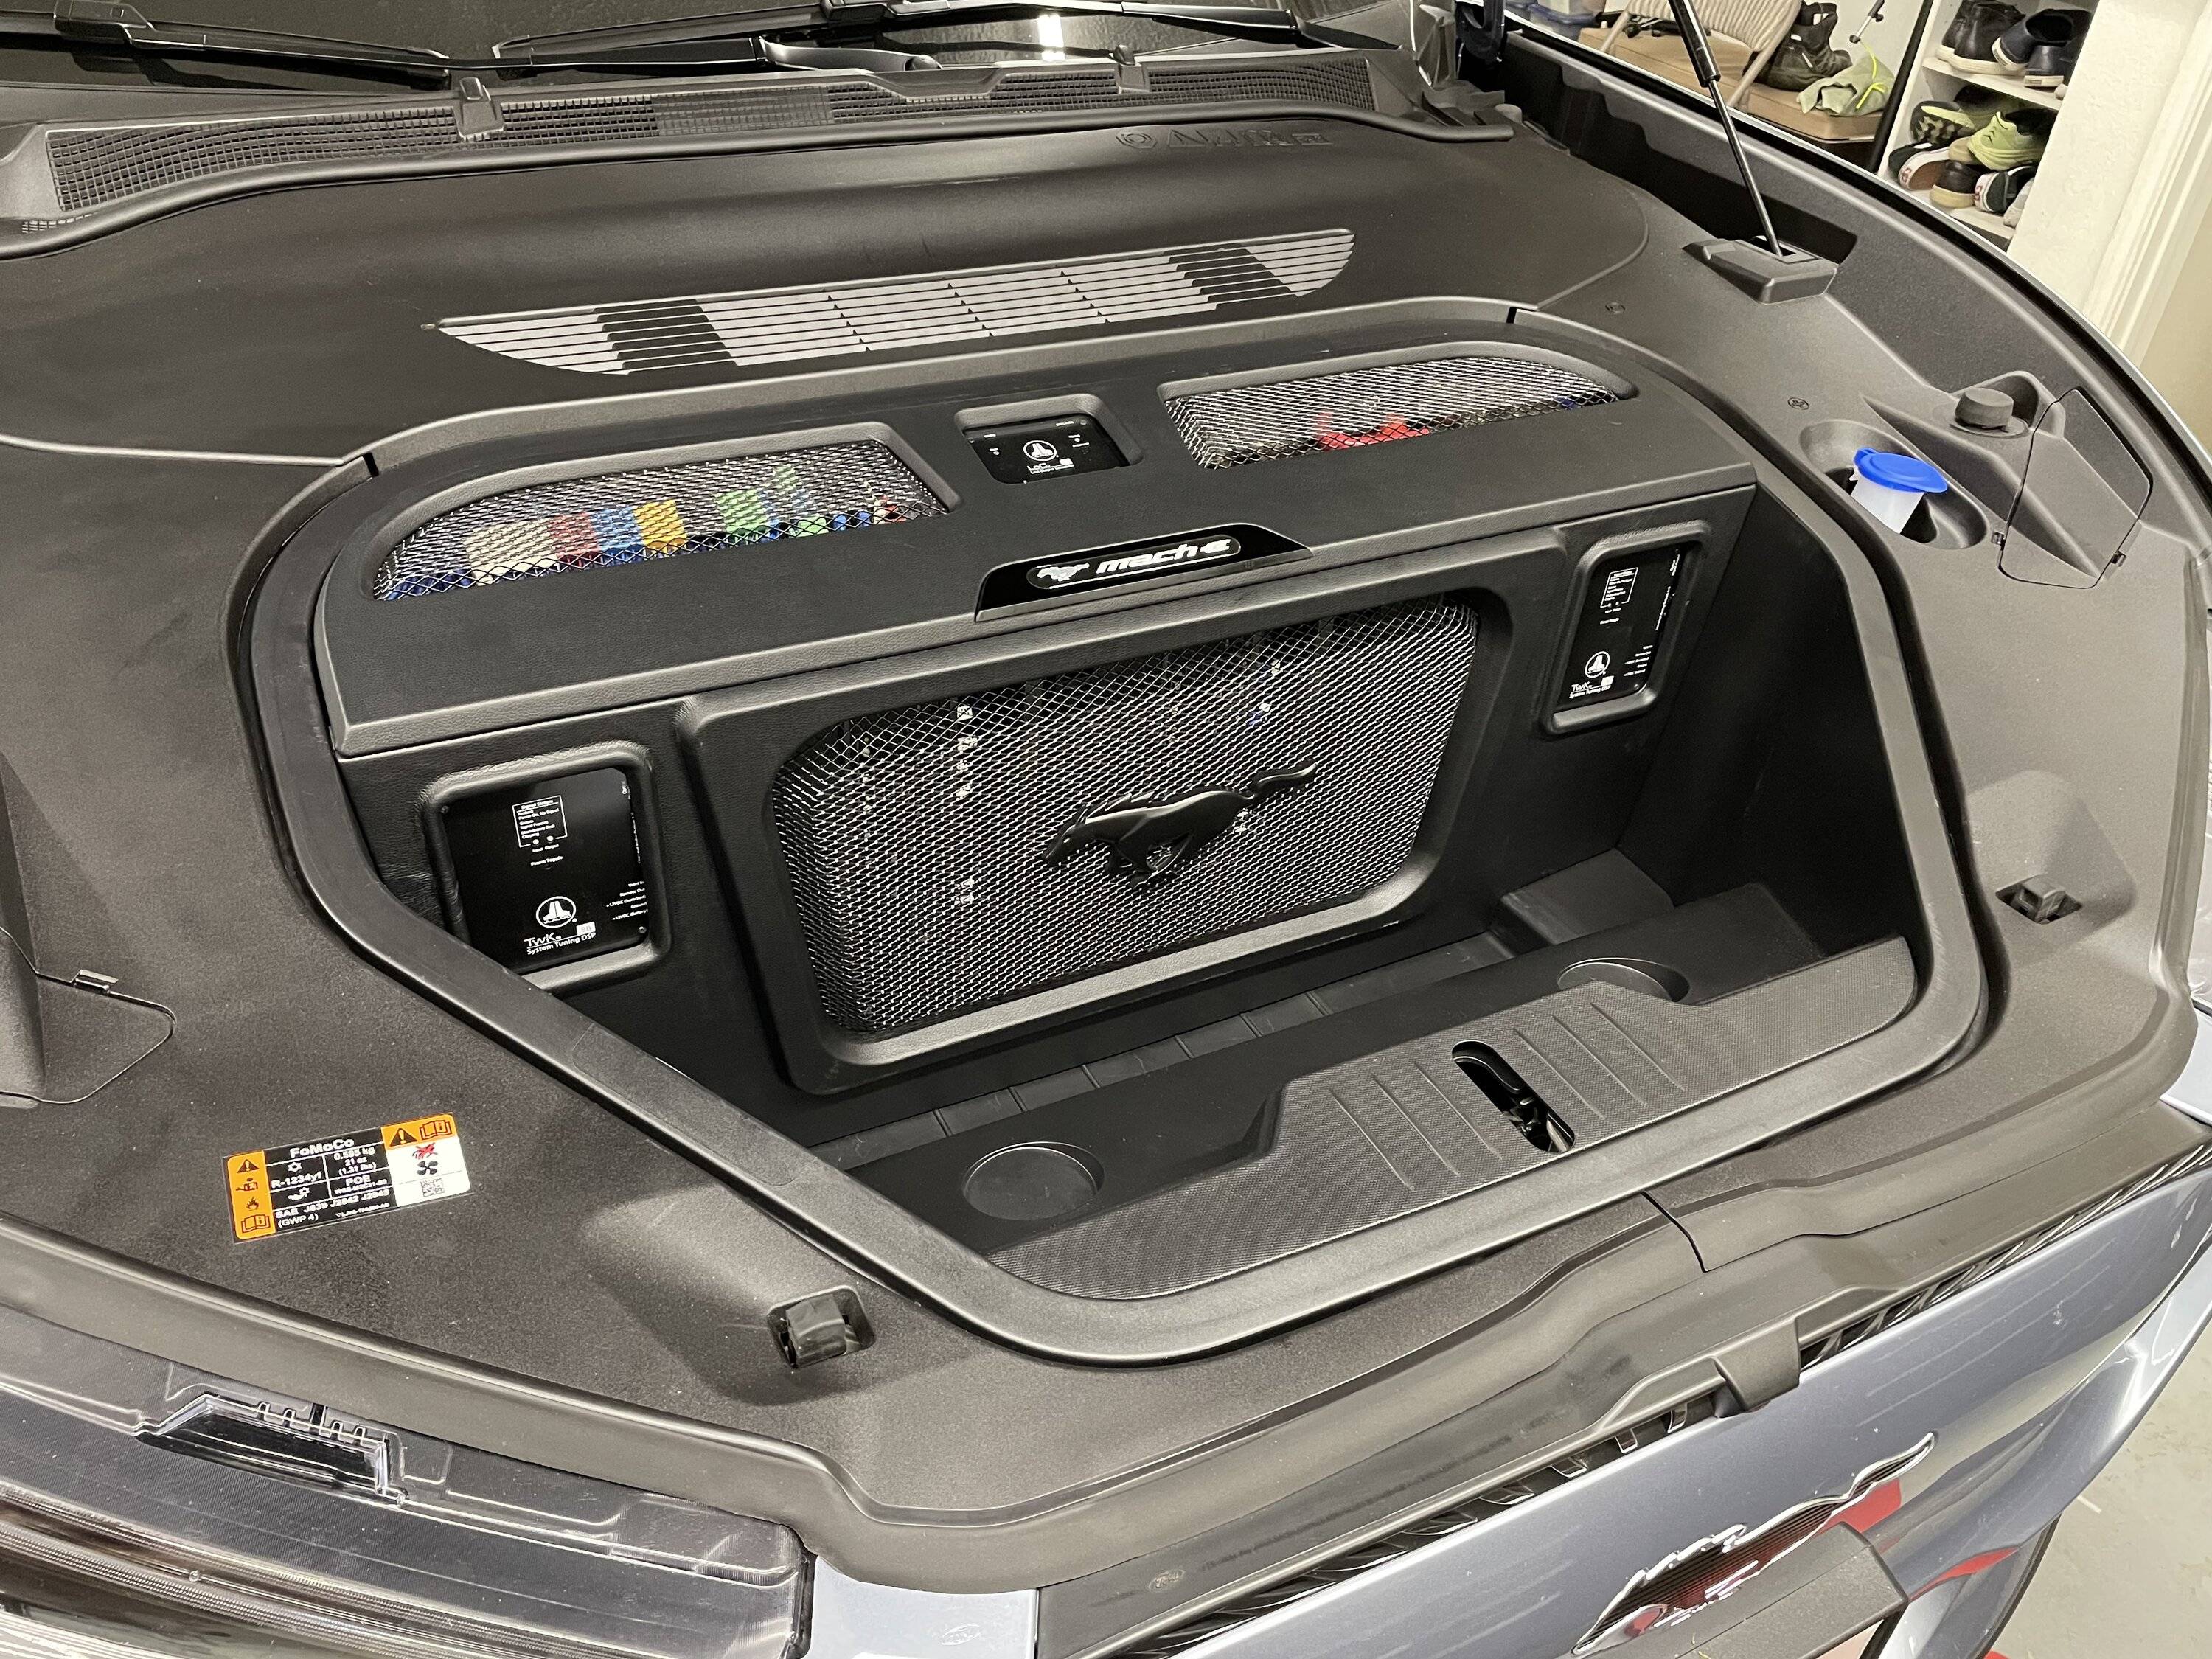
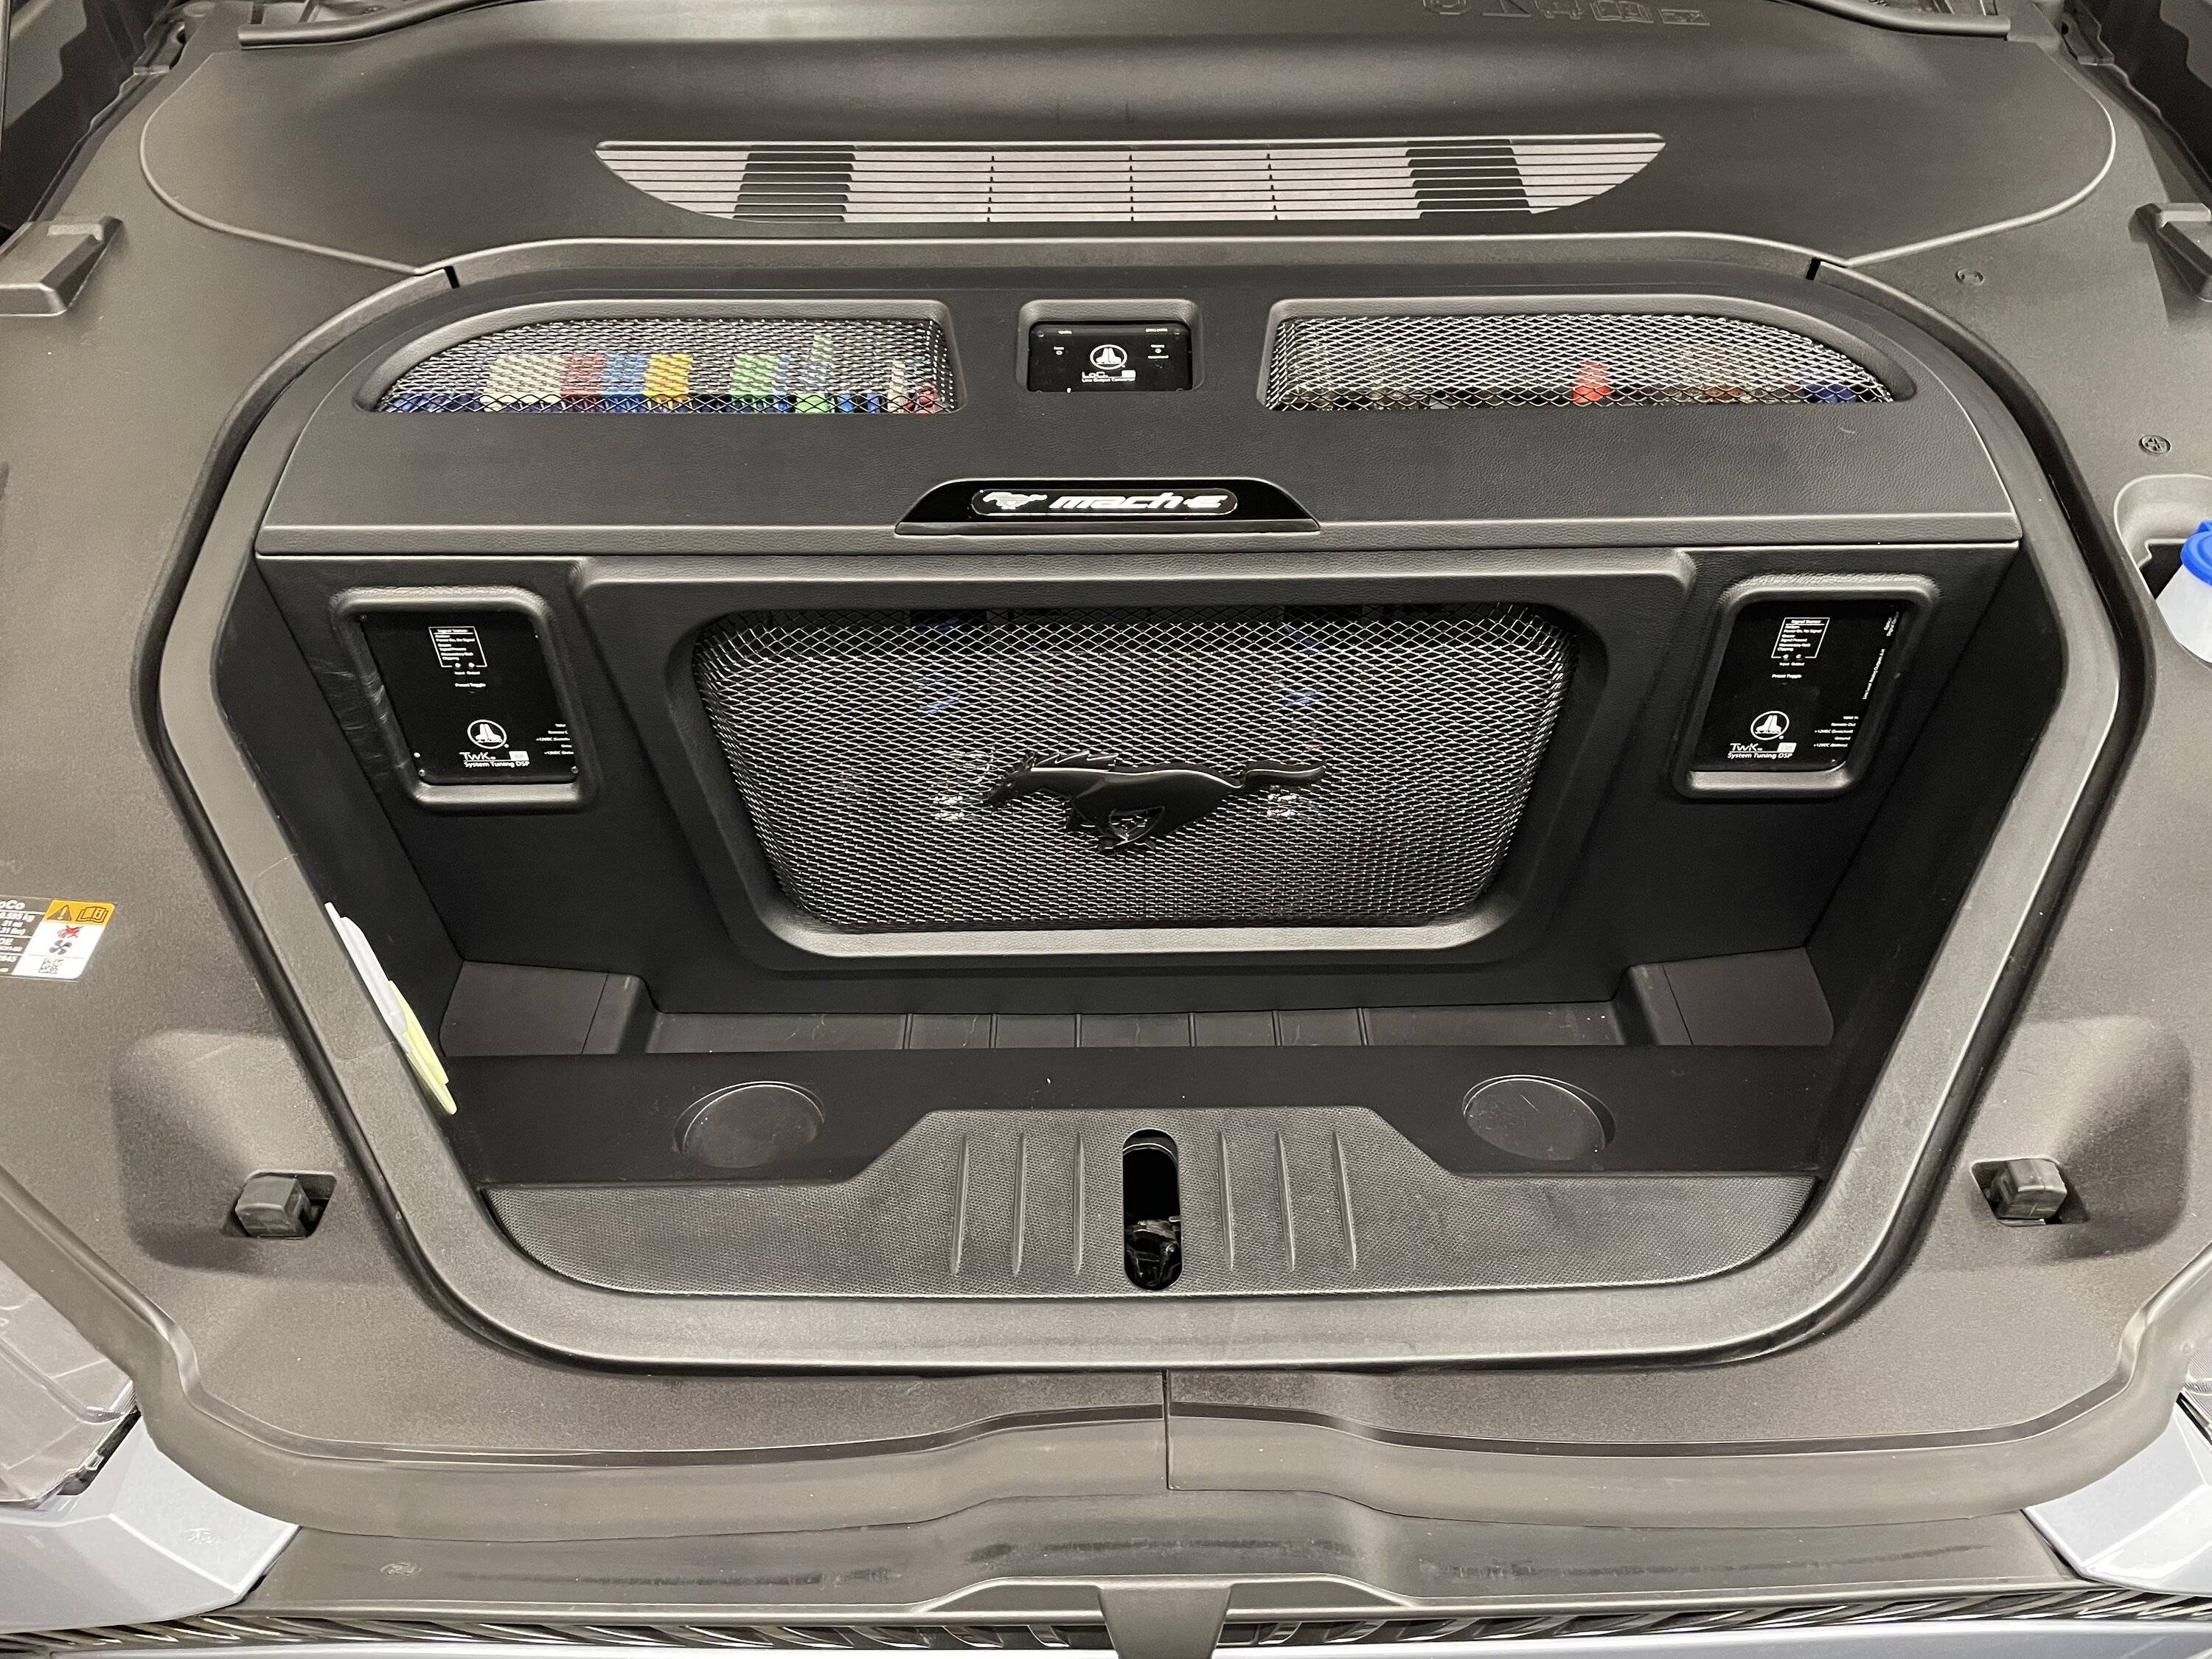
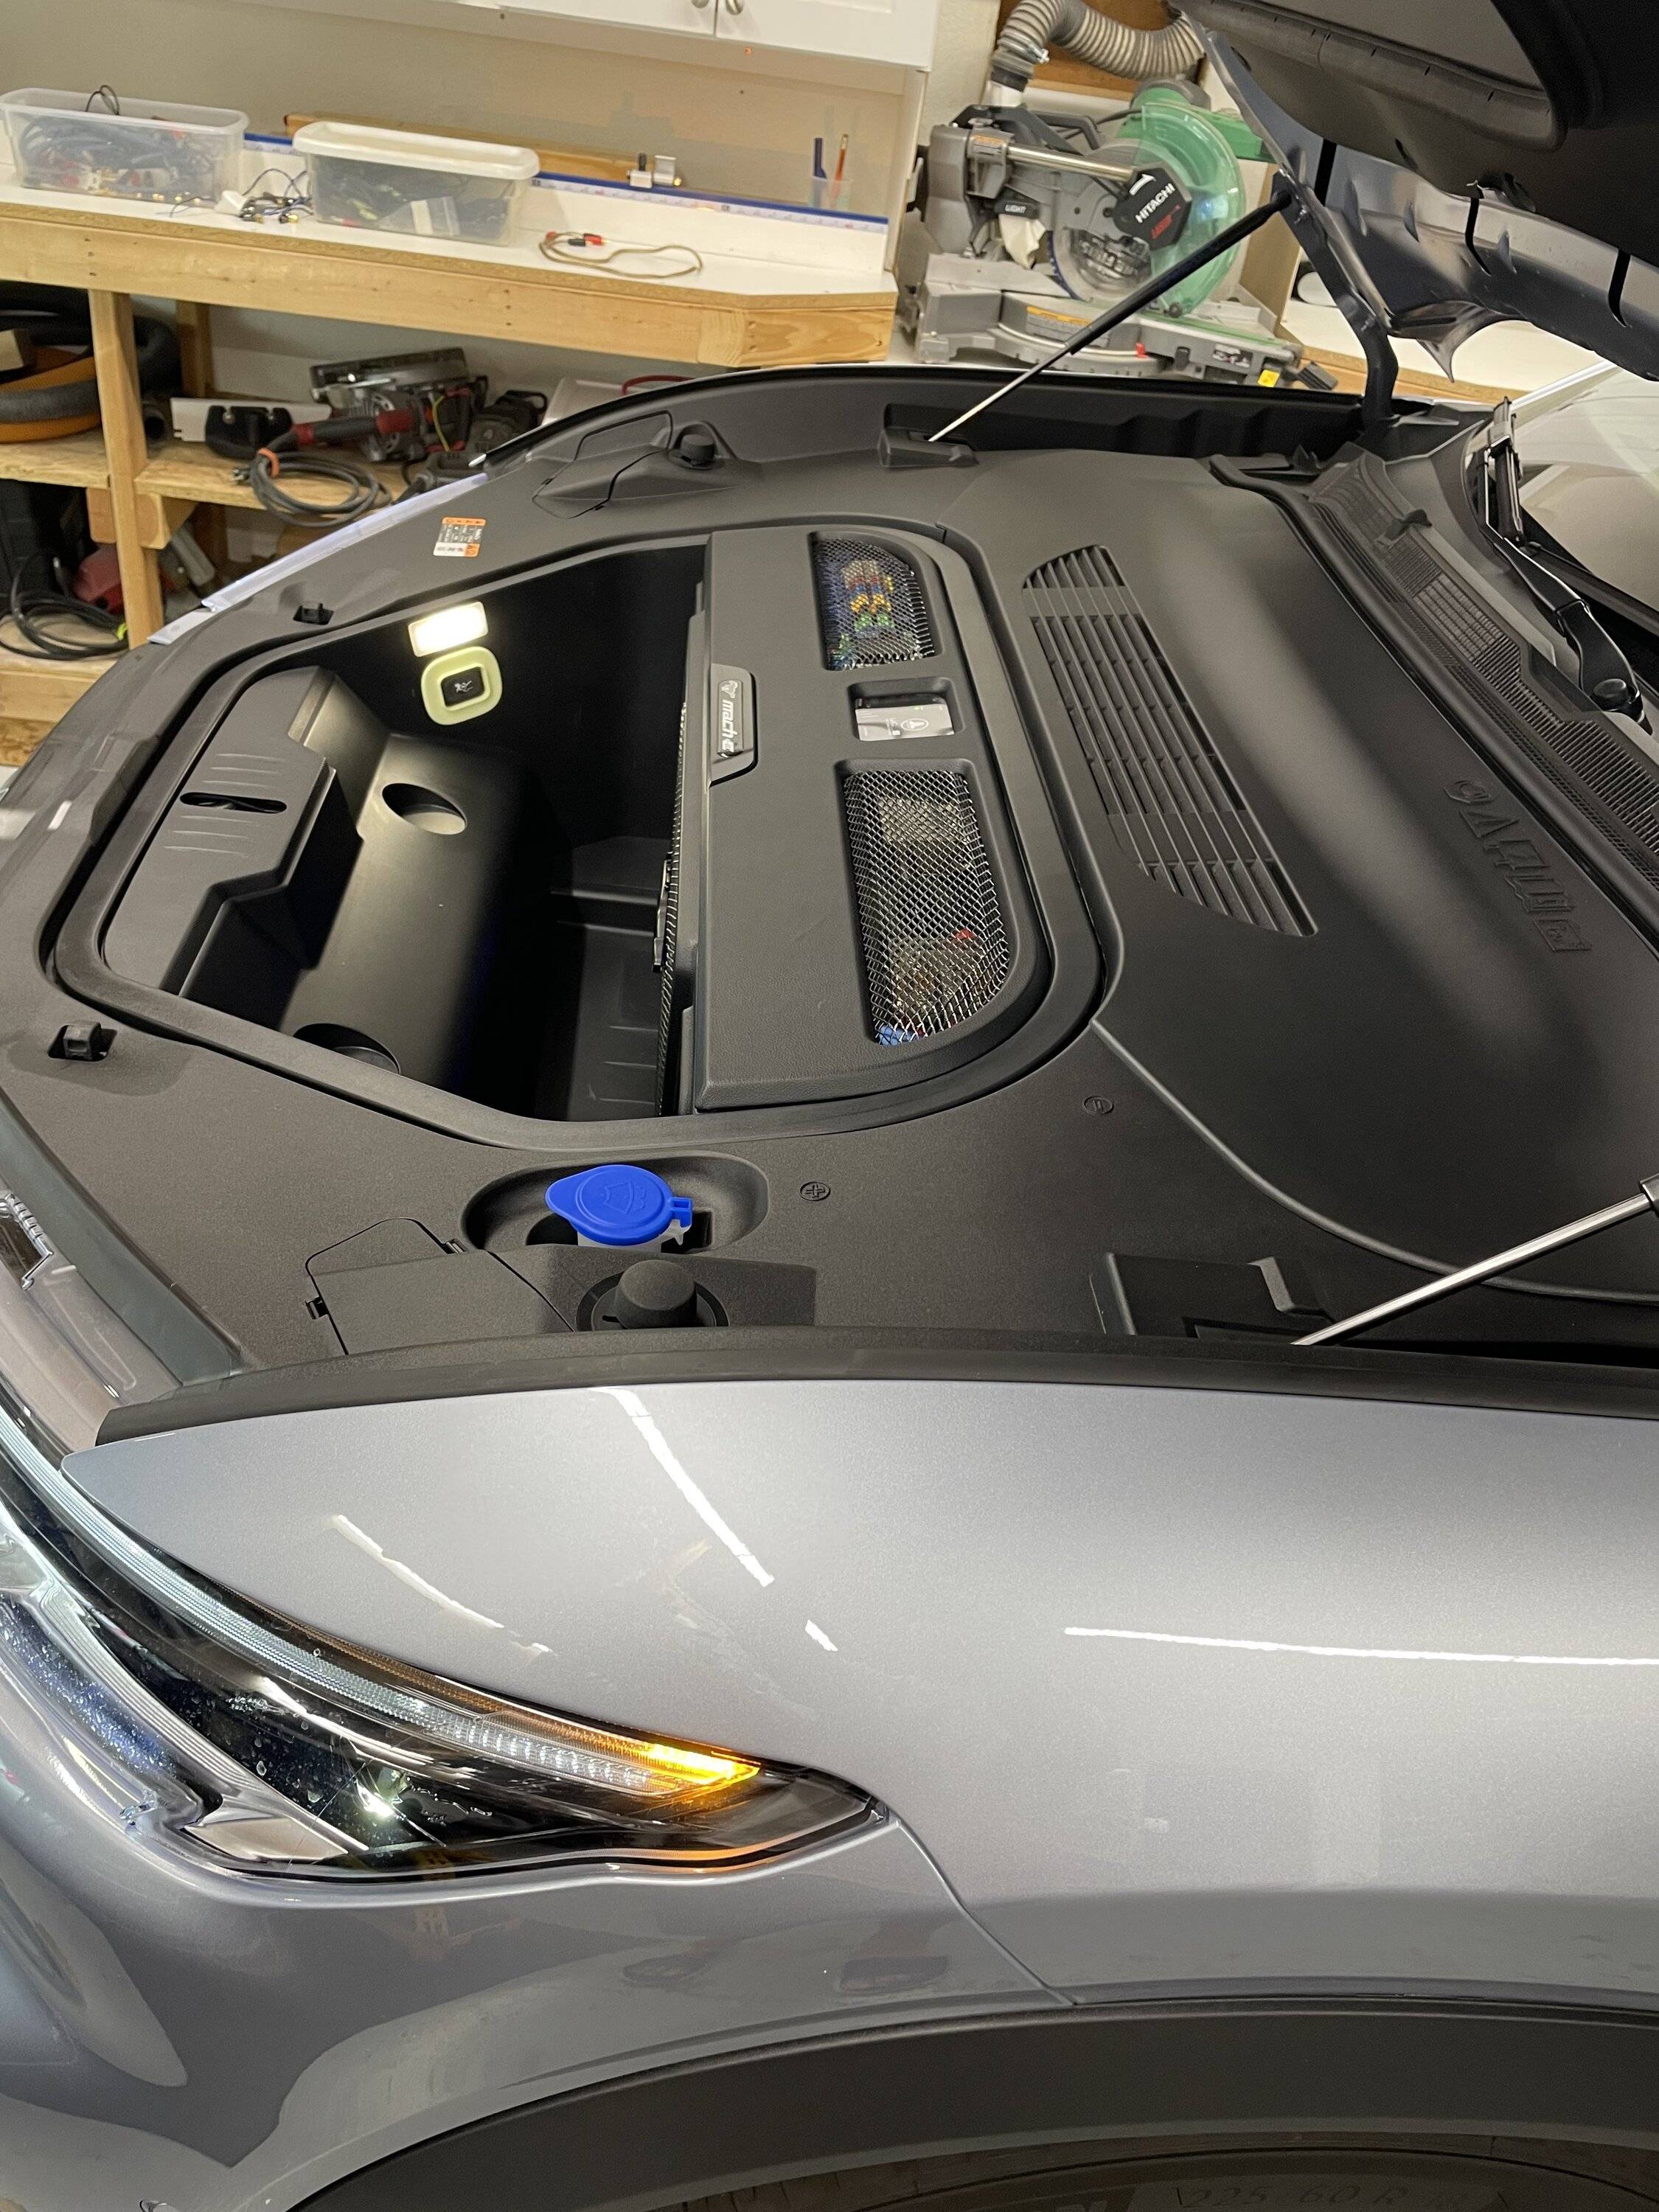
I decided to mount the amps and processors in the frunk since the battery is right there. But I had to punch a larger hole through the fire wall to accommodate all the speaker wires from the frunk to the interior. Although there is a lot of room in the frunk, I had multiple iterations of the design in order for everything to fit and still have the frunk functional. The battery was easy to access and I was able to tap into it easily and kept the connection to only a few inches from the fuse bank. With everything being so tight, I had to make my own rca cables with 90 degree connectors in order to complete the install. I made all the panel covers to the electronics so no screws were visible, so I made the top center logo out of acrylic with magnets to cover the main screws. All the grills were pressed with beveled edges to give it character and I attached a mustang emblem to make look more factory.
Most of the electronics fired up on the first go except for one bad amp and coaxial. After getting the components replaced, I fired it up and started to tune the system with a calibrated mic and a laptop. I spent a lot of time researching speaker components for their parameters and frequency charts and they were worth the time and $. After applying the time delays and checking for phase, I started to adjust the crossovers and frequency response. Very little adjustments to the frequency and gains were done since the initial response was quite good.
The results, unbelievably clean fidelity. The front stage is incredible, balanced, and most of all, no fatigue. And if I want to crank it, it hits pretty hard.
I hope some of you audio nuts find this useful for your next project.
-Ben


I started with downloading the manual online from factorymanuals.com. It’s a large file, but you will need this in order to know how to remove panels and access the necessary wiring. My plan was to use the large 15 inch screen as the audio source/controller and upgrade everything else while keeping a factory/stealth look. Here’s a list of the major components:
JL Audio LOC22 Line converter for factory signal
JL Audio TWK 88 - Front stage dsp
JL Audio D8 - Rear stage dsp
JL Audio RD900/5 - 3 total, sub channels; 1 for each sub, then hi pass for the mb/mr/tw front, mr/tw rear
JL Audio 13TW5 - 3 total
Morel MT300 - 1 pair tweeters (front)
Morel MM3 - 1 pair midrange (front)
Morel SCM634 - 1 pair mid bass (front)
Morel Integra 624 - 1 pair 6.5” coax (rear)
Total System Power 2700 Watts (500W to each sub)
I disassembled all the doors and trunk area to apply sound deadening material to keep rattles to a minimum (the rear outside wing still rattles, will get to that later). After several measurements, calculations, and drawing revisions (on sketch up), I decided to go with three 13 inch JL Audio subs for their shallow mount and minimal air requirement. As you know, there is no spare tire since the trunk cavity is very shallow, the subwoofer options were limited. Fortunately, based on my design and calculations, 3 of them would work (2 would have done it but that would have been too easy). I built the subwoofer box with 3/4 inch mdf and used layers to build up around corners of the well. Each sub has its own chamber and equal in volume. There are multiple layers of panels to achieve a stock look but still give it a premium feel. Different layers of finish were incorporated to match the interior vinyl texture, carpet, and gloss black trim (vinyl wrap). The cover has a breathable grill covered in carpet so the trunk is still usable and factory looking.
For the front doors, I dropped in 6.5 inch Morel carbon fiber midbass and then 6.5 Morel coaxial in the rear doors for fill.
The front A-pillars were completely fabricated to accommodate a 3.5 inch midrange and 1 inch tweeter. The factory location for the tweeter on the dash was a decent location but I felt the midrange needed to be higher and forward. Since I was already building that, I might as well incorporate the tweeter with it. I made an mdf plate to hold the MR/TW combo then glued/screwed it to the plastic A-pillar. Then I wrapped it in a spandex type cloth to achieve a molded look. This gave me a base to apply resin and fiberglass. After multiple bondo fills and sanding, I wrapped it in diamond textured vinyl to match the dash (same as the sub panel). I made a pressed grill with a chrome edge finish to match the chrome around the dash and door panel. Not sure if I will wrap the grill with cloth to match the doors as I like the look of the grill but still looks factory.
I decided to mount the amps and processors in the frunk since the battery is right there. But I had to punch a larger hole through the fire wall to accommodate all the speaker wires from the frunk to the interior. Although there is a lot of room in the frunk, I had multiple iterations of the design in order for everything to fit and still have the frunk functional. The battery was easy to access and I was able to tap into it easily and kept the connection to only a few inches from the fuse bank. With everything being so tight, I had to make my own rca cables with 90 degree connectors in order to complete the install. I made all the panel covers to the electronics so no screws were visible, so I made the top center logo out of acrylic with magnets to cover the main screws. All the grills were pressed with beveled edges to give it character and I attached a mustang emblem to make look more factory.
Most of the electronics fired up on the first go except for one bad amp and coaxial. After getting the components replaced, I fired it up and started to tune the system with a calibrated mic and a laptop. I spent a lot of time researching speaker components for their parameters and frequency charts and they were worth the time and $. After applying the time delays and checking for phase, I started to adjust the crossovers and frequency response. Very little adjustments to the frequency and gains were done since the initial response was quite good.
The results, unbelievably clean fidelity. The front stage is incredible, balanced, and most of all, no fatigue. And if I want to crank it, it hits pretty hard.
I hope some of you audio nuts find this useful for your next project.
-Ben


Sponsored