BCMatt
Member
- Thread starter
- #1
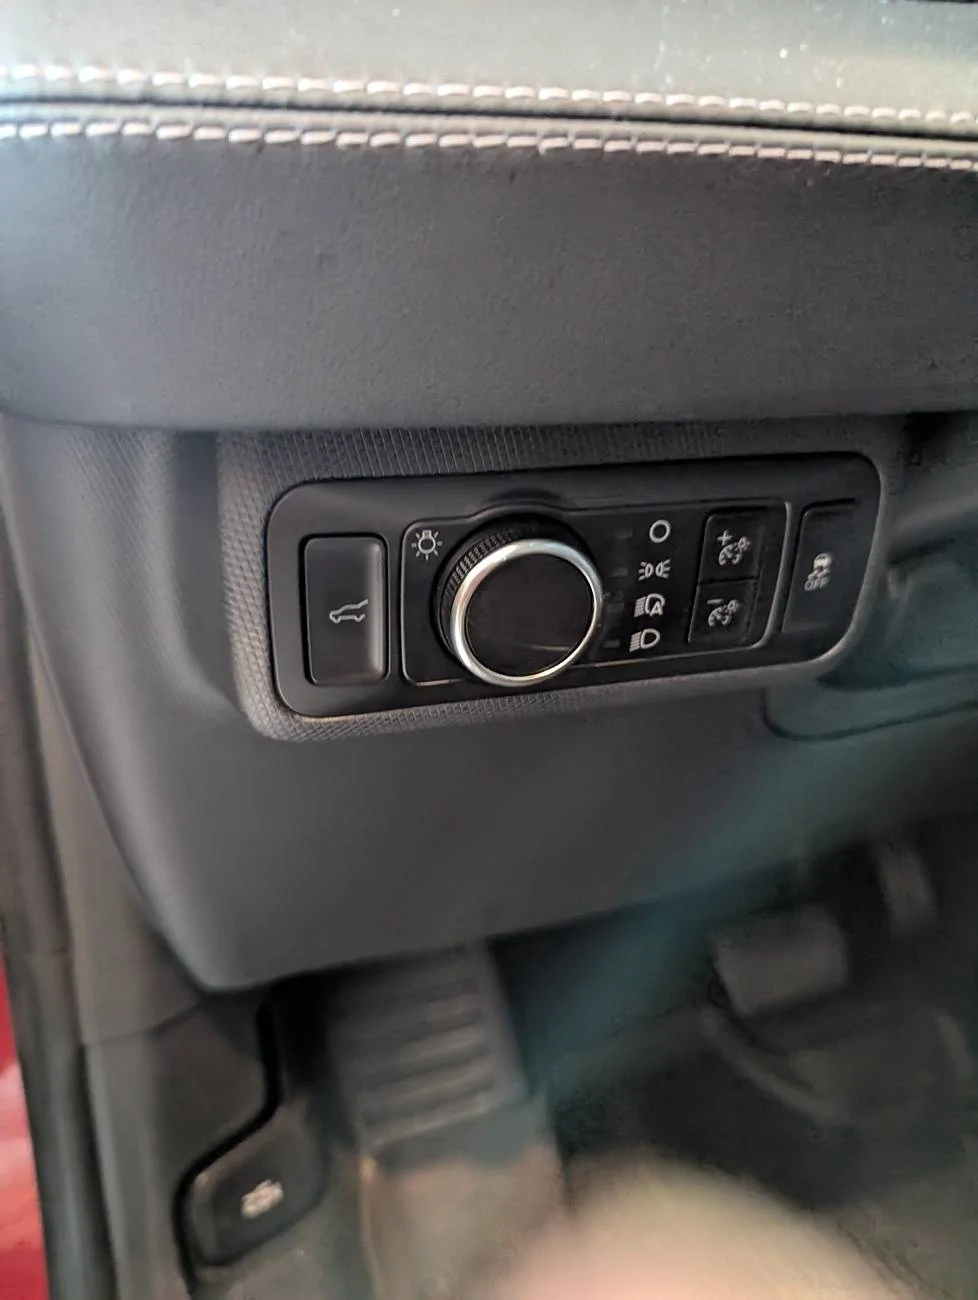
Using a combination of information I got from this site, Reddit and the Mach E wiring diagram I got from easymanuals.co.uk , I added the physical tailgate release button to the headlight switch cluster. This replaced the max defrost button, which I considered to be useless.
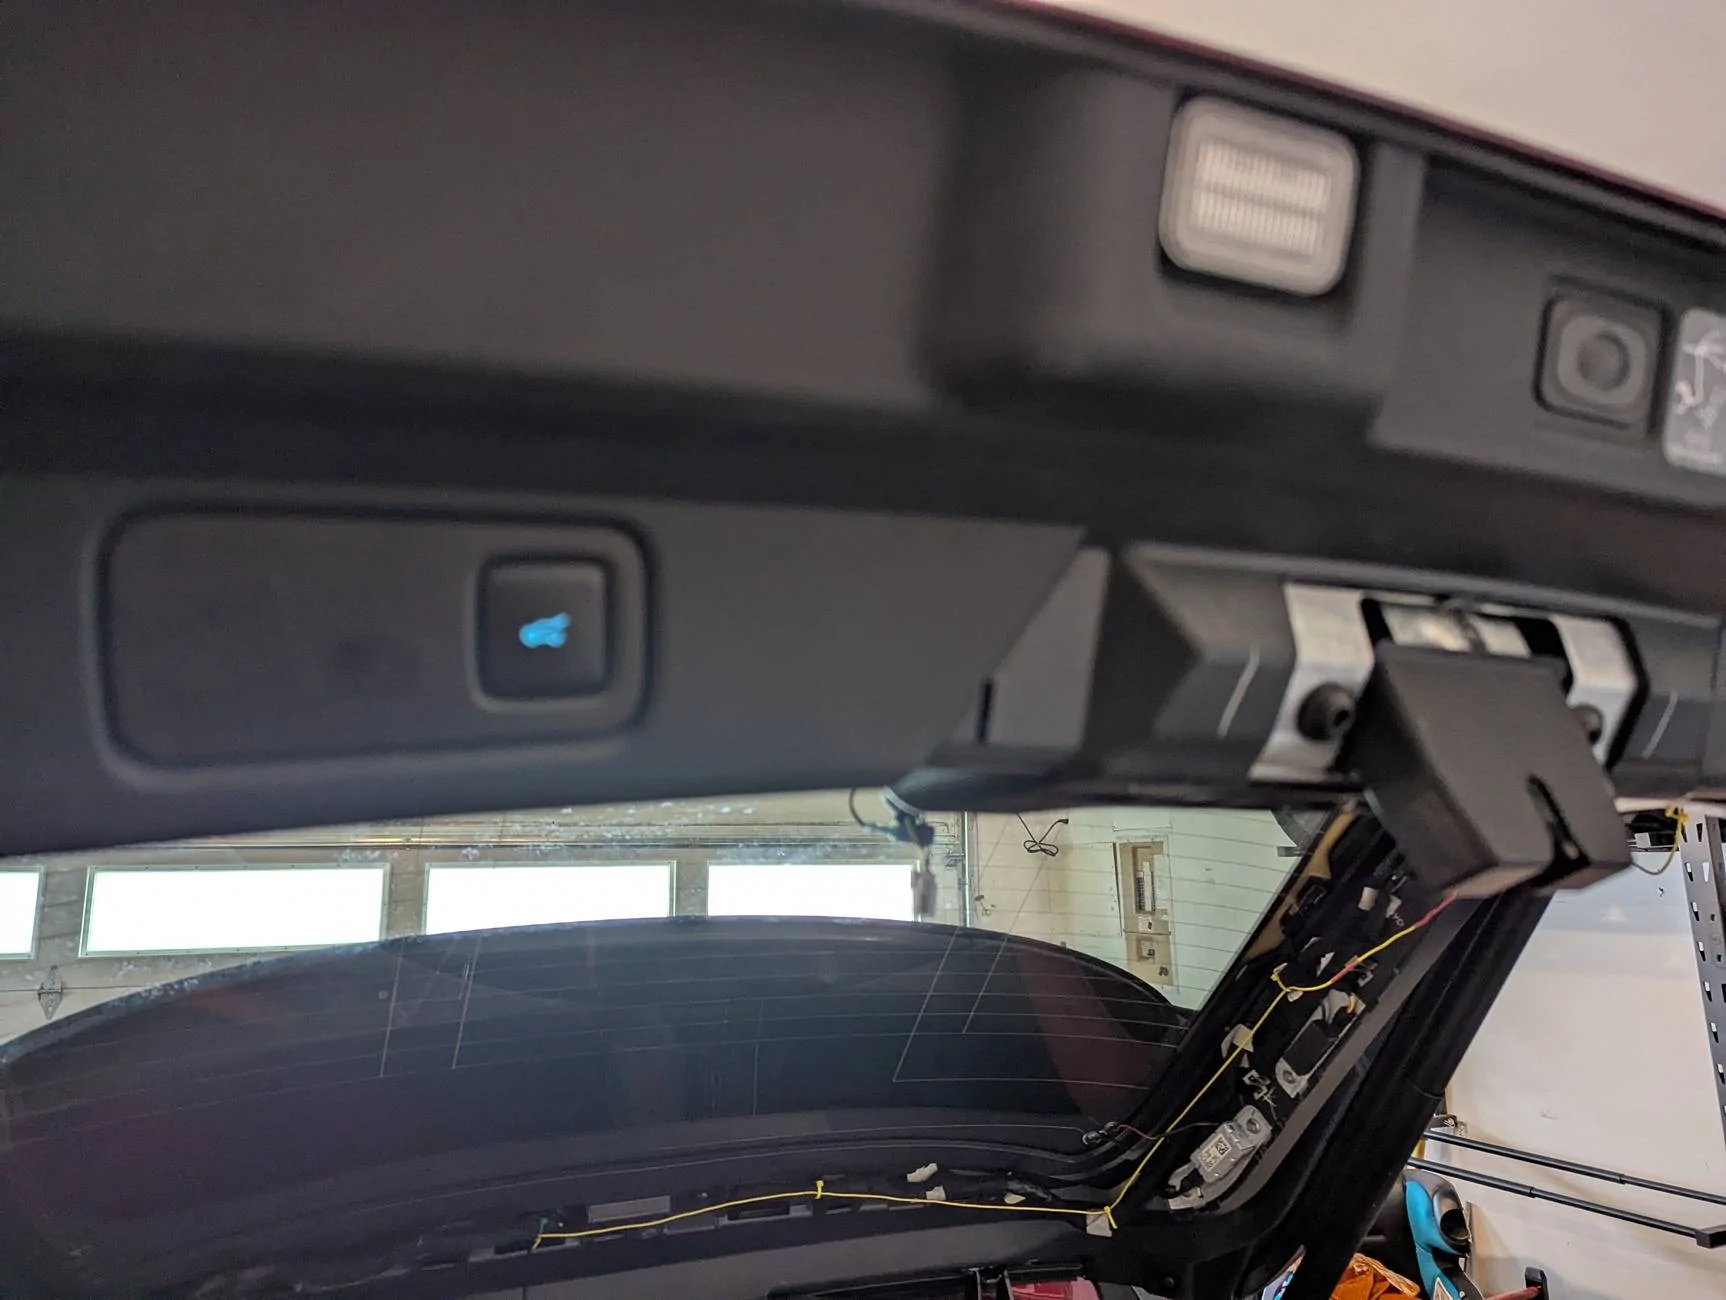
At the same time I also added the power liftgate close button to the hatch itself. This button was installed on early Mach Es, but removed by Ford for cost cutting. I also added a front and rear dashcam at this time, but the focus of this thread are the tailgate buttons.


A lot of my information I grabbed from this thread: https://www.macheforum.com/site/threads/adding-an-inside-liftgate-power-switch.6560/
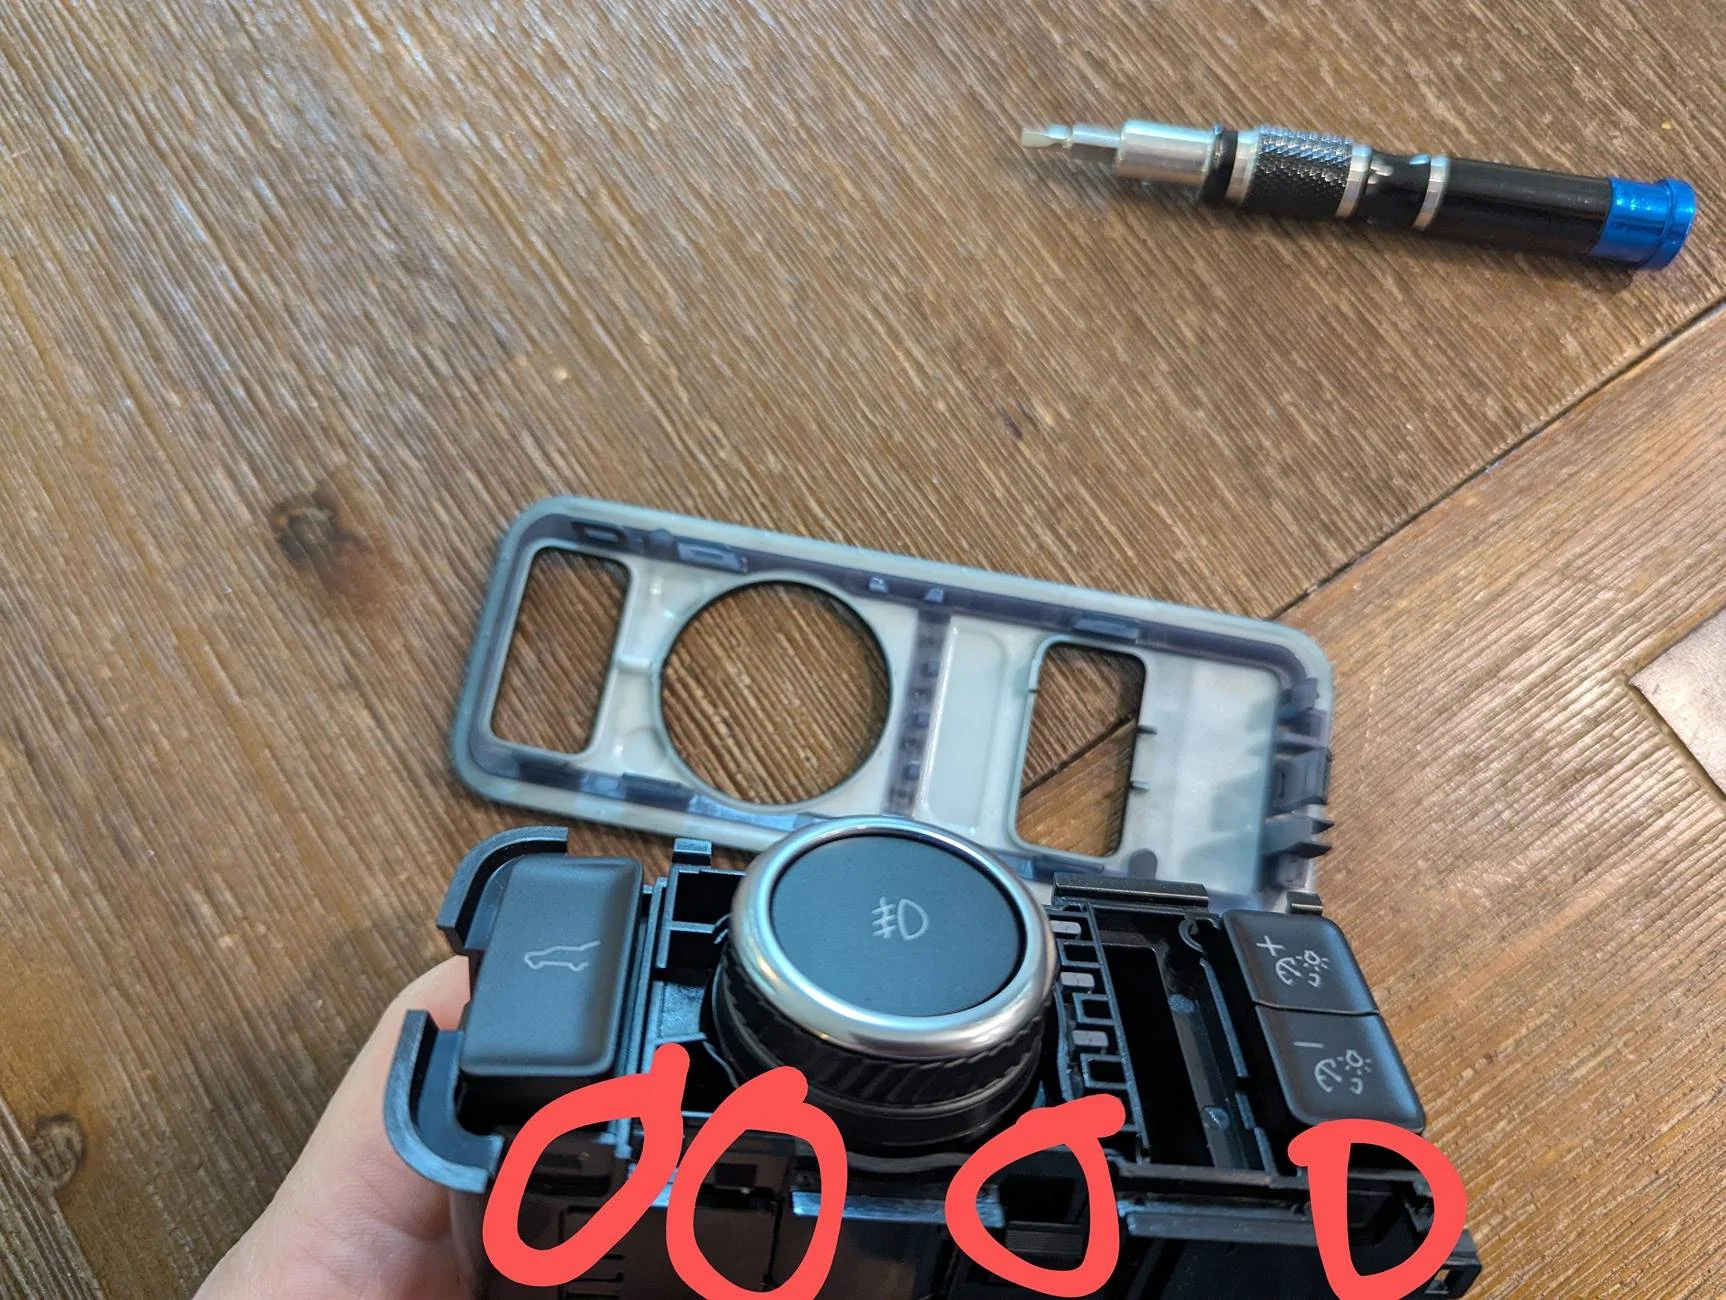
First, I disassembled the donor Bronco/Explorer headlight switch to get the hatch release button. The Bronco headlight switch is similar to the Mach E's, but is missing the traction control button, and has a fog light button so it can't be used directly.
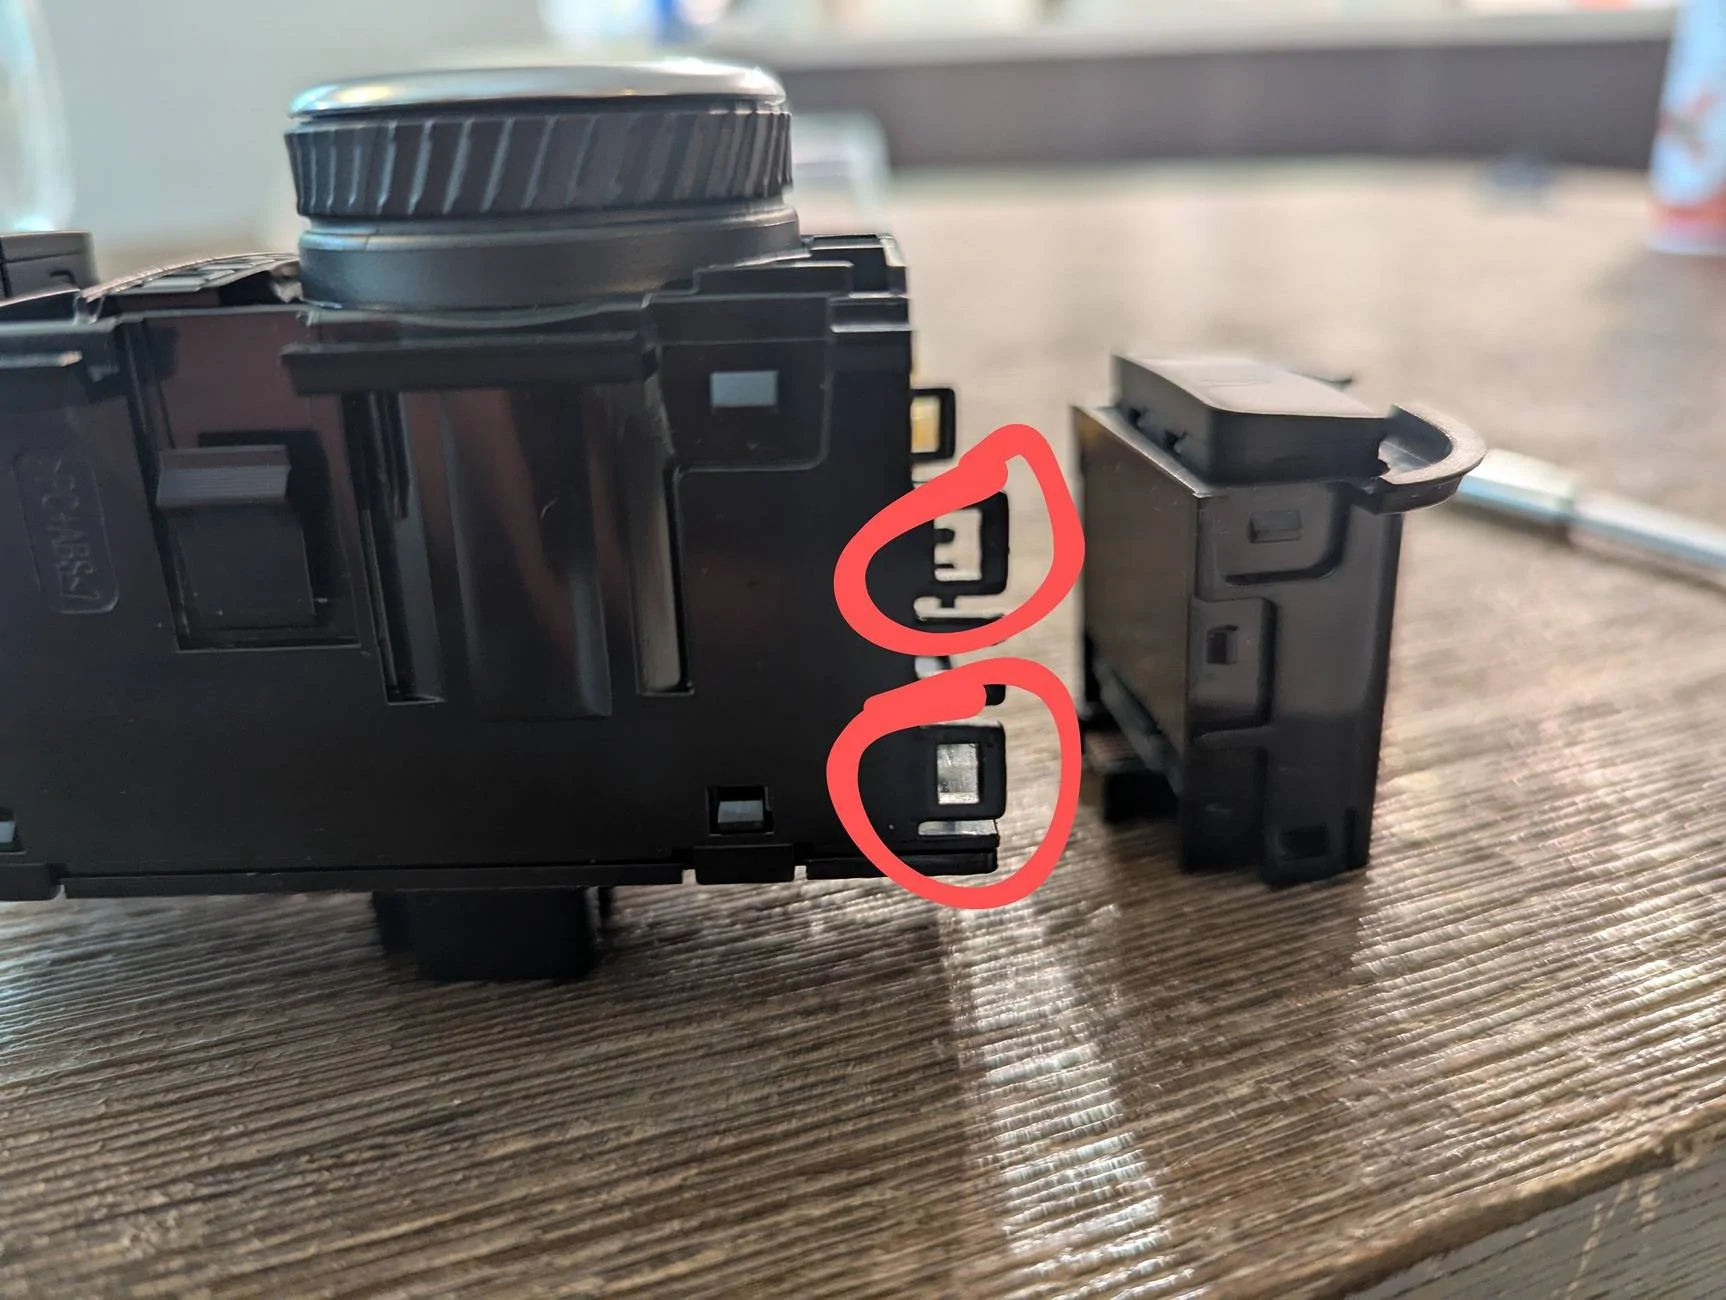
Taking the switch apart is extremely easy. Pry off the faceplate at the tabs shown, then remove the hatch release button with the next set of tabs.
Remove the Mach E headlight switch assembly and do the same thing to it, removing the max defrost button and reassembling with the Bronco's hatch switch. The switch comes out easily if pushed out from behind with your hand. Gain access by removing the side panel from the dash with a plastic trim removal tool. This just pops out with gentle prying.
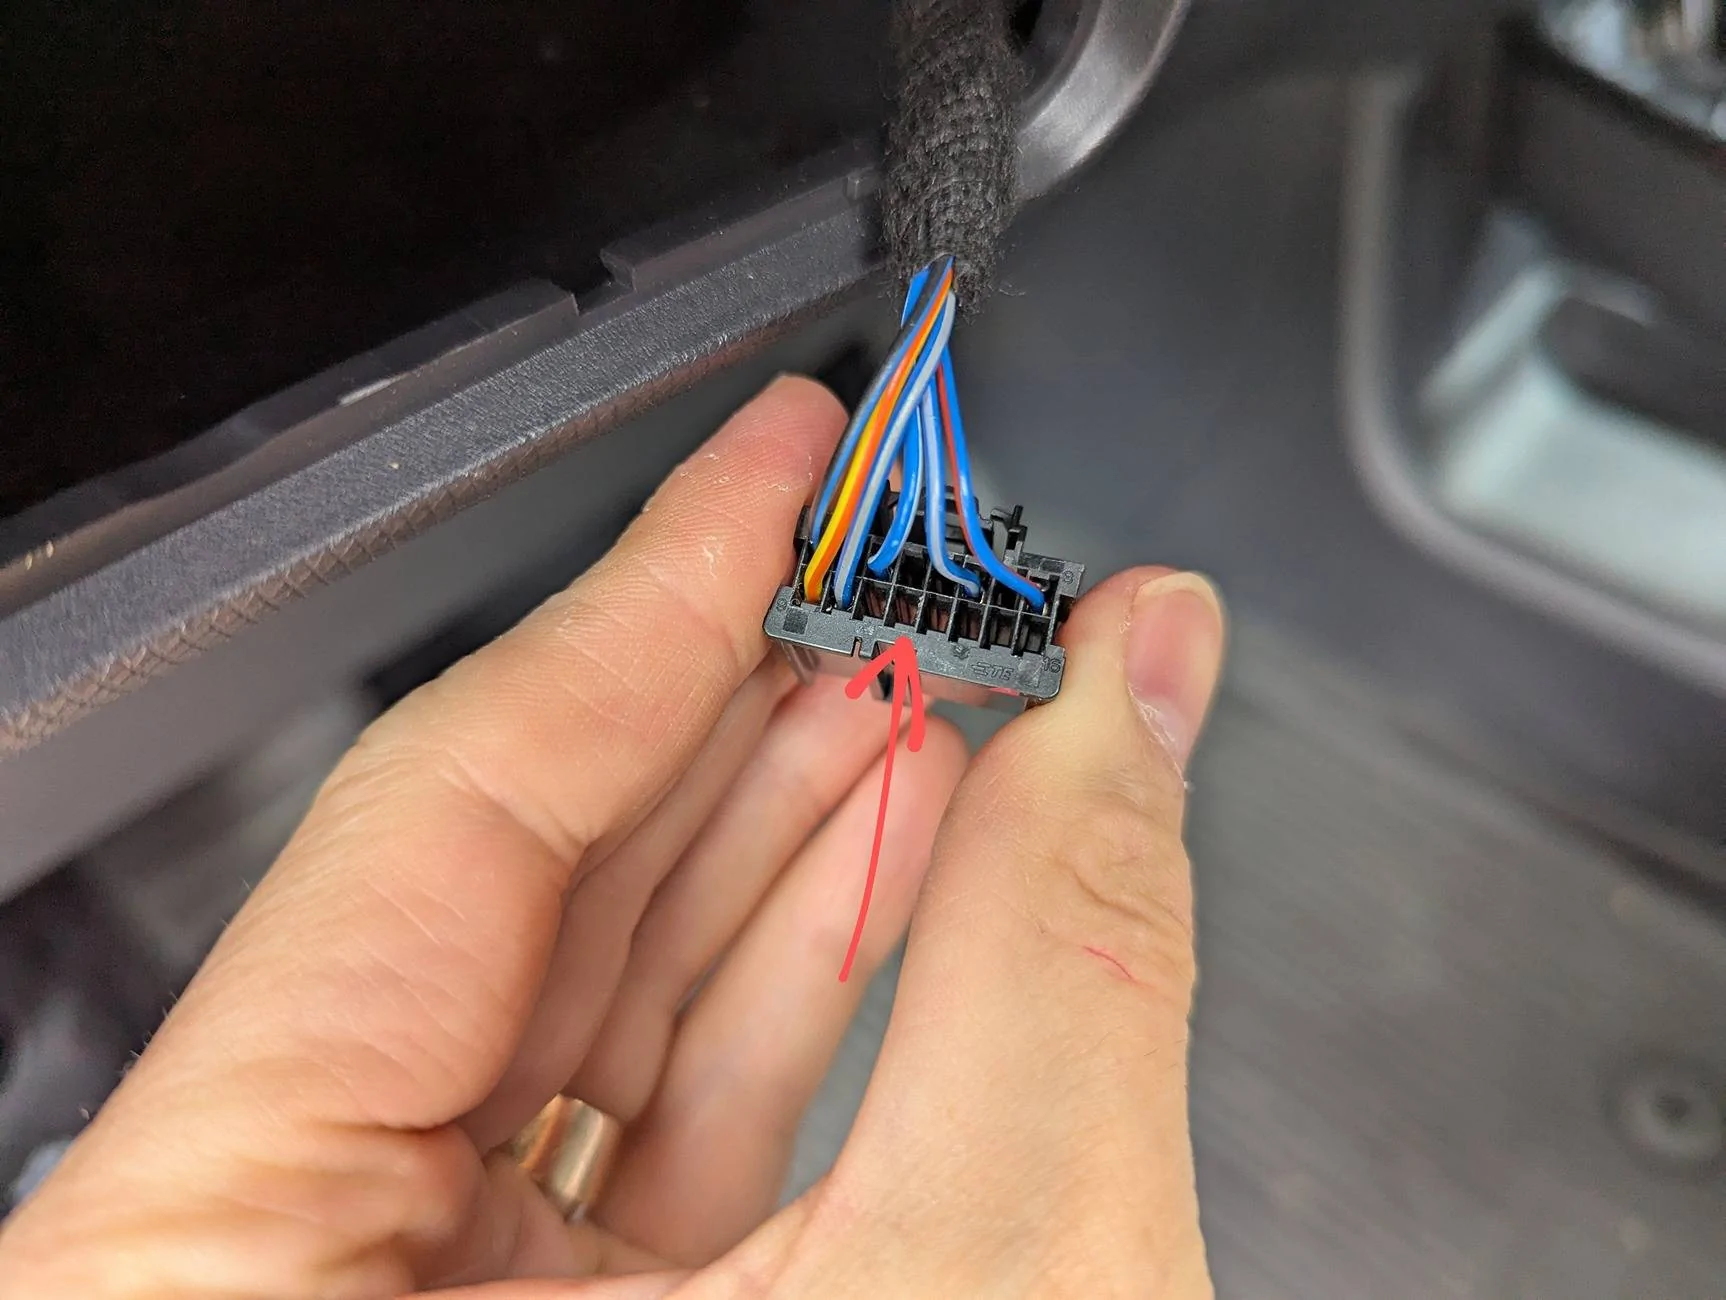
Connect a stranded 20ga wire to one of the WT1002 pins, and add the pin to spot 12 on the headlight switch connector. I used solder and shrink tube to connect my wire, you could also use crimp connectors. Run this wire down from the dash to the trim pieces that run along the door sills all the way to the back of the car. The wire is easily tucked under the trim pieces without having to remove them. I saw one user who ran this wire along the headliner, and unwittingly ran it over the curtain airbags. Don't be this person. Also, that route is harder anyway.
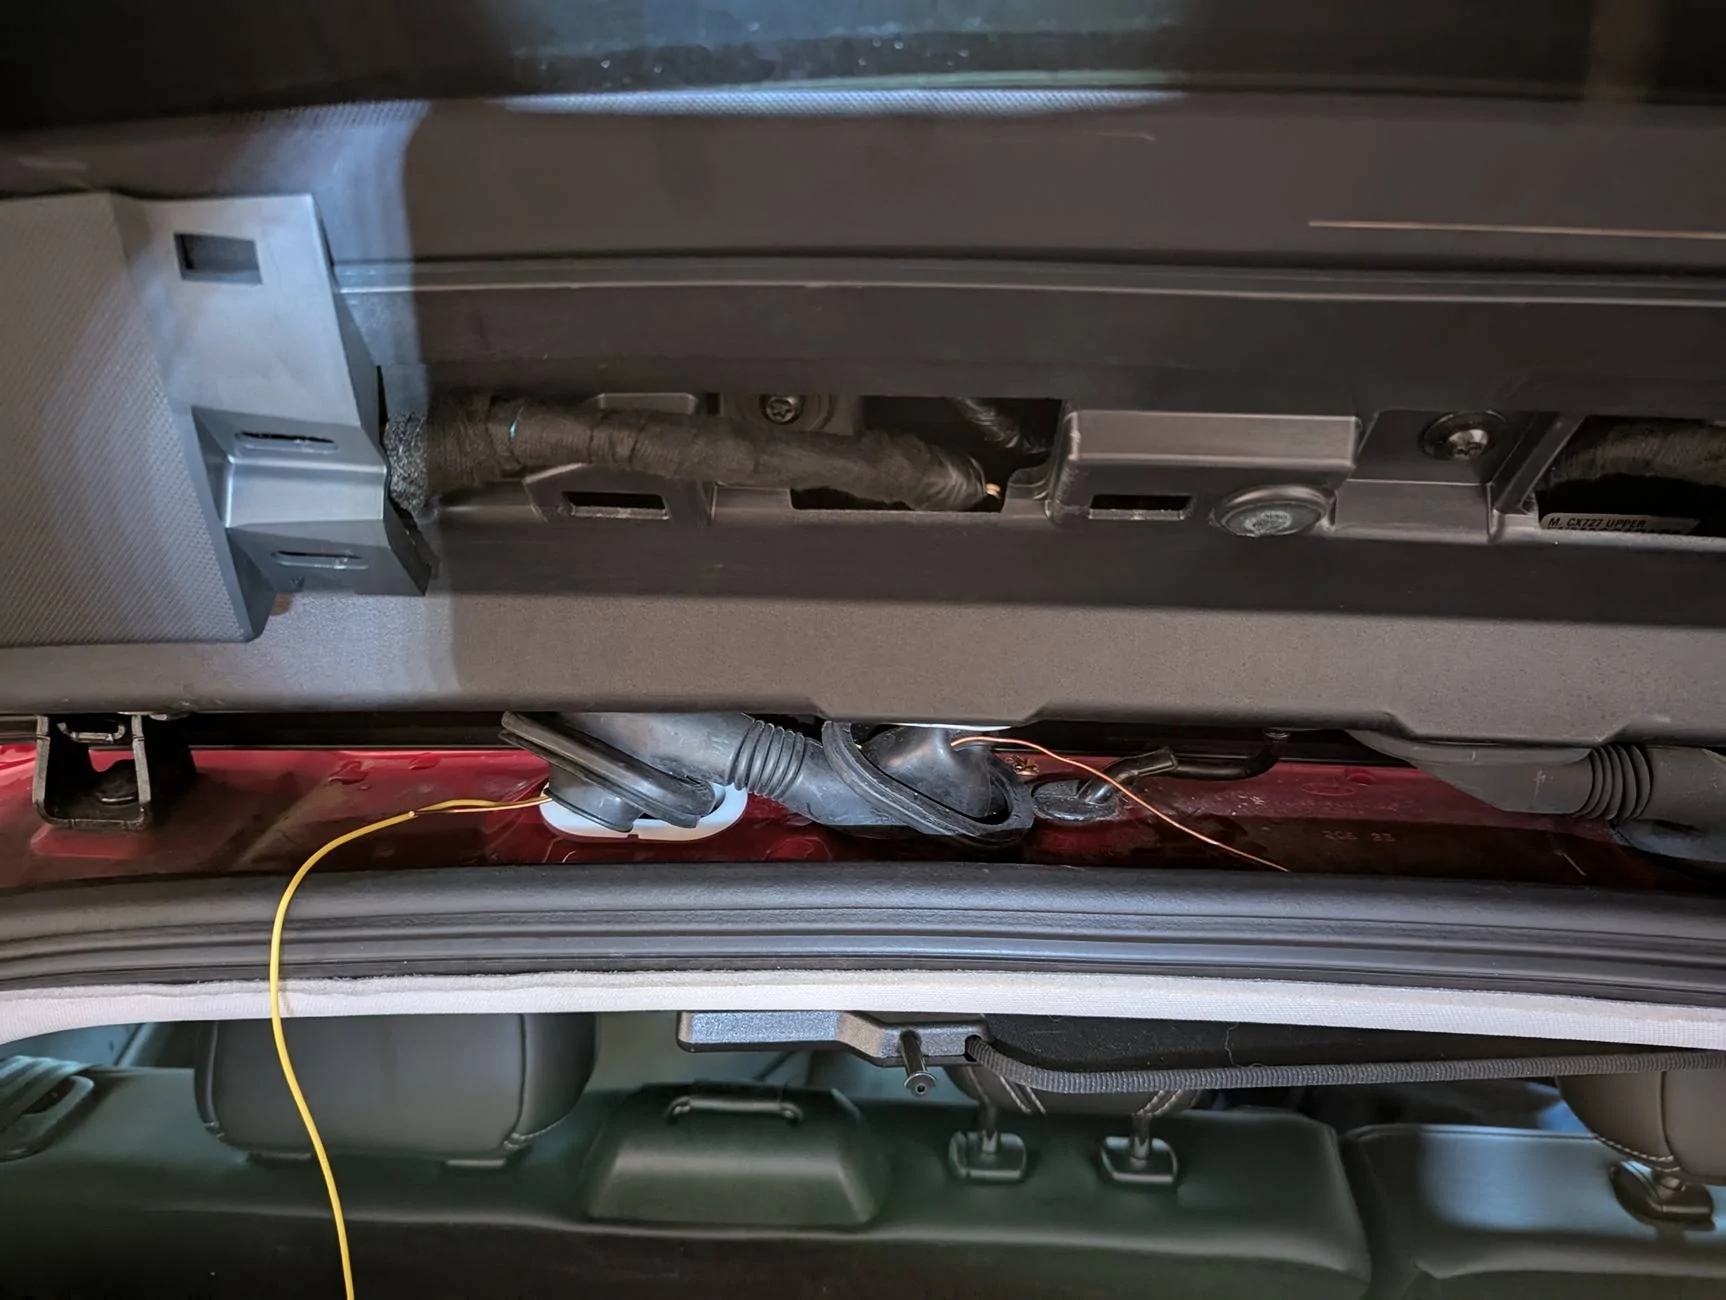
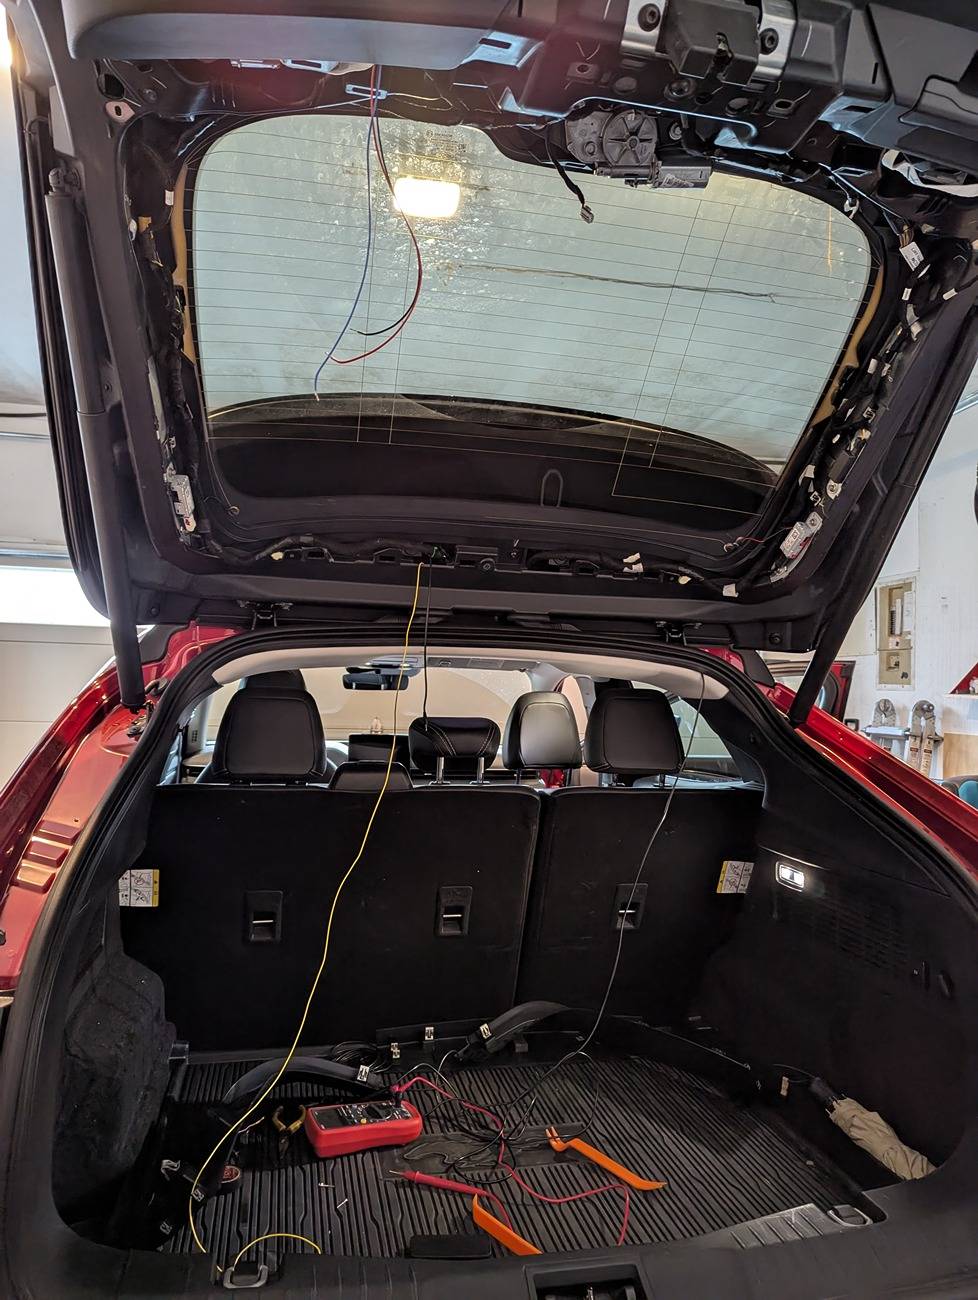
Once your wire has been run to the back of the car, continue to run it up the plastic trim until you have it in the rear headliner. The headliner can be gently pried down to allow access. Run the wire to the flexible boot that leads to the hatch. Your goal is to run the wire through that boot. This isn't hard, but it isn't easy. First, all the trim has to come off the tailgate. Starting near the hinges and working toward the latch, gently pry all the trim off. The only tools you need are your fingers and plastic trim removal tools. The last panel has a light in it, so be careful to disconnect the connector when removing this. Next, pull the left flexible boot out of the holes on the car side and the hatch side. Run a copper wire through the boot as a fish, and pull your release wire through with that.
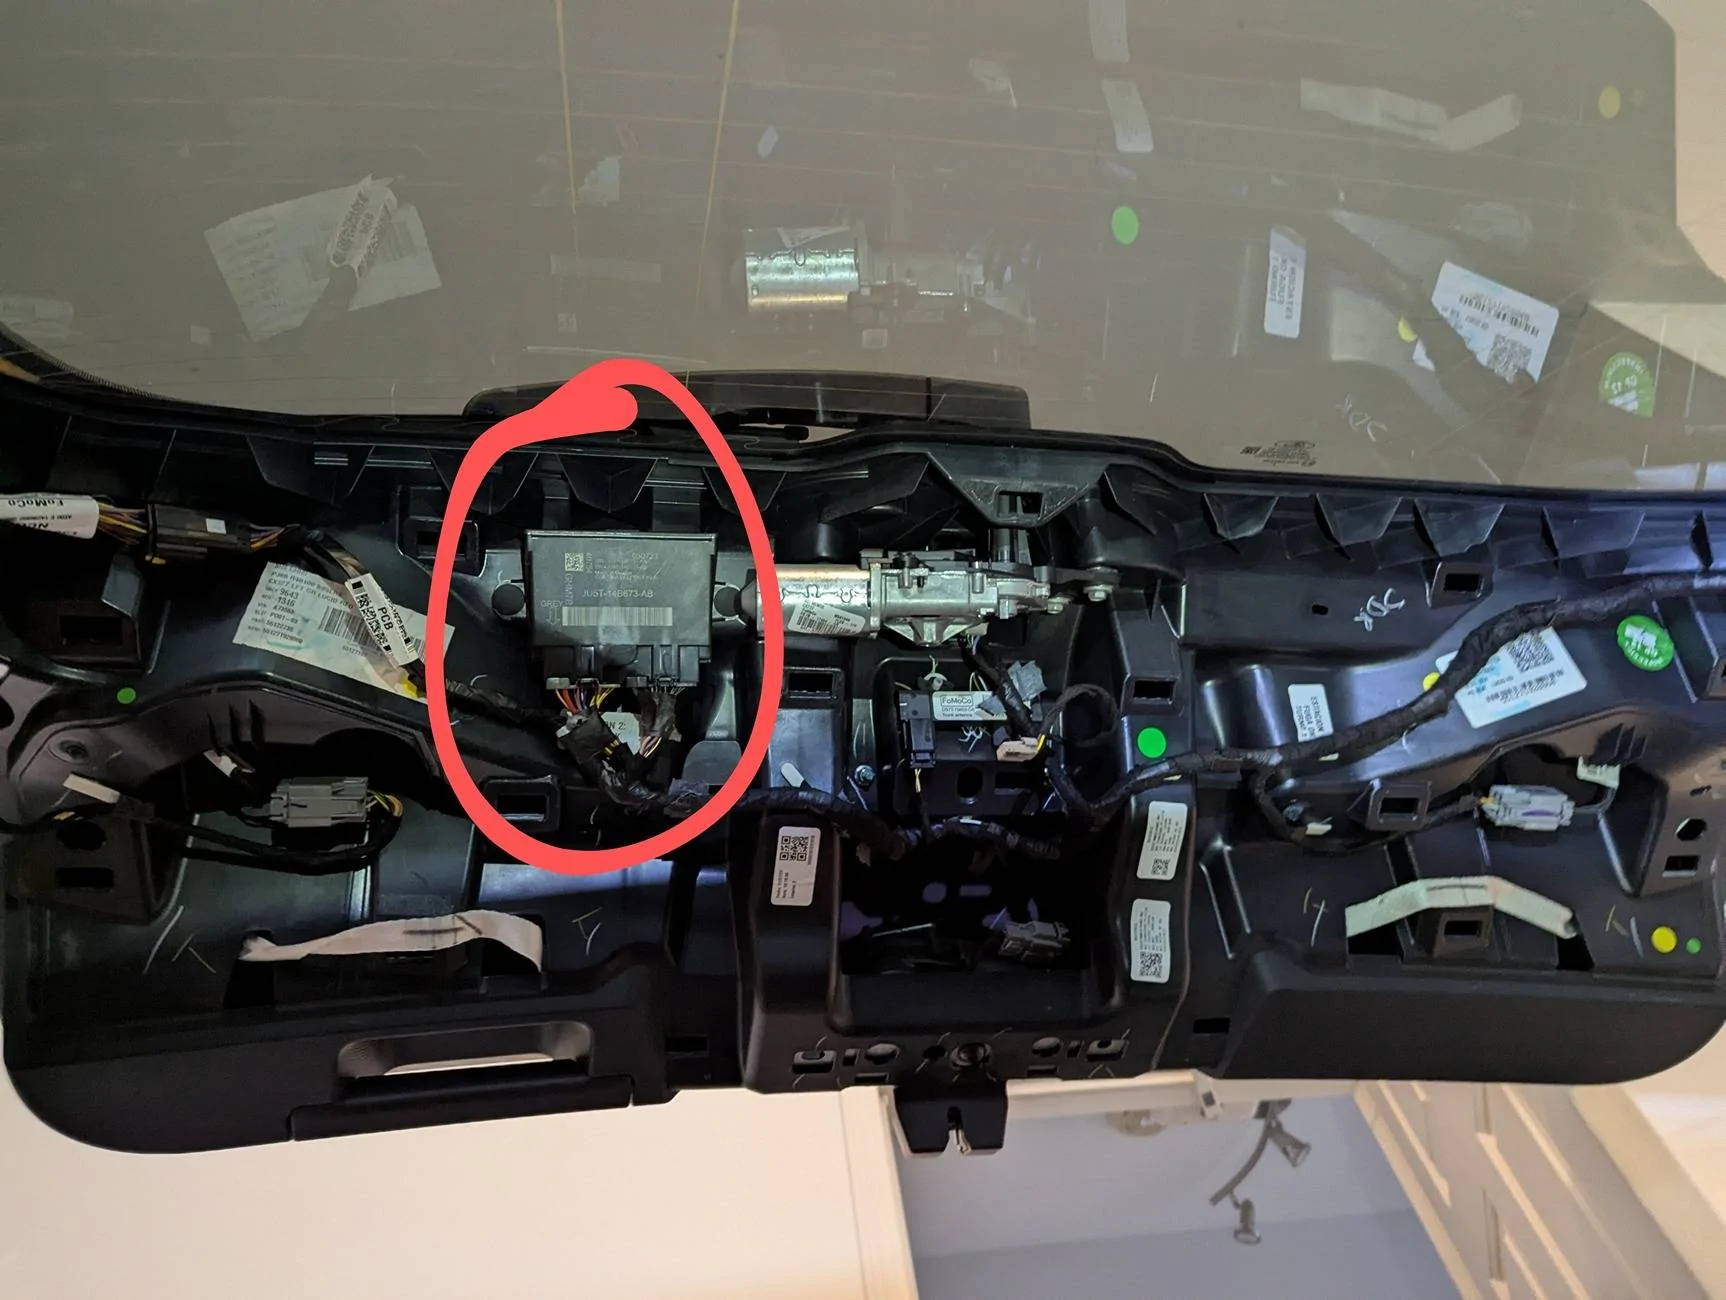
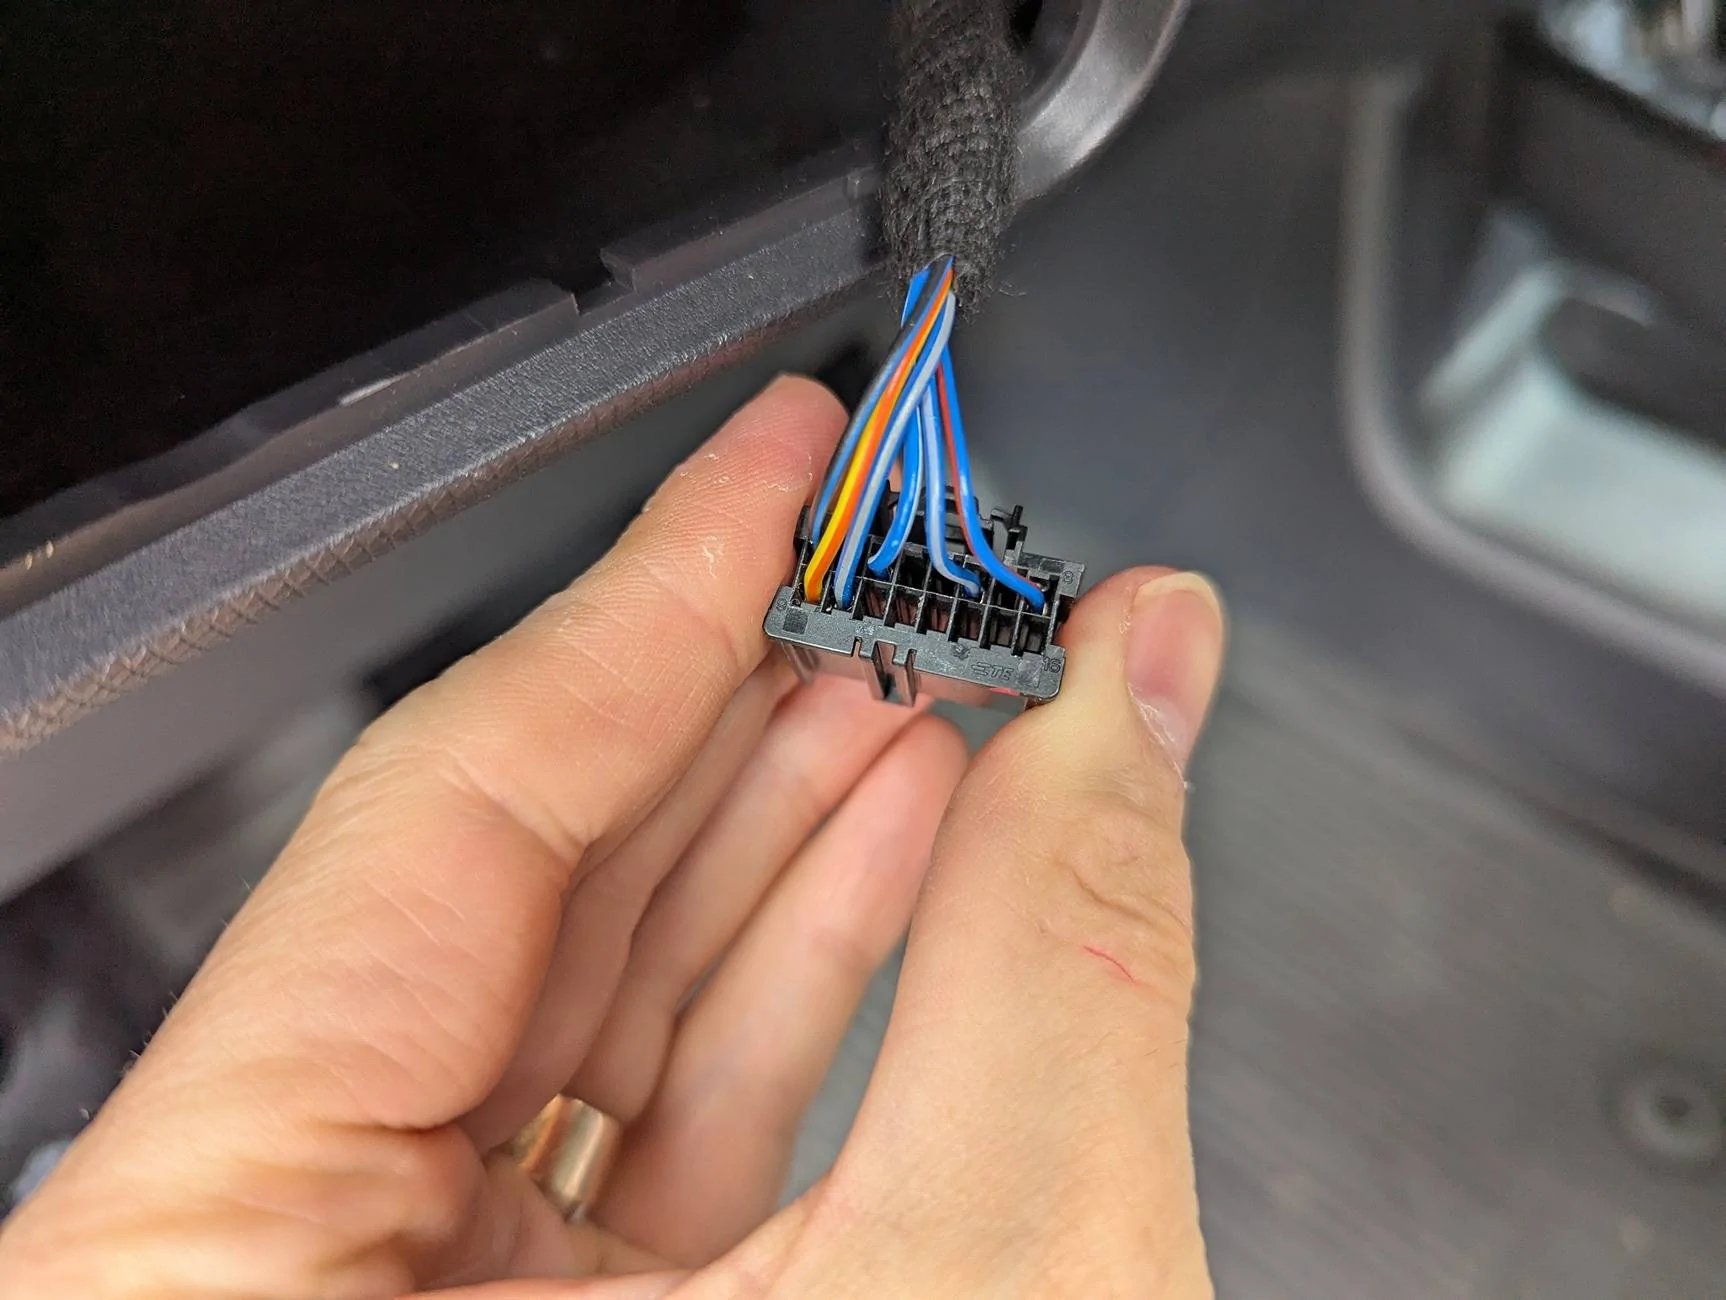
Now that your wire is at the tailgate, zip tie it into place and connect it to another WT1002 pin. This will get inserted into spot 19 on the grey connector of the RGTM module.
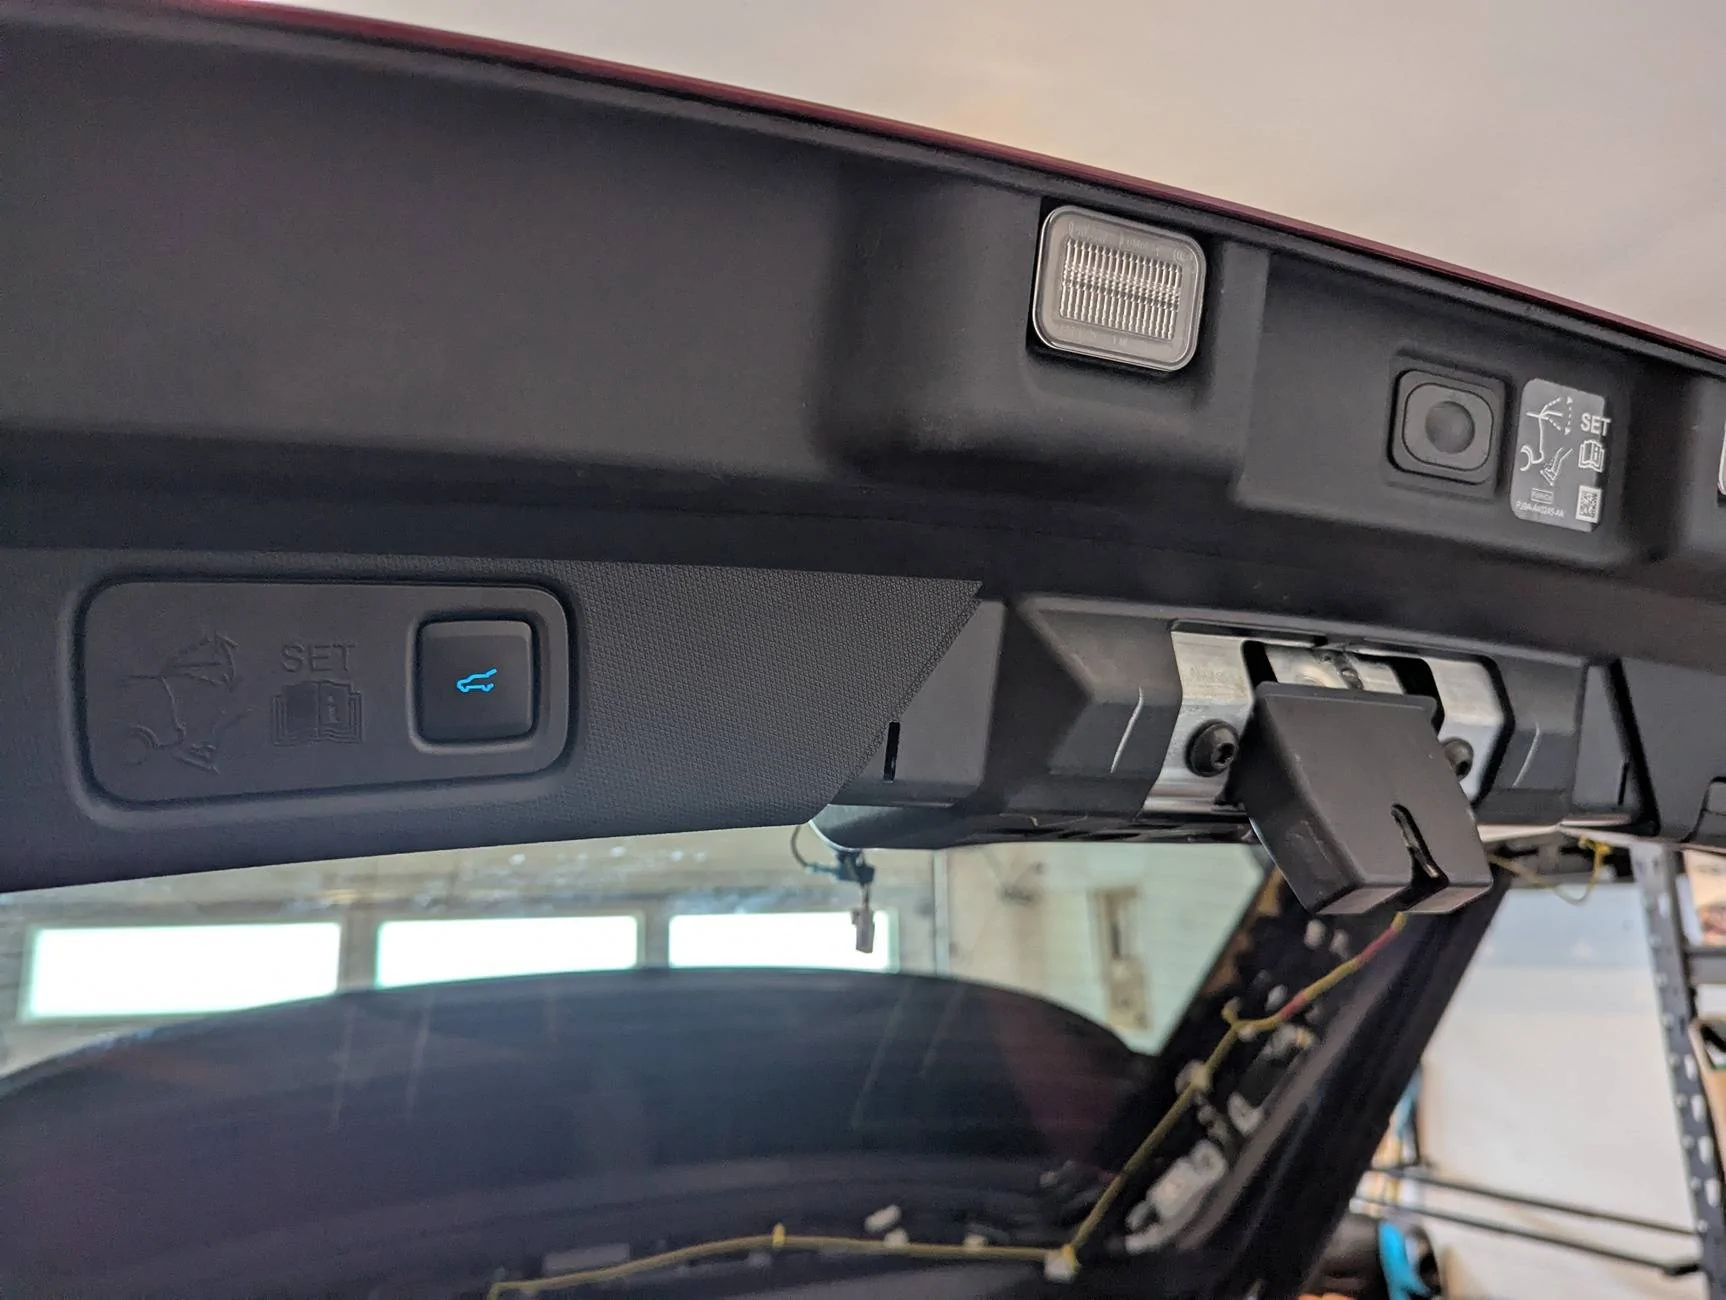
Your front trunk release button should now work. Next I added the rear closer button. This is an illuminated button and power for the light would normally come from the BCM. For ease of installation, I tapped into the tailgate interior light instead (not the license plate lights like a different user, I think the logic for the interior lights is closer to what I wanted). I used wire taps for this, although soldering and heat shrinking would've been neater and in hindsight I should've done this.
The stock Ford connector for the closer switch is absurdly expensive, so I used generic Amazon pins and a healthy amount of hot glue to connect to the switch and hold and insulate everything in place. You can also use WT1002 pins in place of the Amazon ones.
Pin 6 of the switch goes to pin 20 of the grey connector on the RGTM (right next to the one I added on pin 19 in the previous step). Pin 2 is grounded at the interior light connector as shown above and pin 3 picks up power for the light here as well.
Hope you enjoy these mods as much as I do. Good luck!
Part numbers:
Headlight switch assembly: SW-8816
Rear close switch: JL1Z-54432A38-AA
Rear close switch cover: LJ8Z-5840726-B
Connector pins: WT1002 (two required for front button mod, four required for rear button mod)
At the same time I also added the power liftgate close button to the hatch itself. This button was installed on early Mach Es, but removed by Ford for cost cutting. I also added a front and rear dashcam at this time, but the focus of this thread are the tailgate buttons.
A lot of my information I grabbed from this thread: https://www.macheforum.com/site/threads/adding-an-inside-liftgate-power-switch.6560/
First, I disassembled the donor Bronco/Explorer headlight switch to get the hatch release button. The Bronco headlight switch is similar to the Mach E's, but is missing the traction control button, and has a fog light button so it can't be used directly.
Taking the switch apart is extremely easy. Pry off the faceplate at the tabs shown, then remove the hatch release button with the next set of tabs.
Remove the Mach E headlight switch assembly and do the same thing to it, removing the max defrost button and reassembling with the Bronco's hatch switch. The switch comes out easily if pushed out from behind with your hand. Gain access by removing the side panel from the dash with a plastic trim removal tool. This just pops out with gentle prying.
Connect a stranded 20ga wire to one of the WT1002 pins, and add the pin to spot 12 on the headlight switch connector. I used solder and shrink tube to connect my wire, you could also use crimp connectors. Run this wire down from the dash to the trim pieces that run along the door sills all the way to the back of the car. The wire is easily tucked under the trim pieces without having to remove them. I saw one user who ran this wire along the headliner, and unwittingly ran it over the curtain airbags. Don't be this person. Also, that route is harder anyway.
Once your wire has been run to the back of the car, continue to run it up the plastic trim until you have it in the rear headliner. The headliner can be gently pried down to allow access. Run the wire to the flexible boot that leads to the hatch. Your goal is to run the wire through that boot. This isn't hard, but it isn't easy. First, all the trim has to come off the tailgate. Starting near the hinges and working toward the latch, gently pry all the trim off. The only tools you need are your fingers and plastic trim removal tools. The last panel has a light in it, so be careful to disconnect the connector when removing this. Next, pull the left flexible boot out of the holes on the car side and the hatch side. Run a copper wire through the boot as a fish, and pull your release wire through with that.
Now that your wire is at the tailgate, zip tie it into place and connect it to another WT1002 pin. This will get inserted into spot 19 on the grey connector of the RGTM module.
Your front trunk release button should now work. Next I added the rear closer button. This is an illuminated button and power for the light would normally come from the BCM. For ease of installation, I tapped into the tailgate interior light instead (not the license plate lights like a different user, I think the logic for the interior lights is closer to what I wanted). I used wire taps for this, although soldering and heat shrinking would've been neater and in hindsight I should've done this.
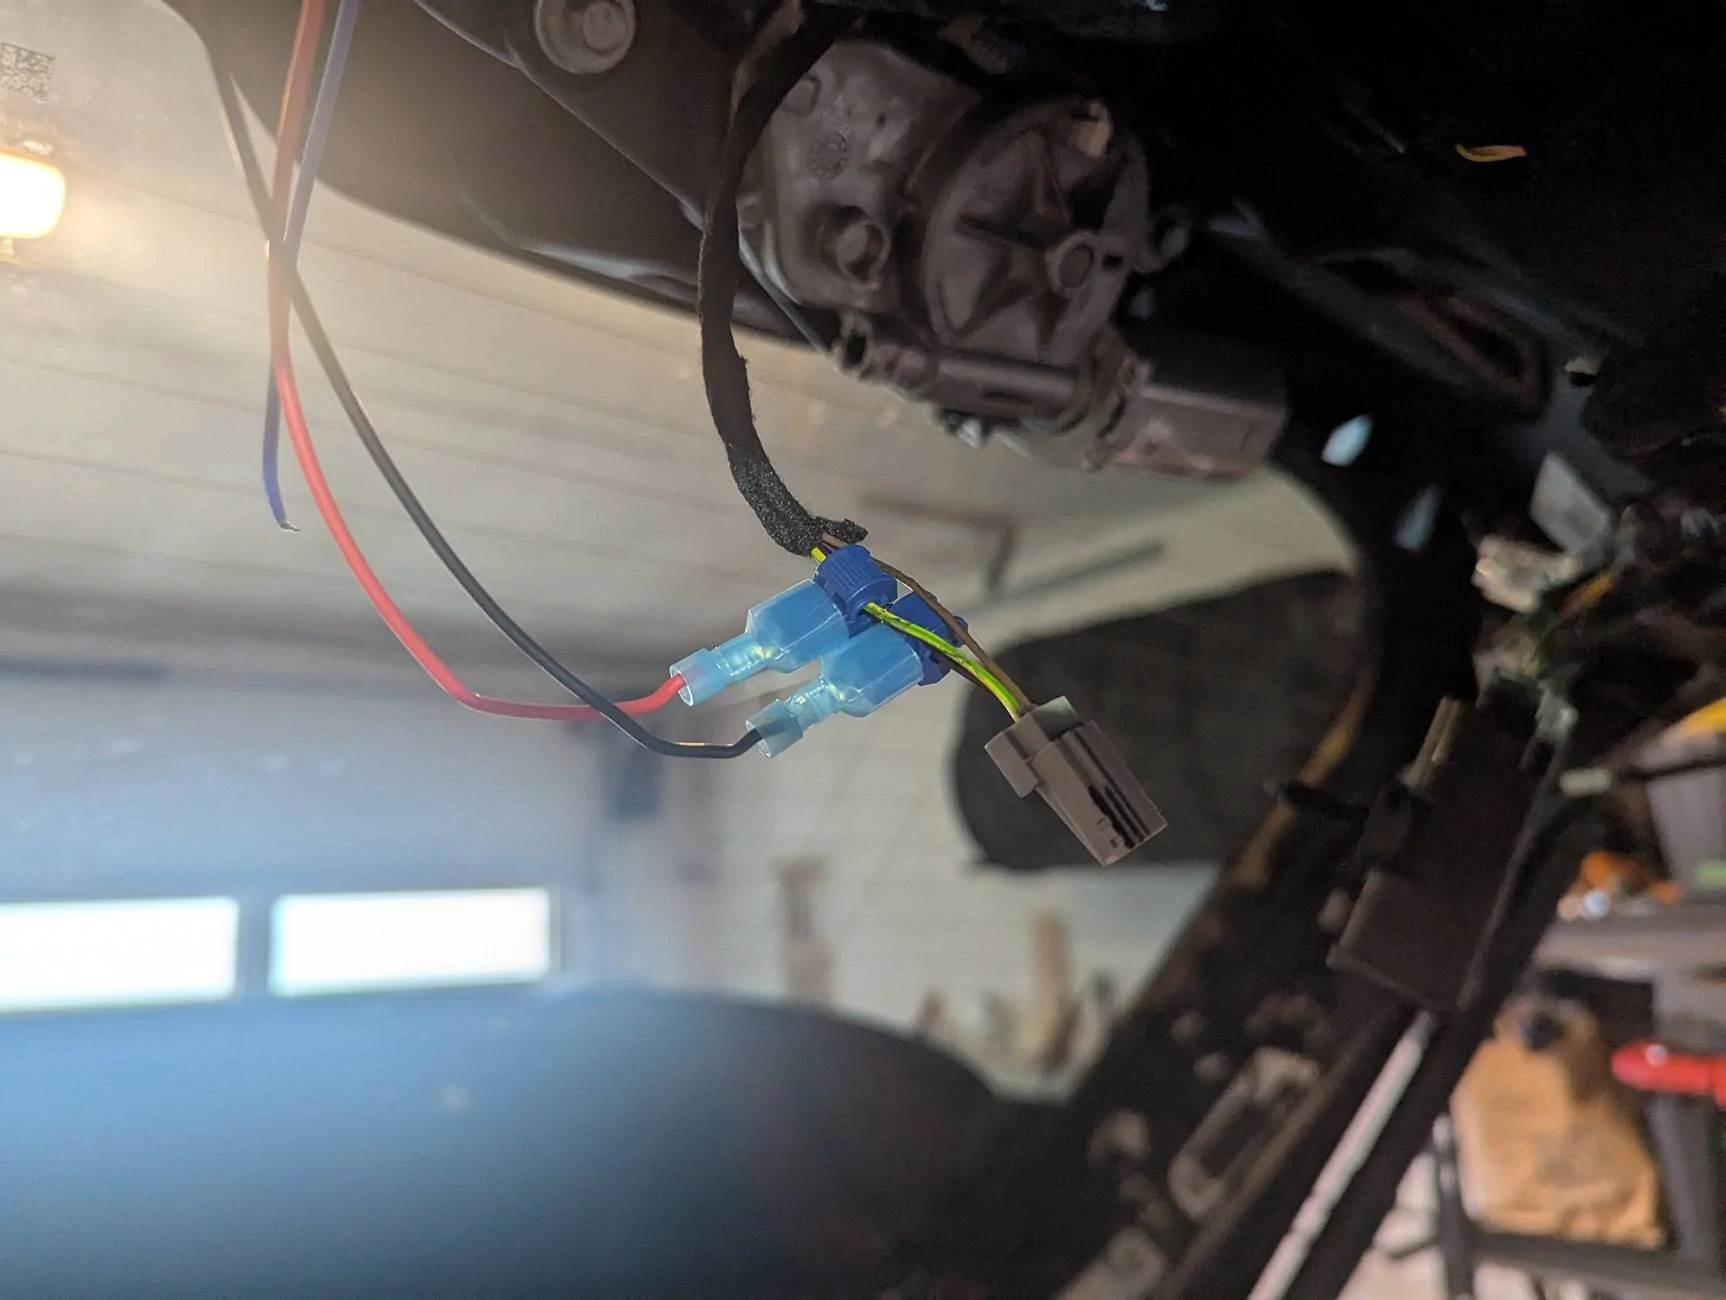
The stock Ford connector for the closer switch is absurdly expensive, so I used generic Amazon pins and a healthy amount of hot glue to connect to the switch and hold and insulate everything in place. You can also use WT1002 pins in place of the Amazon ones.
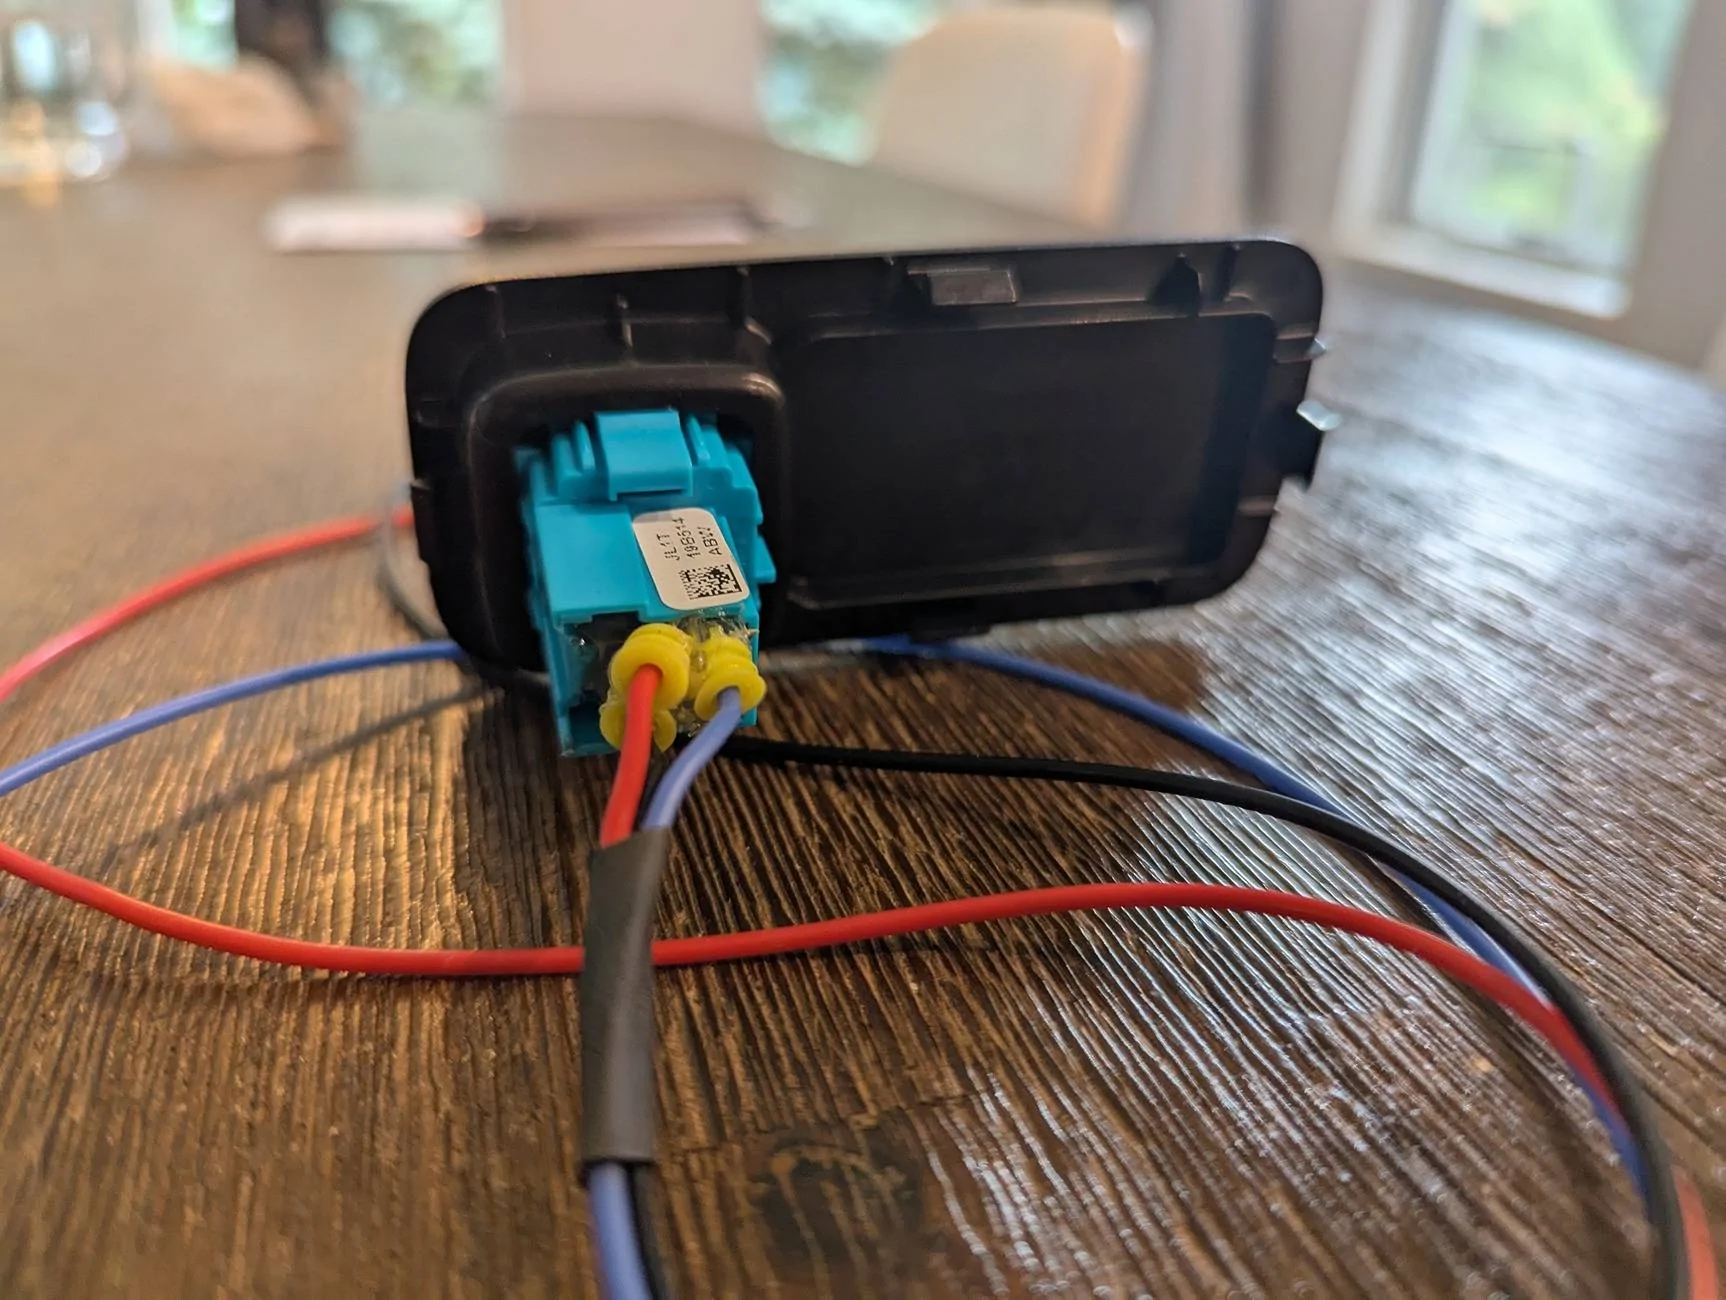
Pin 6 of the switch goes to pin 20 of the grey connector on the RGTM (right next to the one I added on pin 19 in the previous step). Pin 2 is grounded at the interior light connector as shown above and pin 3 picks up power for the light here as well.
Hope you enjoy these mods as much as I do. Good luck!
Part numbers:
Headlight switch assembly: SW-8816
Rear close switch: JL1Z-54432A38-AA
Rear close switch cover: LJ8Z-5840726-B
Connector pins: WT1002 (two required for front button mod, four required for rear button mod)

Sponsored
Last edited:
")